
Kepler's Status Page
An impulsive purchase in early 2025 led to the inception of this page. His name's Kepler, Kep for short, and he's making good progress. Keep scrolling for some thoughts on trains.
Build Time: 167 Days
Up Time: 267 Days
Check out a tour of Kep! →
September 12, 2025
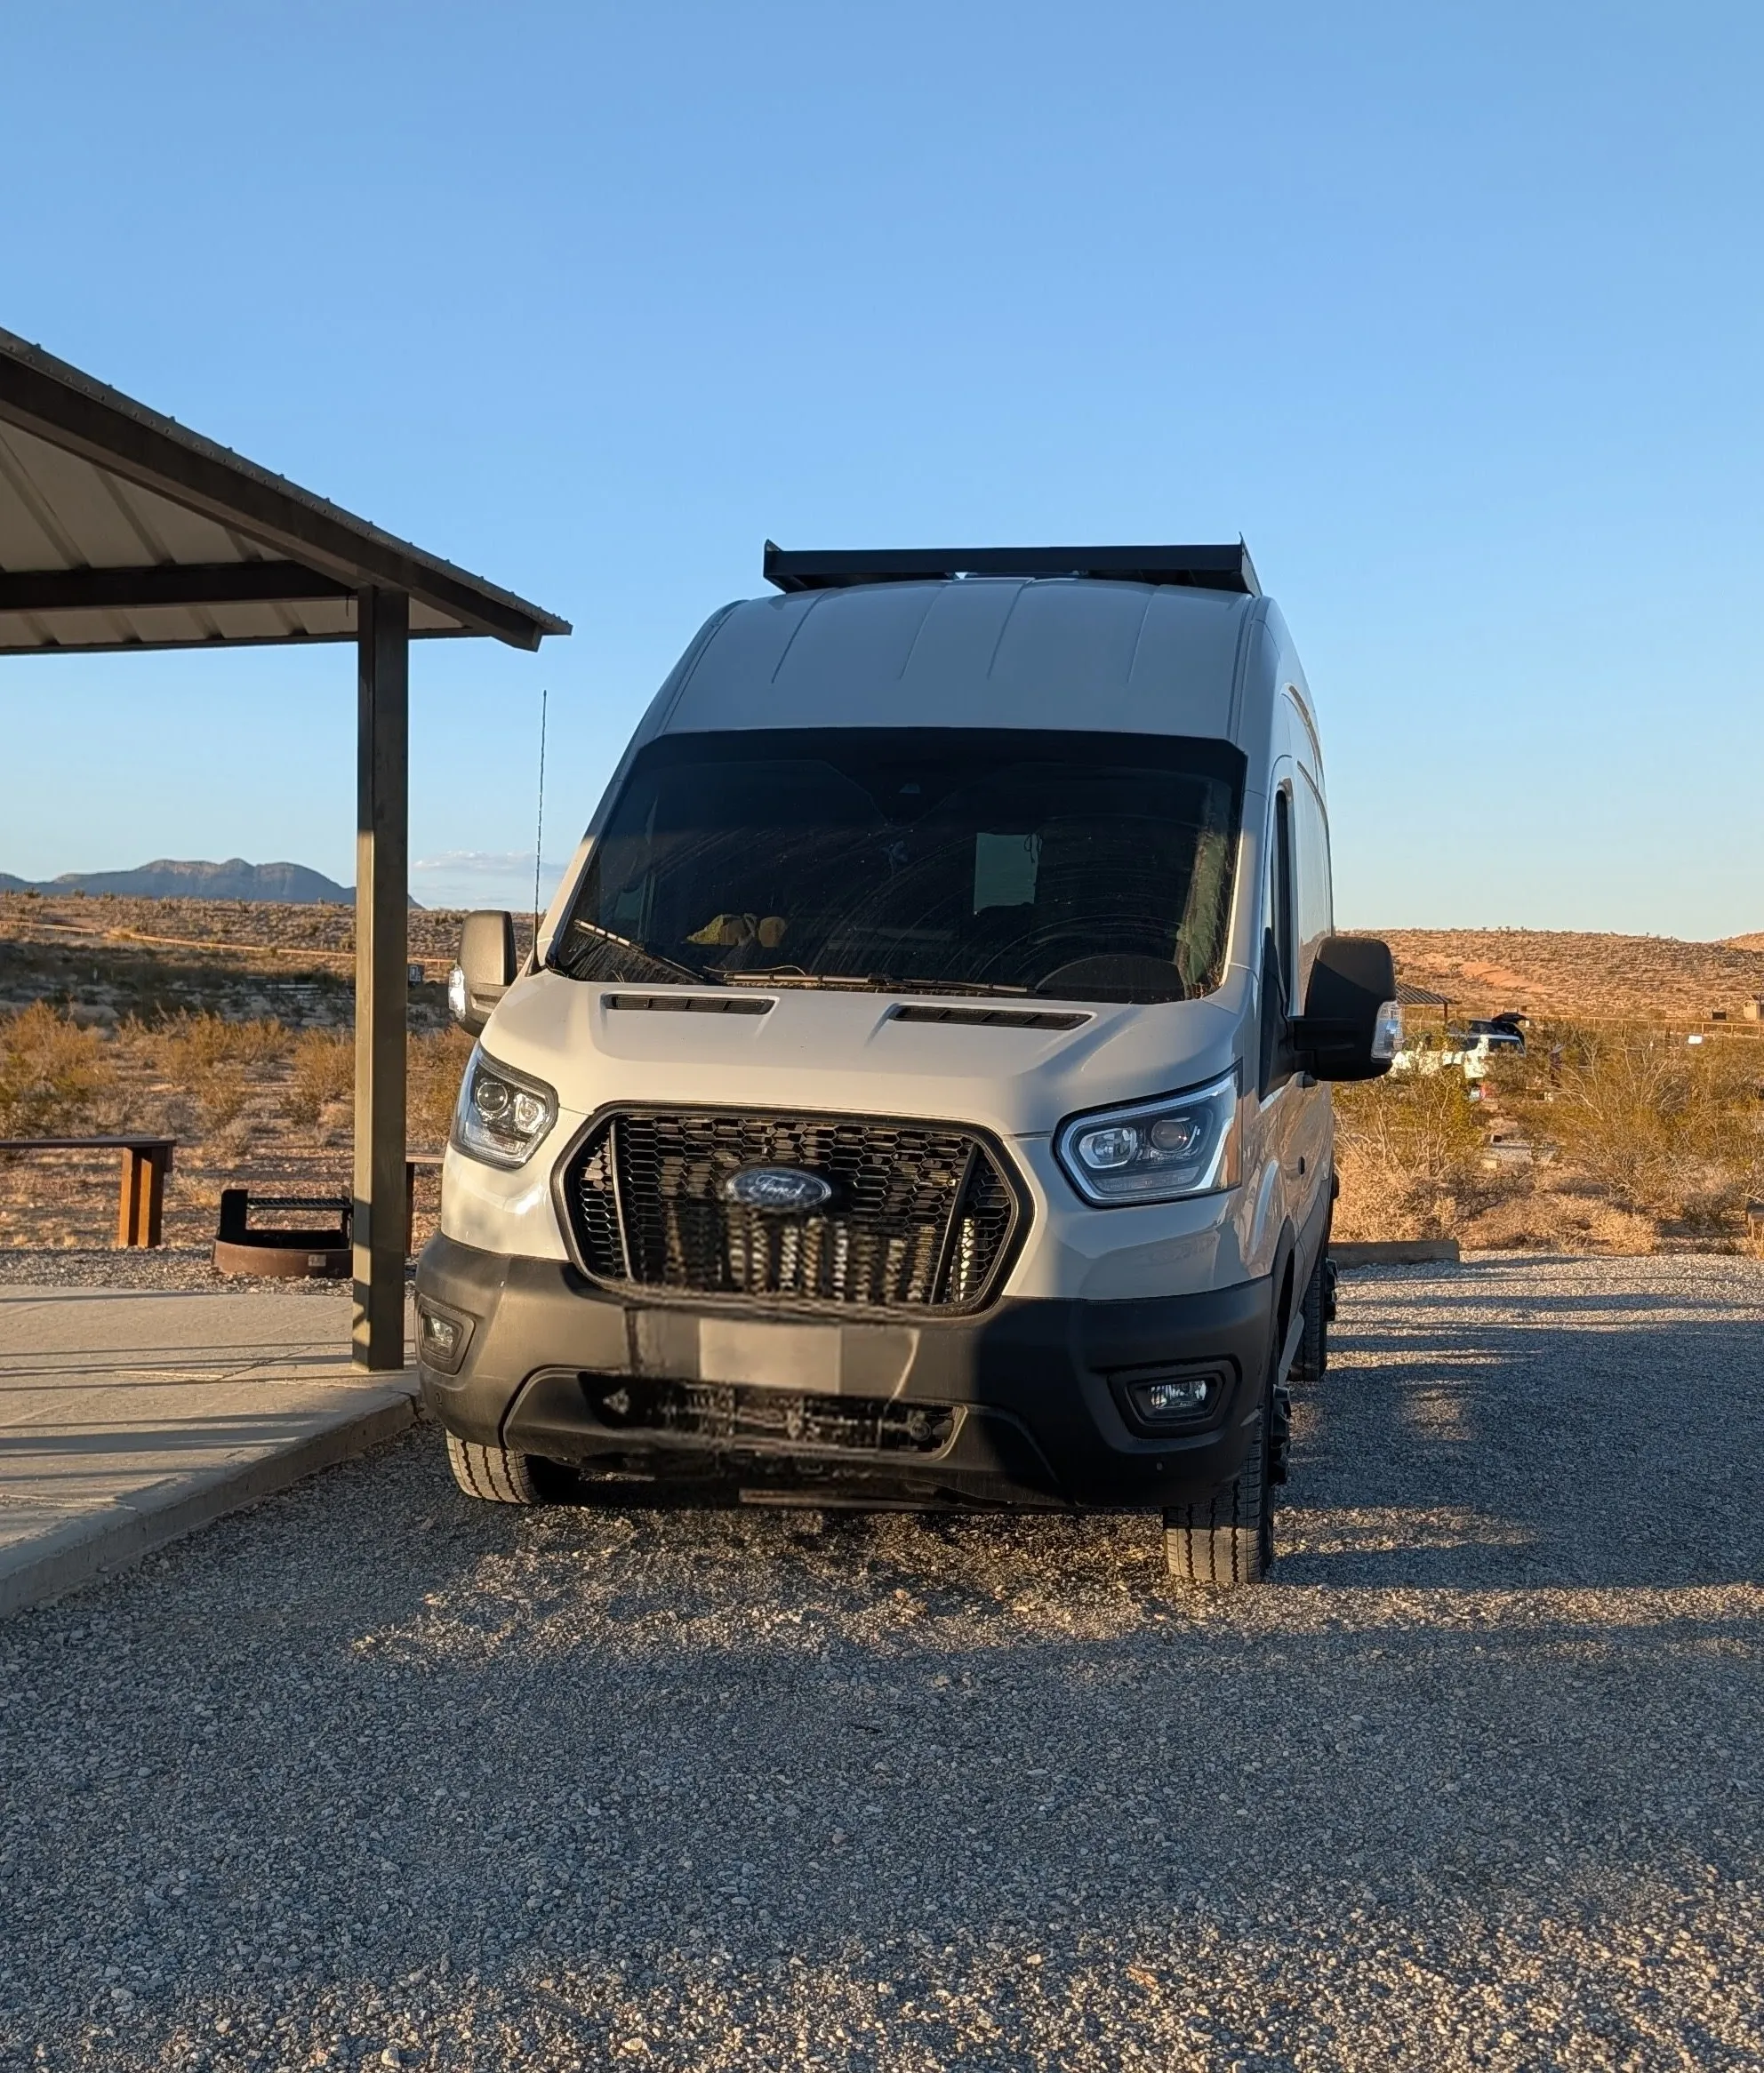
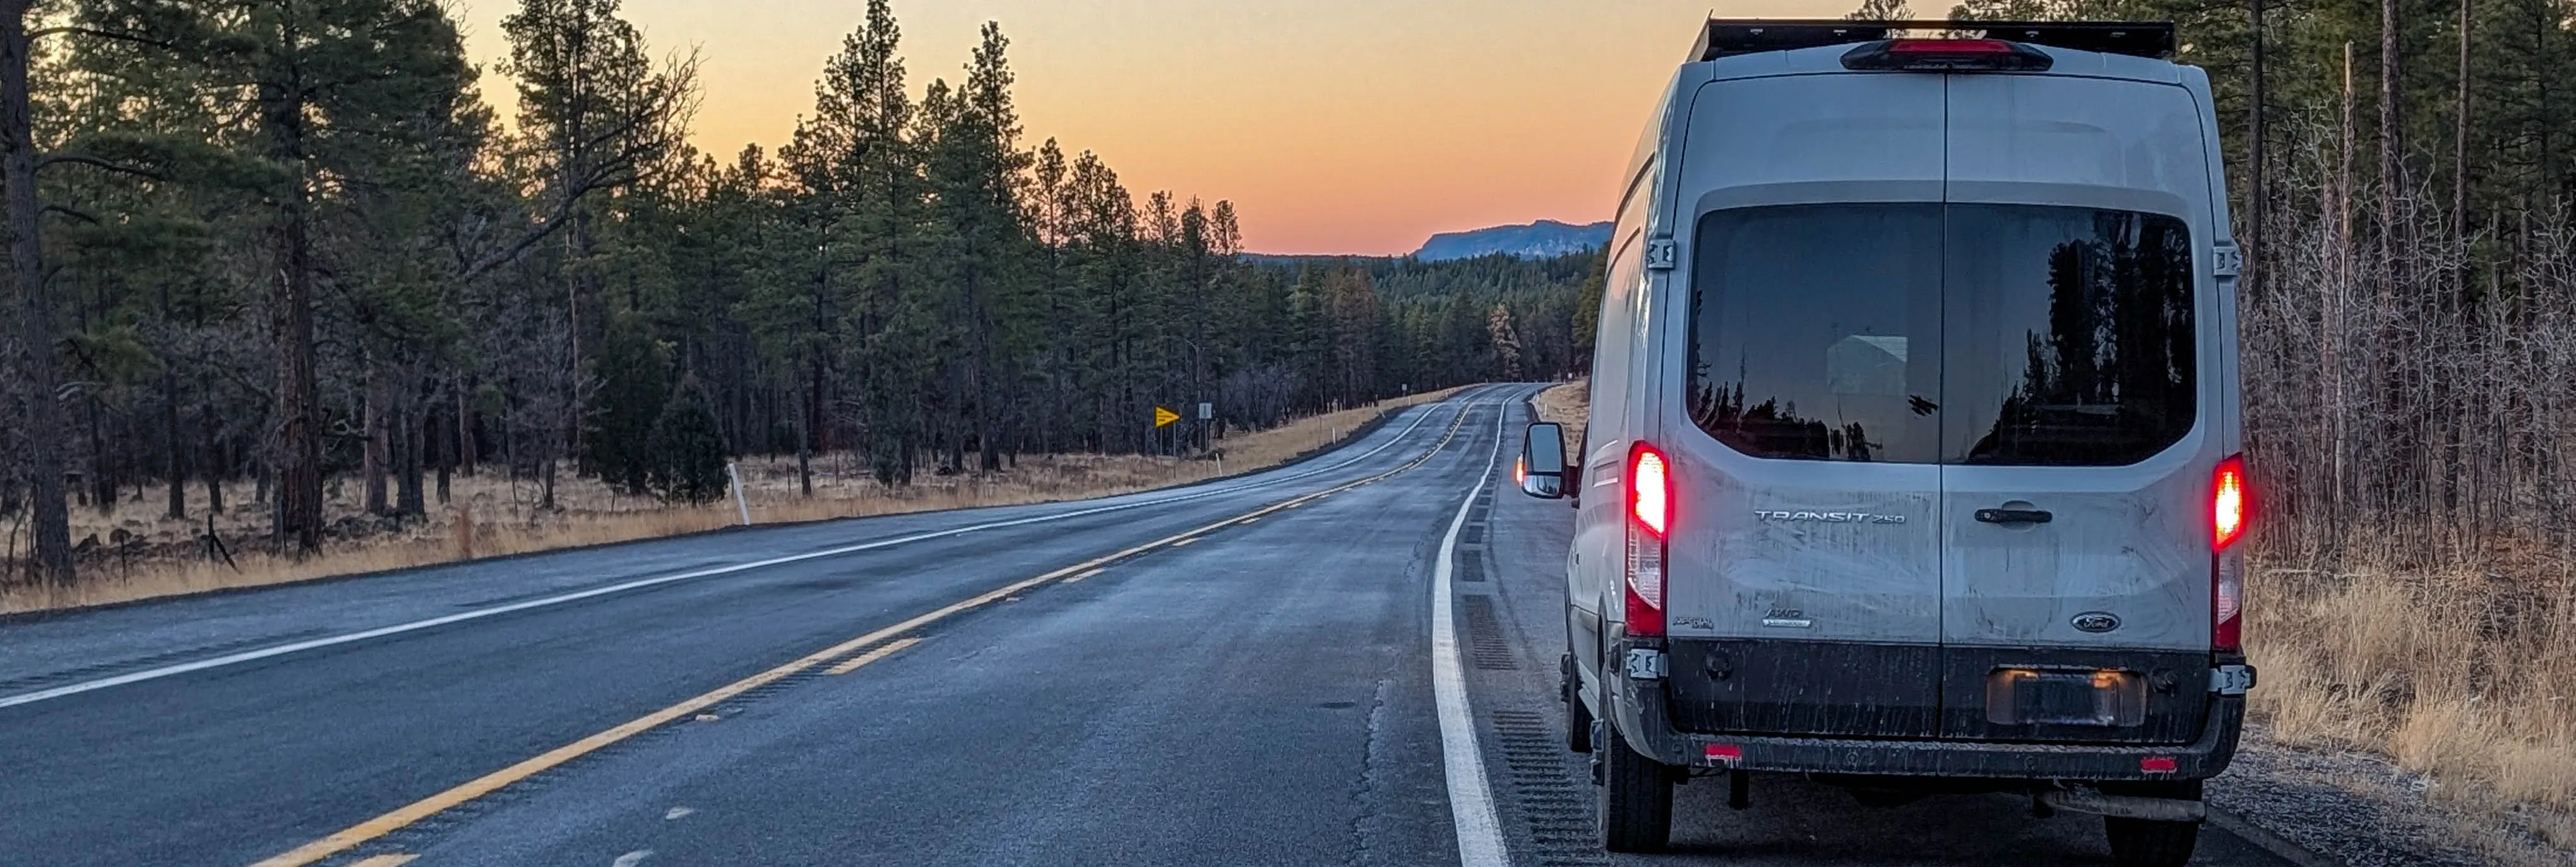
A wild Kep has been spotted. His first night out was a success with some minor bumps and potentially bruises. To get to the campground, Kep trekked through some uneven gravel, which really tested the stability of all the loose components. Thankfully, none of the drawers or cabinets popped open but the toilet did shift around a bit. However, the plumbing under the sink had a leak, which was probably caused by the skewed pipes (who would’ve thought?) and vibrations. I tightened the culprit for now but will need to find a more permanent solution.
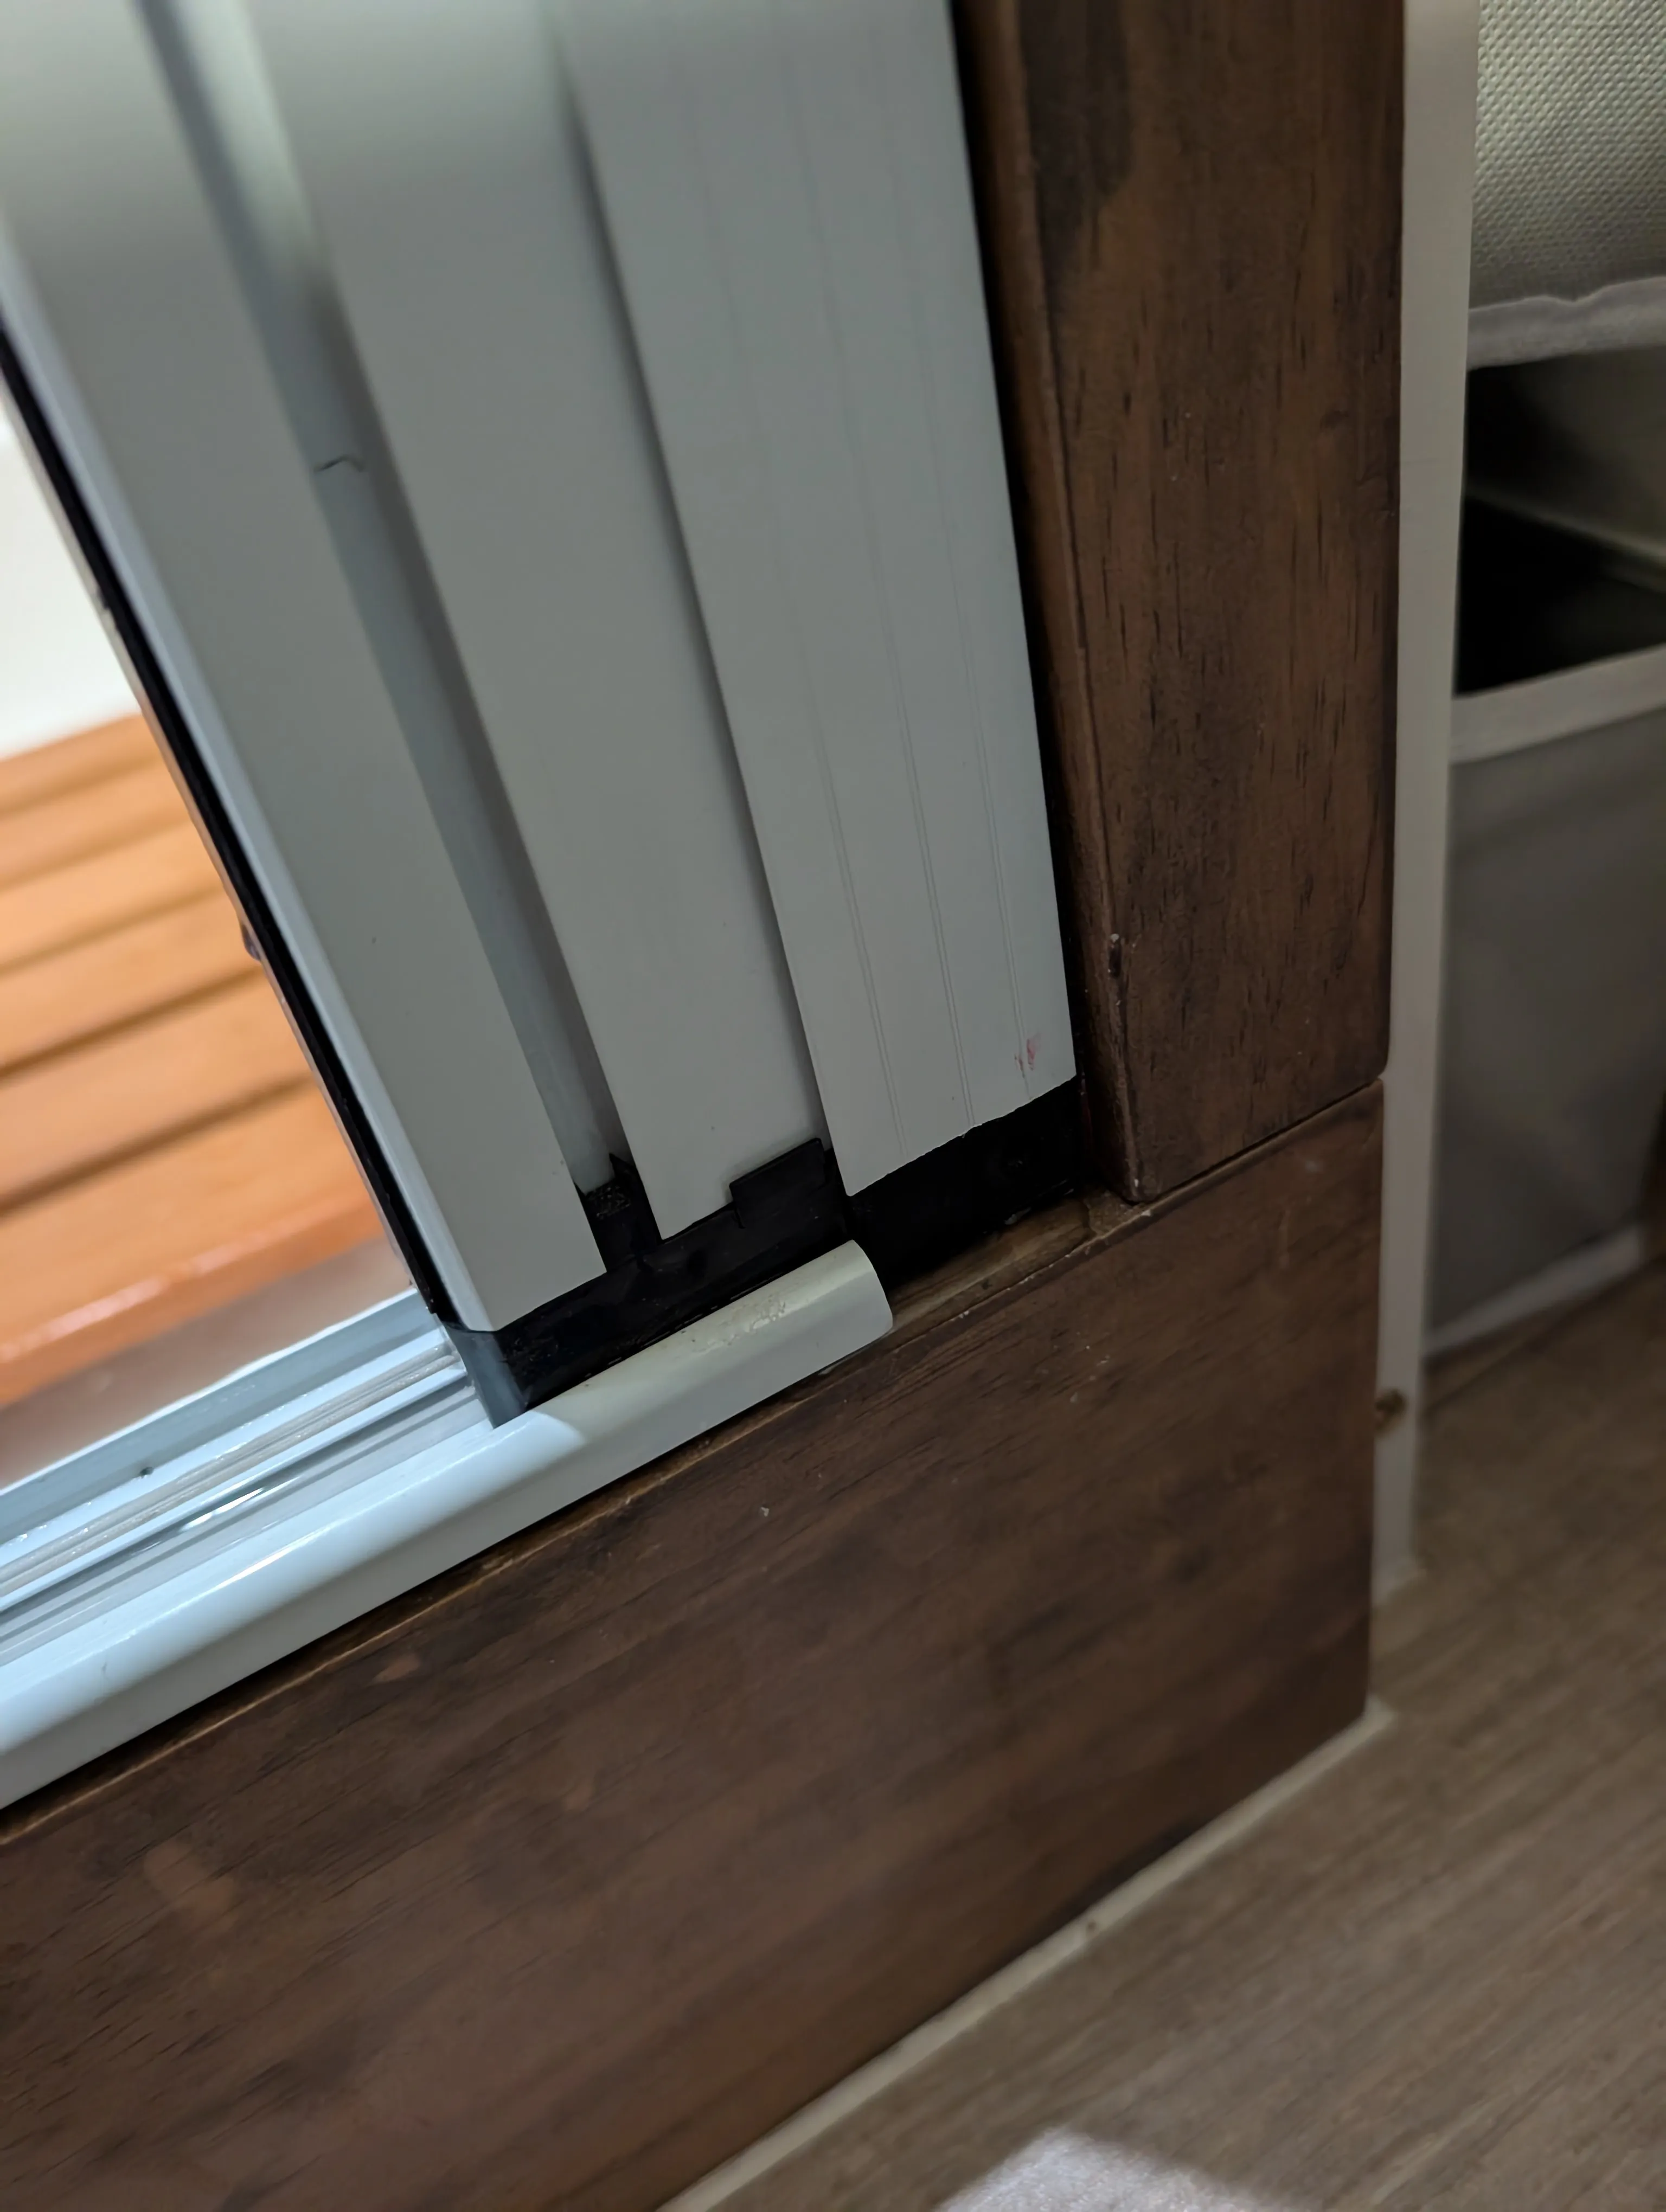
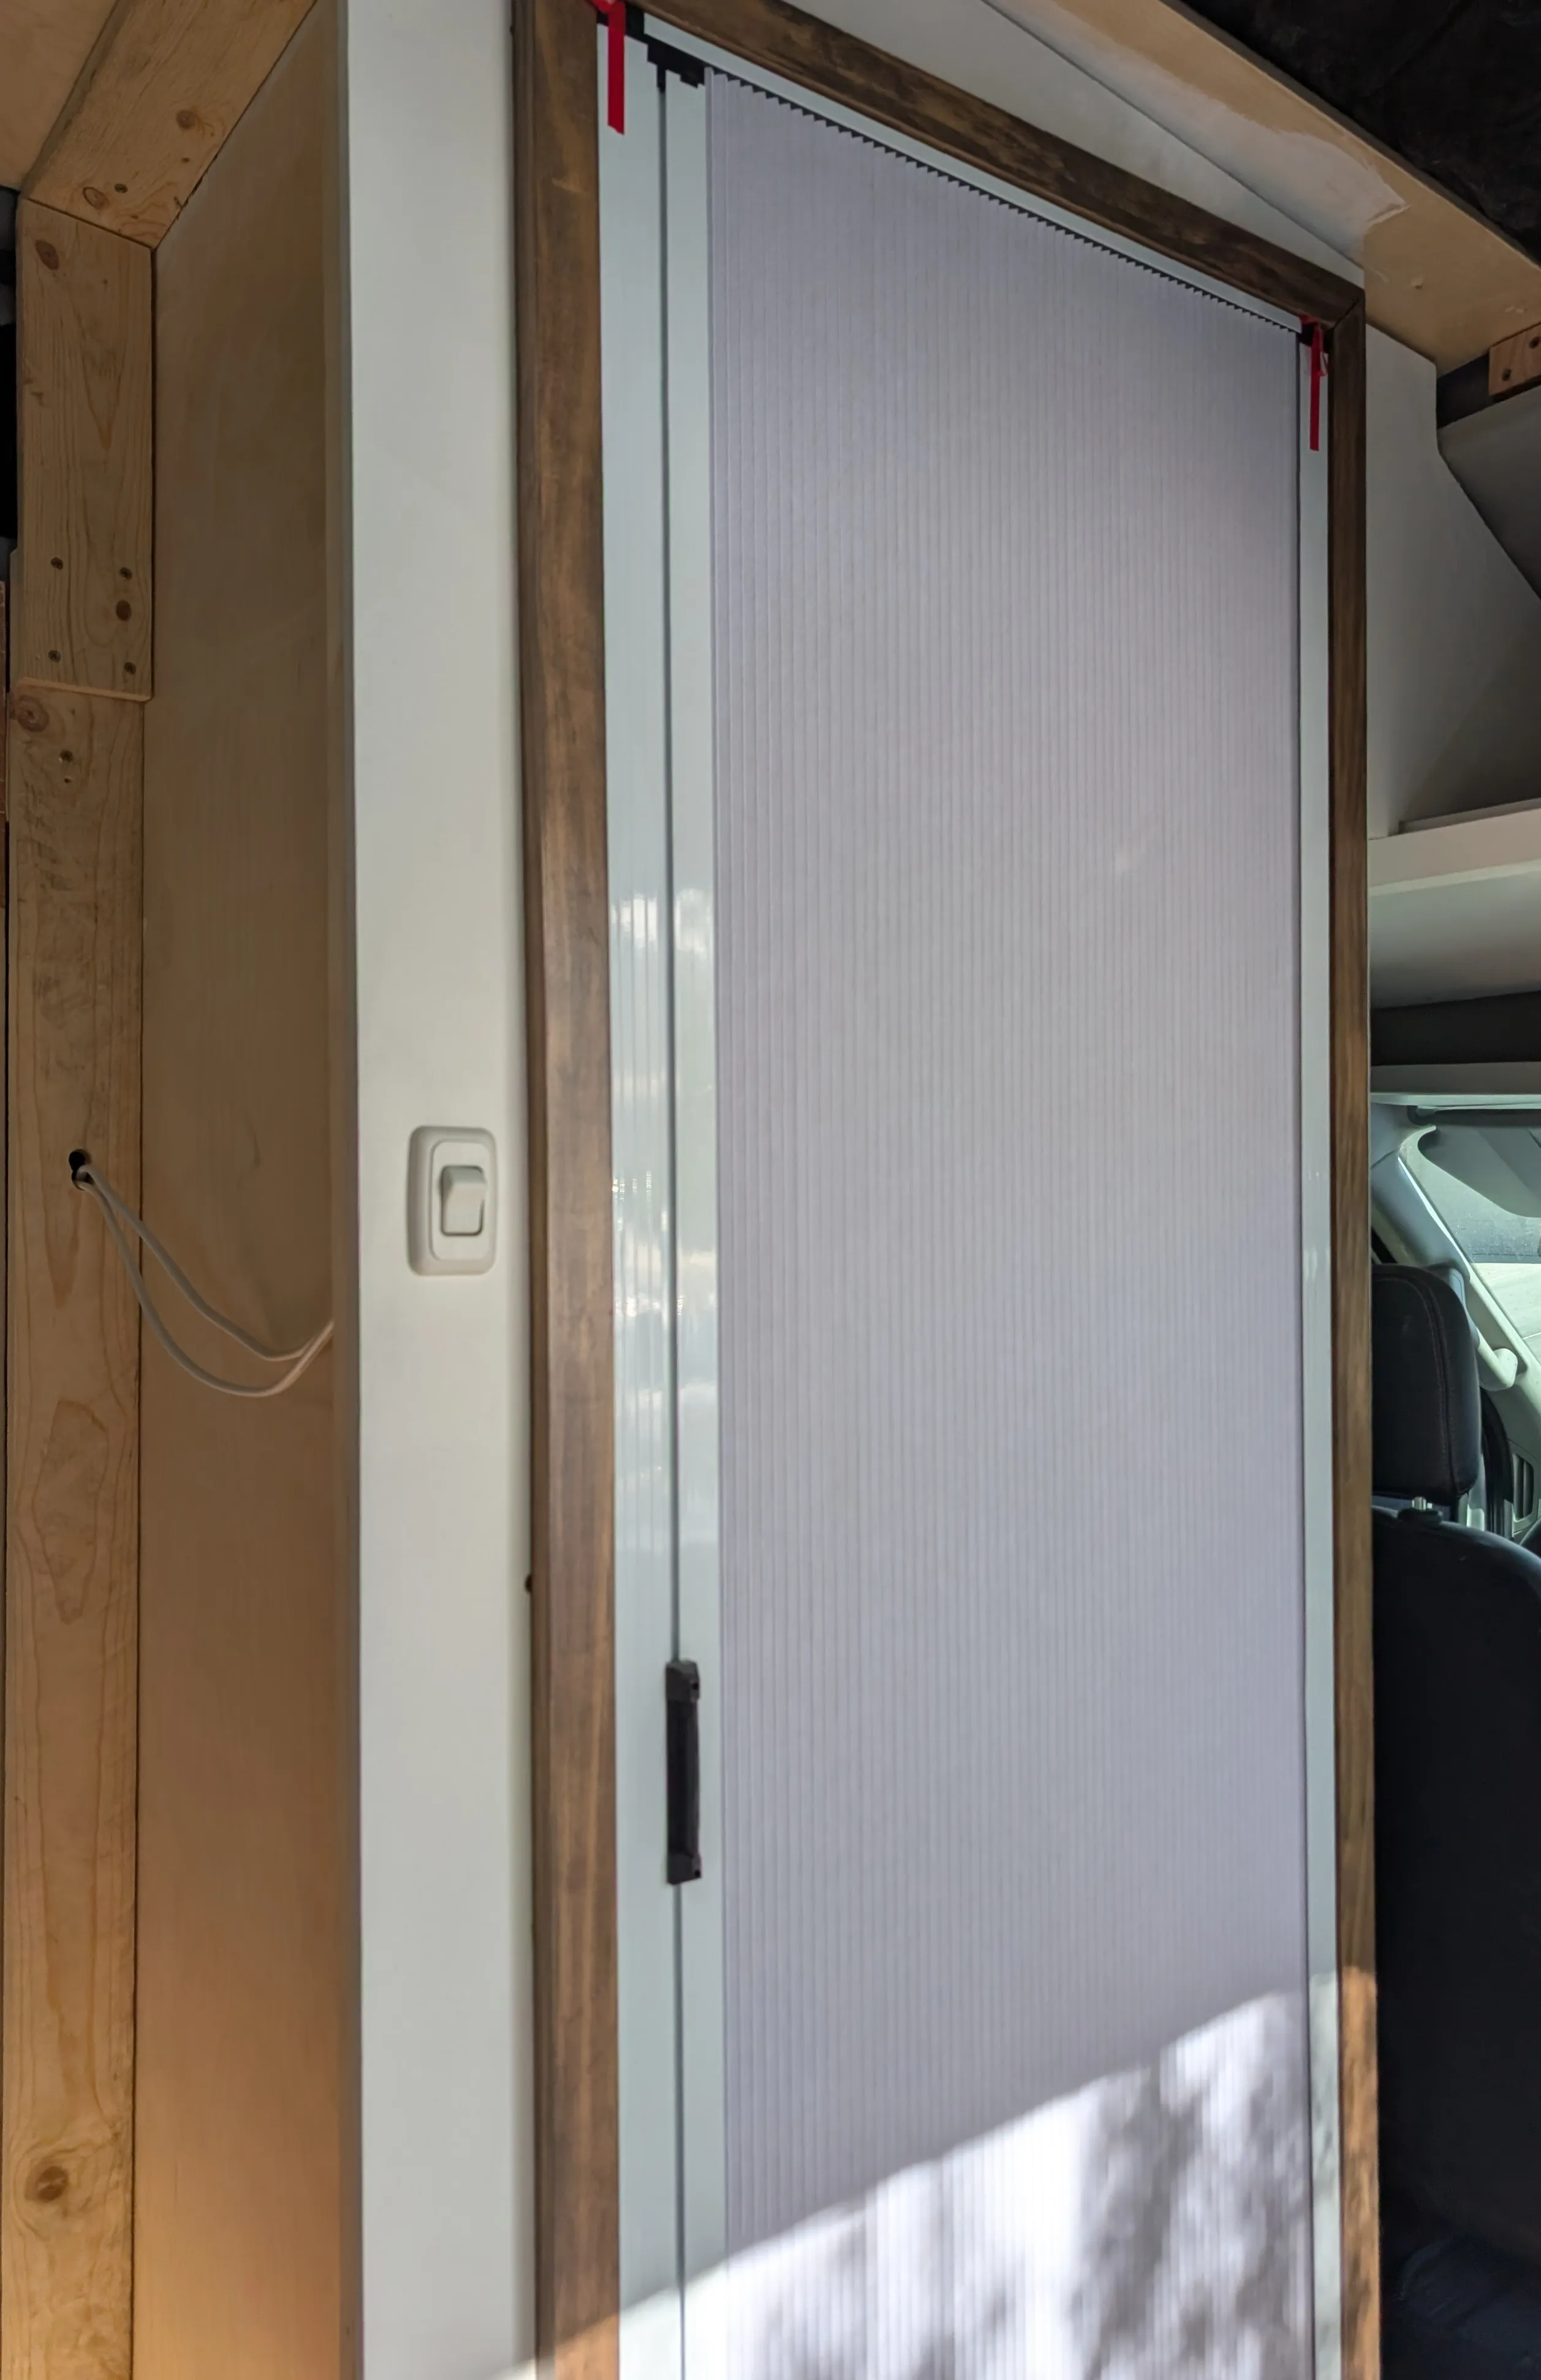
A second leak was discovered in the shower. Of course, all the problems stem from the plumbing. The supposed waterproof shower door is not actually waterproof and leaks a bit from the edges. Kep did also catch three bugs at night, so a bug net for all the openings would be useful.

September 2, 2025
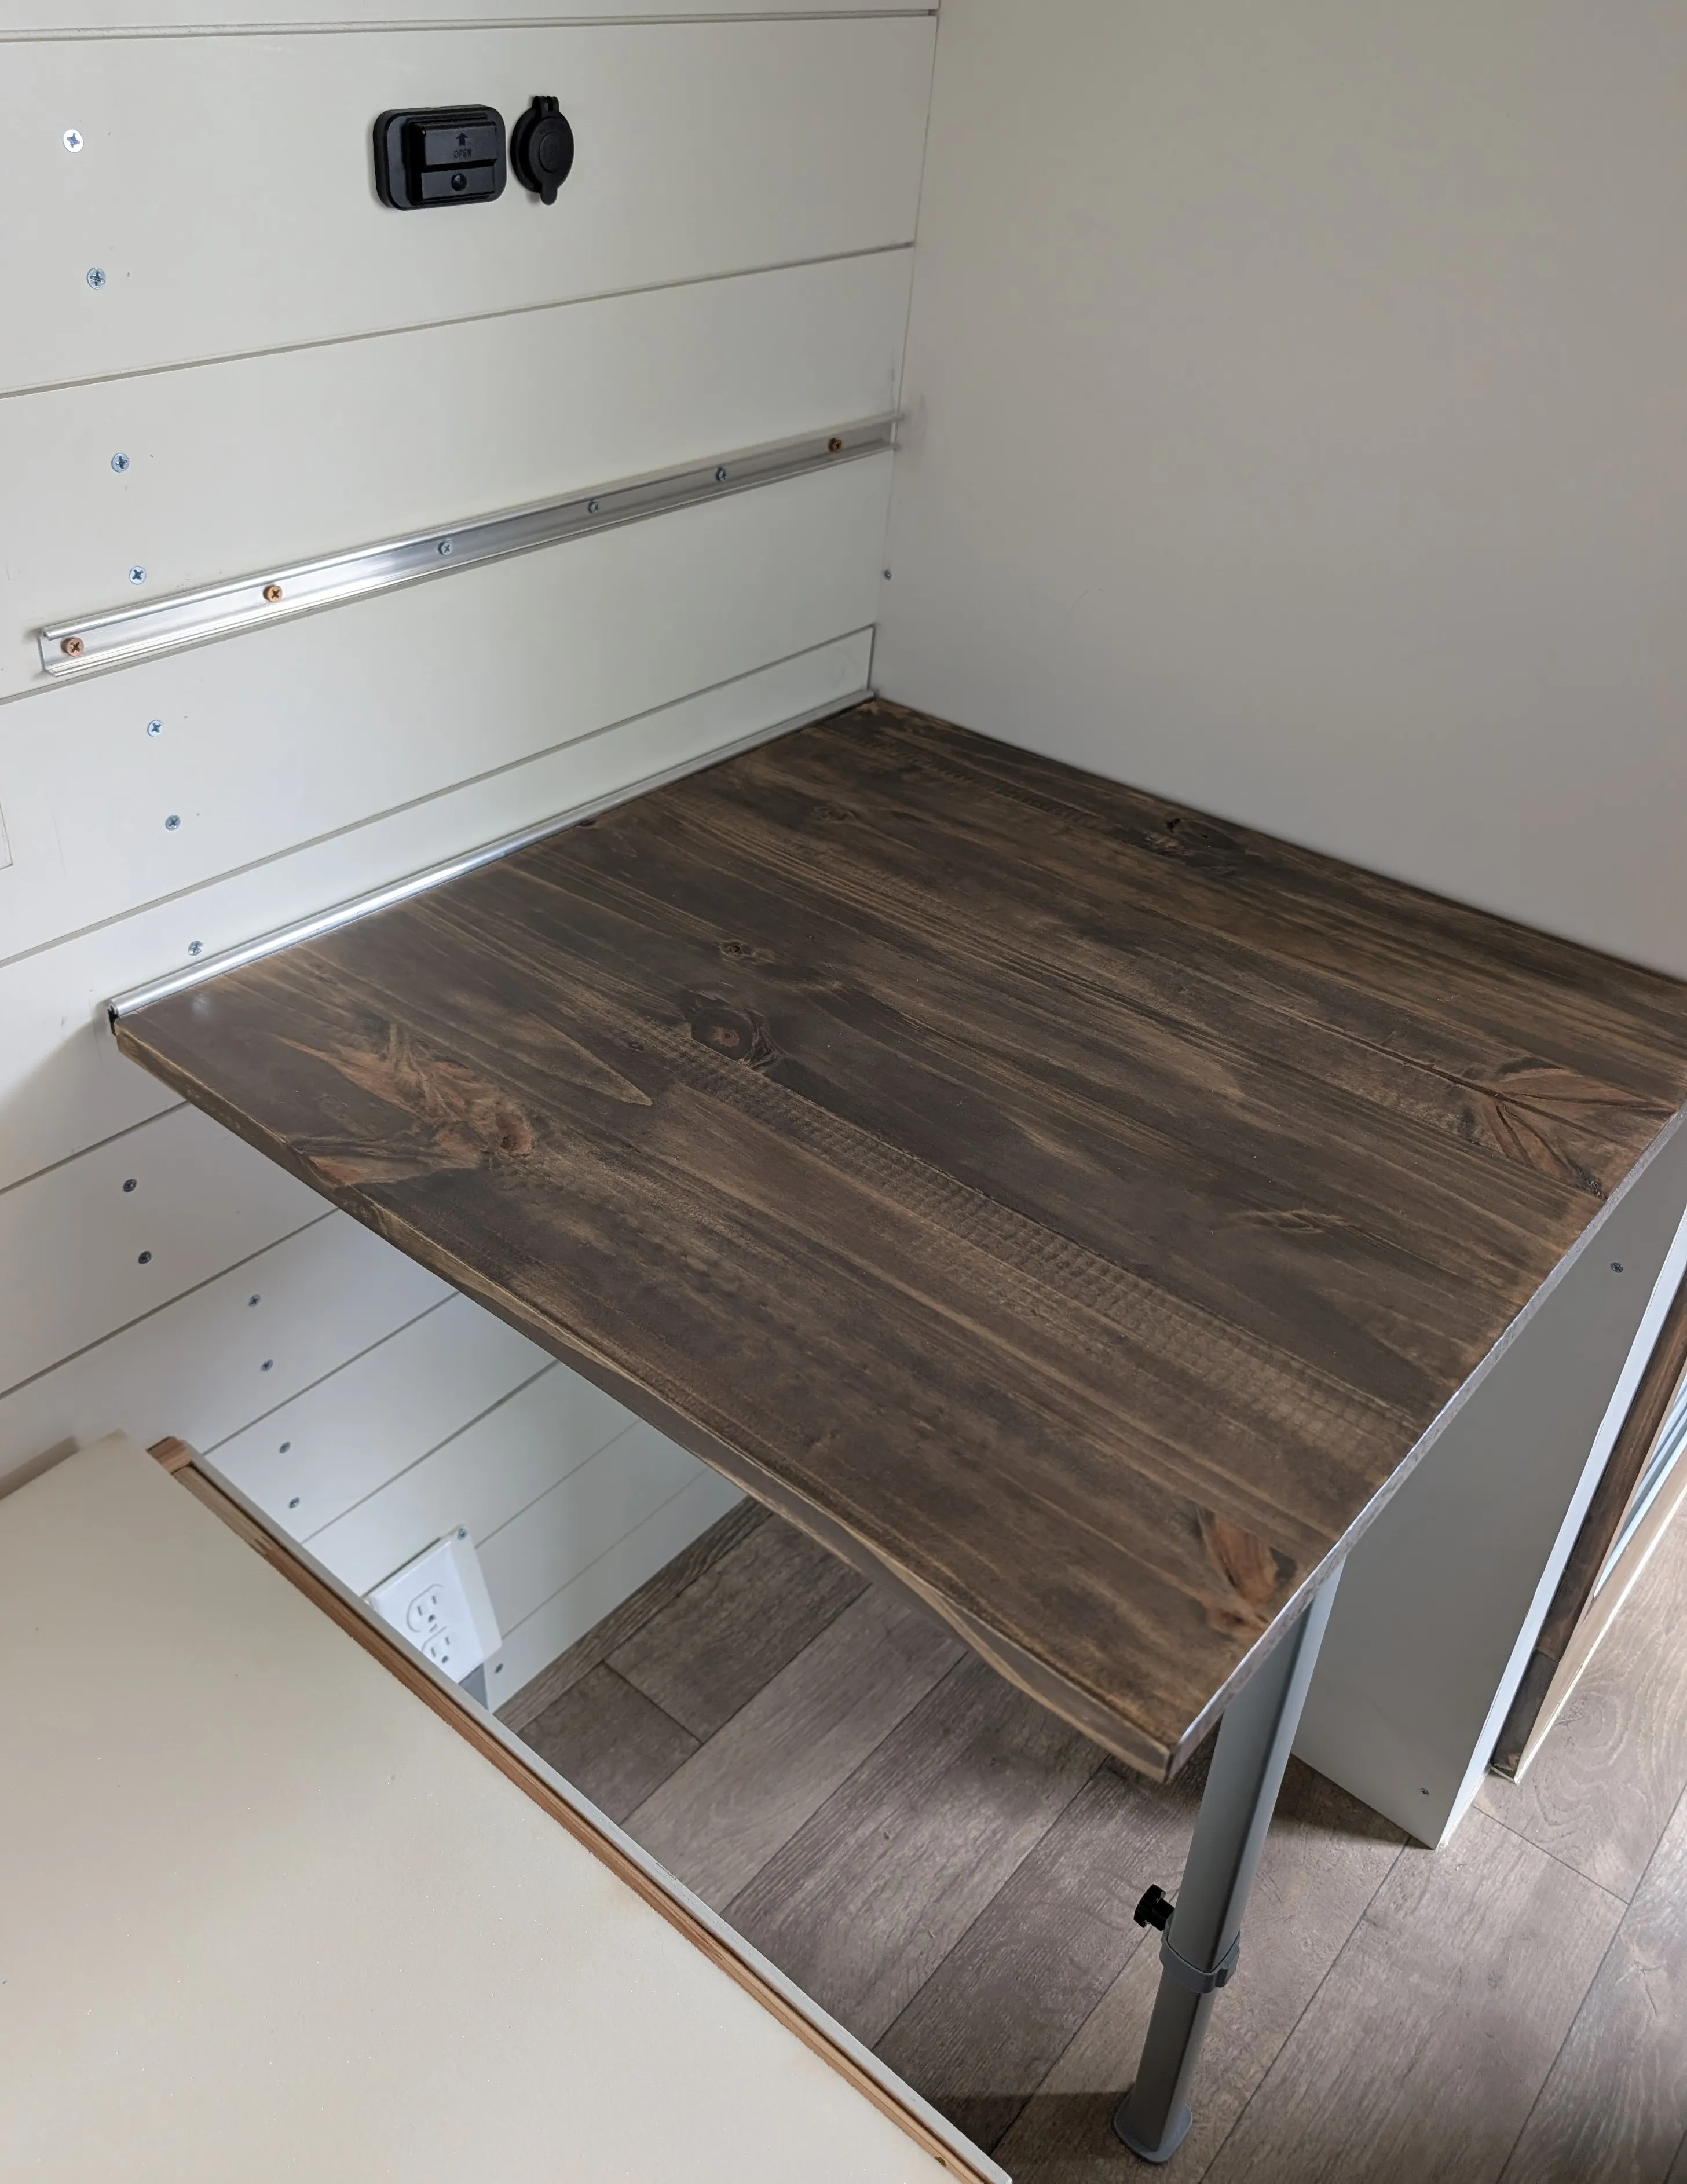
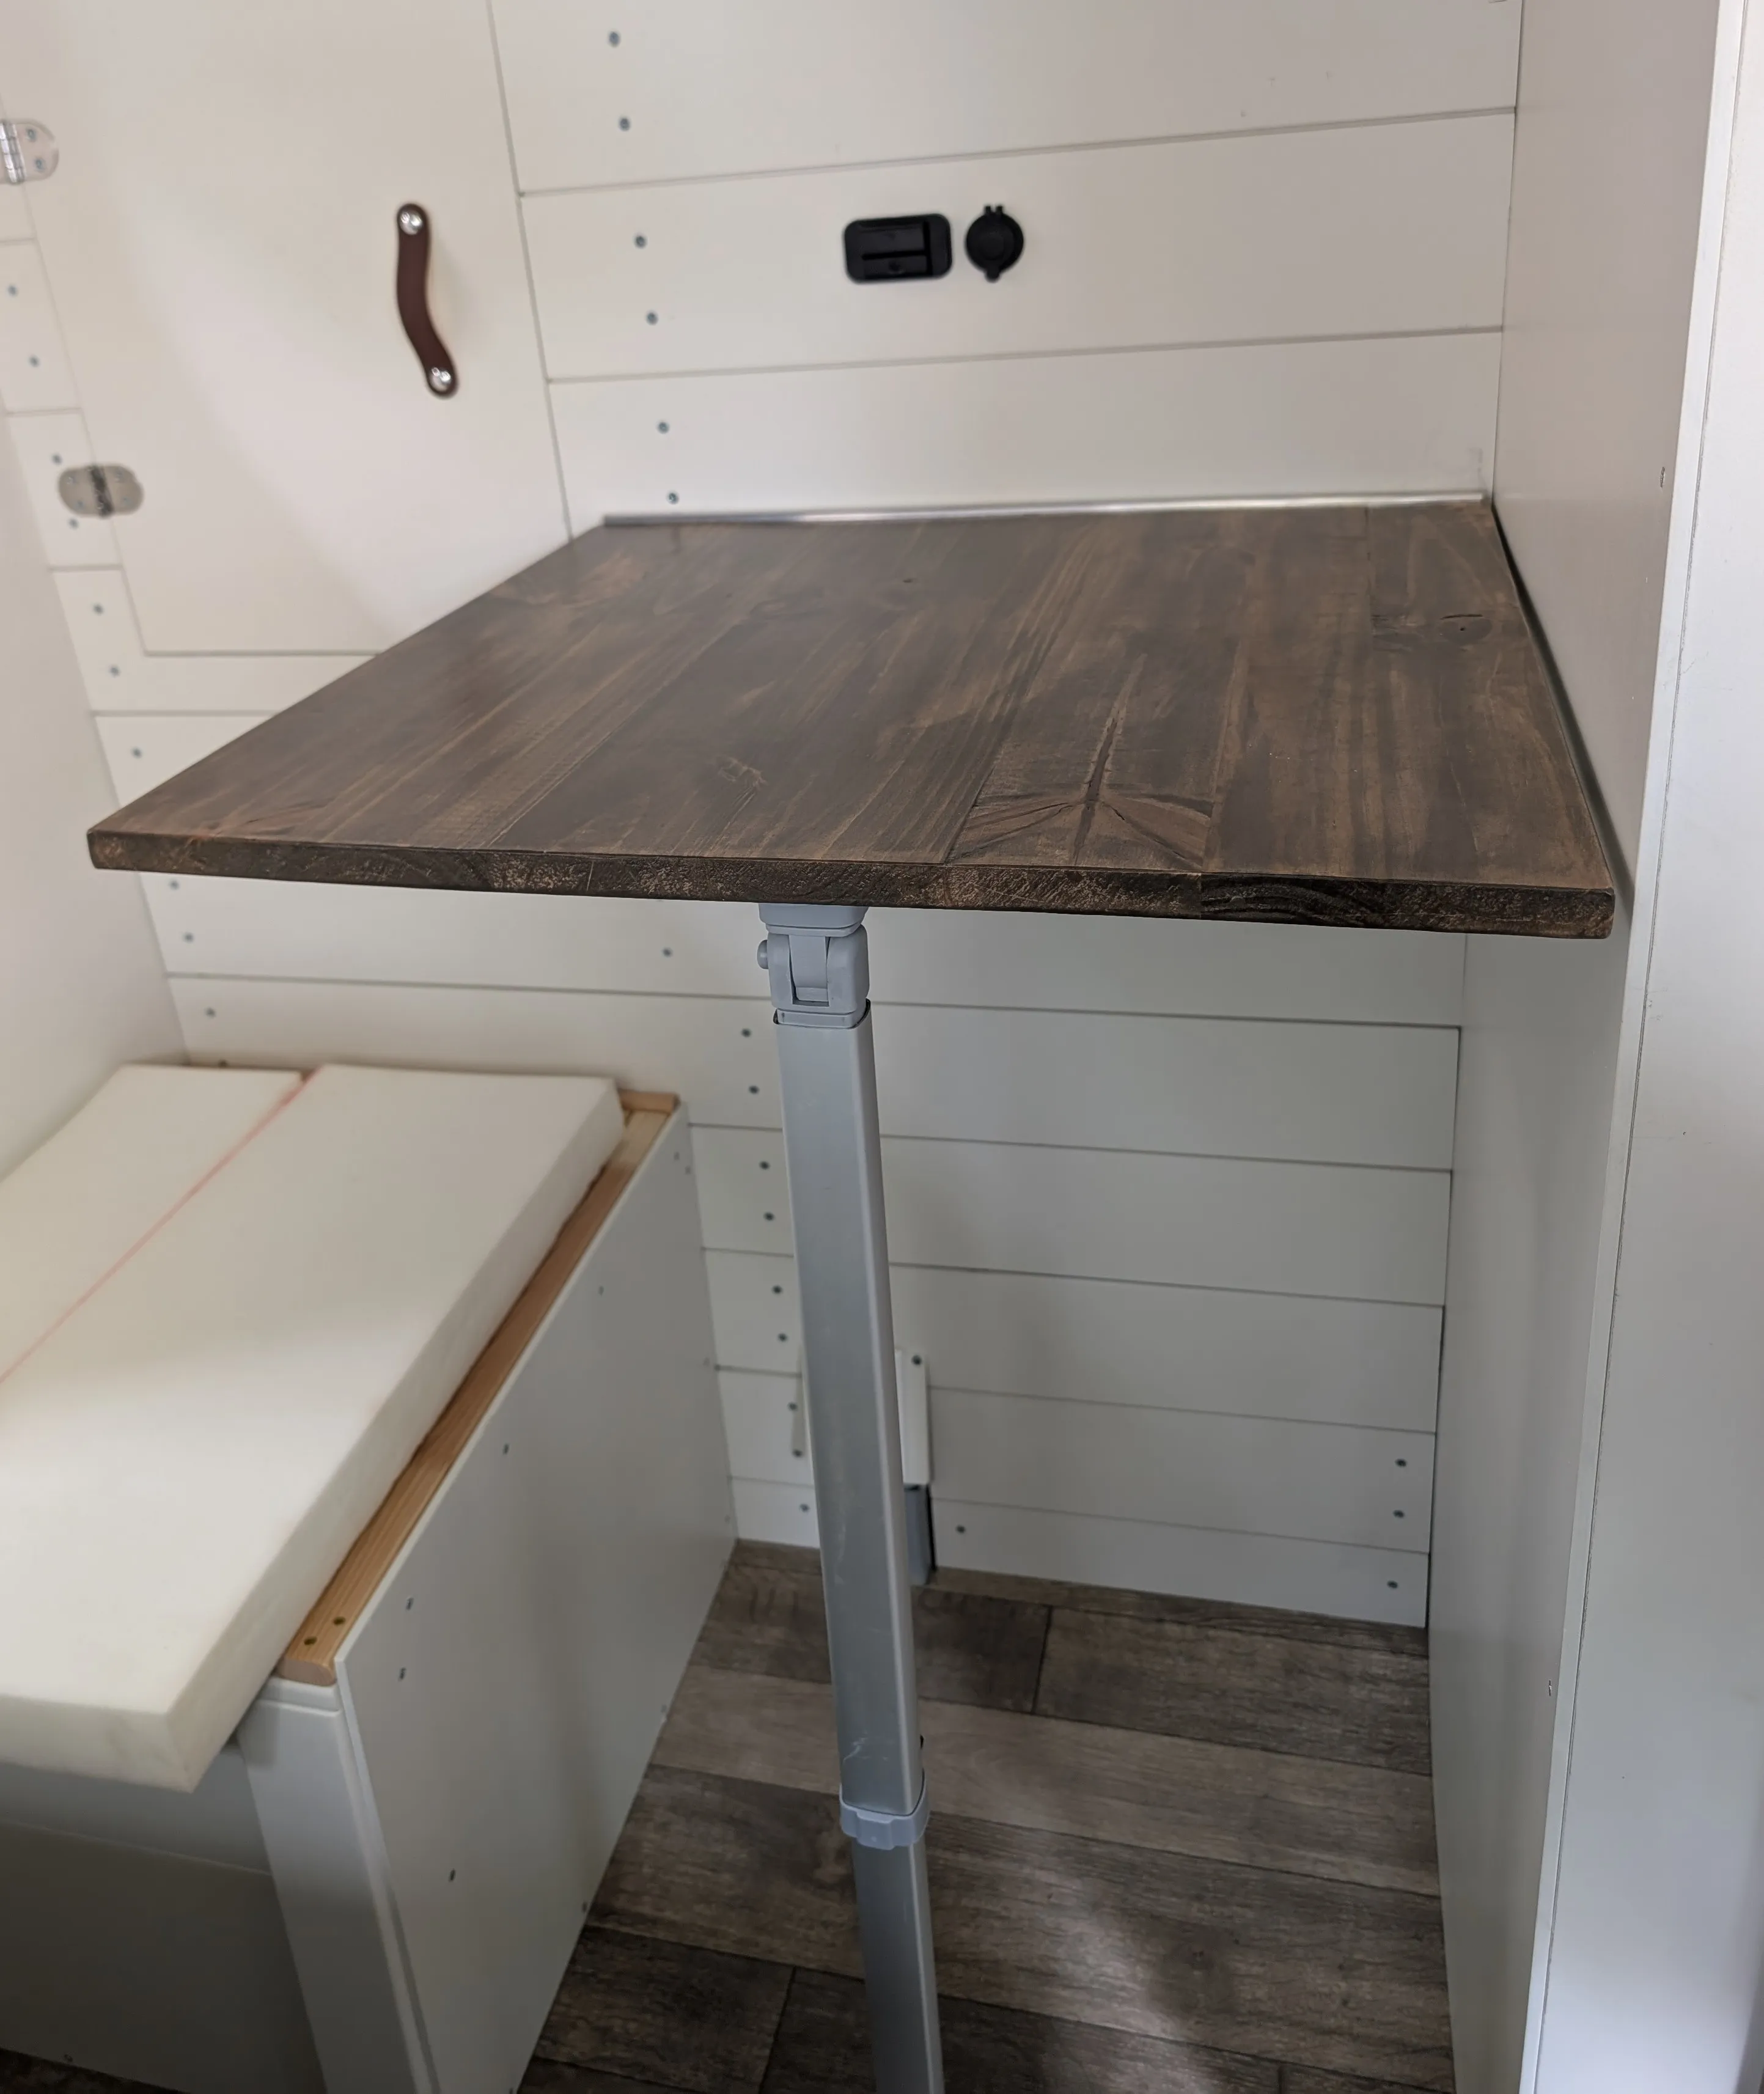
The dining/office table has two settings, standing and sitting. There is a bracket that goes along the side of the table and connects to another bracket on the wall. I was a bit hesitant to use 3/4” thick wood but it seems to be holding up well. The table also has a leg for support, which is also height adjustable. I chose these parts specifically for the standing desk option, which worked out perfectly.
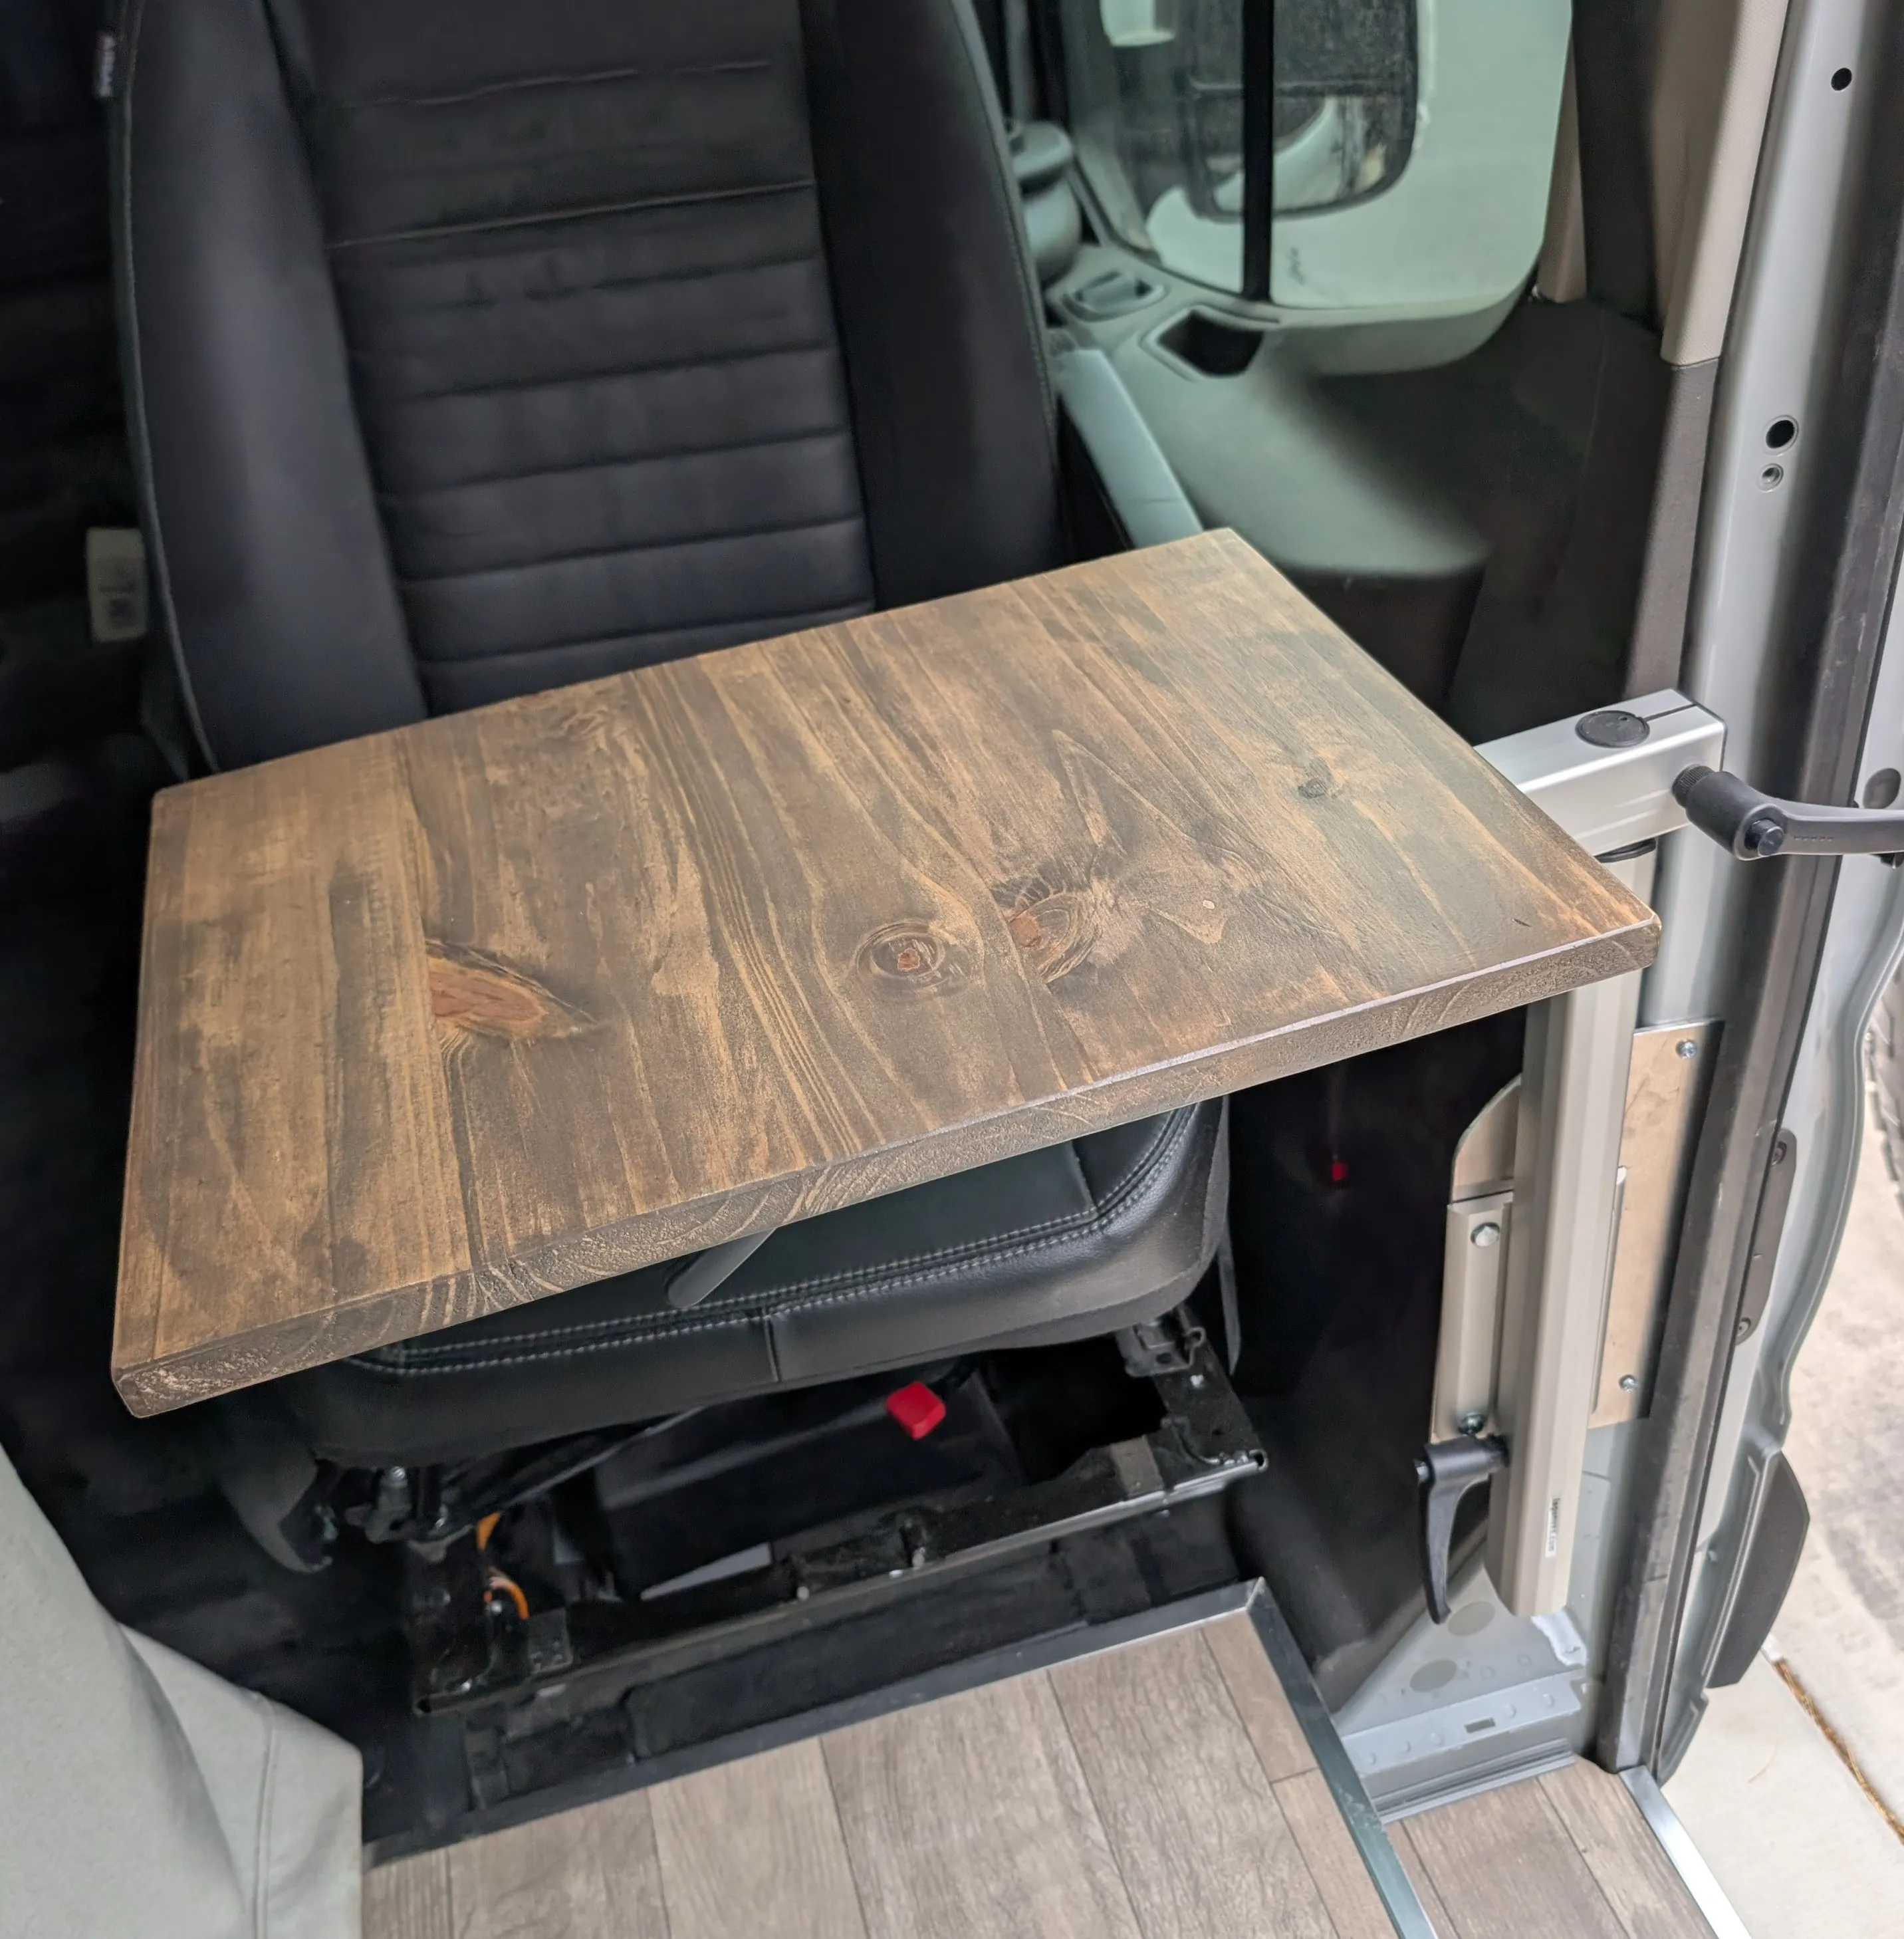
The second desk will be by the passenger swivel seat where the lagun mount was previously installed. I used leftover wood from the dining table and the piece is a bit small, but will do for now.
August 31, 2025
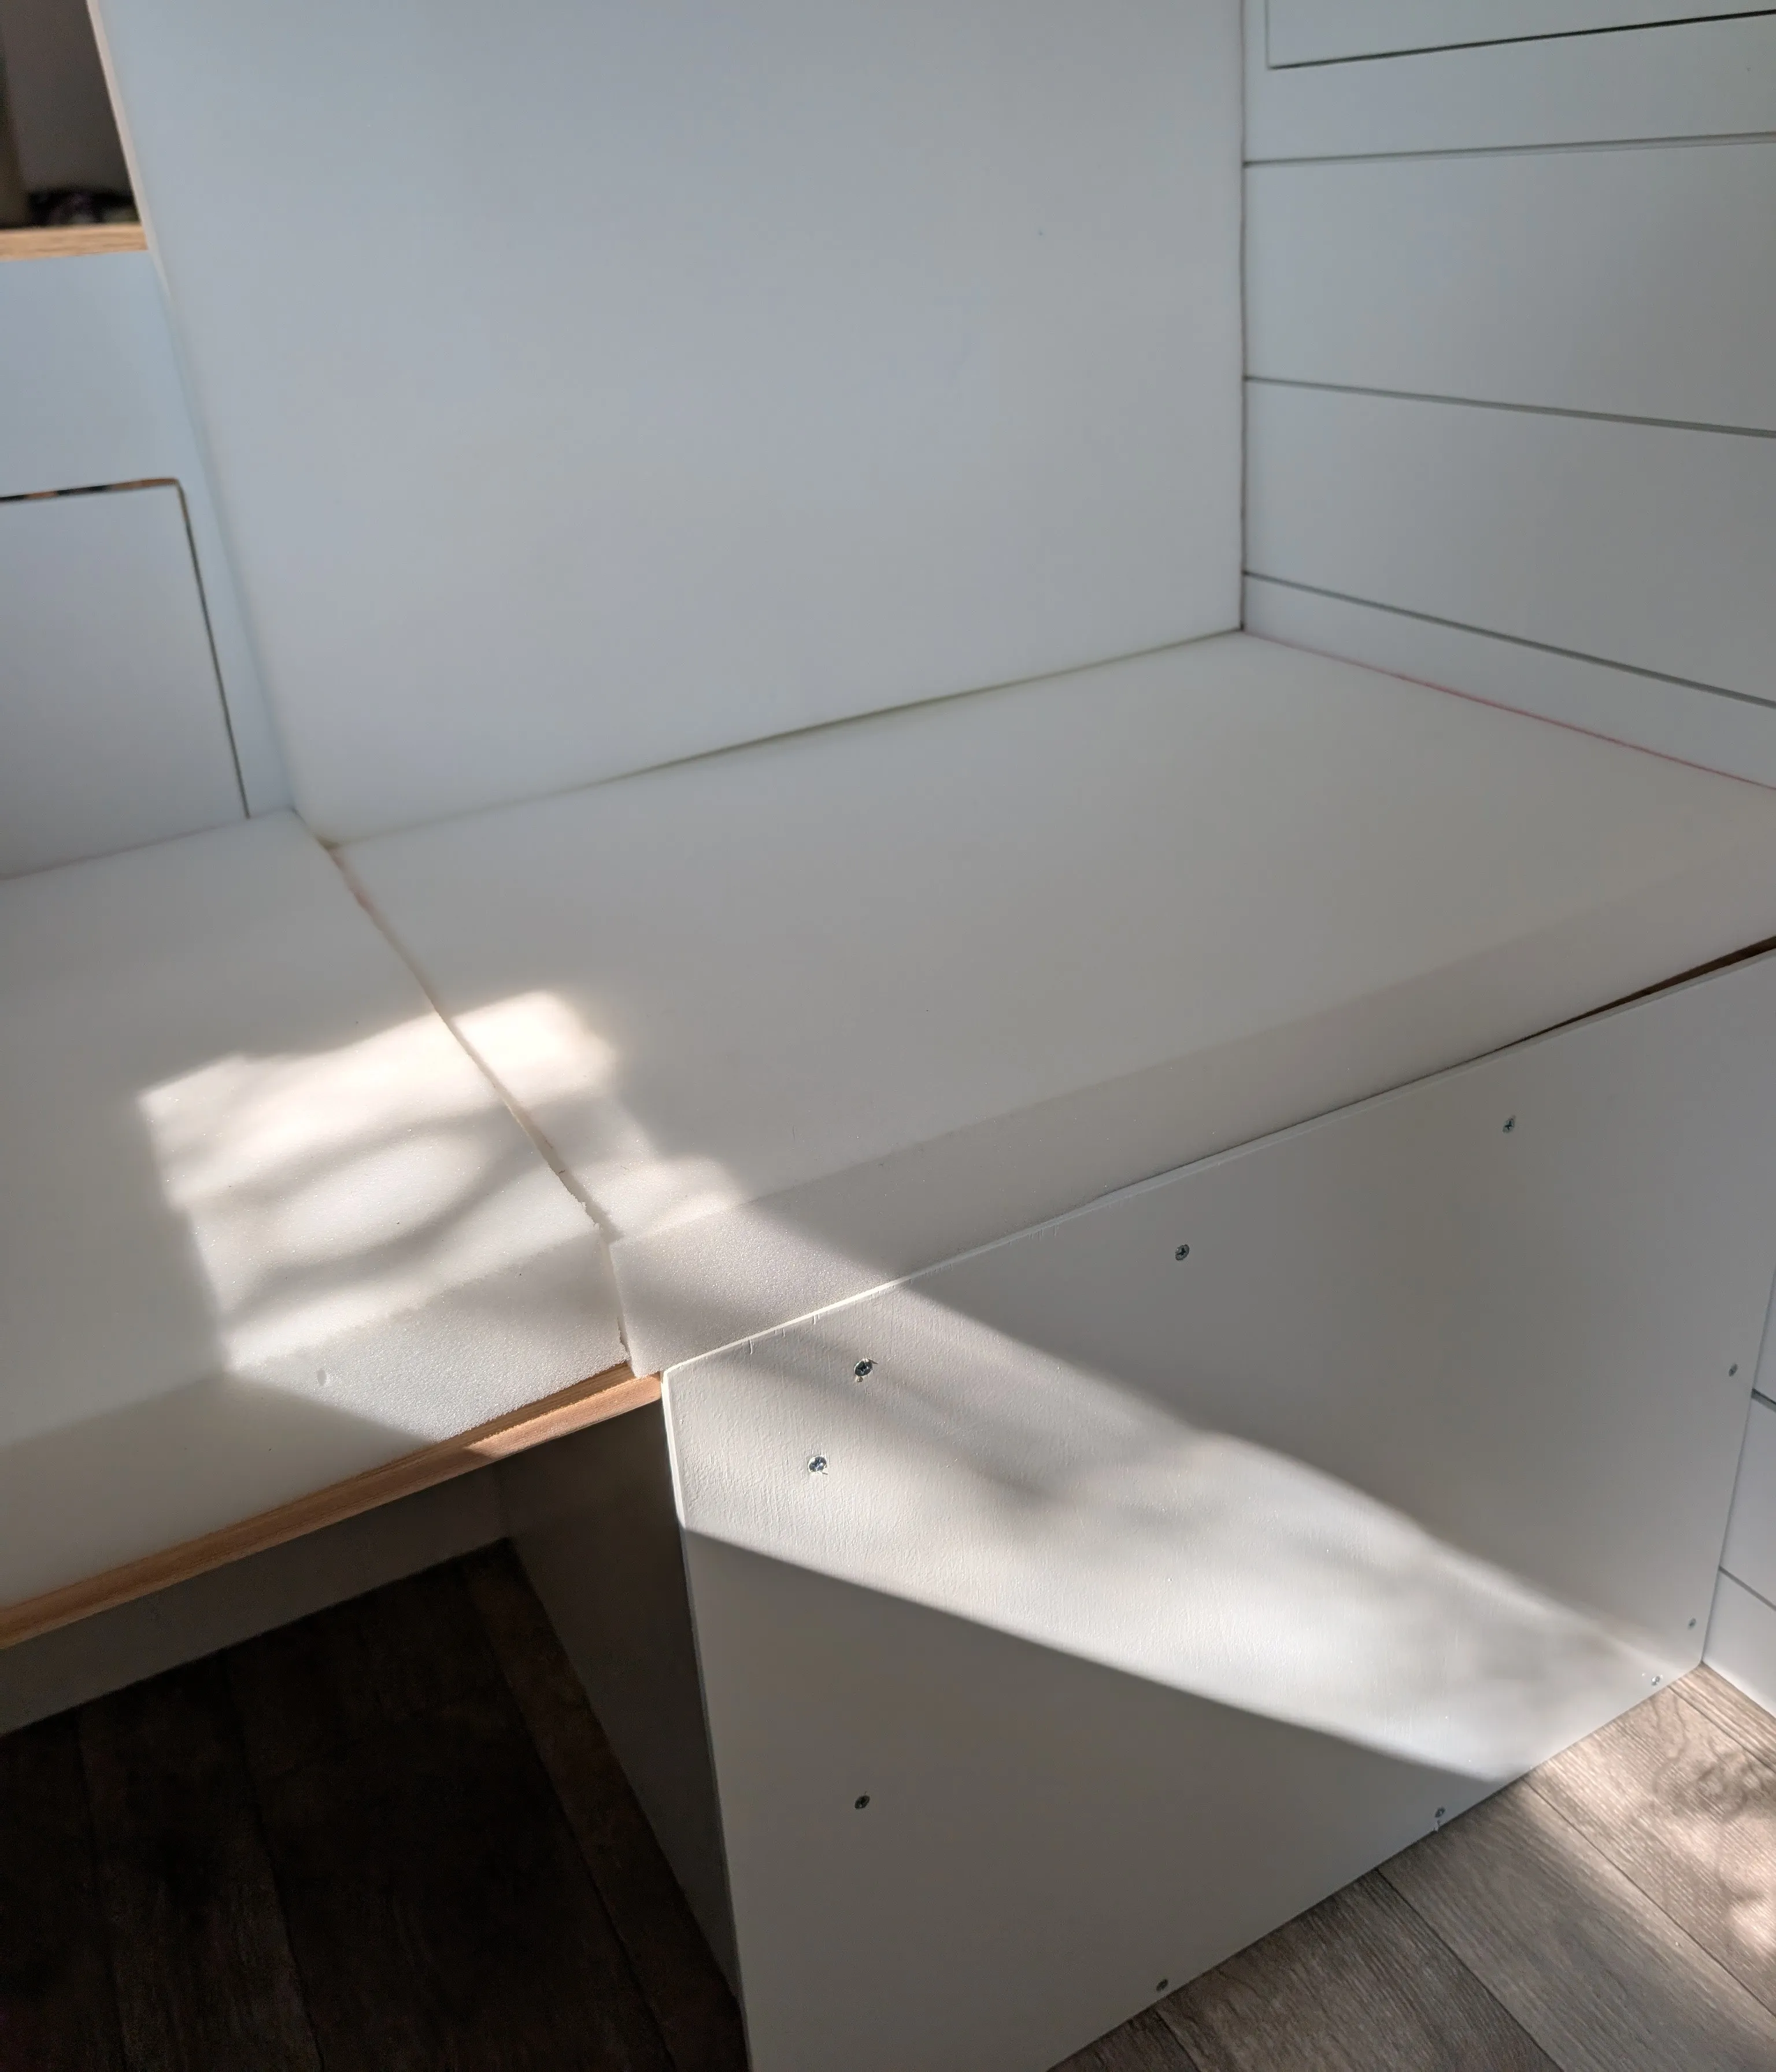
The bench is just screwed to the floor and fits well in this space. I’ve cut up some 2” thick foam for the seat cushion and it does make a difference with the height of the bench. It could have been about an inch lower for a more comfortable height.
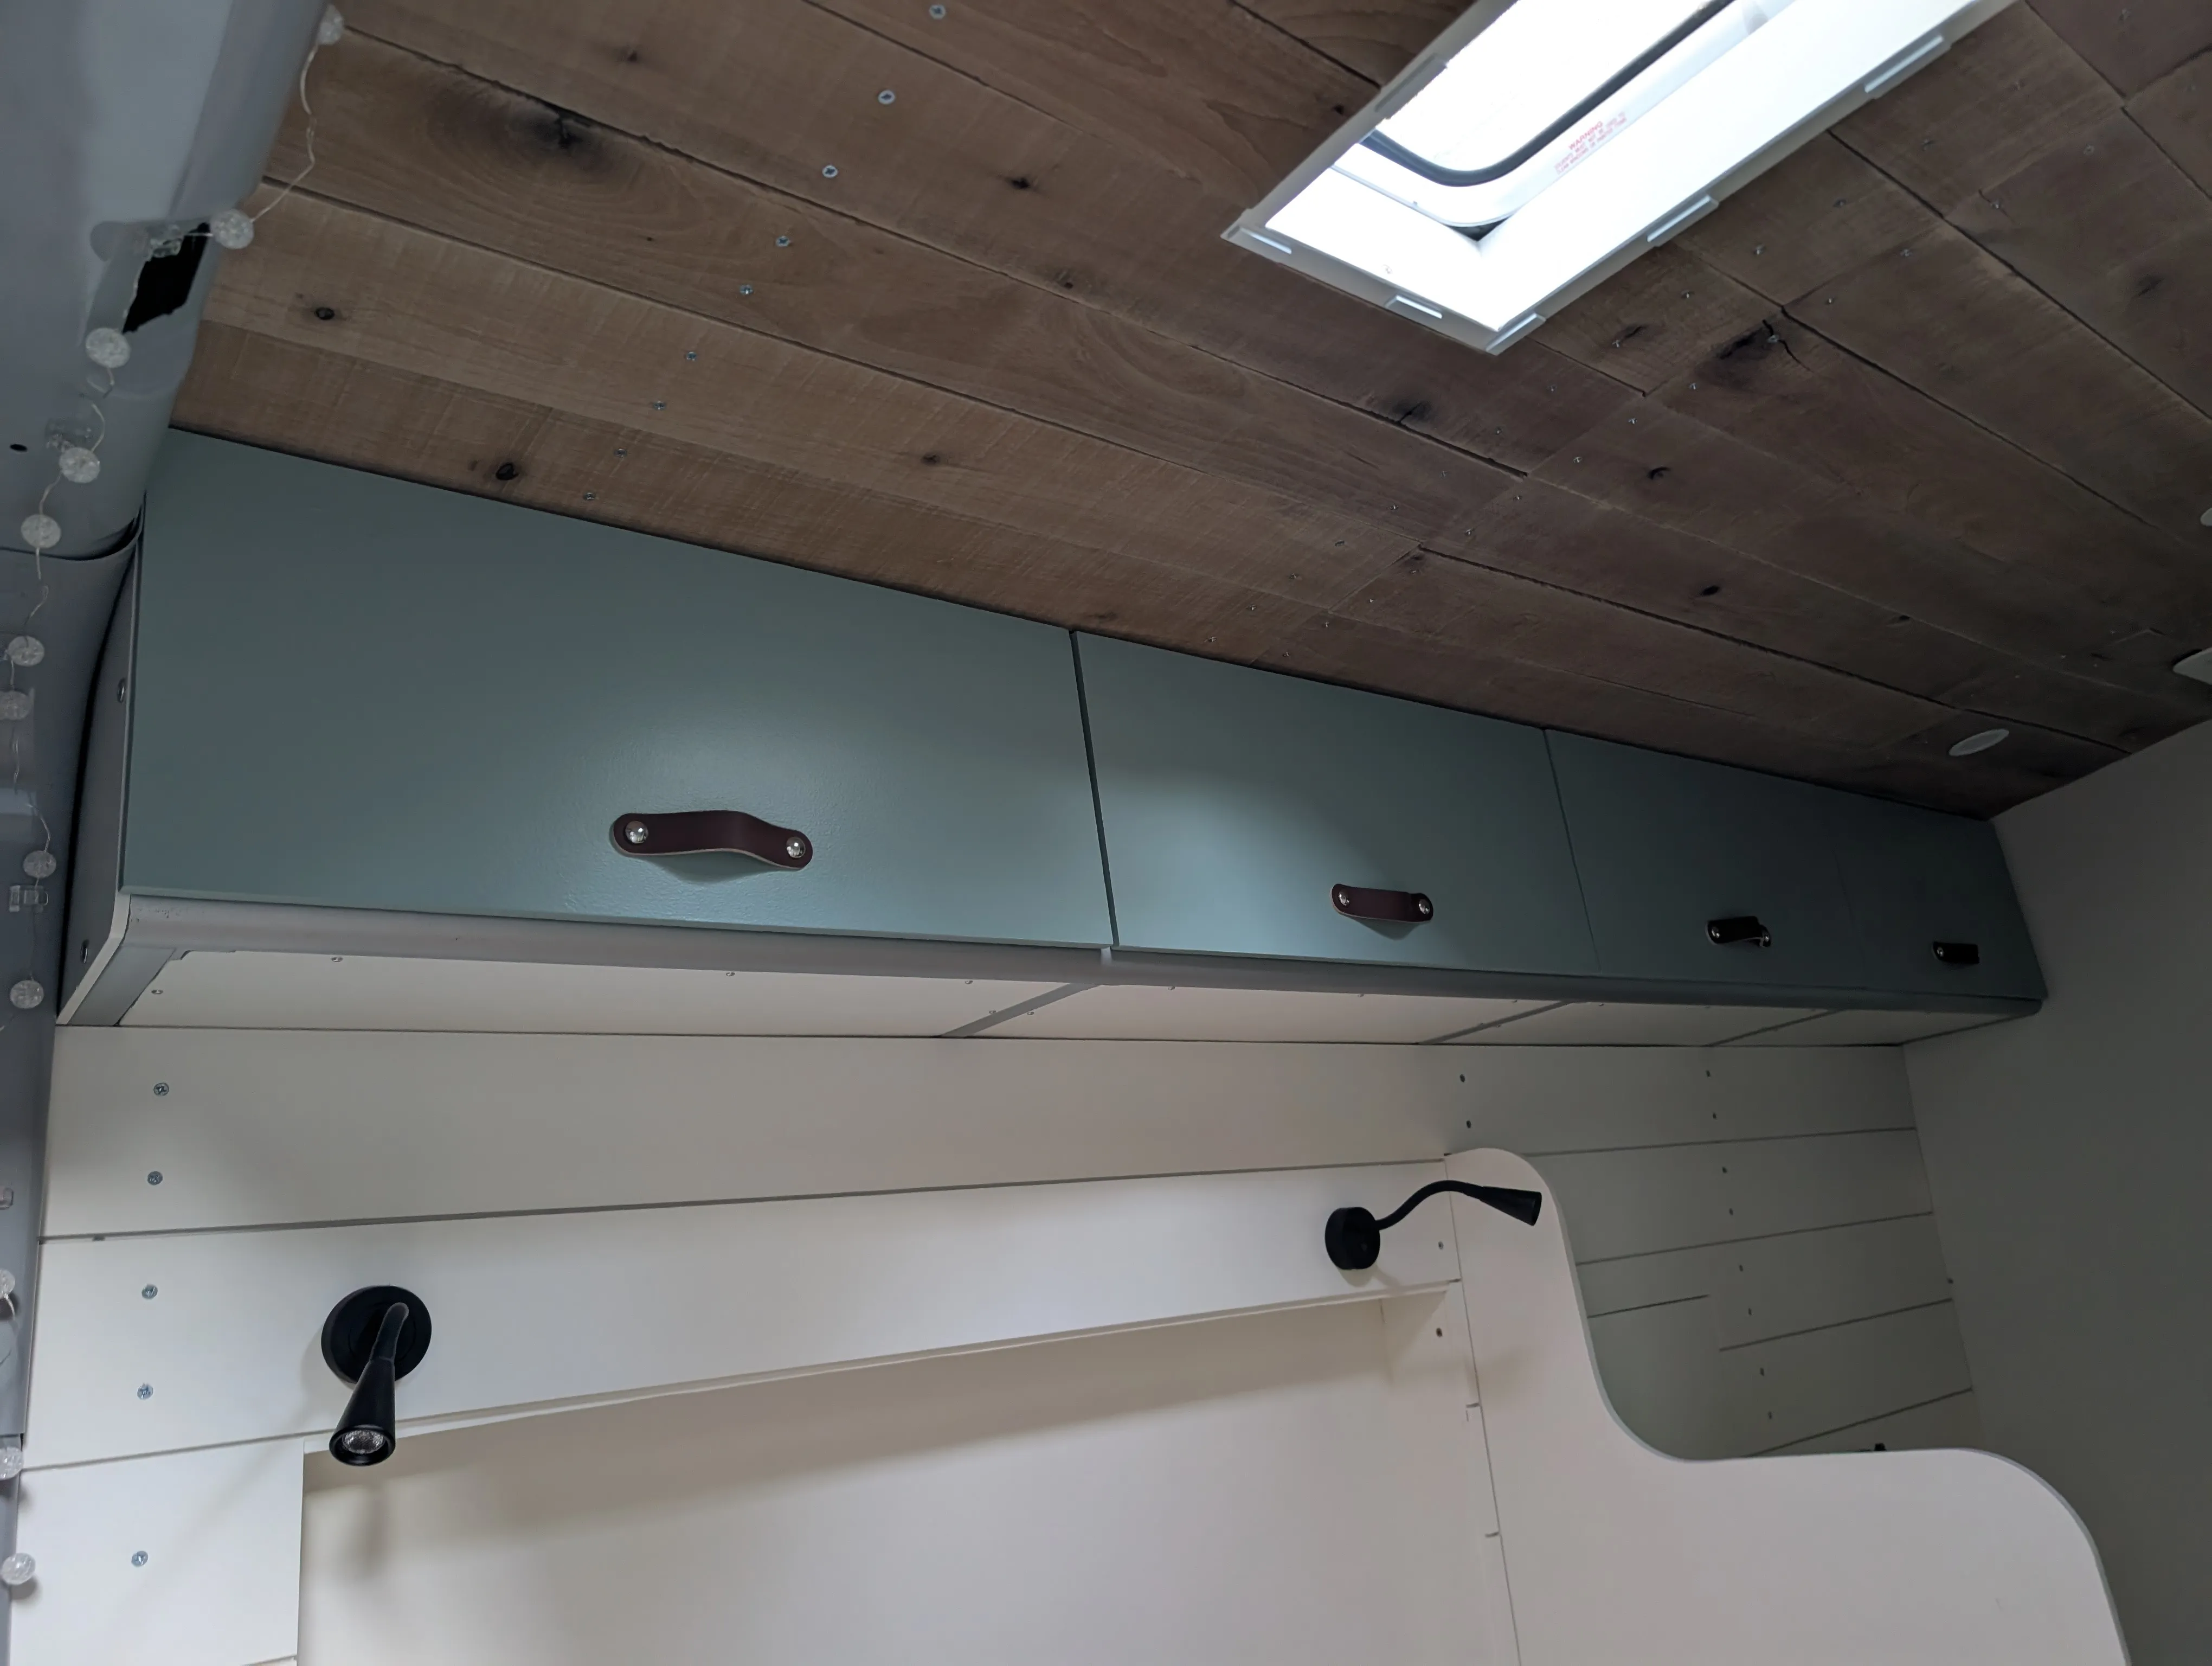
These leather handles match well with the dark wood. The bolts that it came with were too long for 1/2” thick plywood so I had to trim them down a bit, which made it a lot more work but was worth it.
August 24, 2025
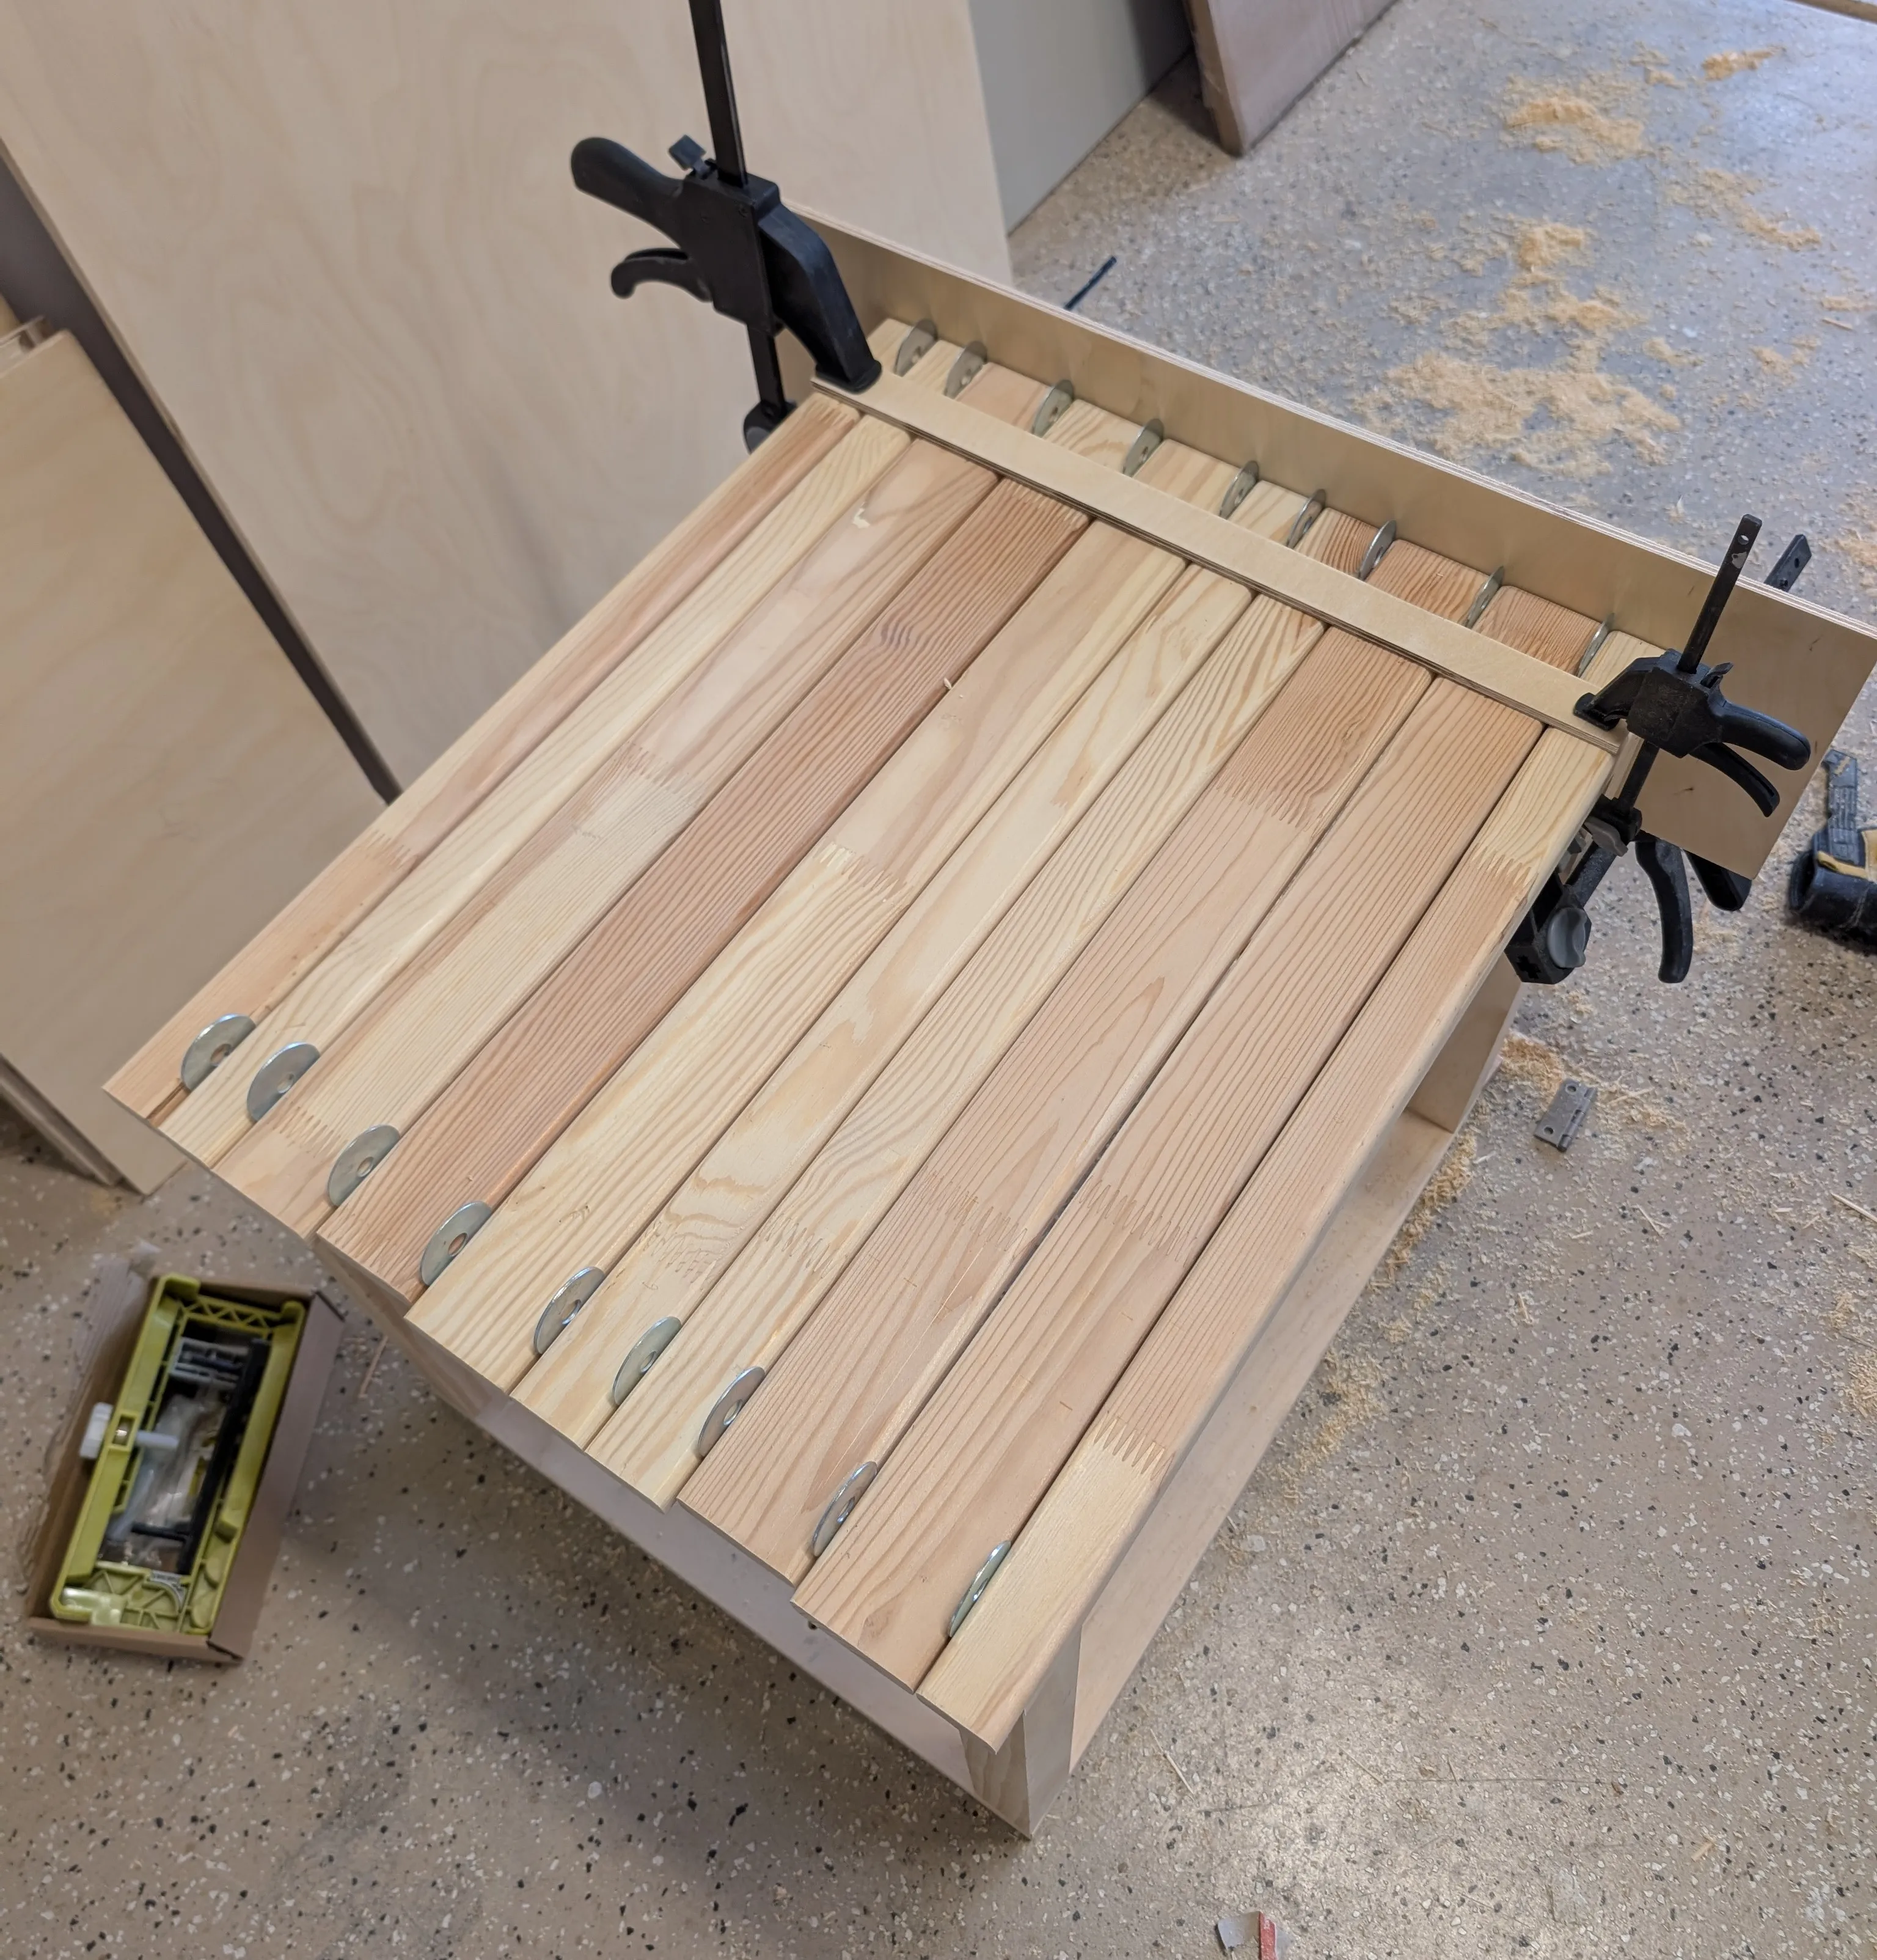
The bench slats consist of 3/4” thick beams from old Ikea furniture, cut and routed to size. It took some careful calculating to determine the size and spacing of the slats so that there was an even number. Even then, I found that I made the slats too wide so the spacing in between was also too wide. This is why there are uneven sizes.
To secure the slats, there’s a strip of 1/4” plywood that rests inside this routed slot in the frame. This is to prevent it from moving but also to keep the spacing even.

This is the final result of the bench and what it looks like in its rightful spot (minus the end faces).
Feature 1: Open for storage
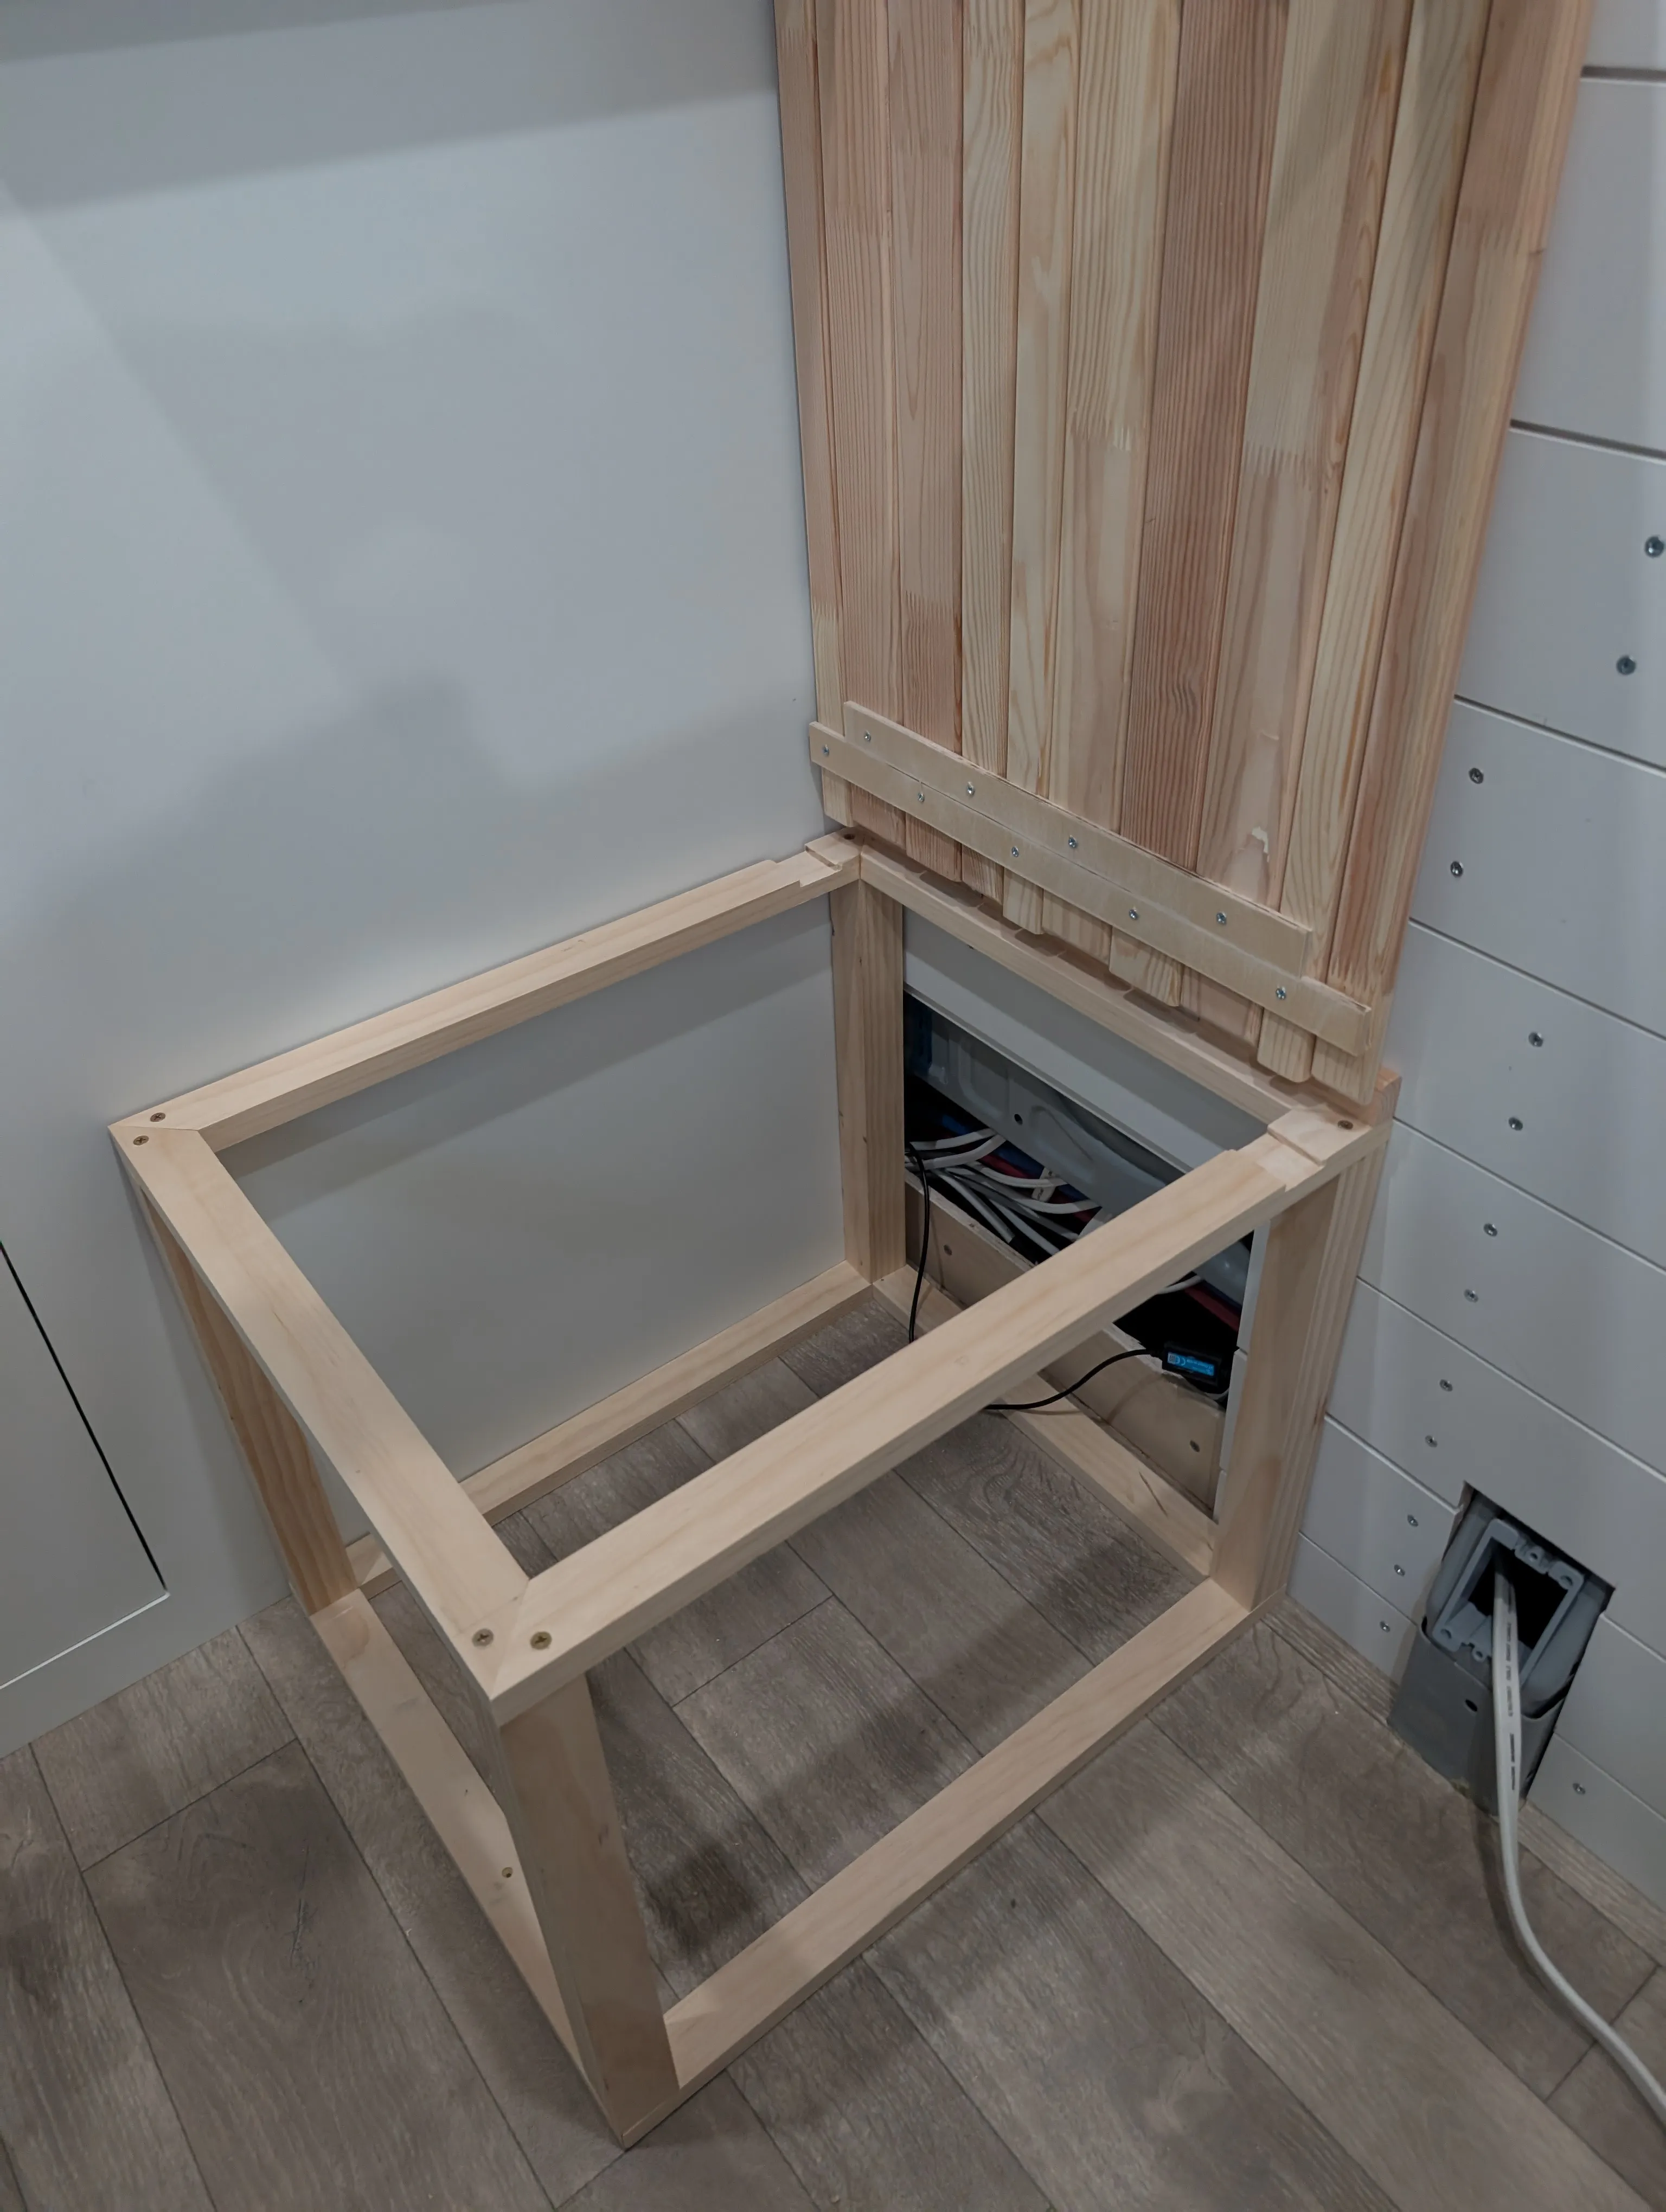
The inside of the box will serve as a storage box. There are two hinges on the end of the slats in order to flip the top up for access. There is about 1” space between the frame of the bench and the end piece to prevent the pieces from clashing when opening. This was actually not necessary as the hinge does it’s job.
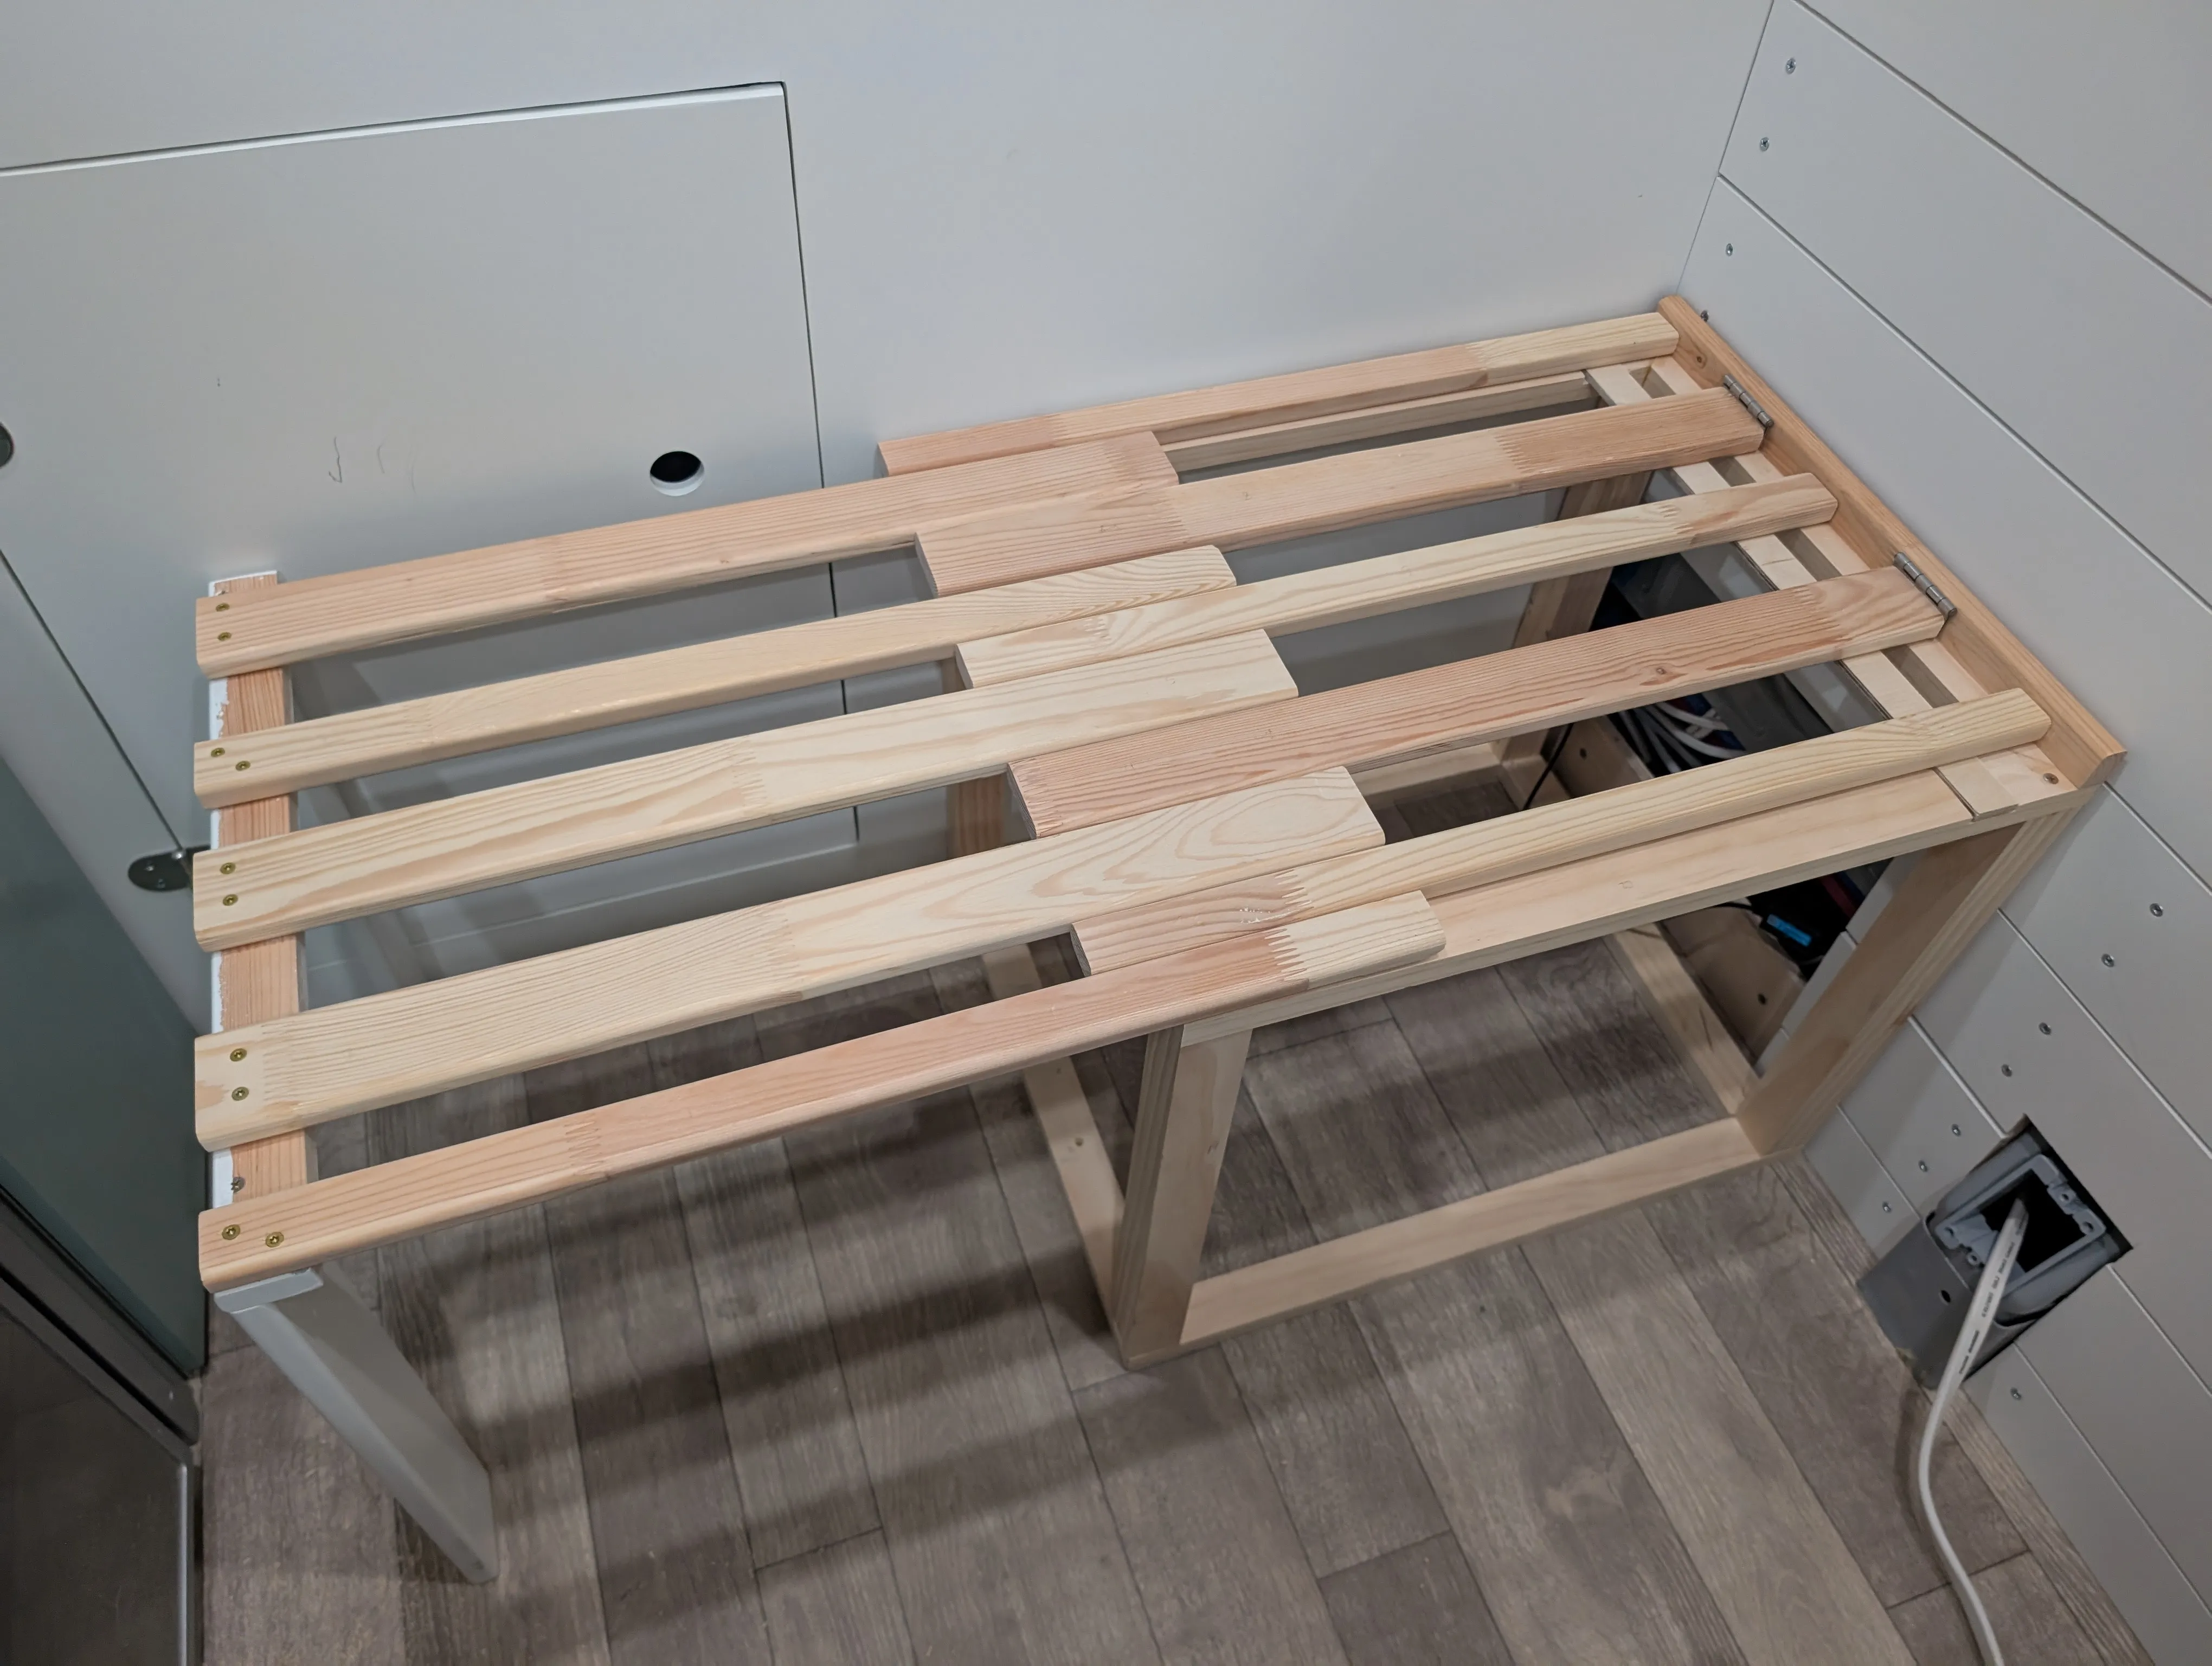
Feature 2: Extend for more bench
Half of the slats will stay put while the other half are screwed to the end piece. That way the bench can be extended for more space. Unfortunately, the slats prevent it from extending any further but I would have preferred it to extend closer to the drawers so this might be modified.
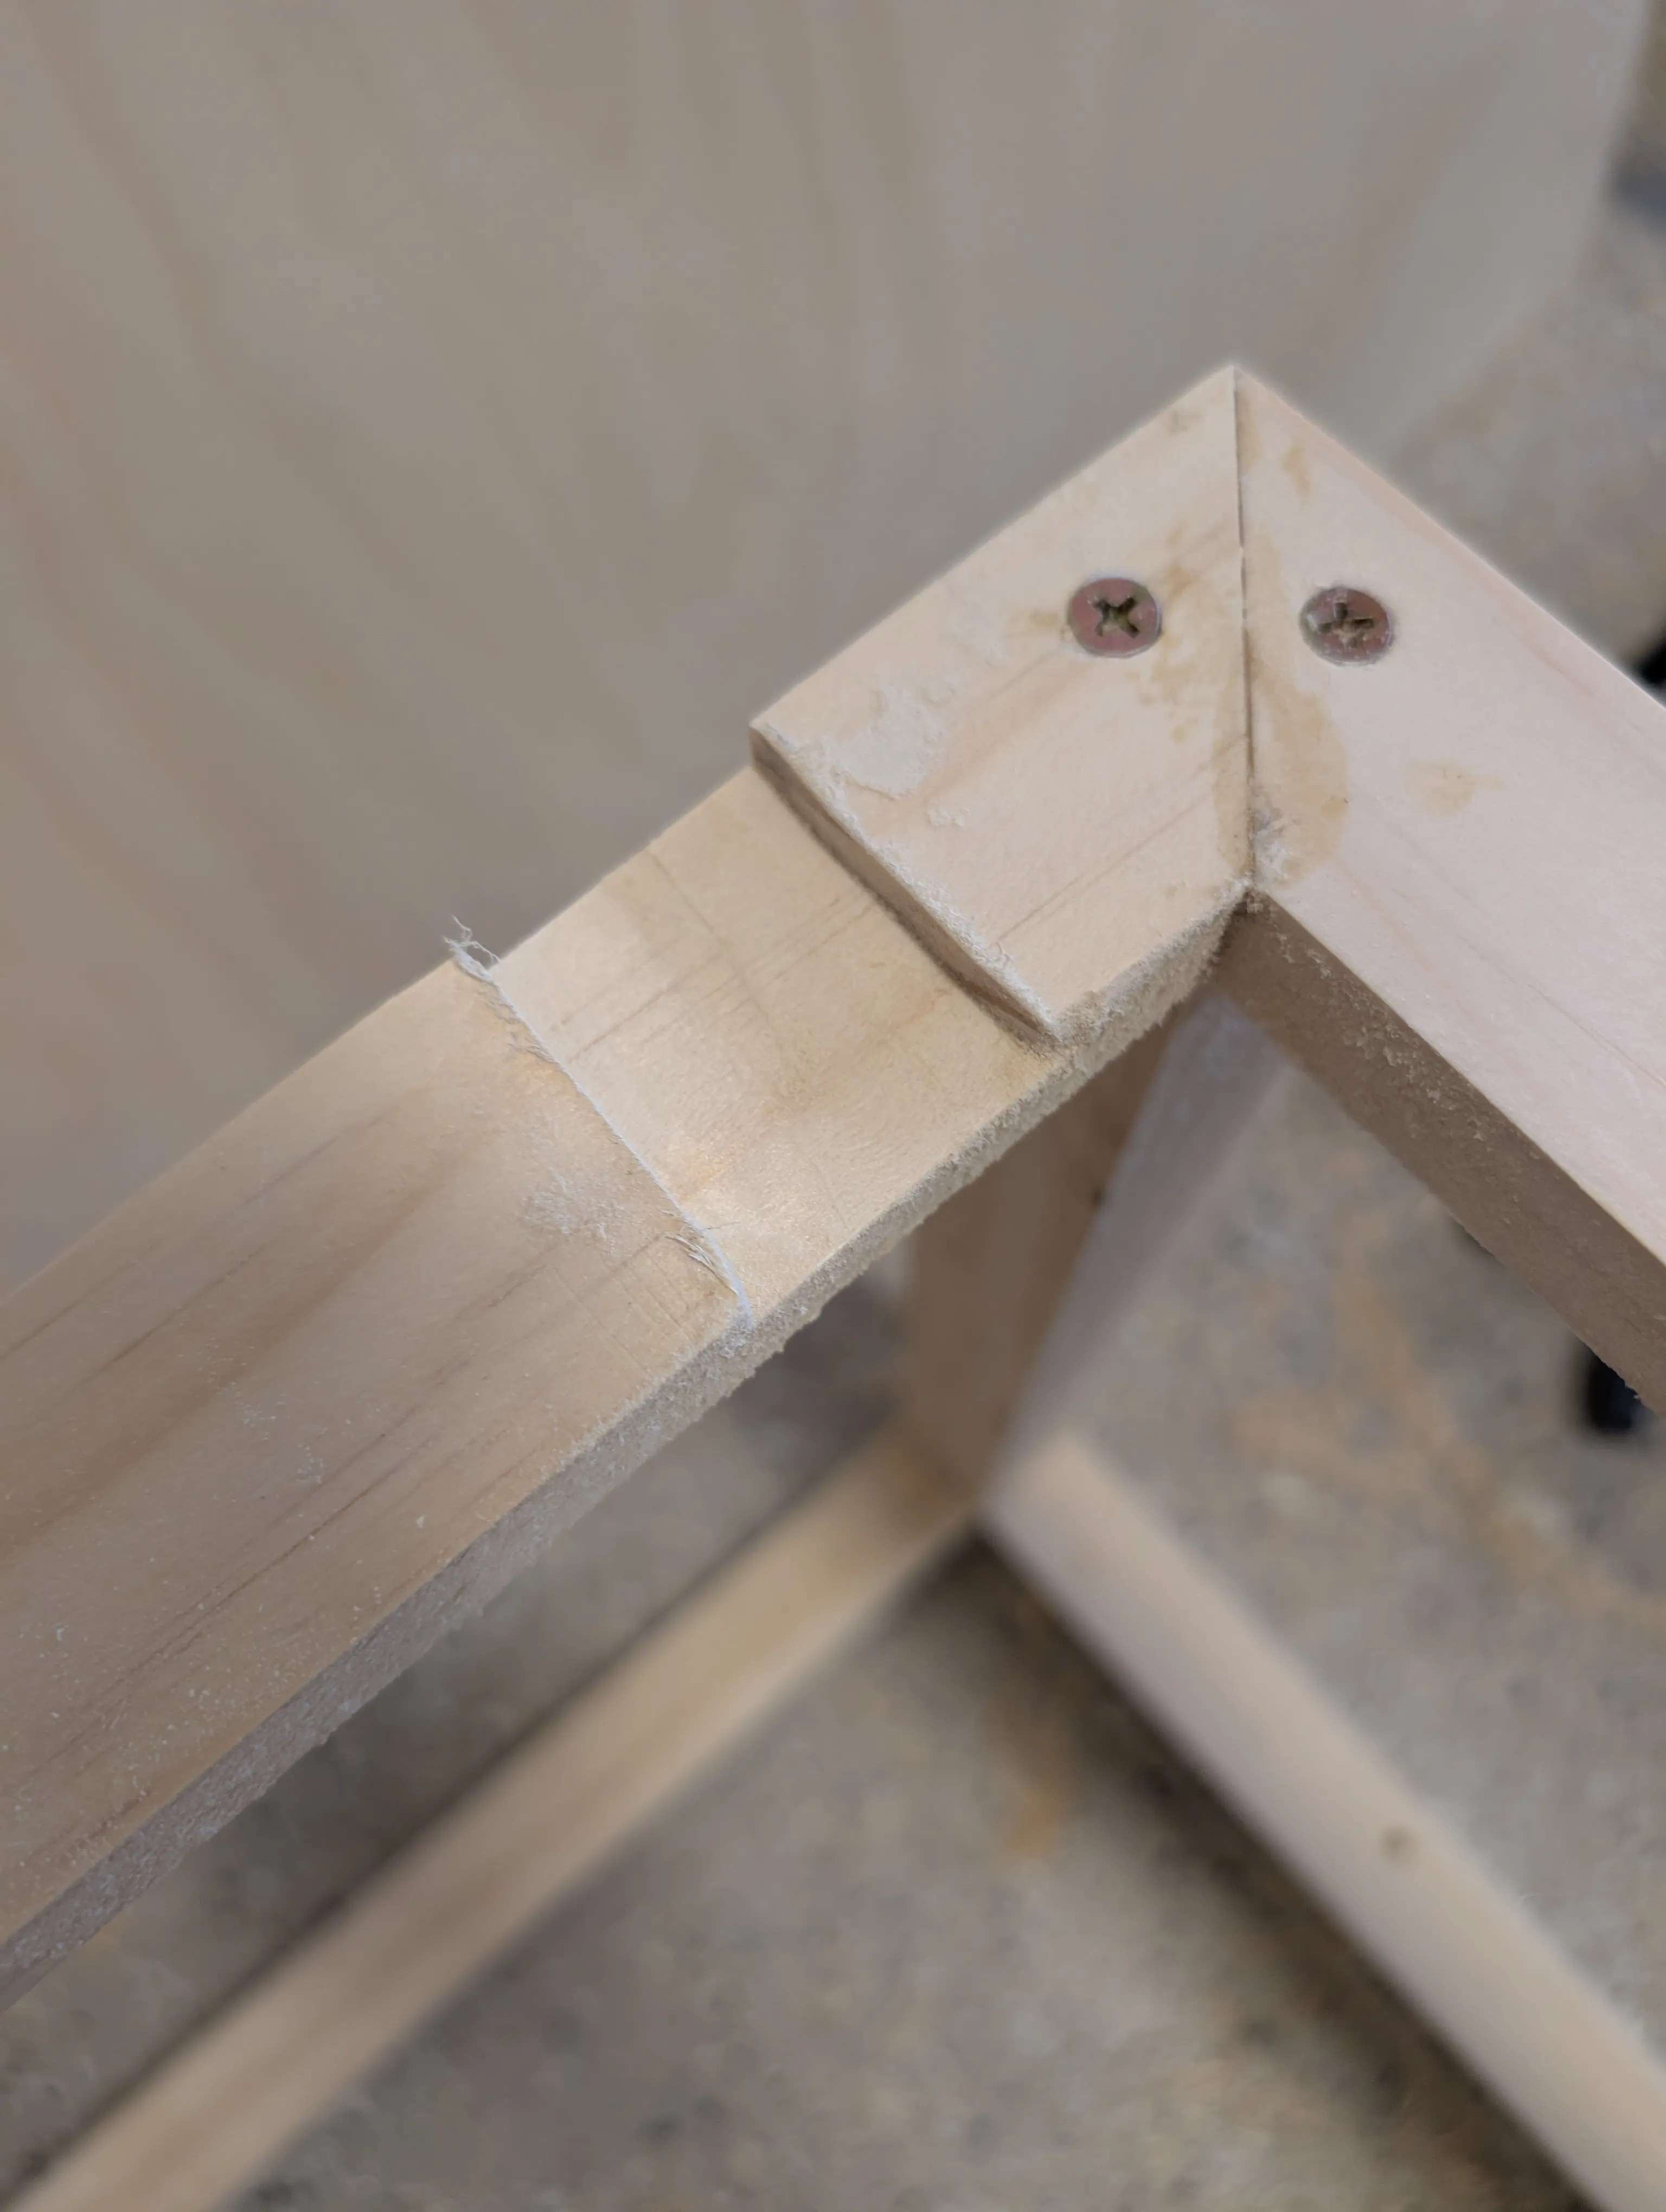
August 23, 2025
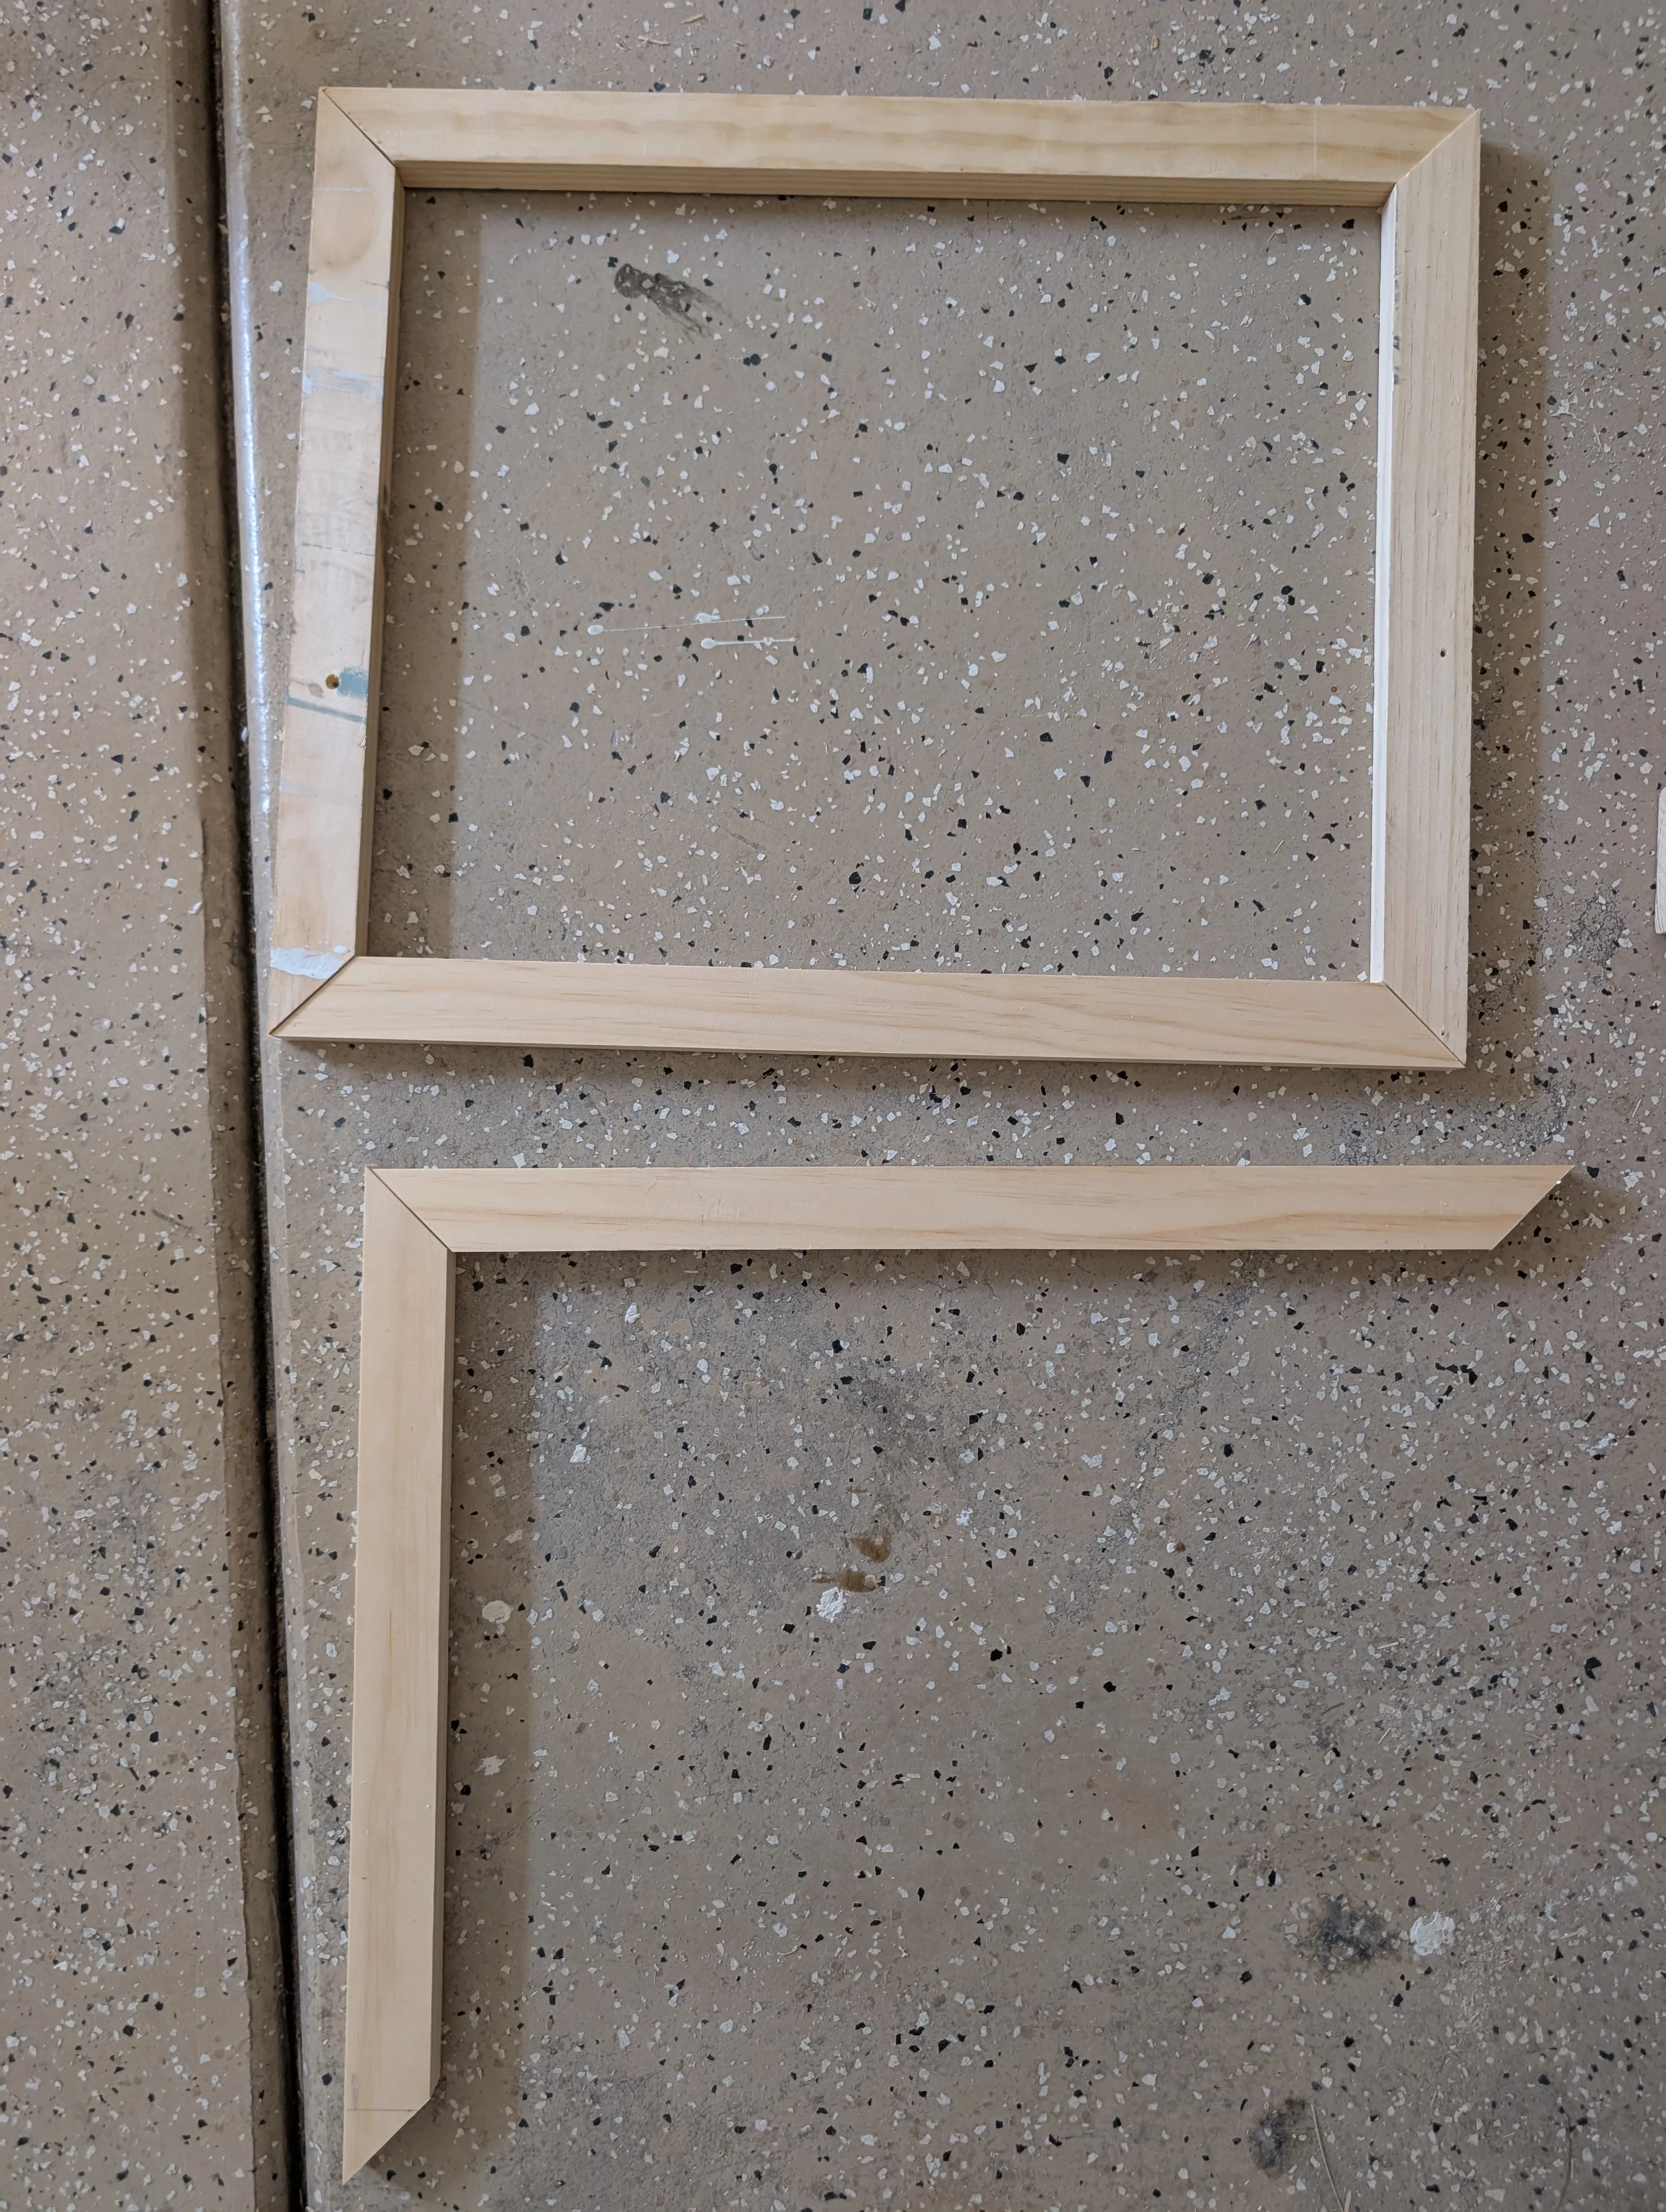
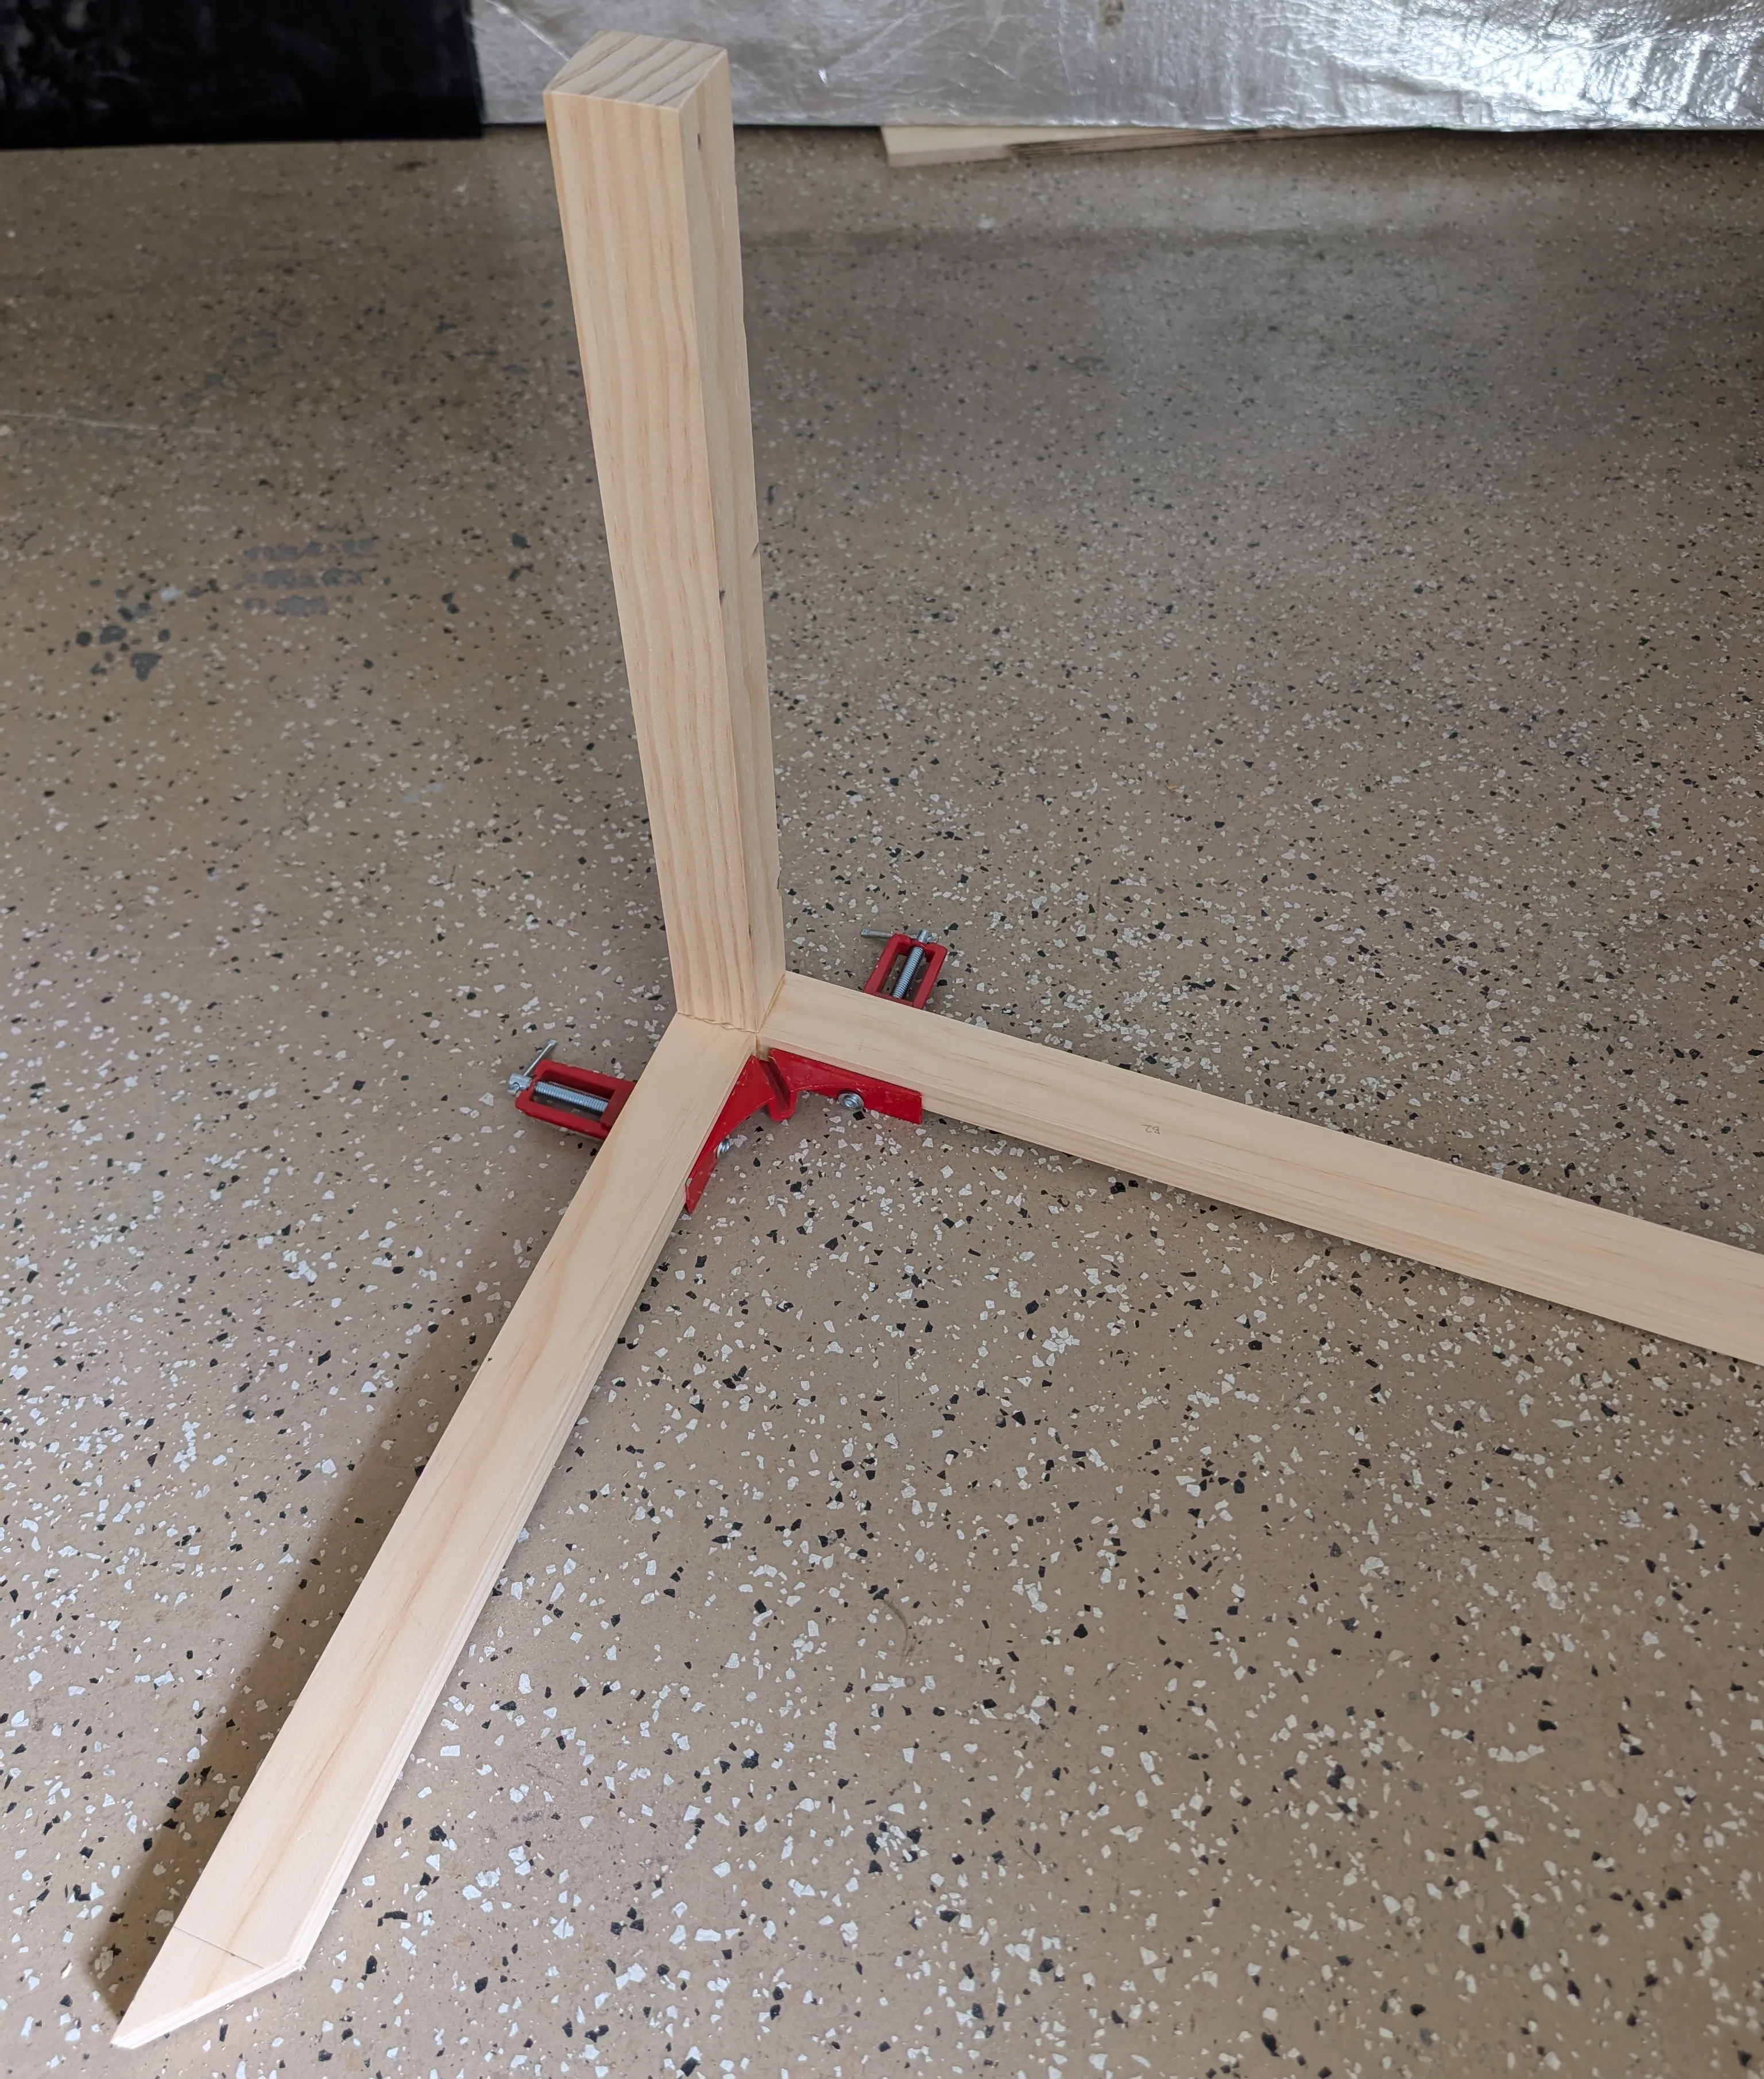
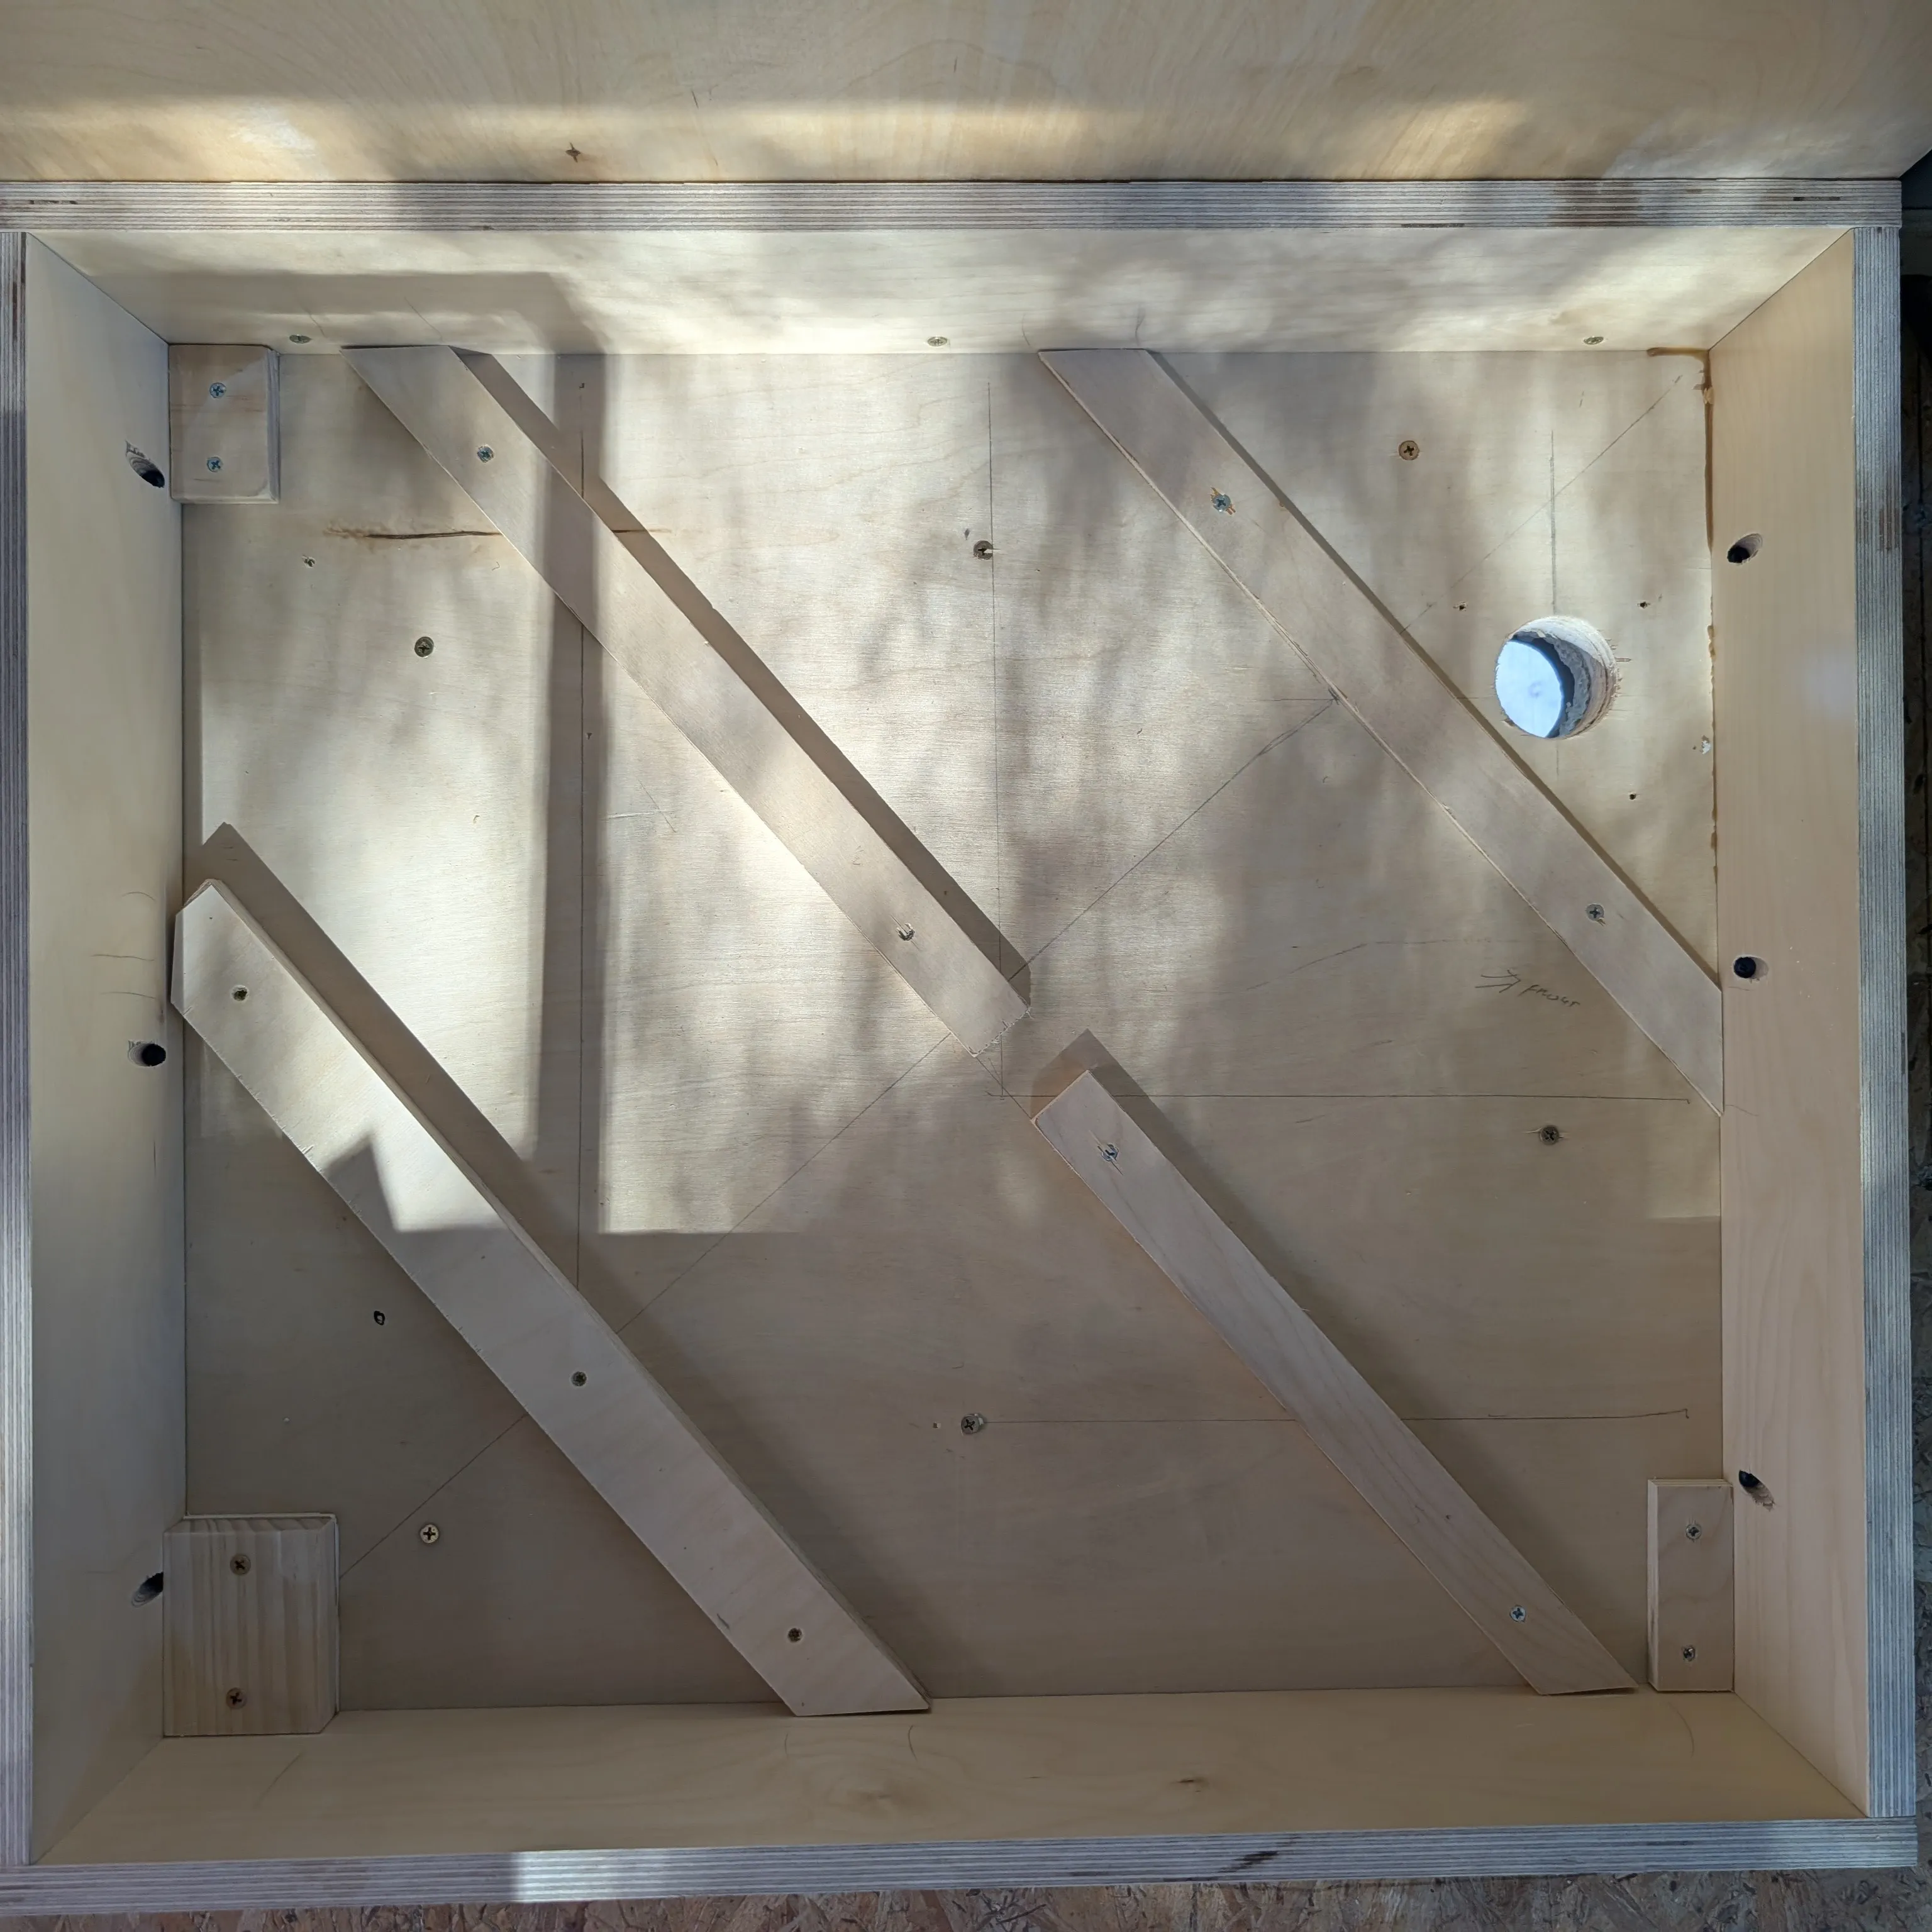
It’s time to begin the bench! I’ve been waiting for this day with anticipation because I’ve seen designs like this and have been dying to recreate it. The first step is to create the base frame. This frame is composed to 1.5” x 1.5” beams for the legs and 1.5” x 3/4” beams for the horizontal pieces. Using a square clamp, I was able to square each corner, but this was definitely the most time consuming part.
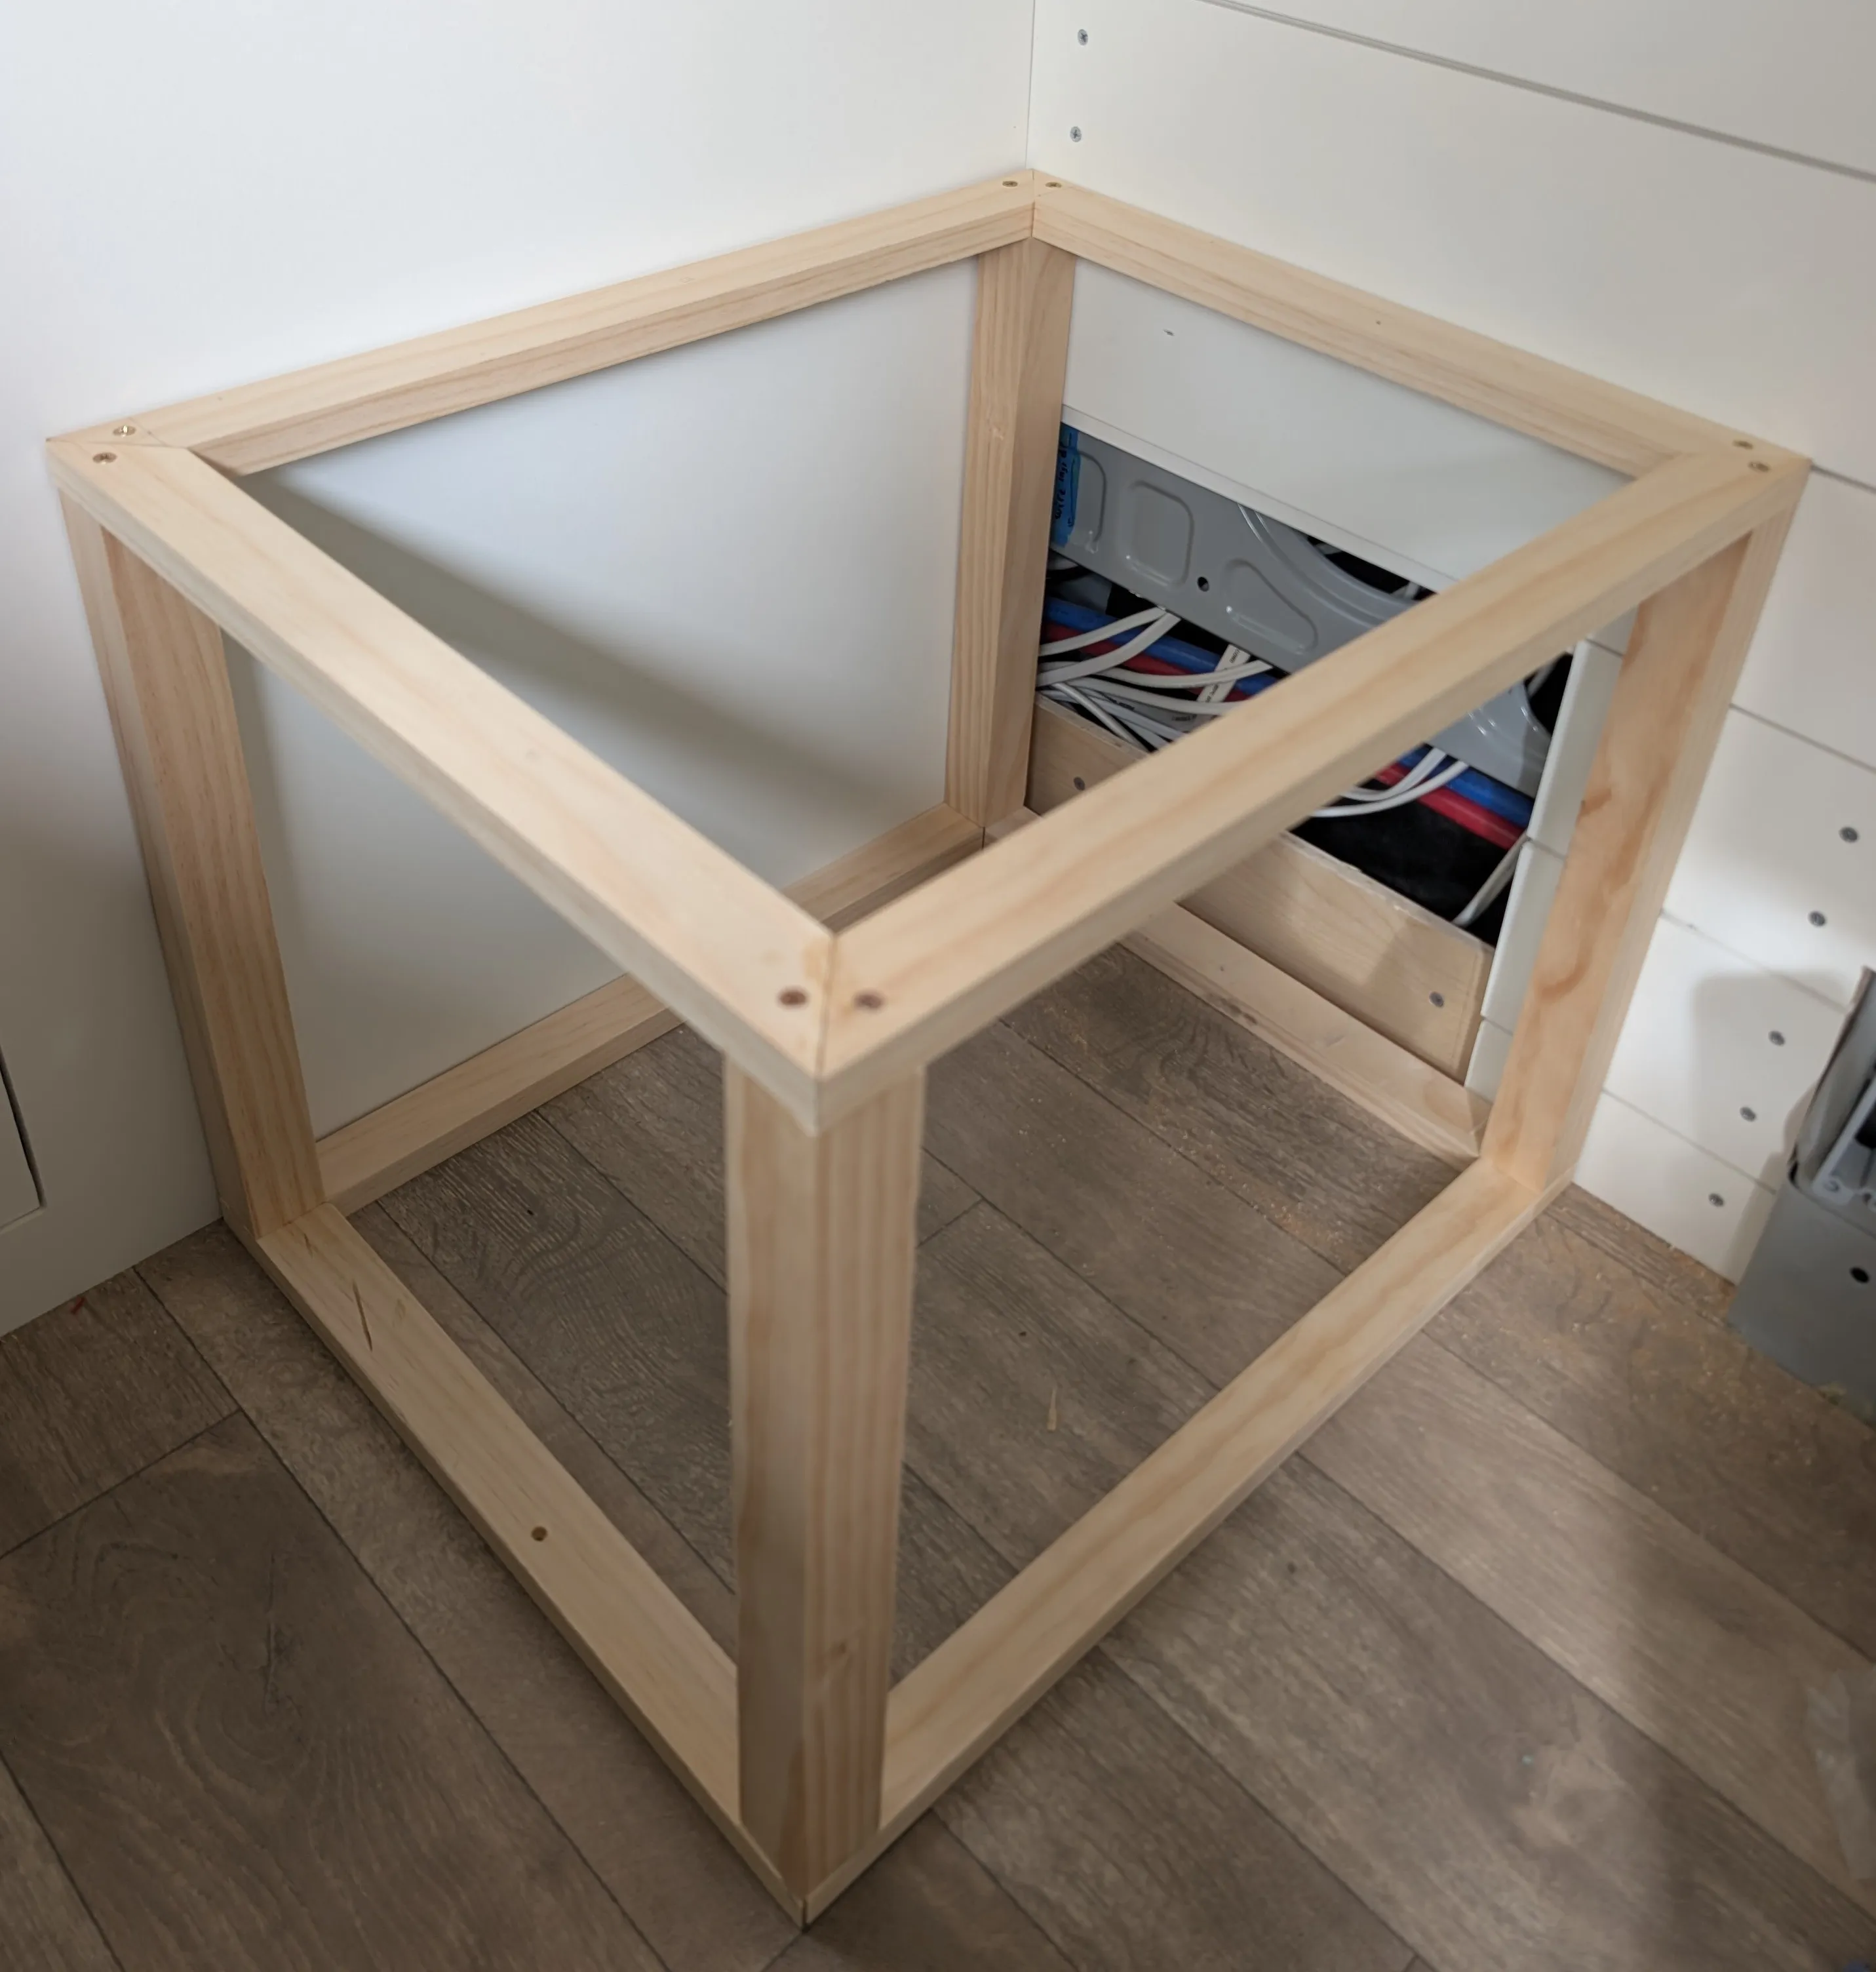
In total, the frame’s dimensions are 16.25”L x 17.75”W x 18”H. The fractional measurements were to accomodate the 1/4” faces on the front and side. Thankfully, it’s quite sturdy.
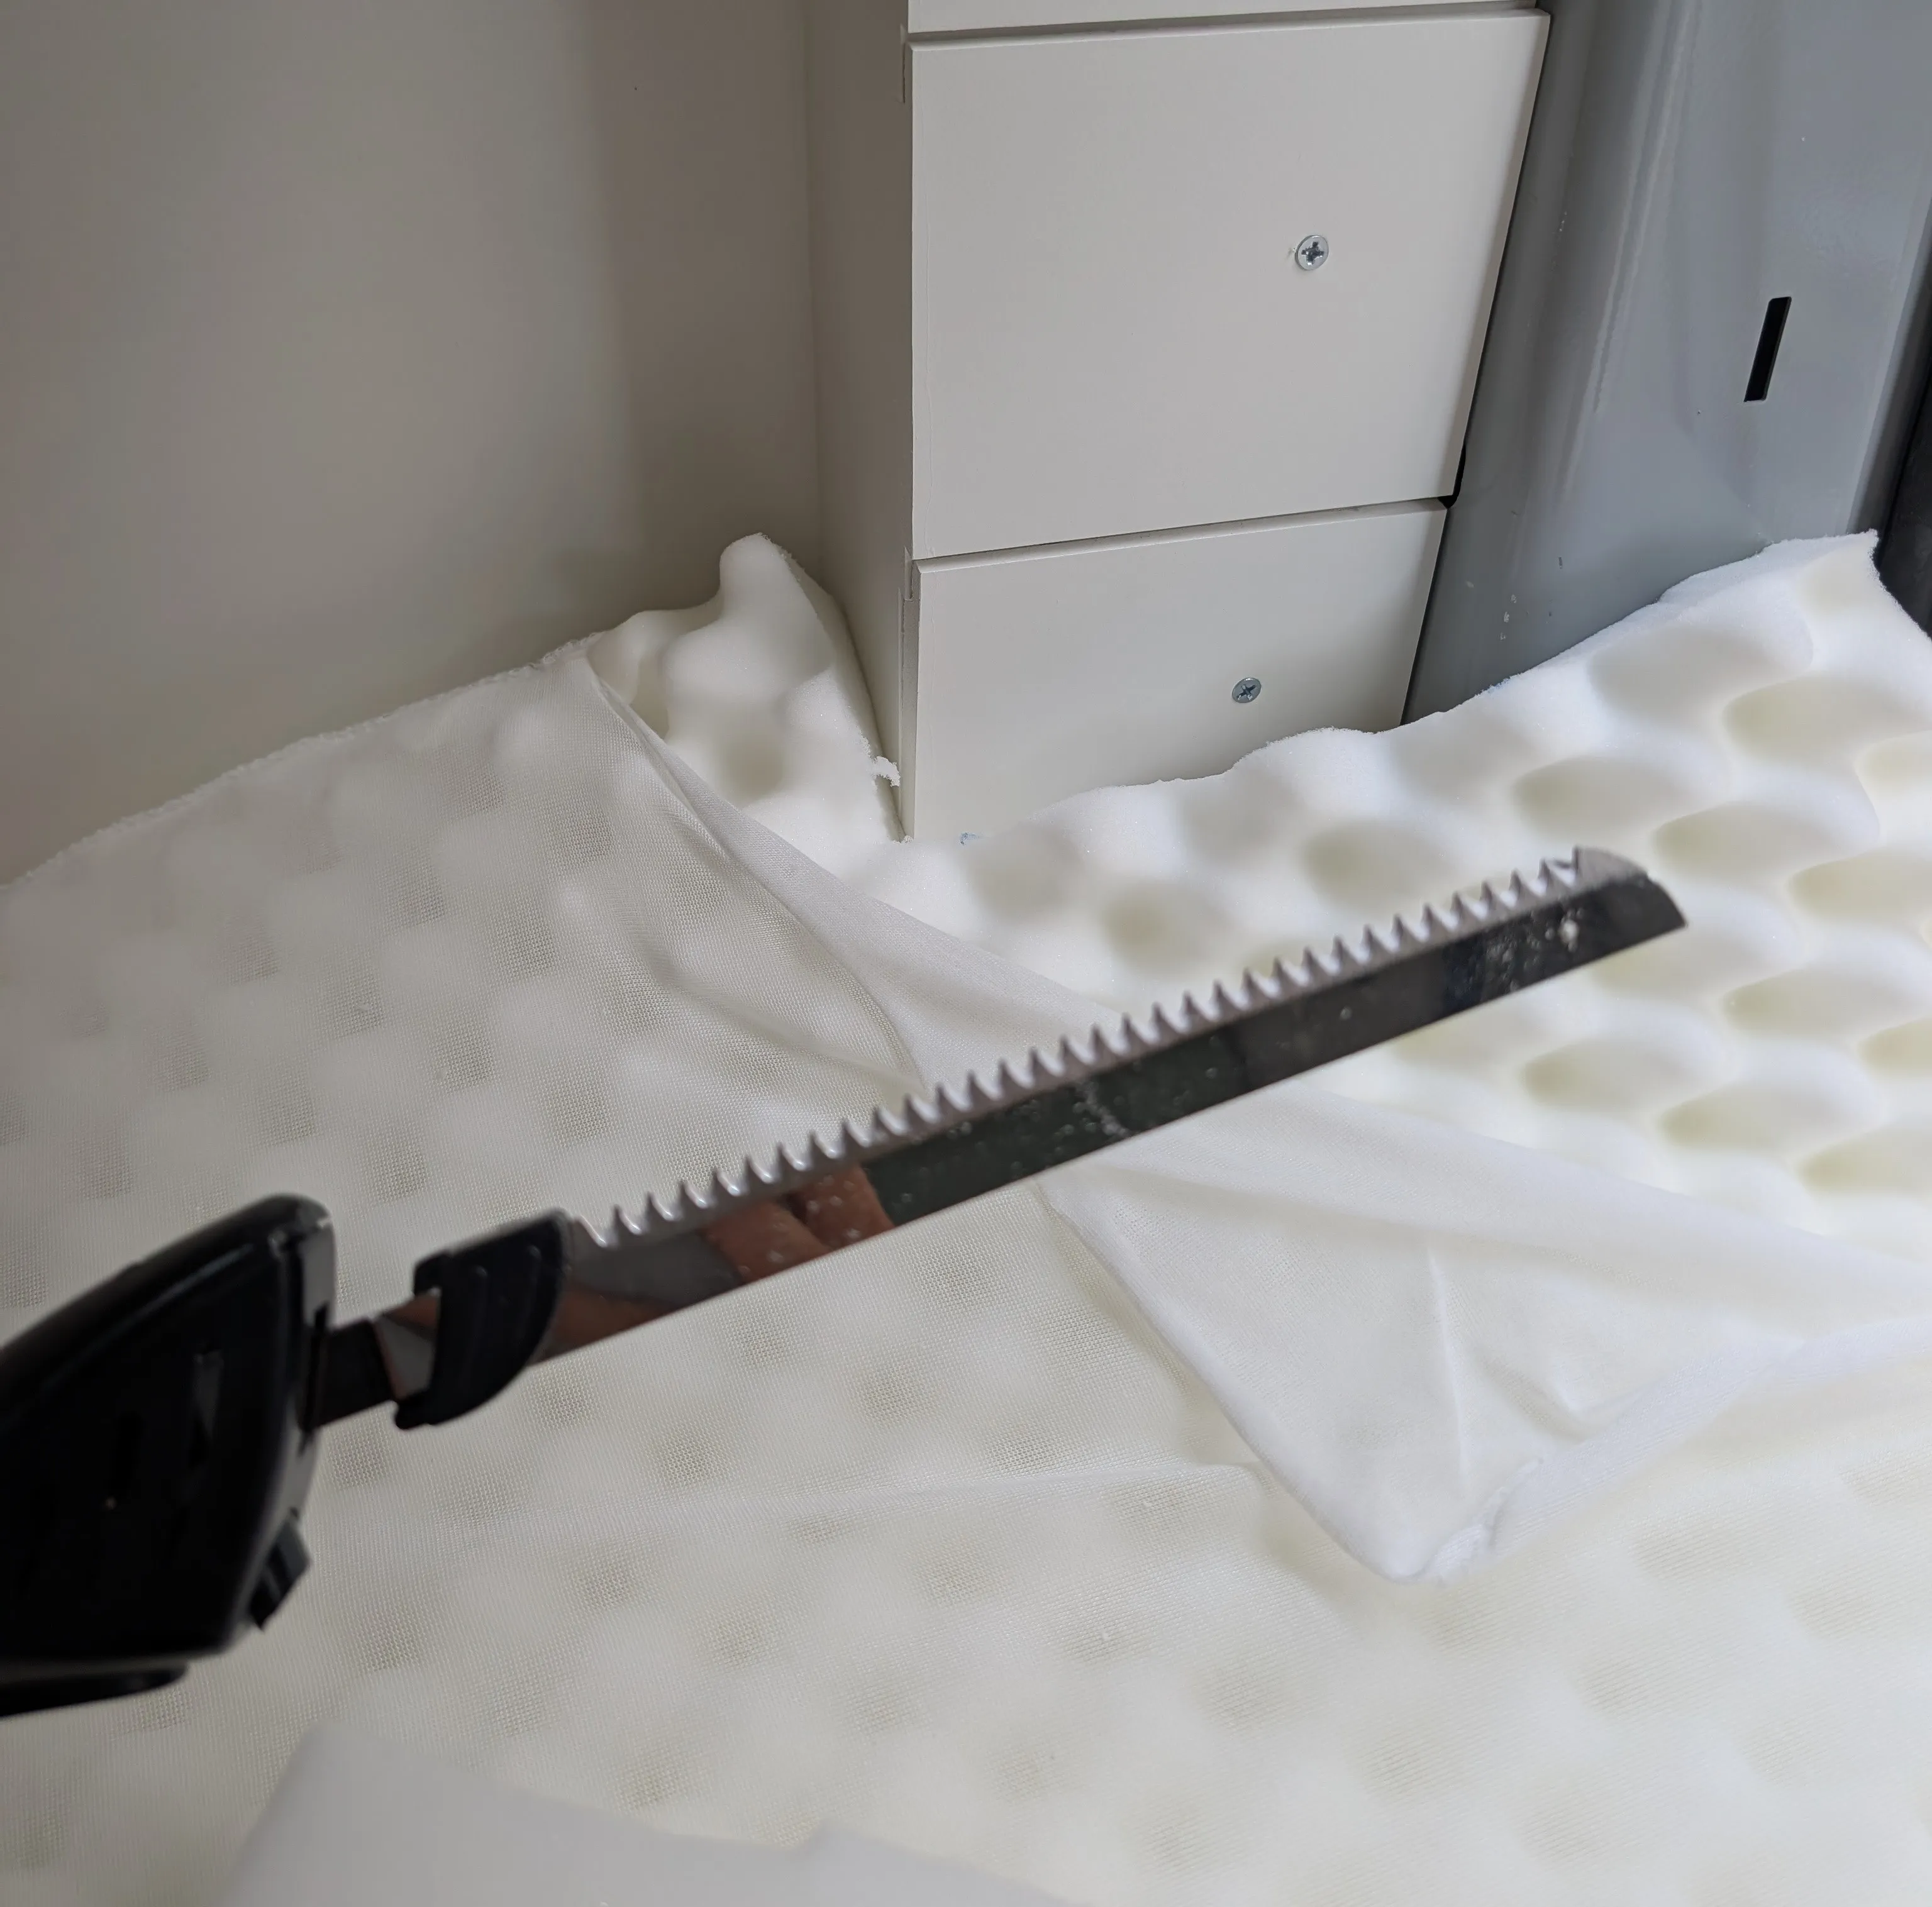
Kep will have a 4 inch foam mattress cut to size. This electric turkey knife works realy well for cutting foam. Overall, the bed from head to toe is 63 inches and side to side is 52 inches.
August 22, 2025
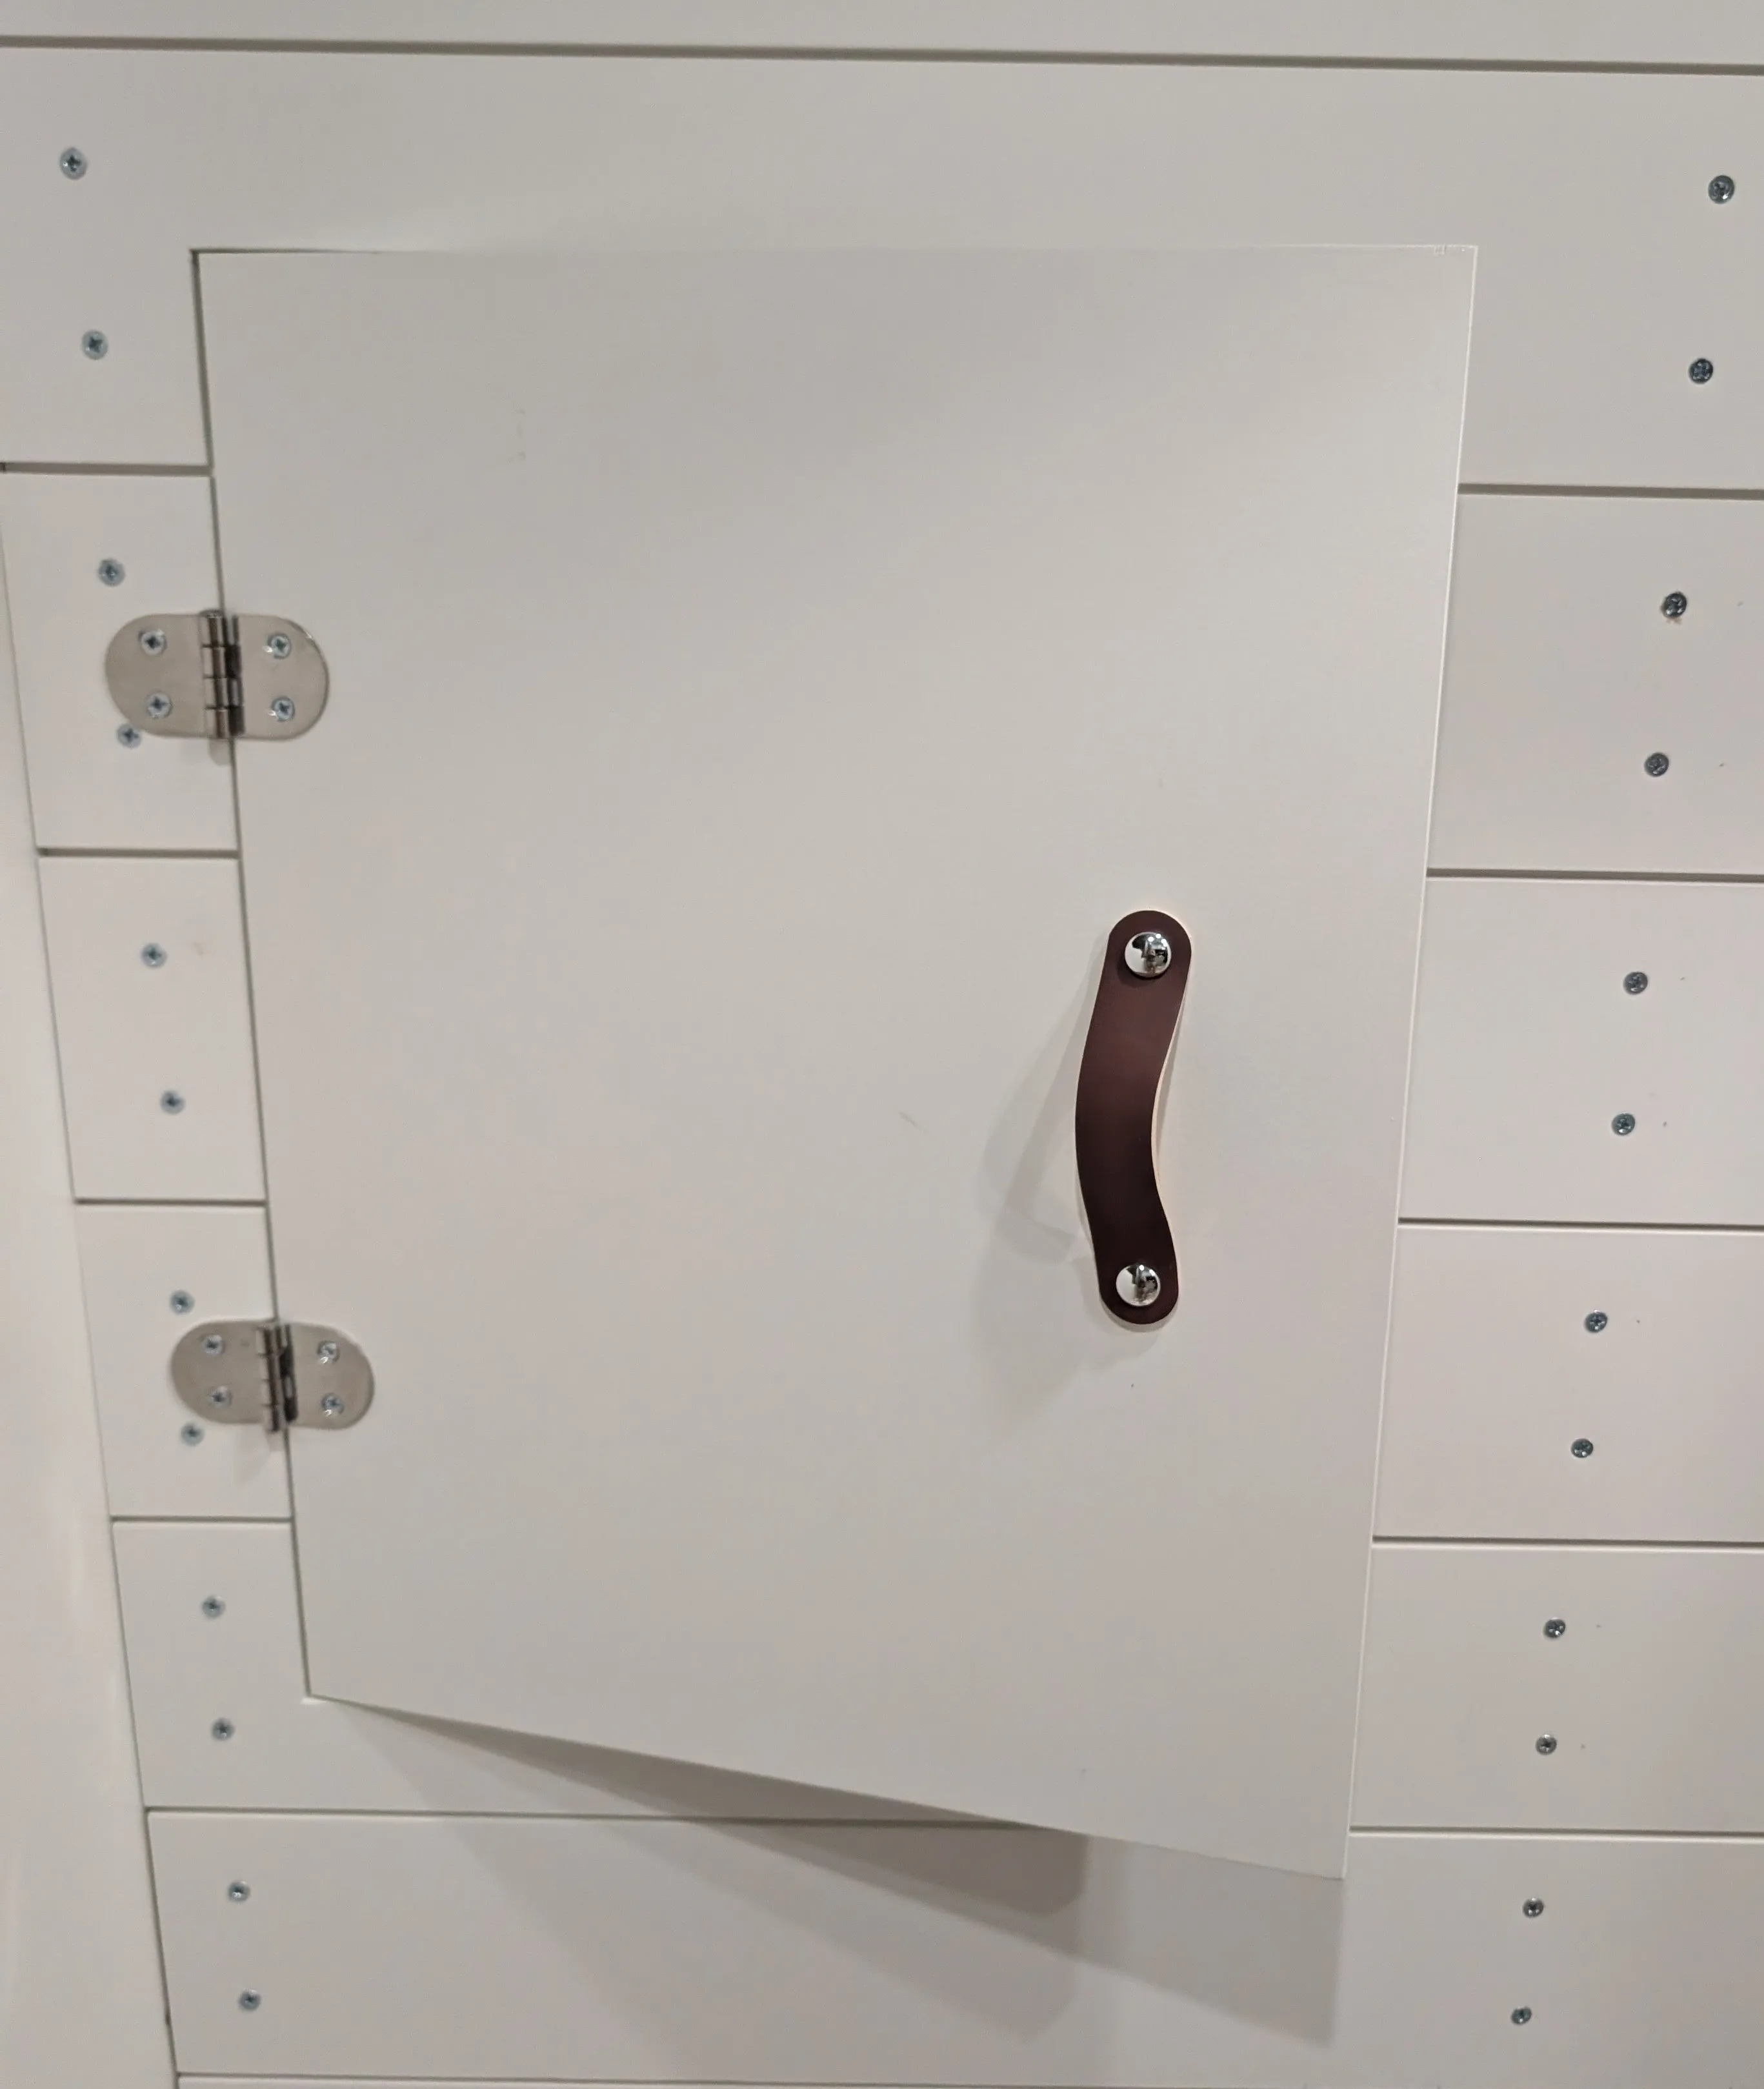
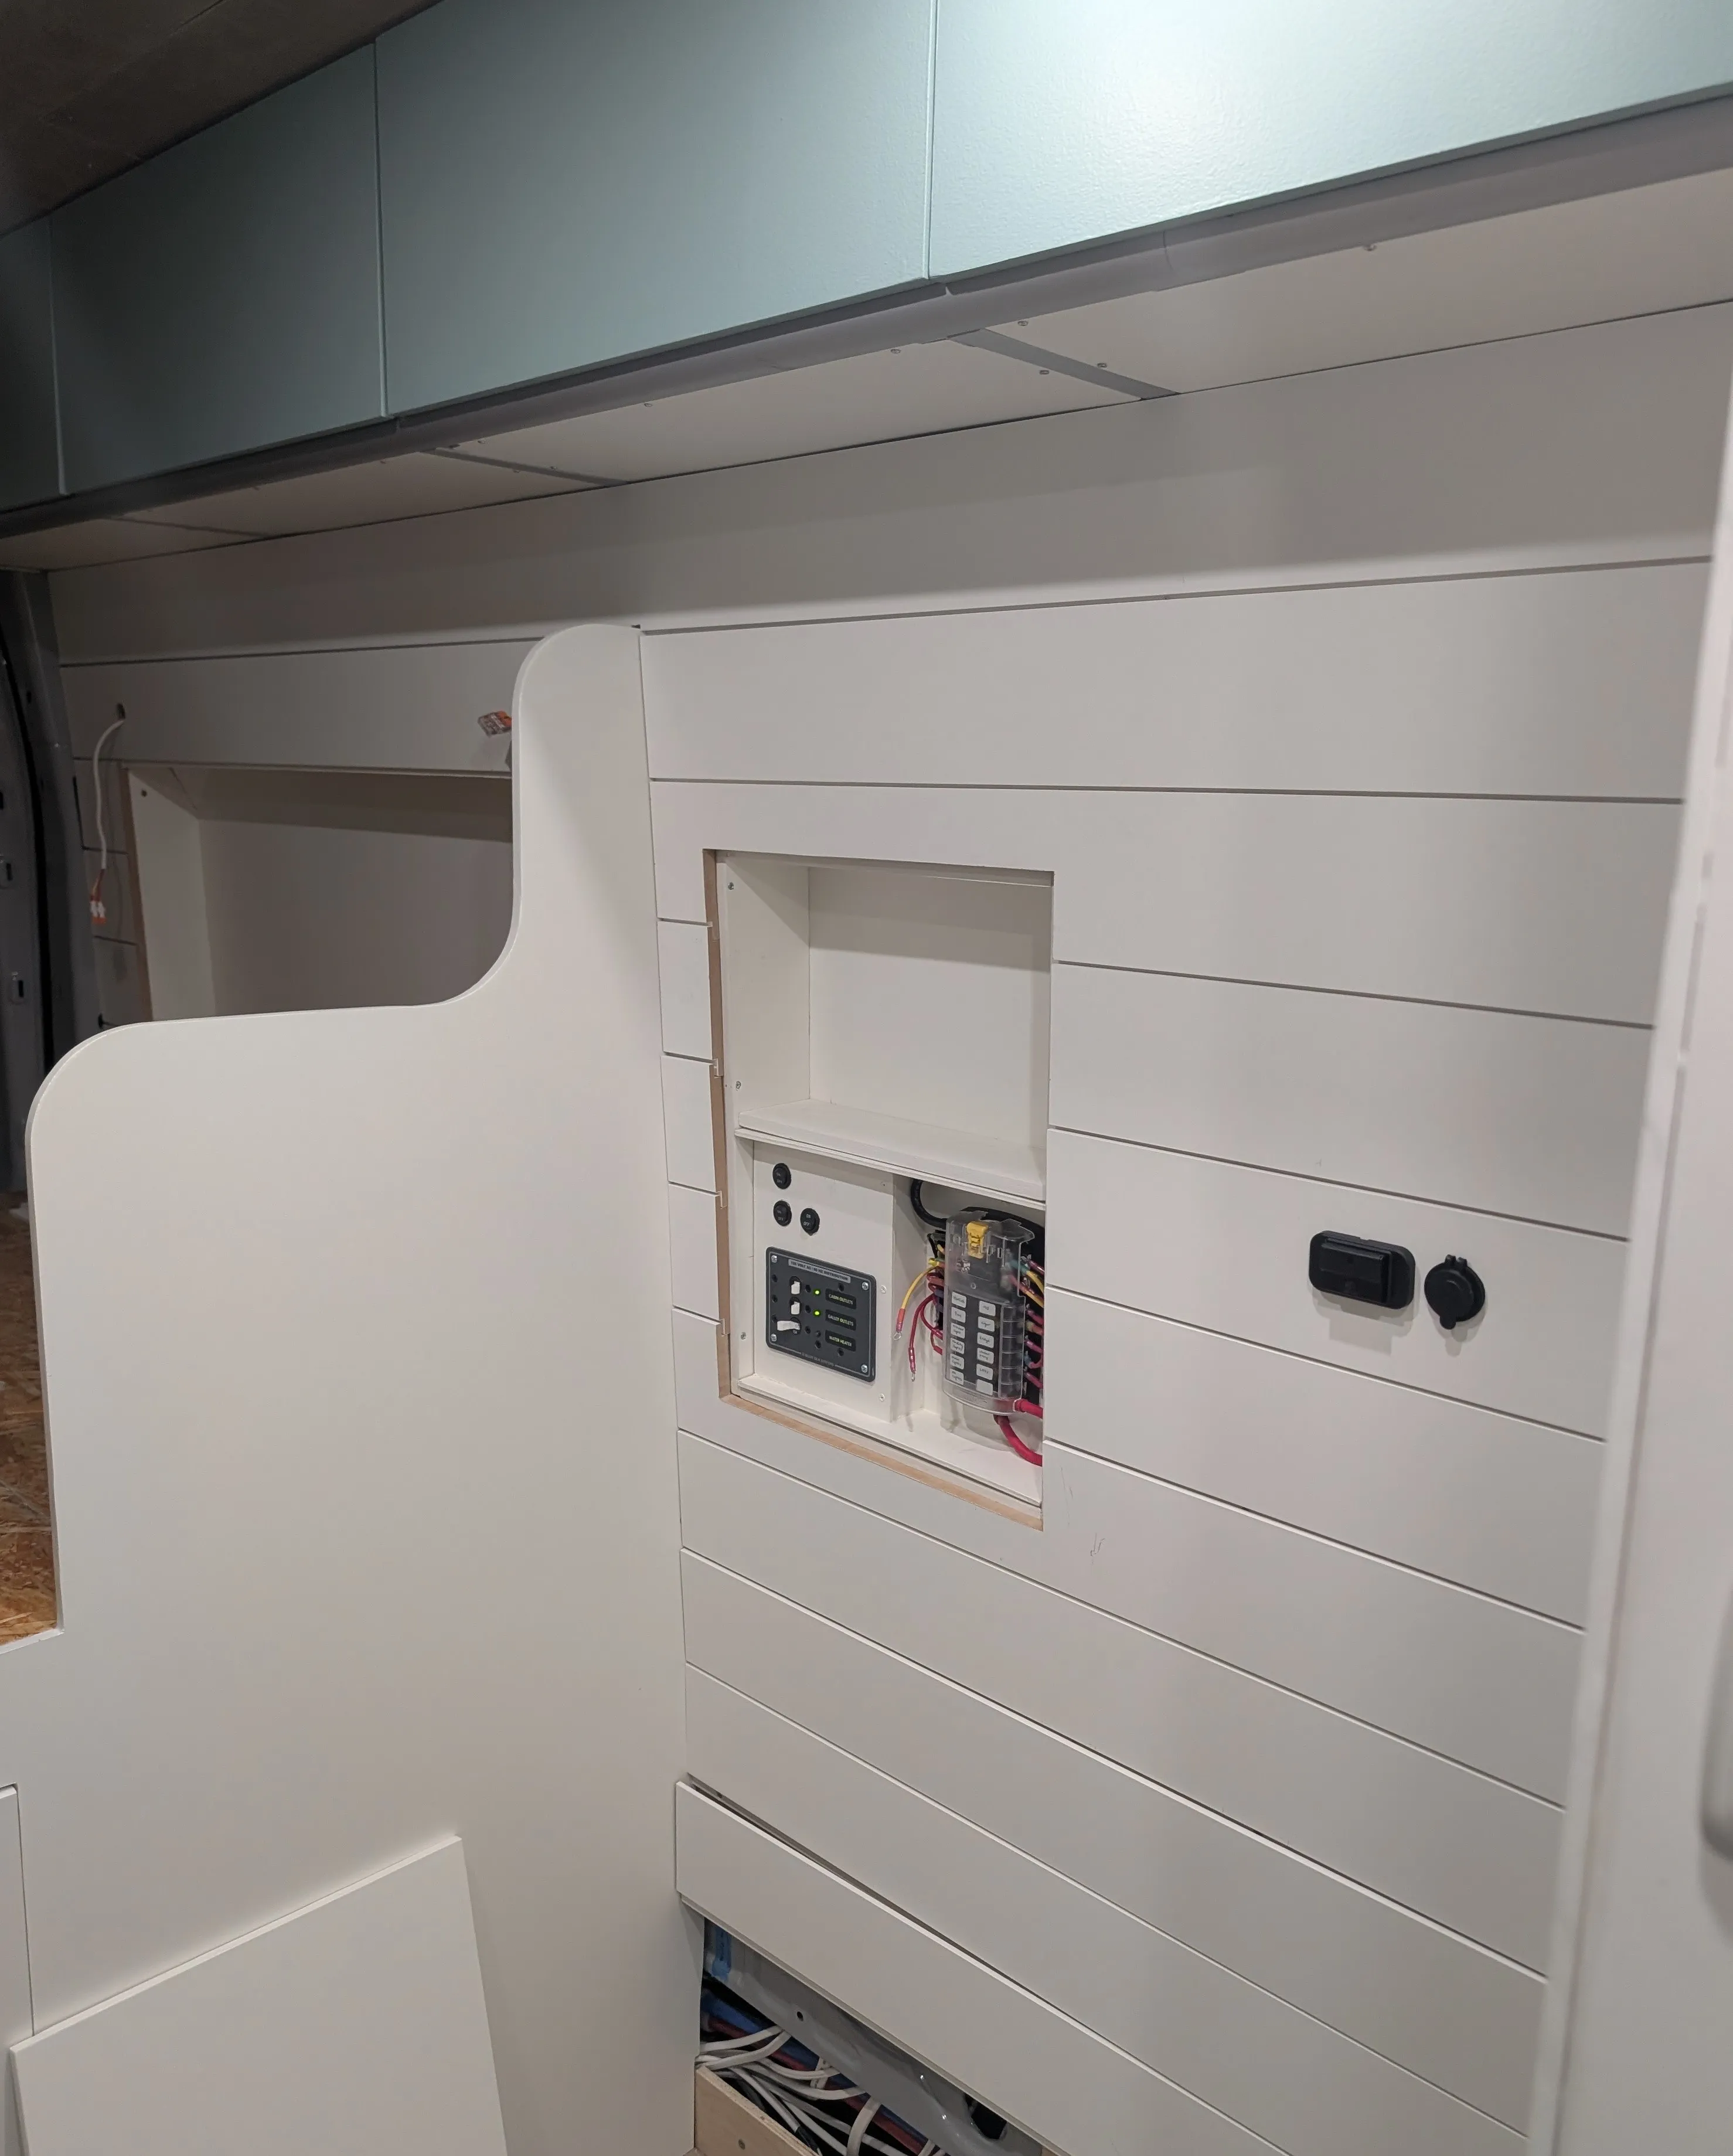
The door to the control panel fits perfectly into the cut out in the wall. It’s held closed with a magnet latch. I plan to use these soft leather handles for all the drawers and cabinets.The hinges are exposed like the door to the garage but they are easy to install and don’t look terrible.
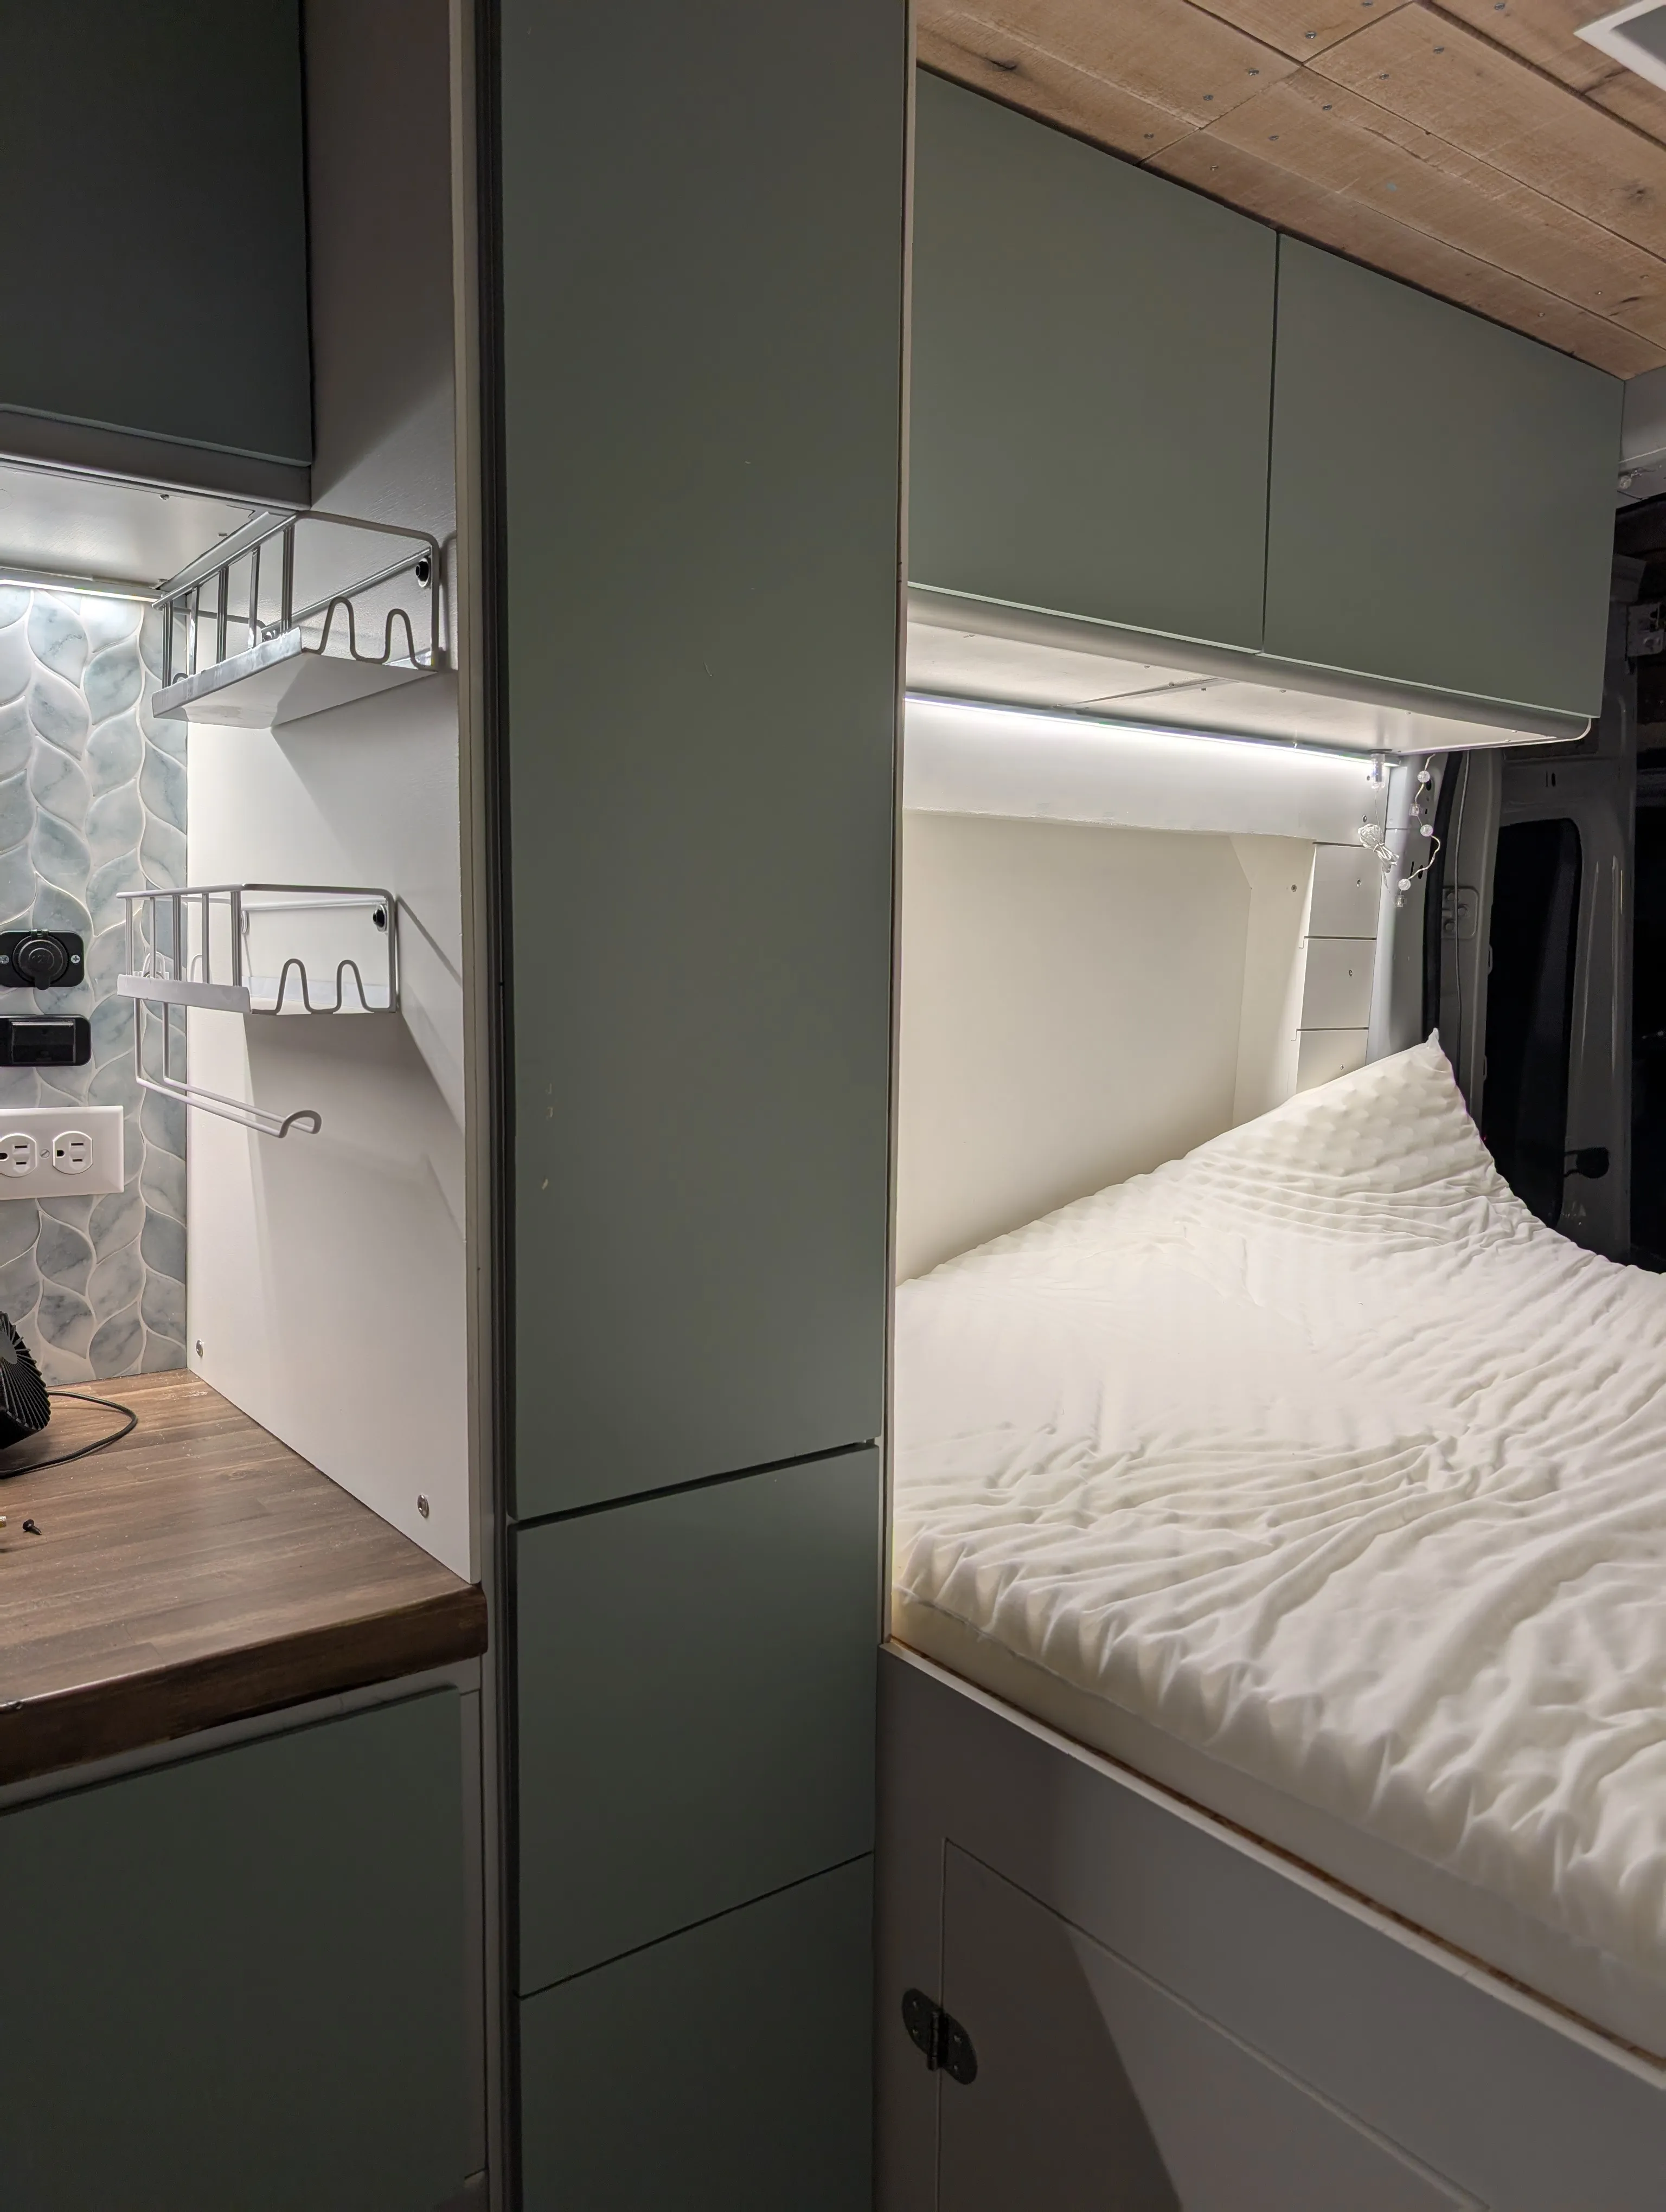
Finally, all of the faces are up! The wardrobe was definitely easier to install since the whole 1/2” piece goes on the outer face of the aluminum.
August 19, 2025
I painted some shiplap to finish off the walls. It is still in progress as I realized I need to add one more furring strip since the bottom pieces won’t have anything to attach to. The drawers and cabinet faces for the kitchen galley are also now in. There are a couple of hacks (can you tell?) that went into it just because I messed up the depth of the countertop a bit, so having 1/2” faces would not have been very aesthetic.
August 17, 2025
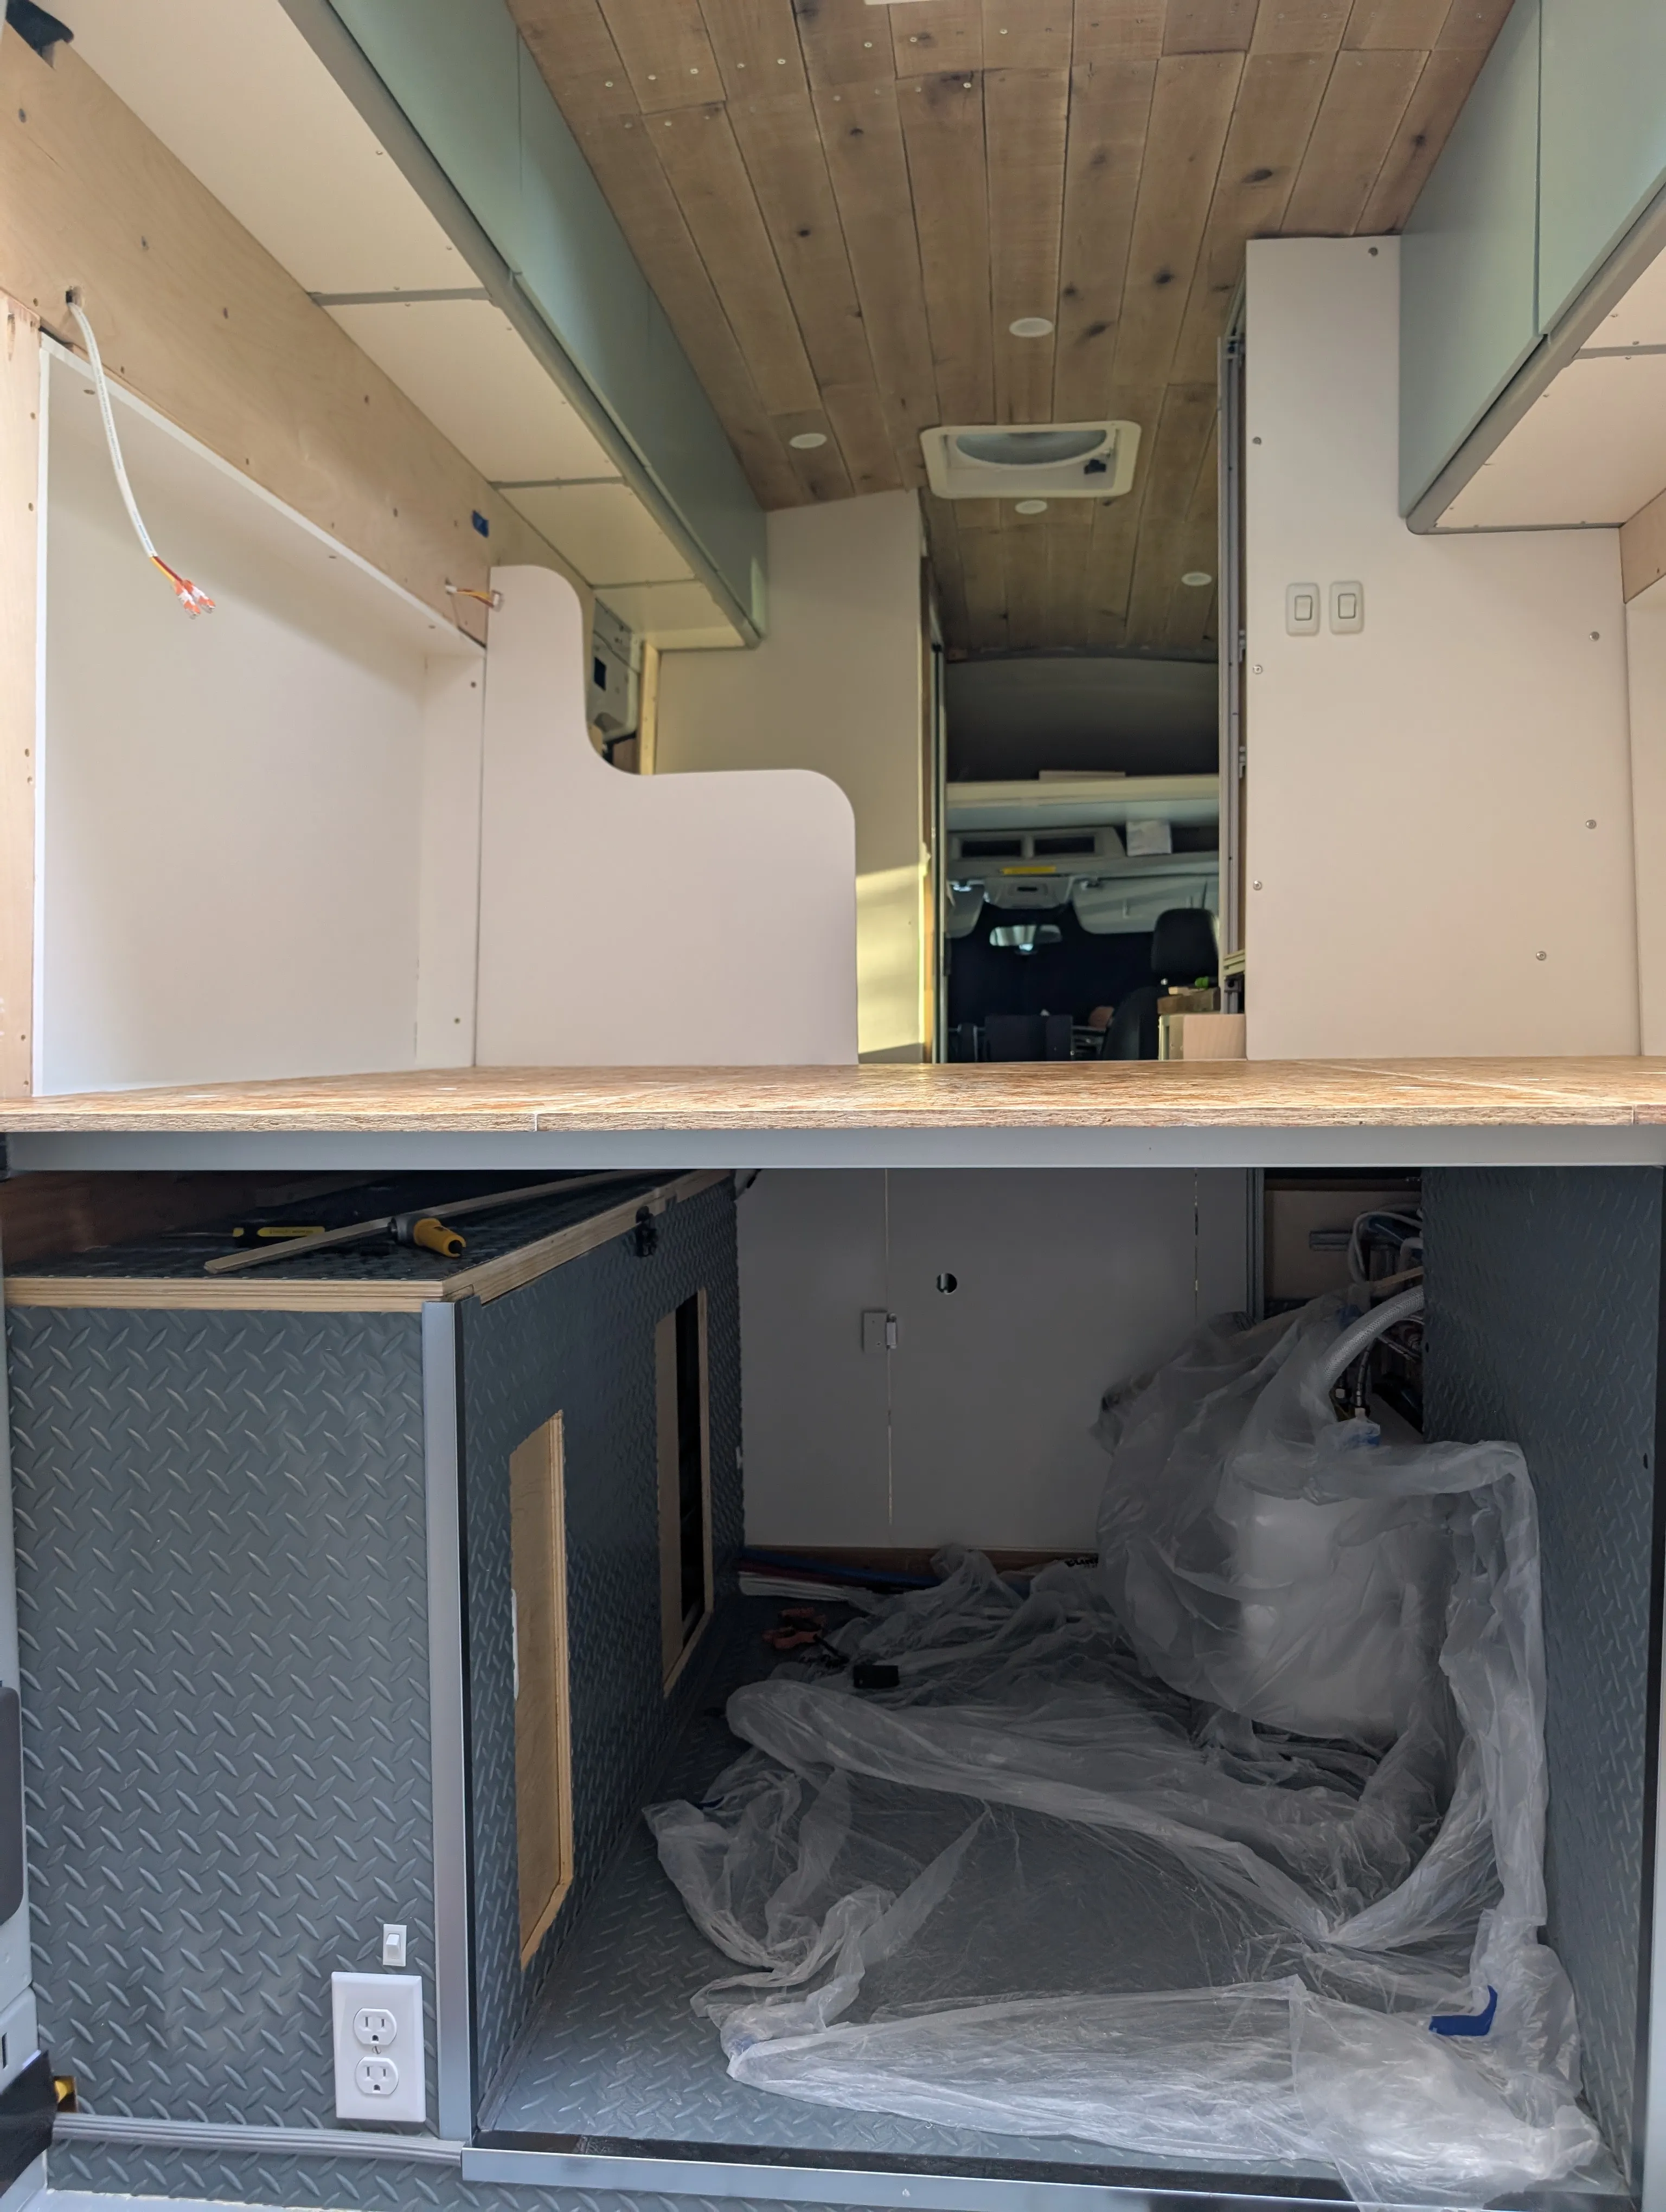
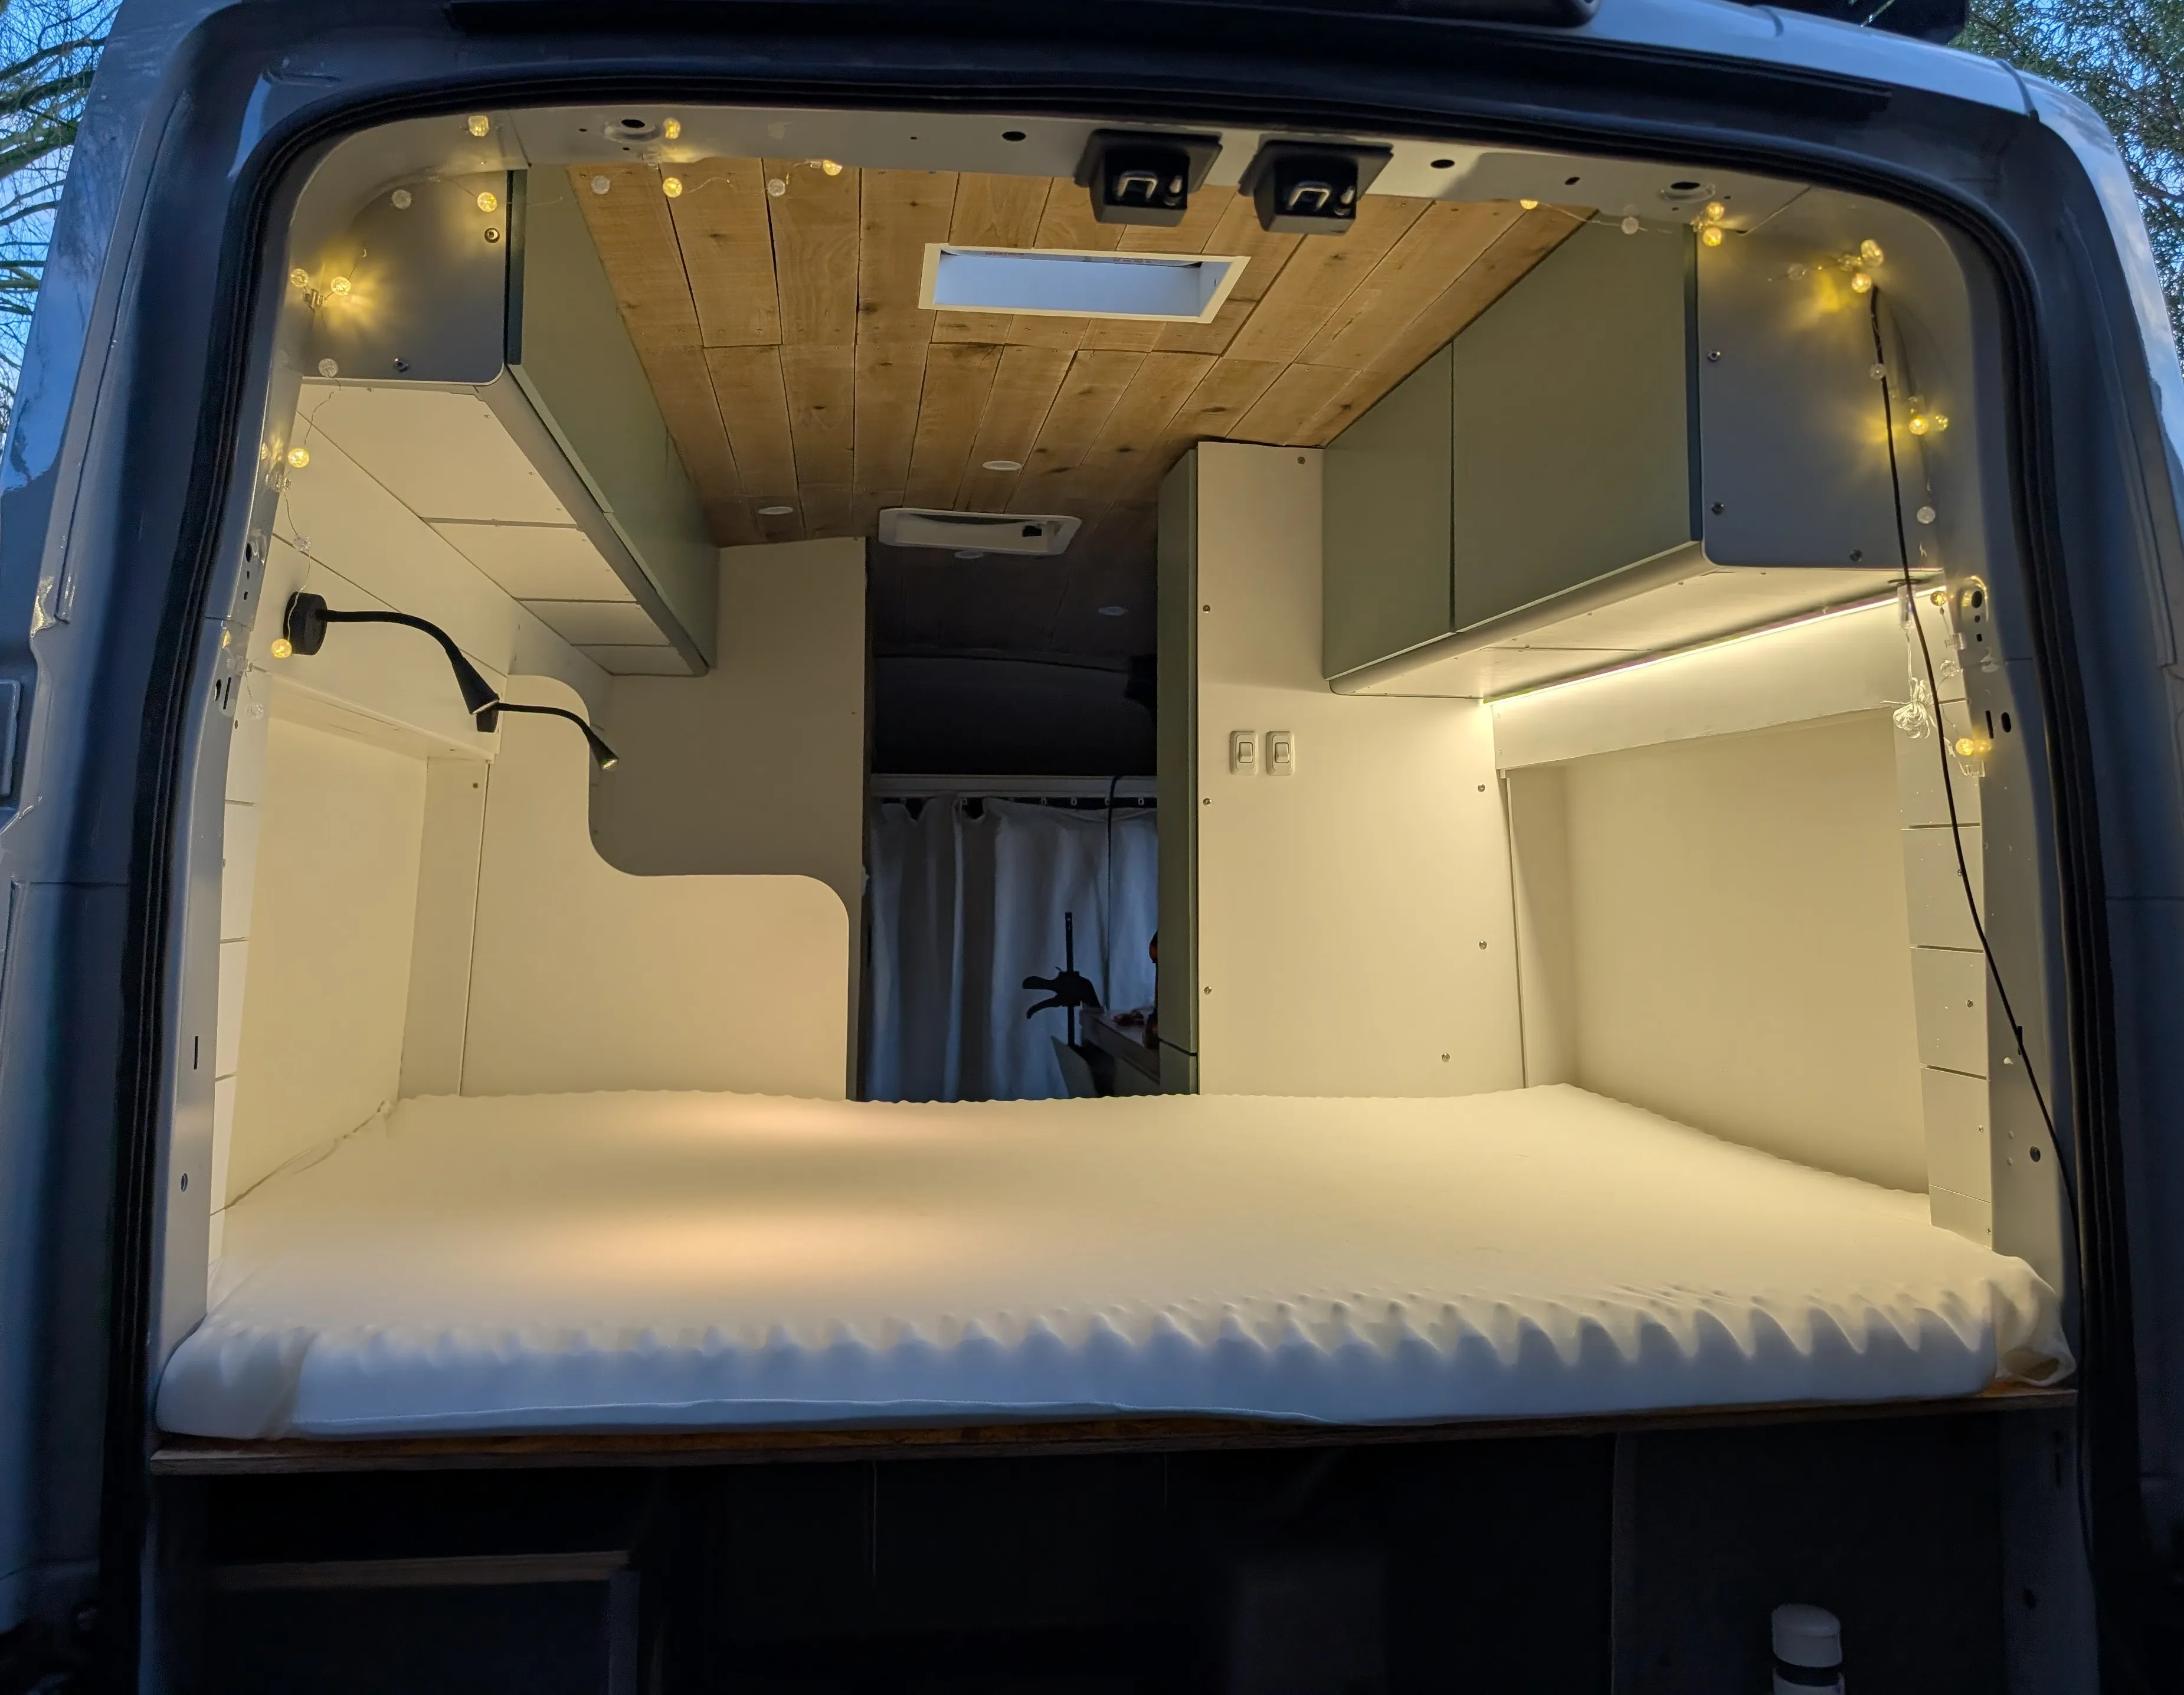
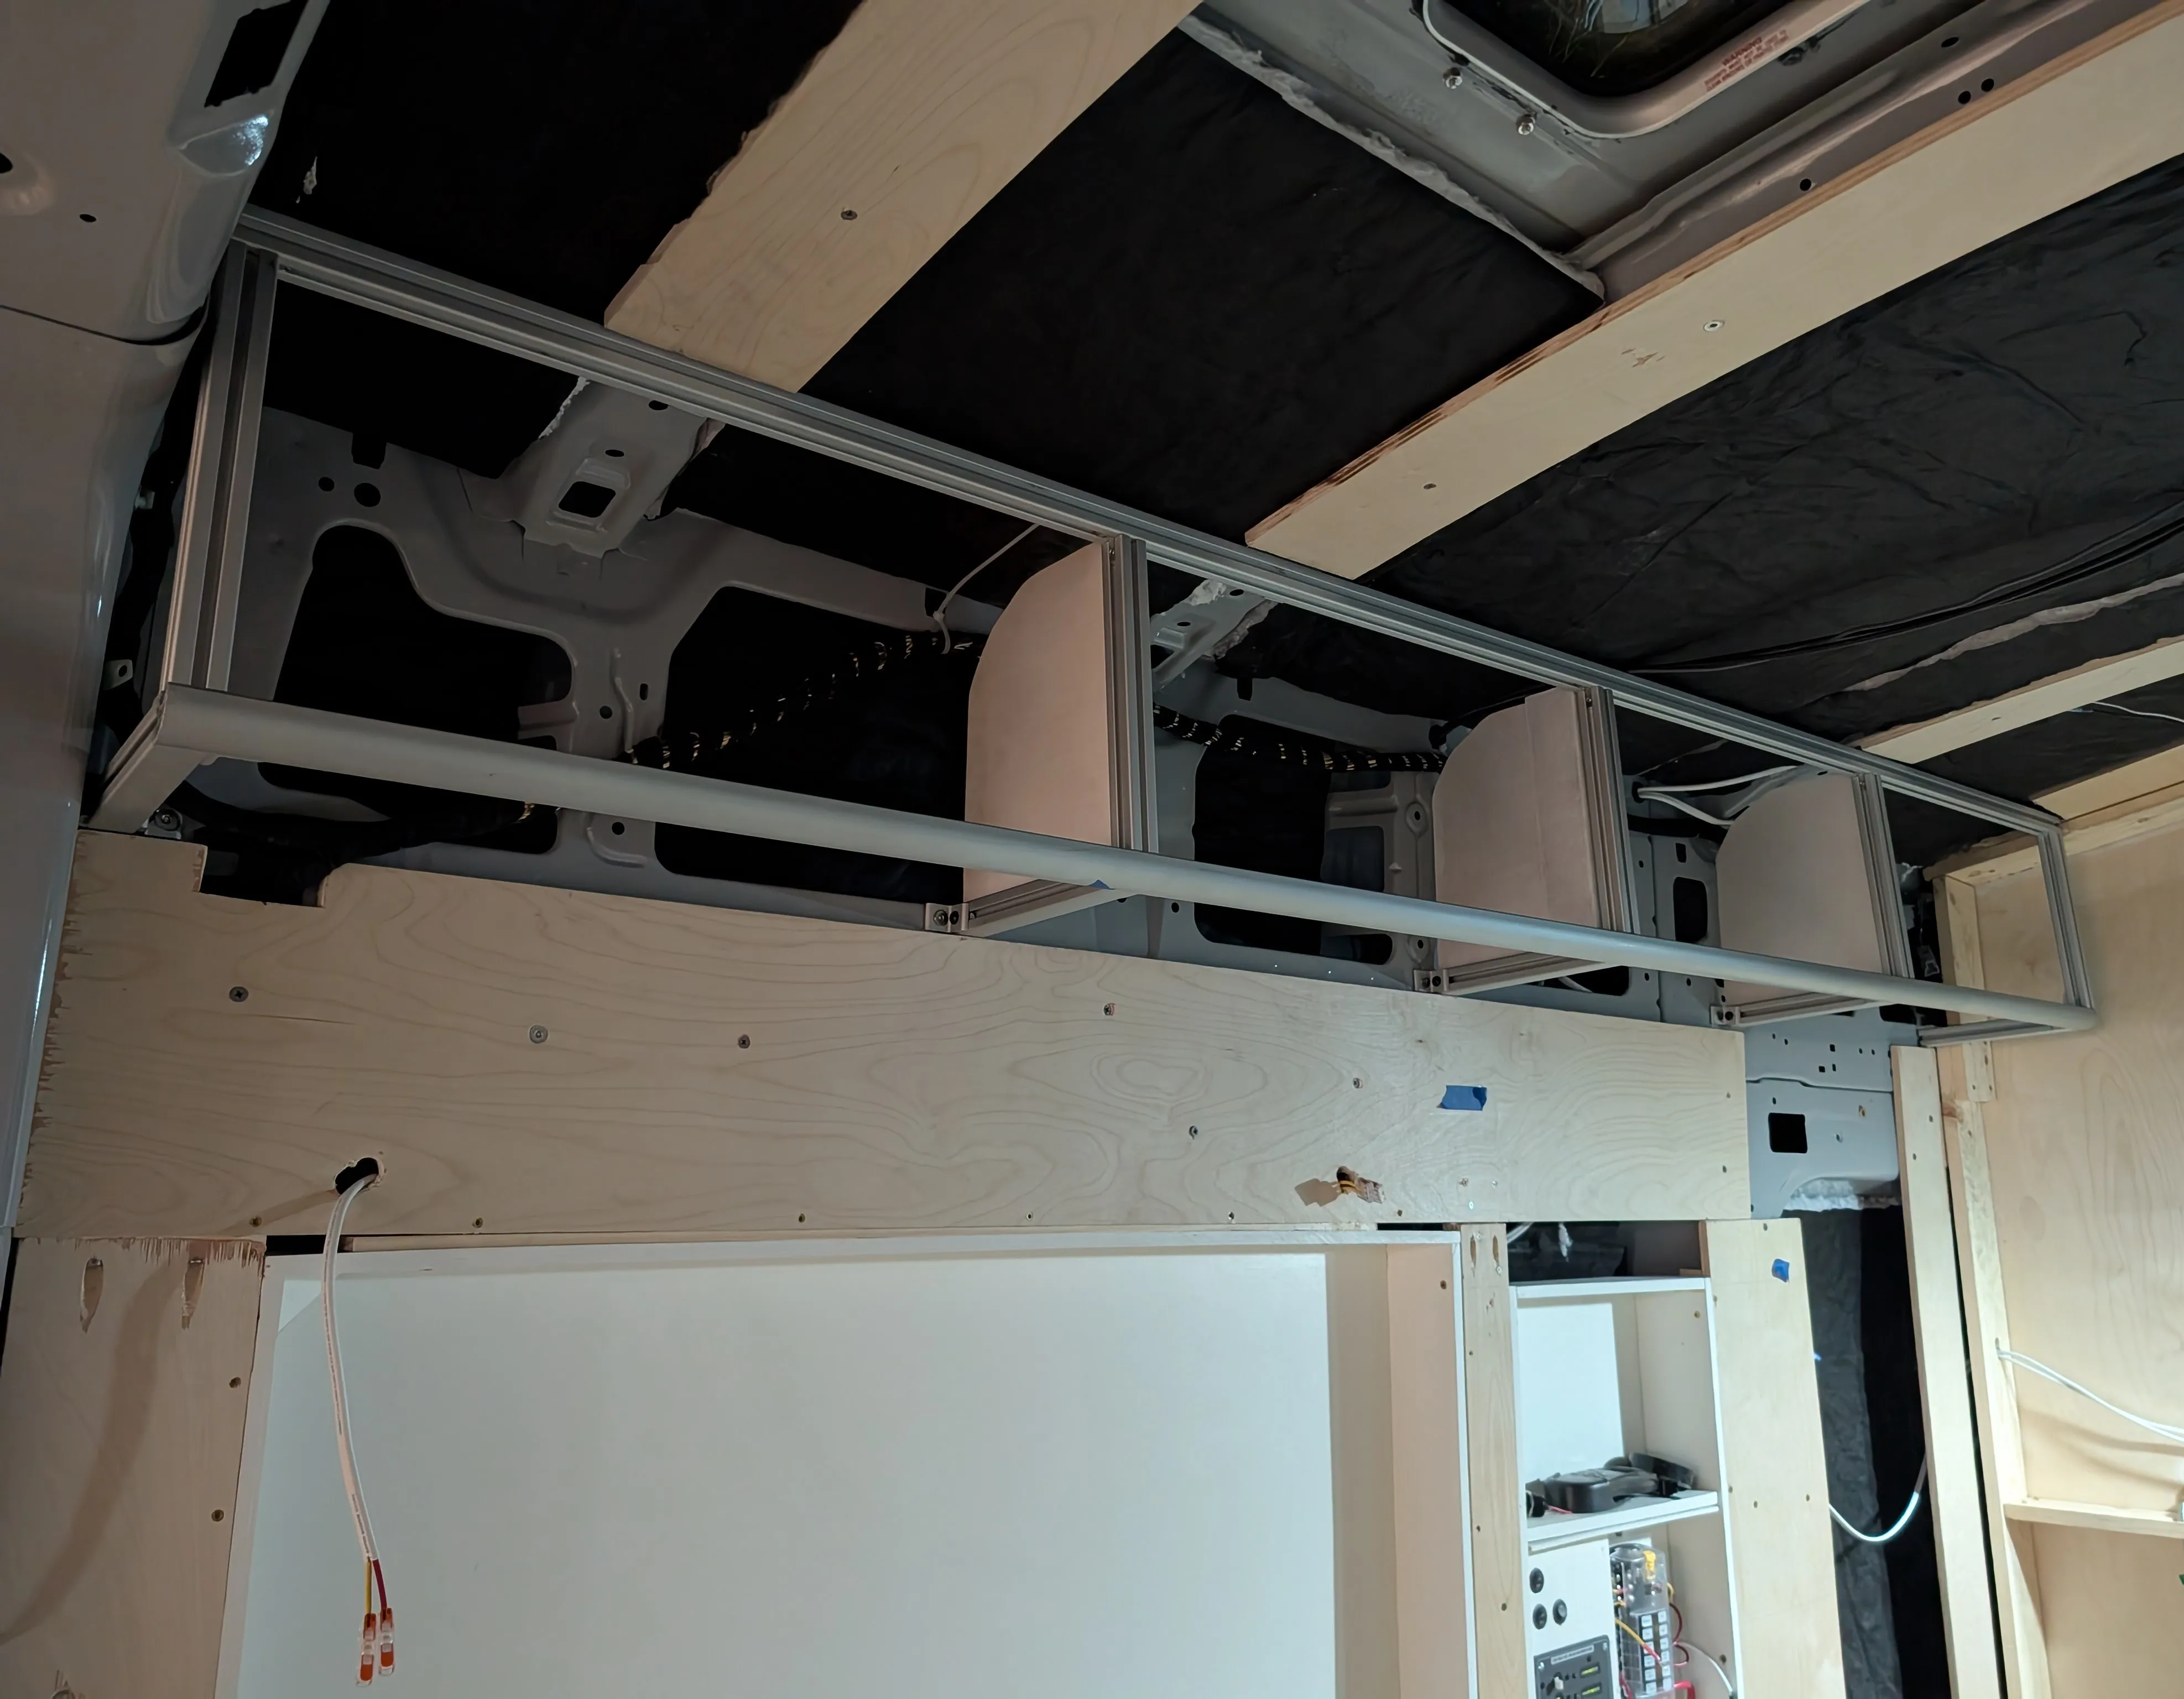
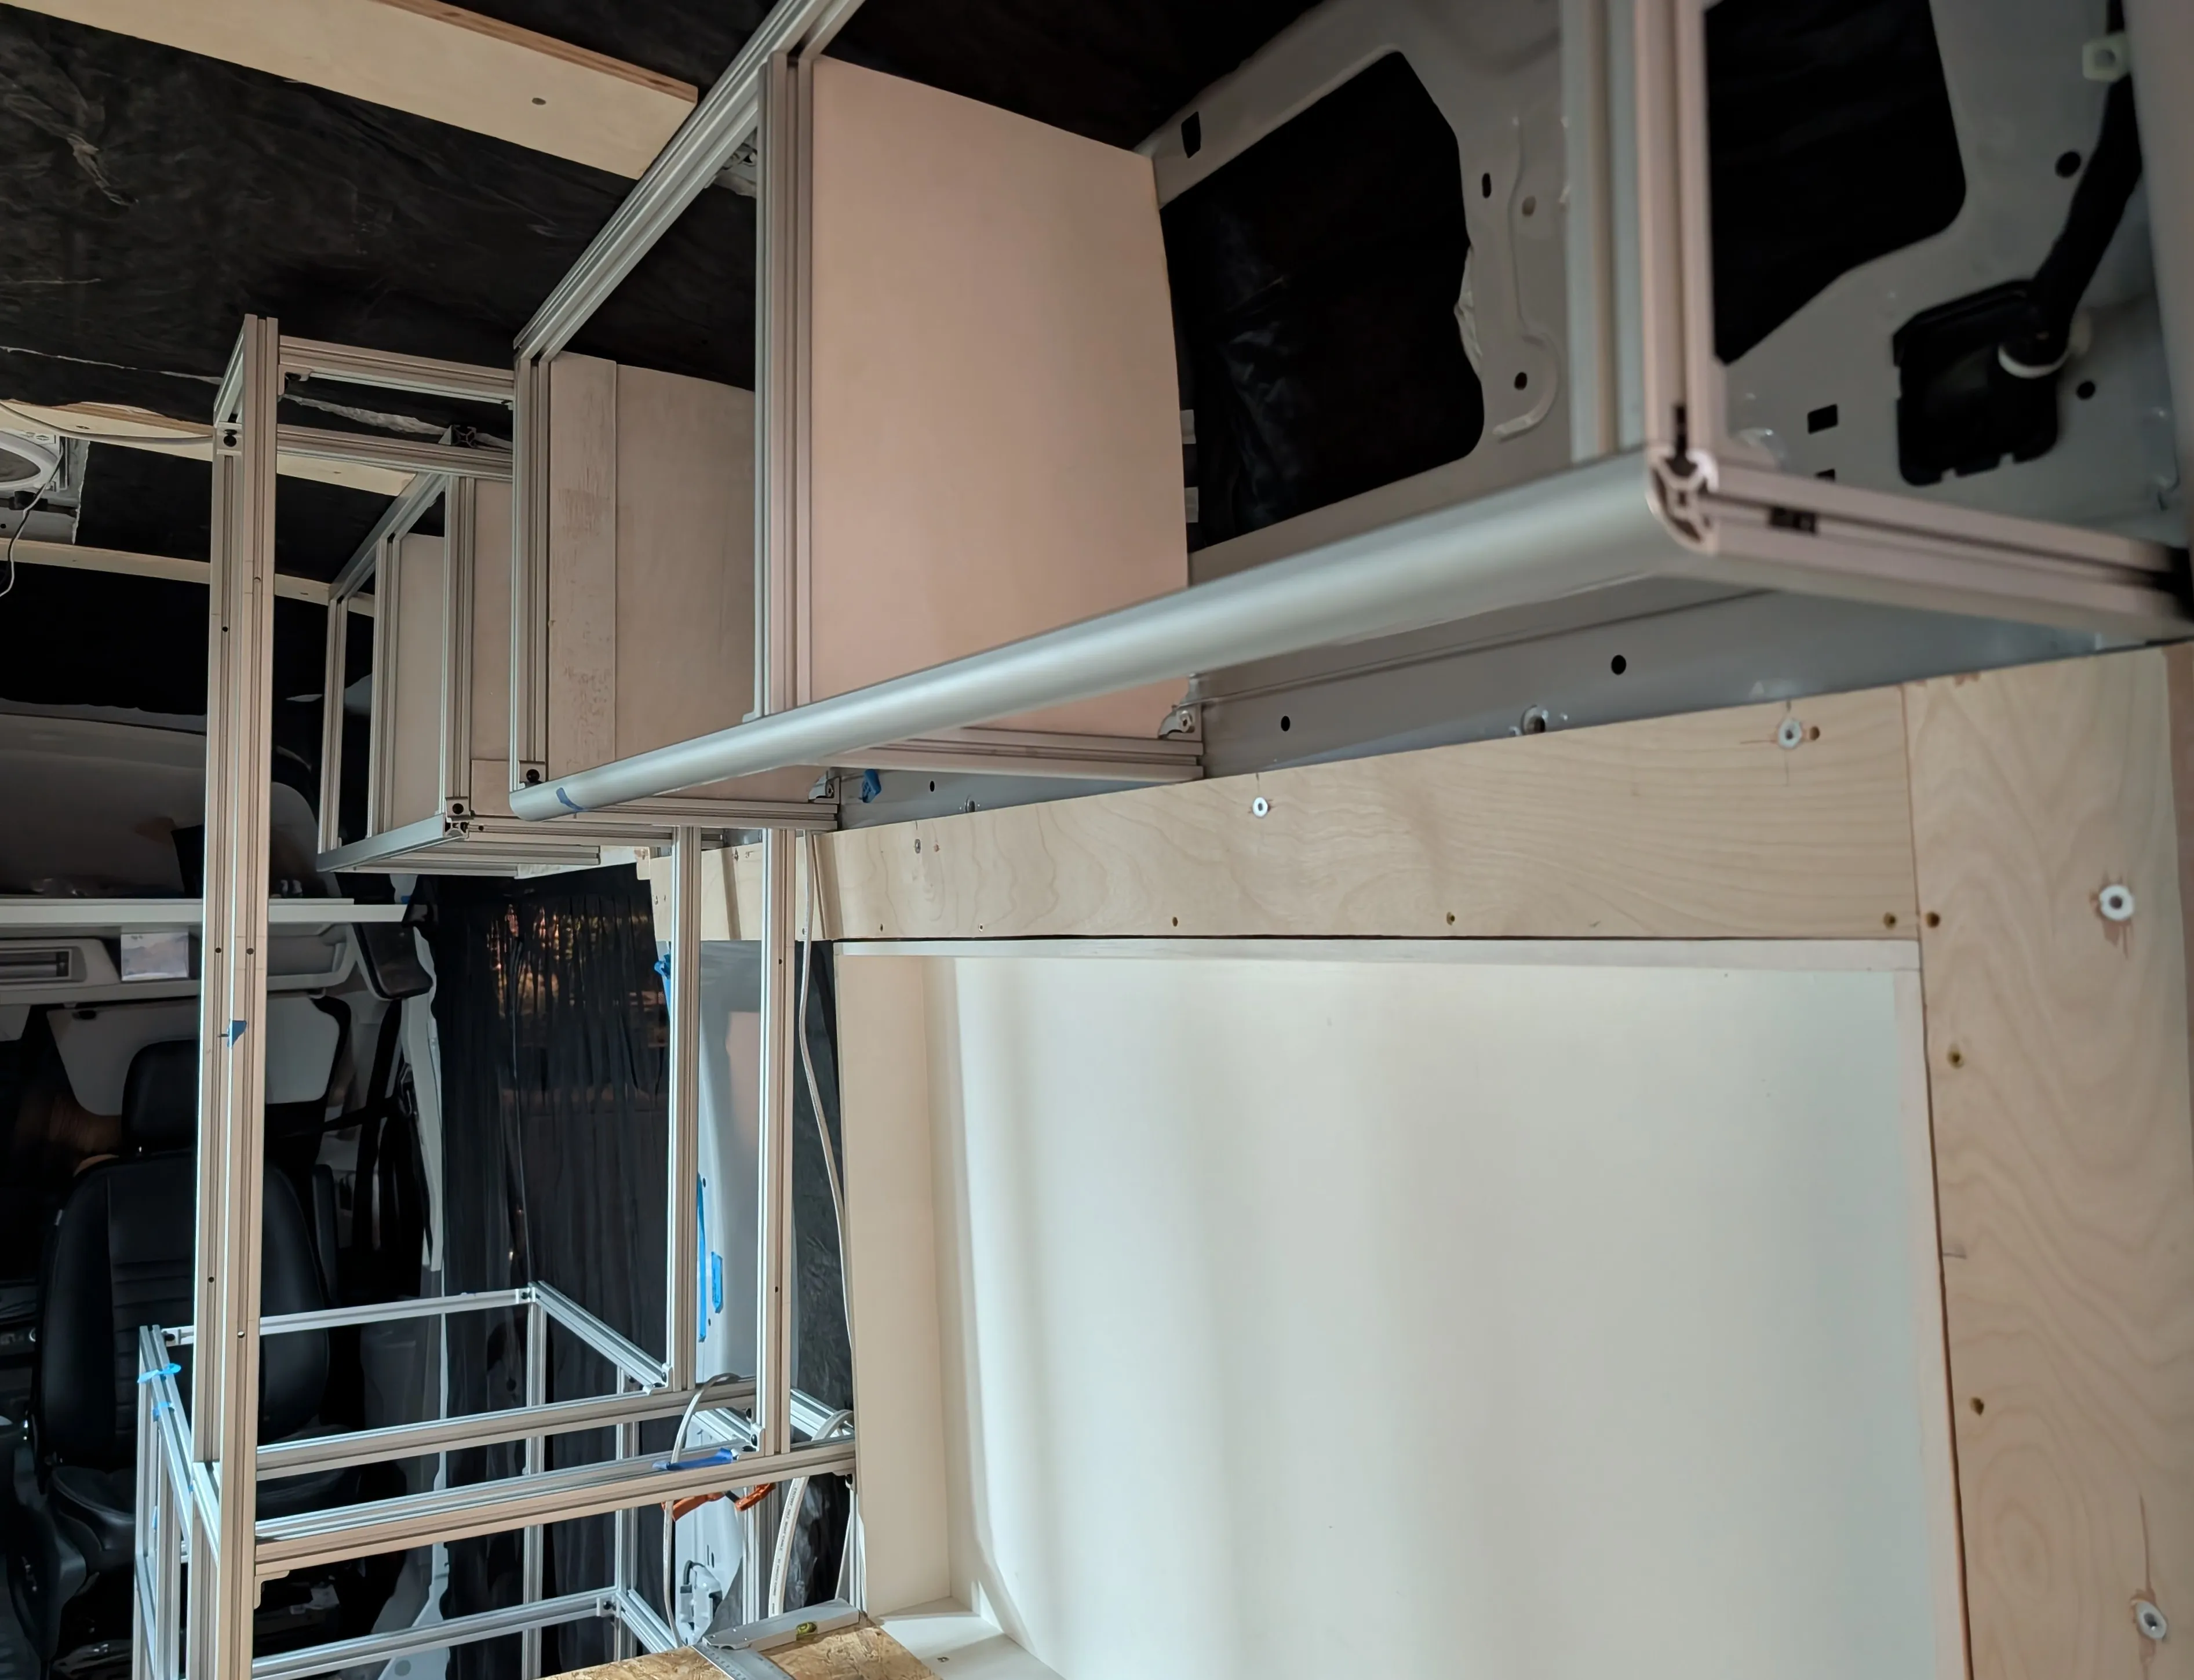
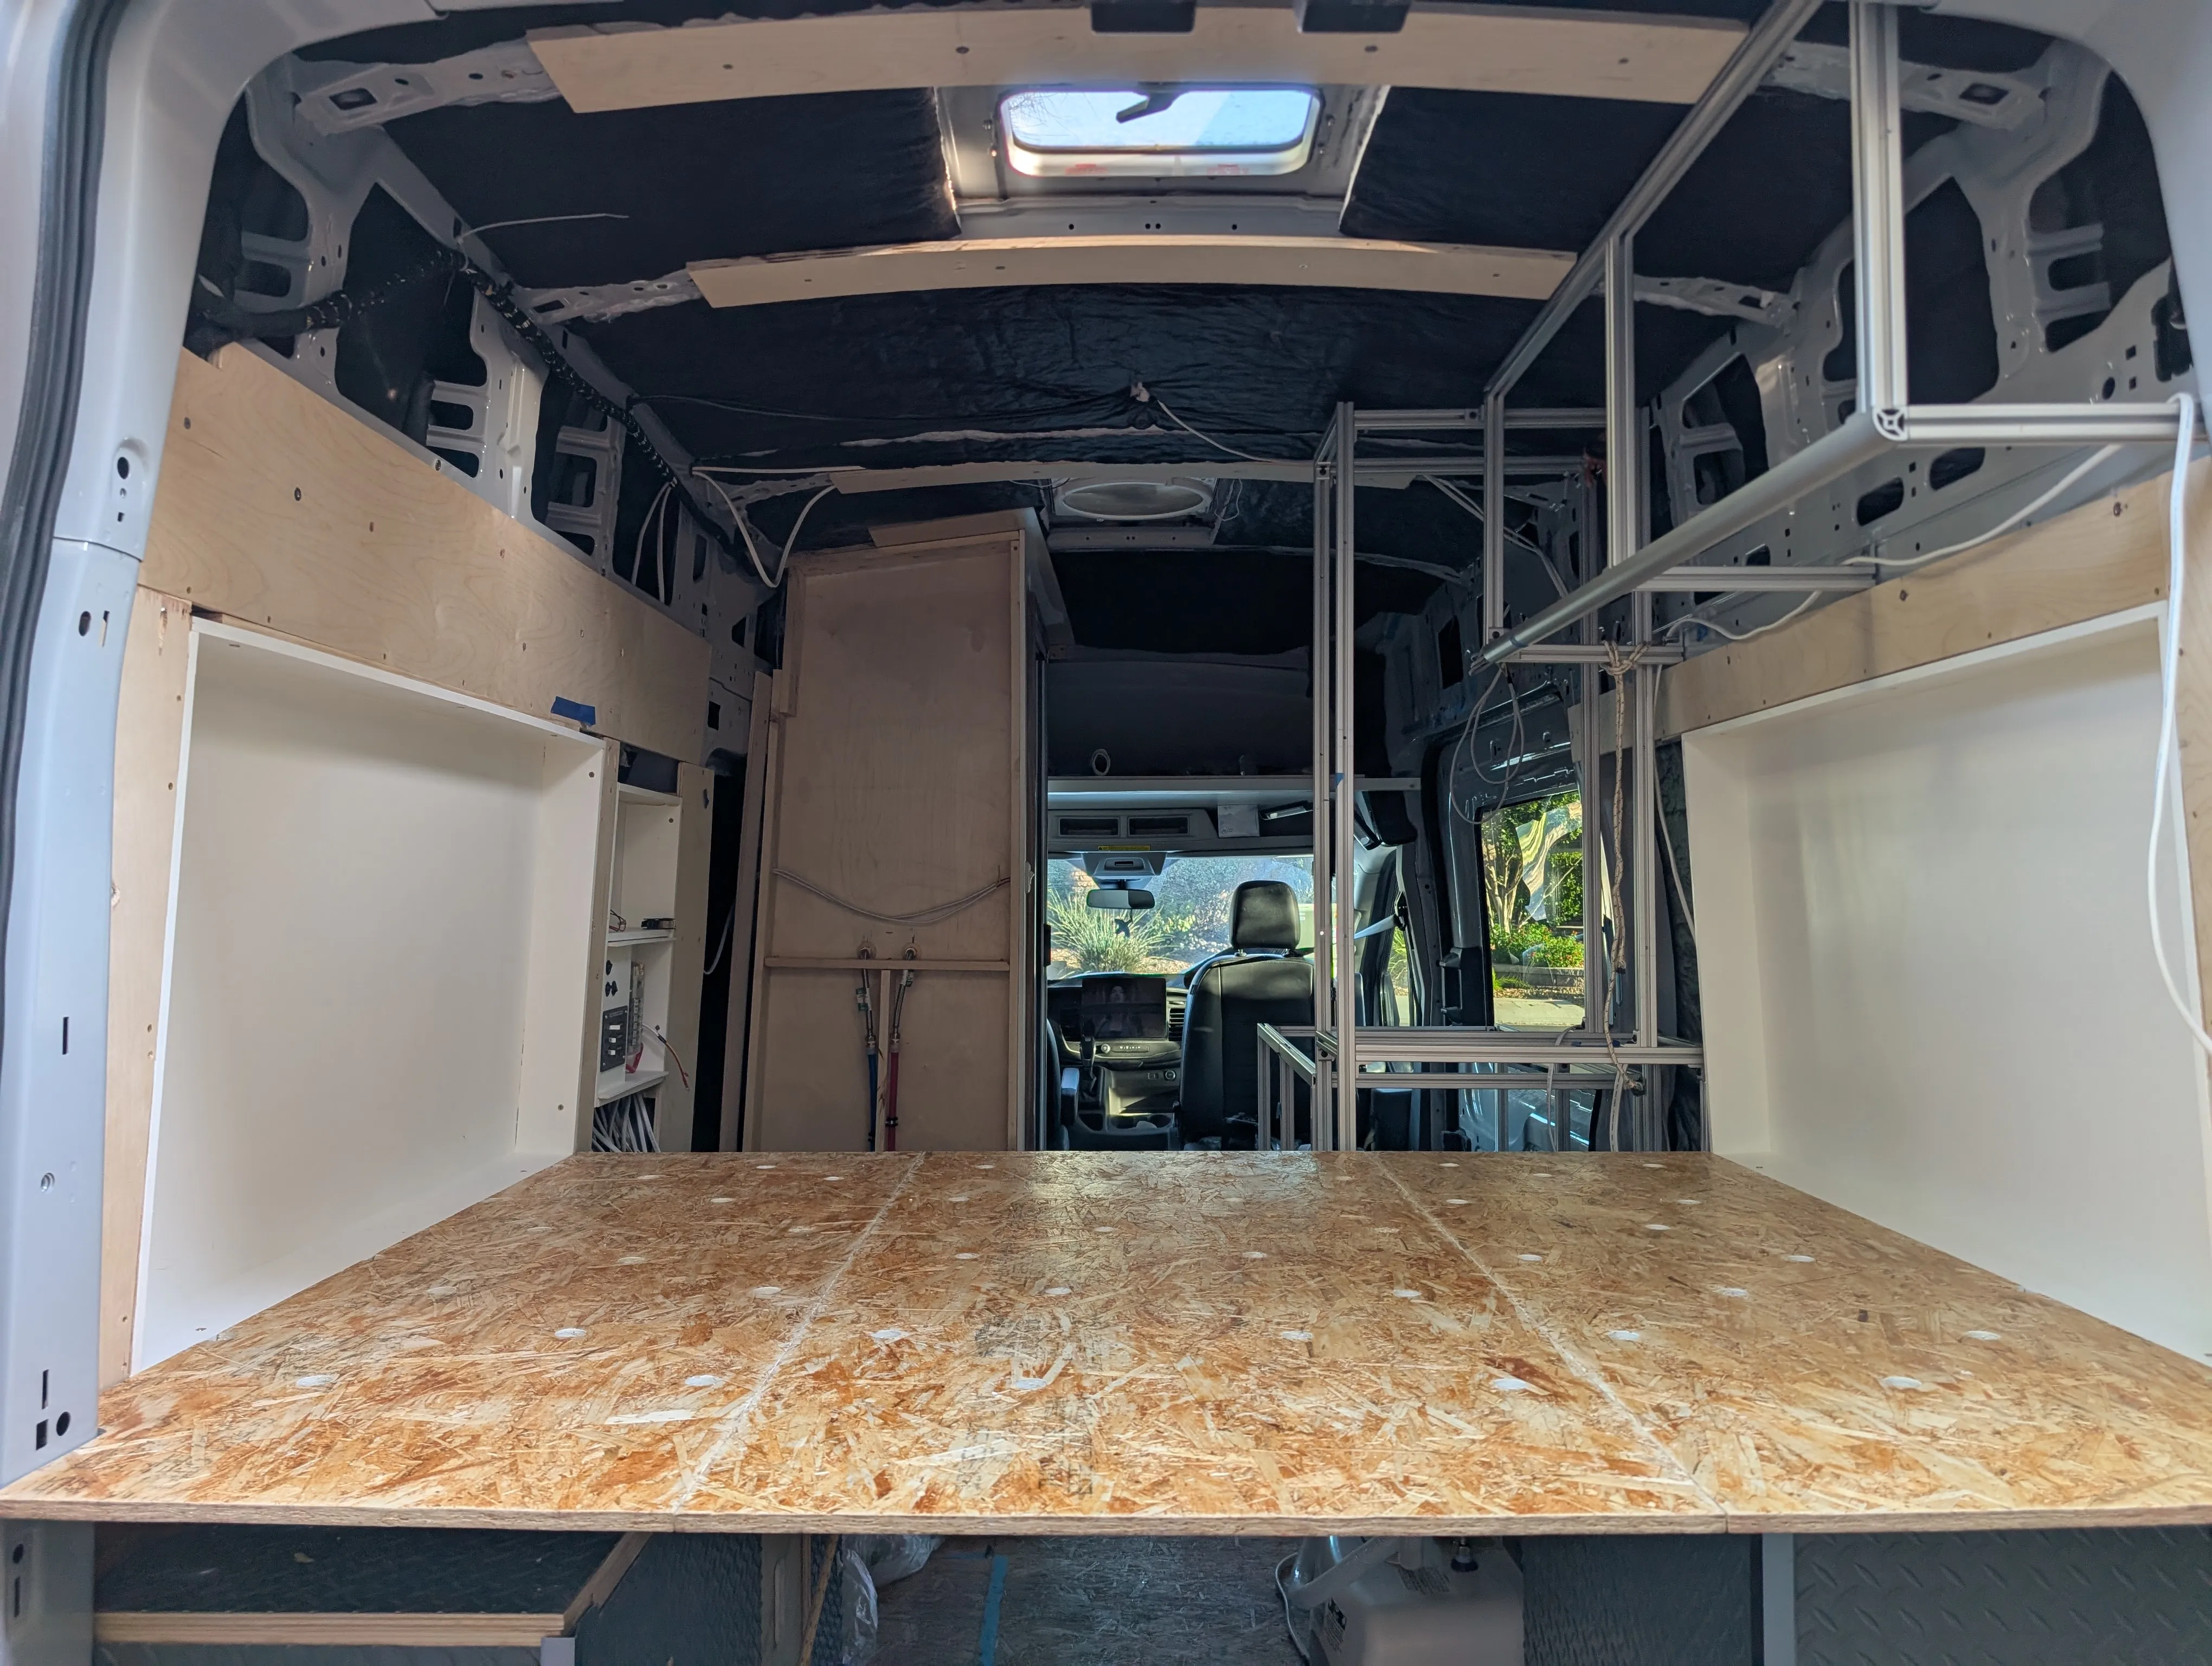
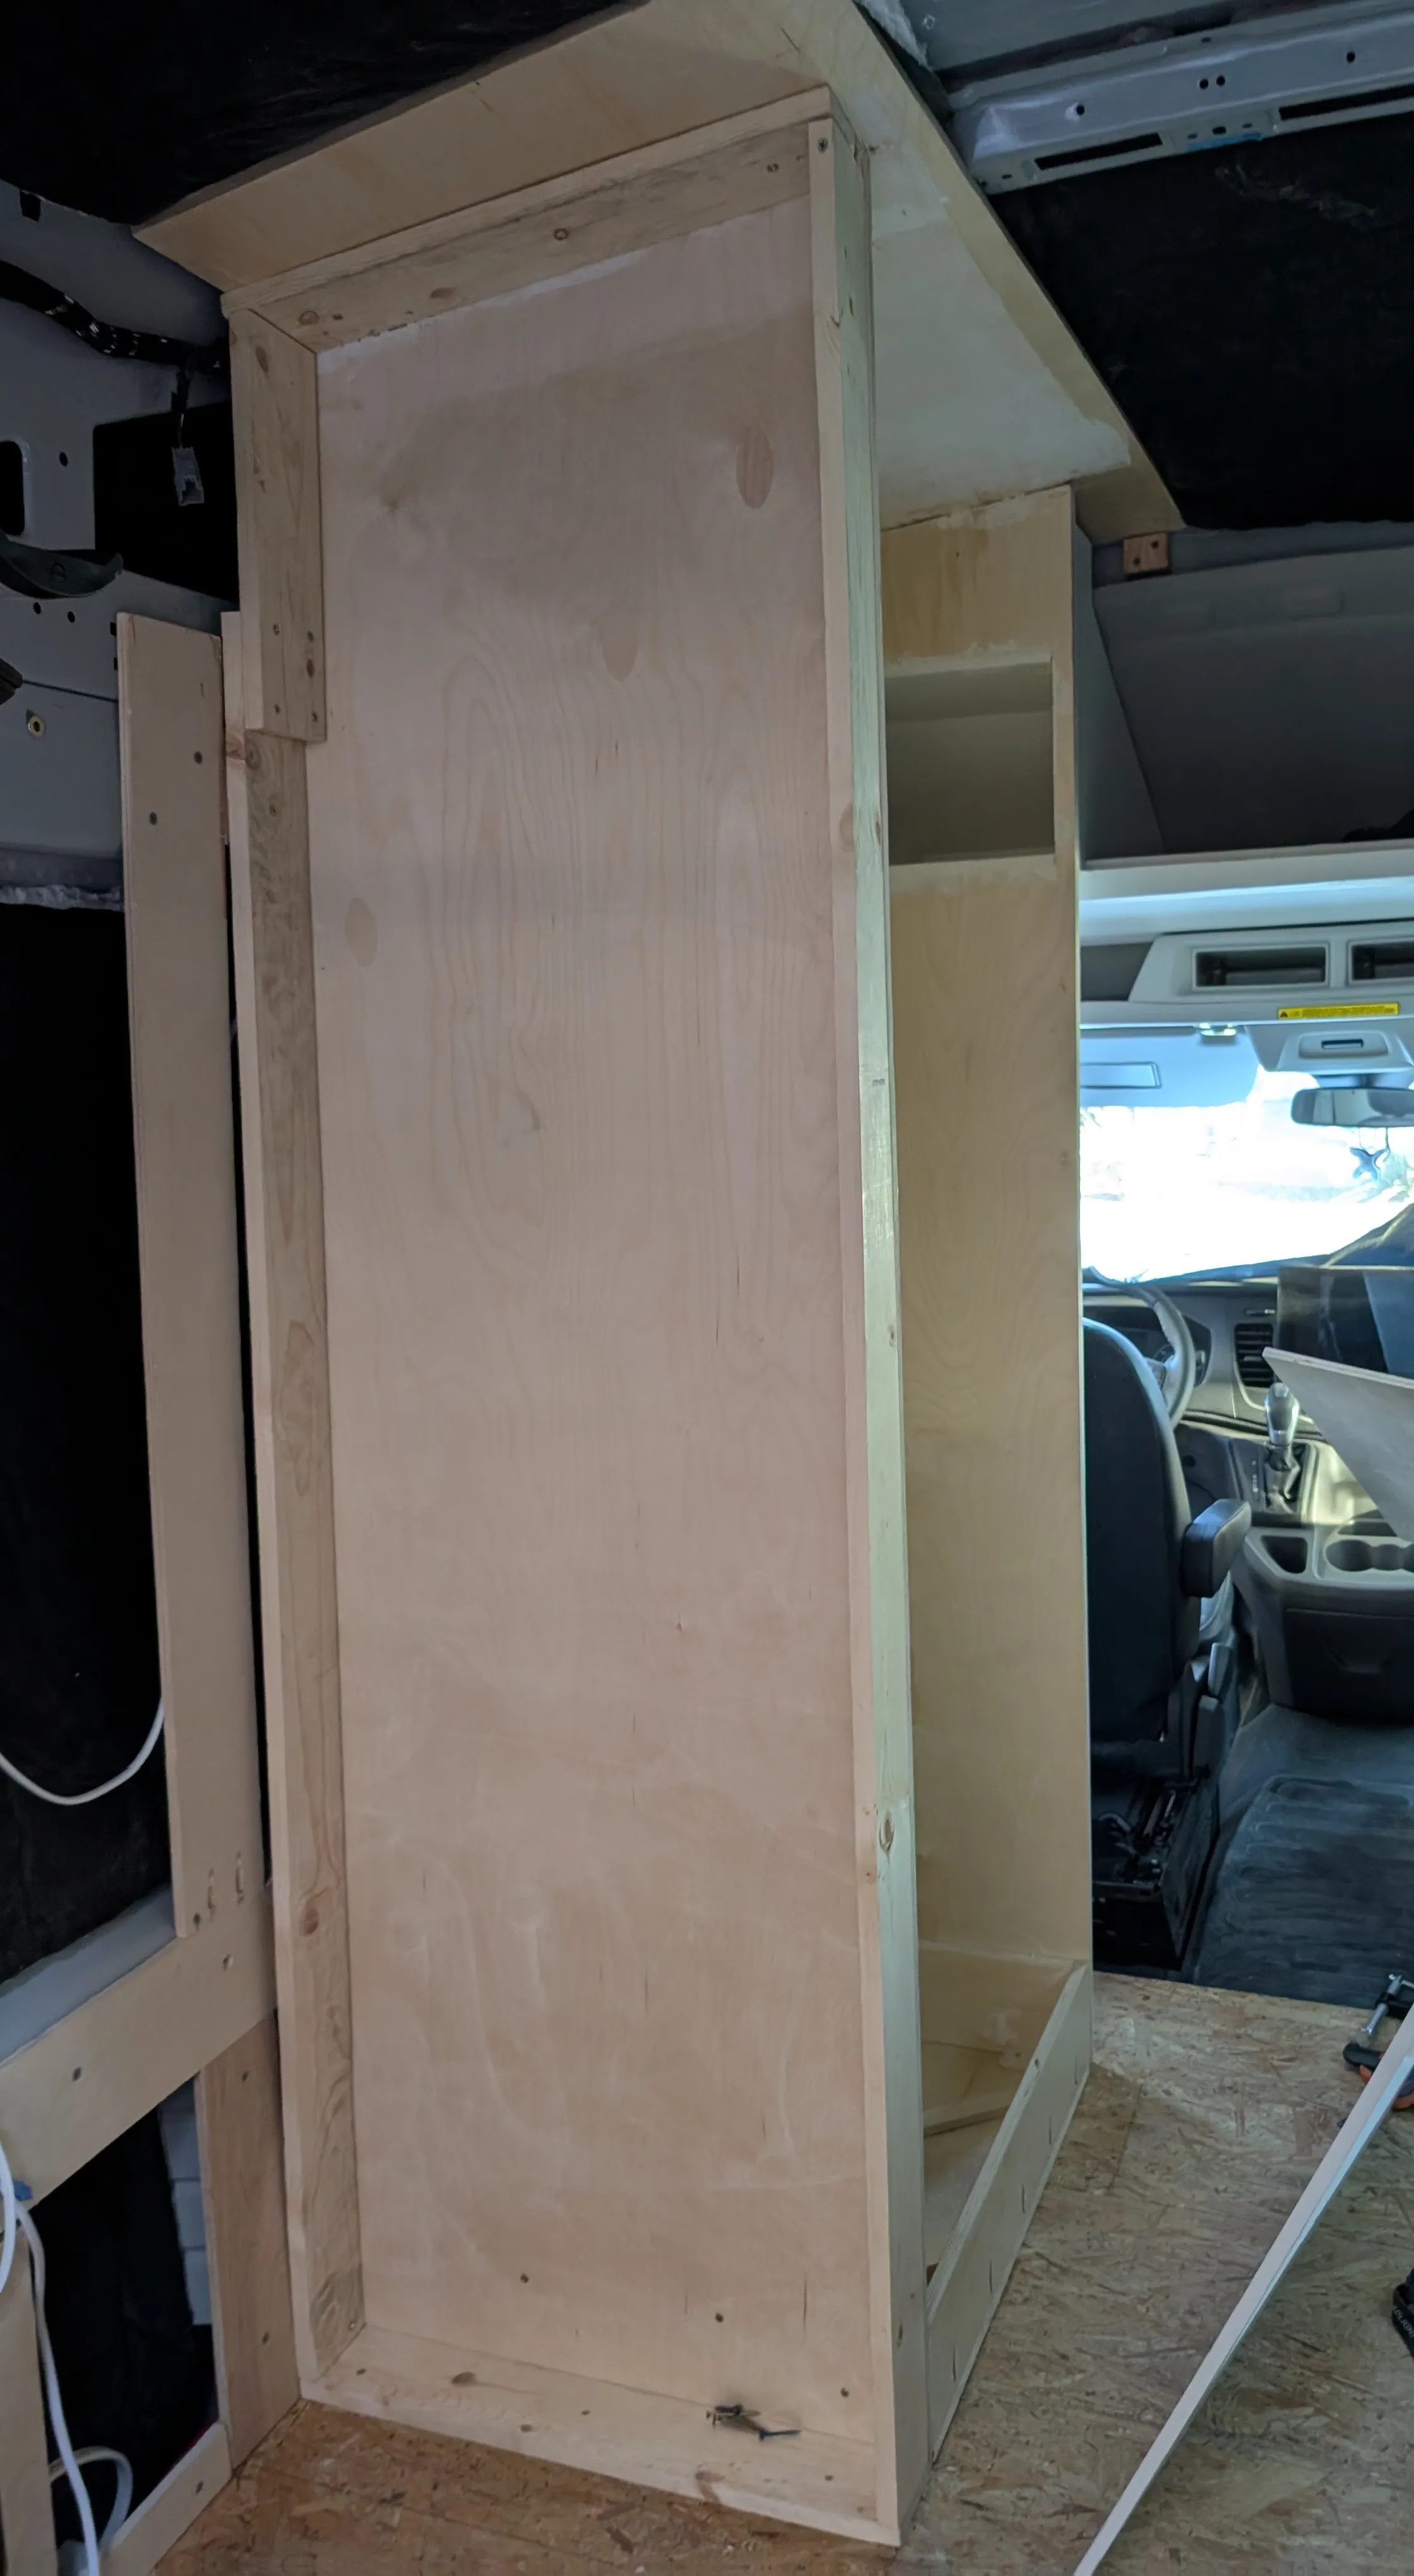
The partition wall and the bed is finally going in for good. Kep is becoming more livable by the day. The main struggle was finding a way to secure the wall since there’s not much it can screw into. The bed sits on top of 5 1515 series extruded aluminum beams and is bolted into the aluminum.
August 16, 2025
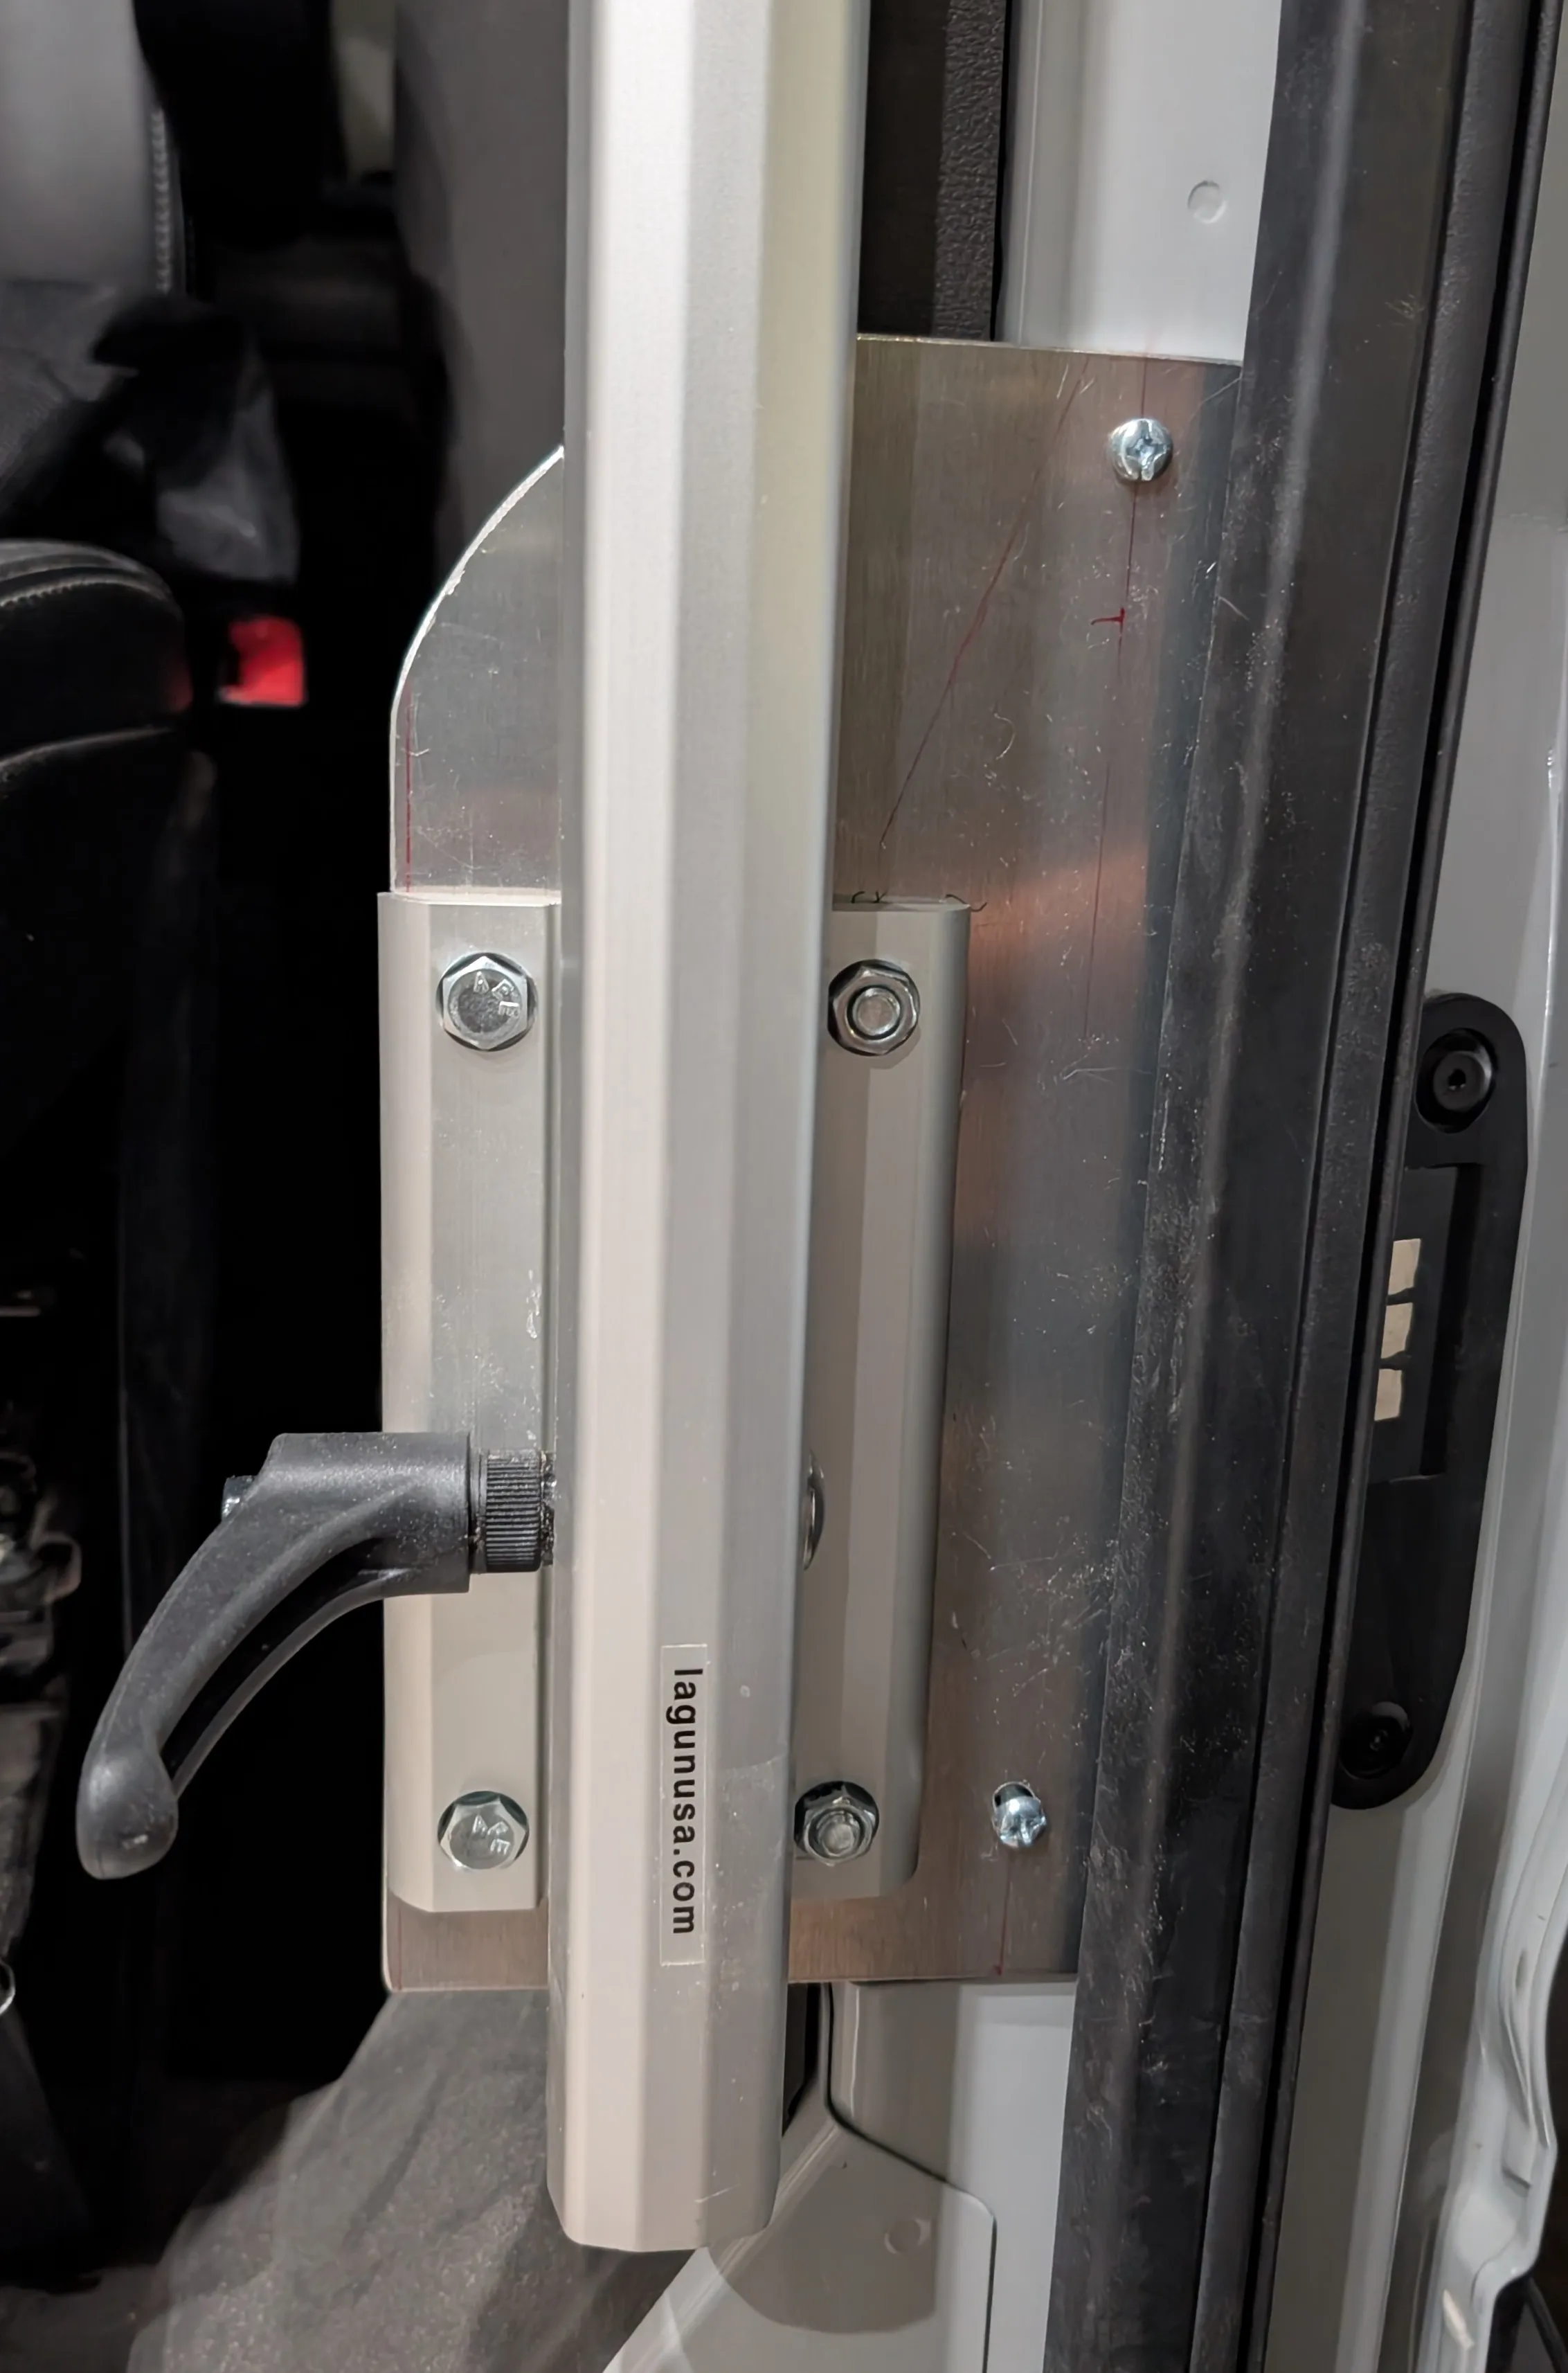
Since the passenger seat swivels, I thought it’d be fitting to add a table in front of it. The pre-existing M6 holes on the side of the sliding door provide the perfect support. There are some expensive mounts online specifically designed for the Transit but taking a closer look, it’s actually a pretty simple DIY job. I used a 1/8” thick aluminum plate, drilled some holes in the same position as the existing holes, and placed the table mount at the desired height.
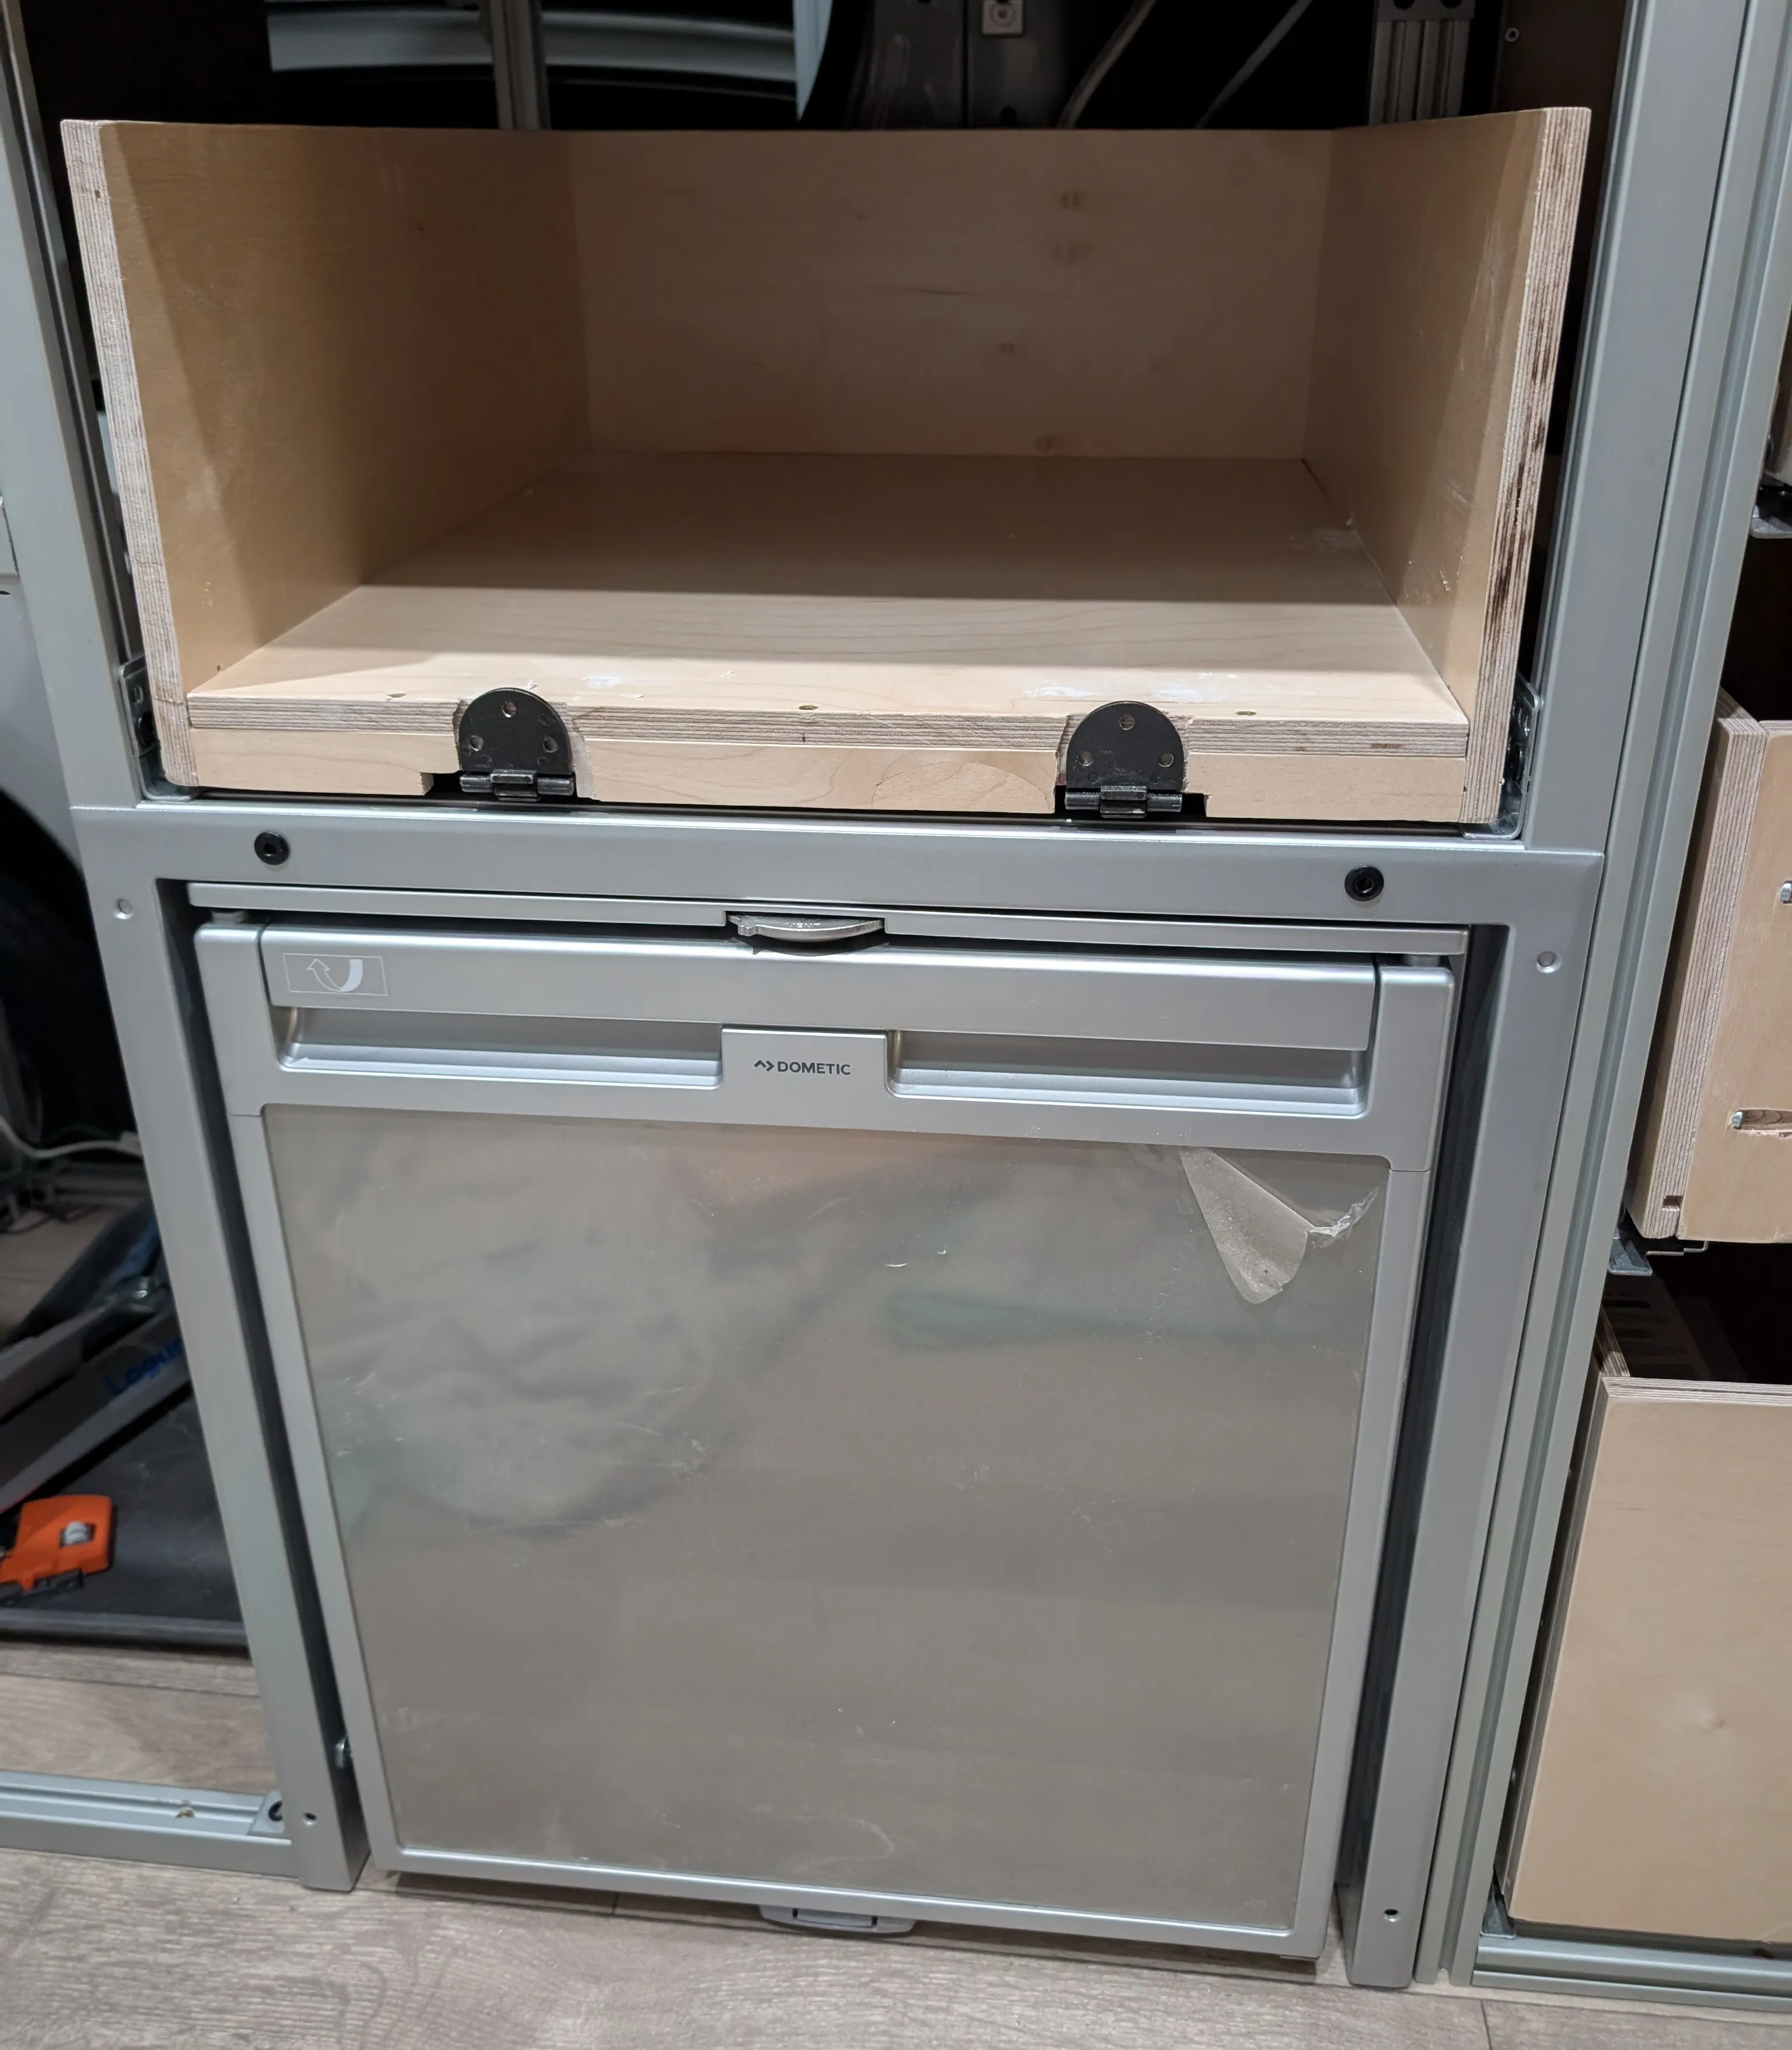
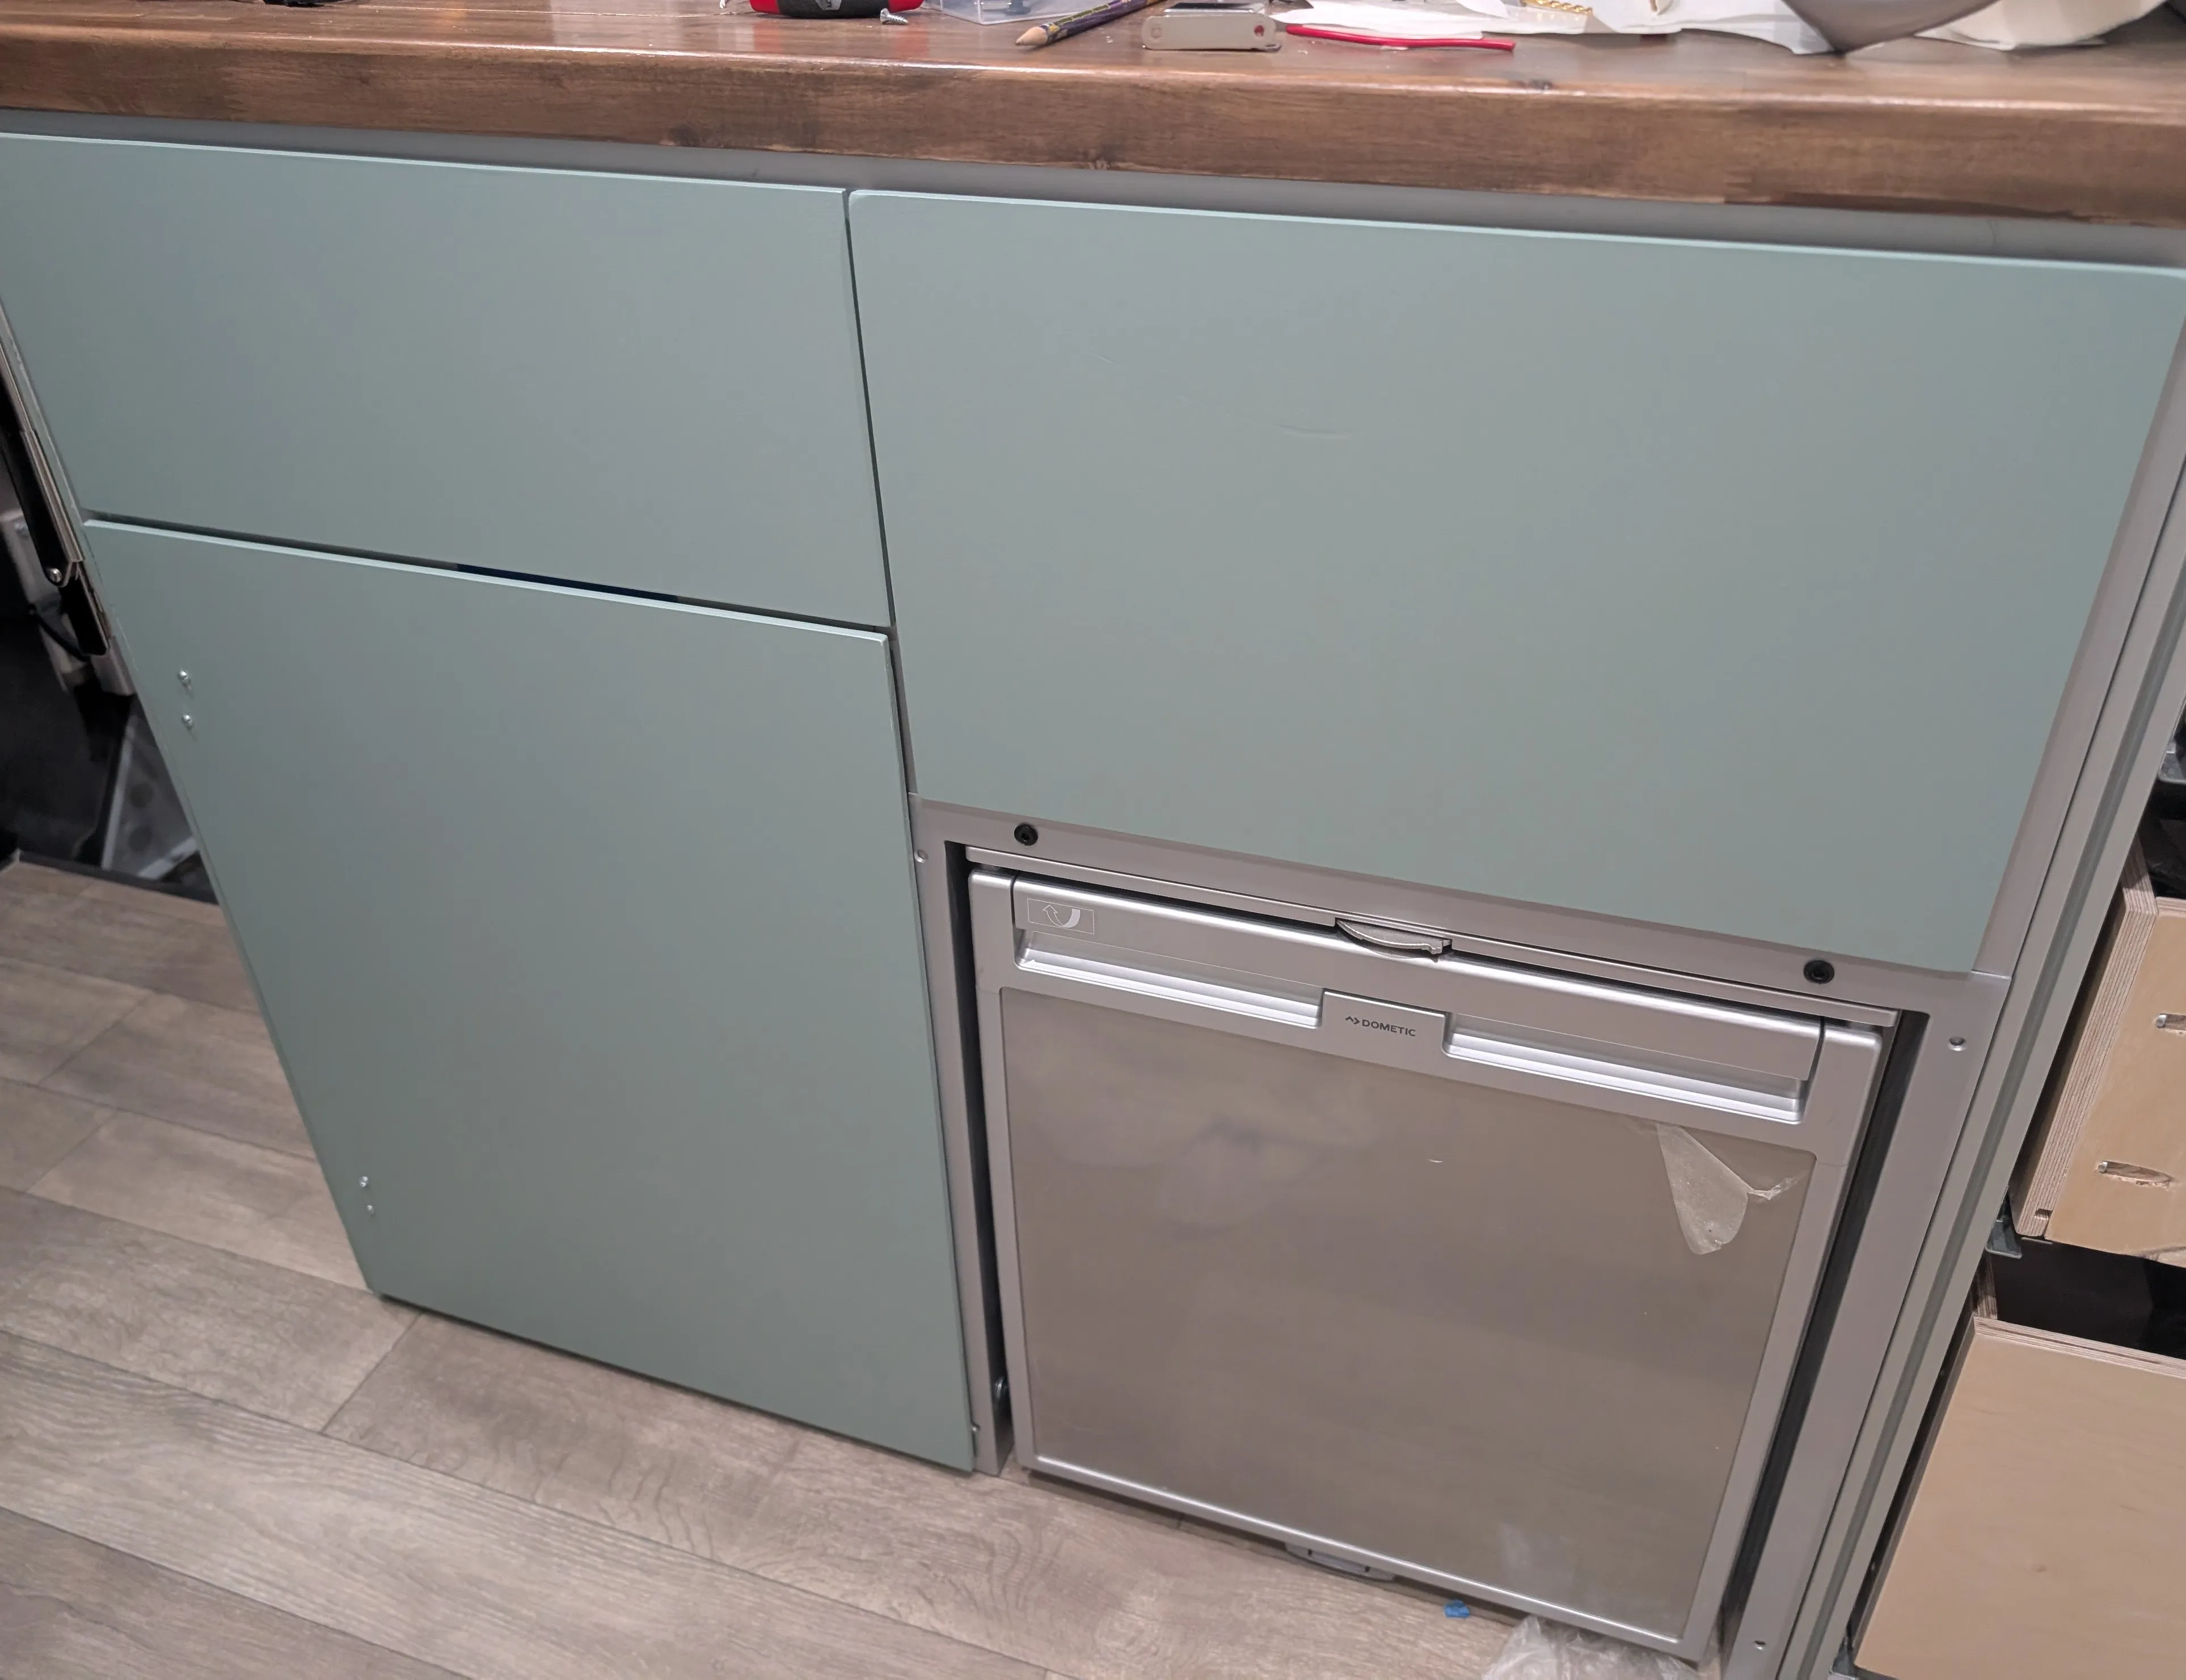
Now that most things in the galley are done, it’s time to mount the fridge. I had to enlarge the holes so that it aligned with the aluminum. It’s really just being held by the two screws on the top of the frame and one on the left side.
August 13, 2025
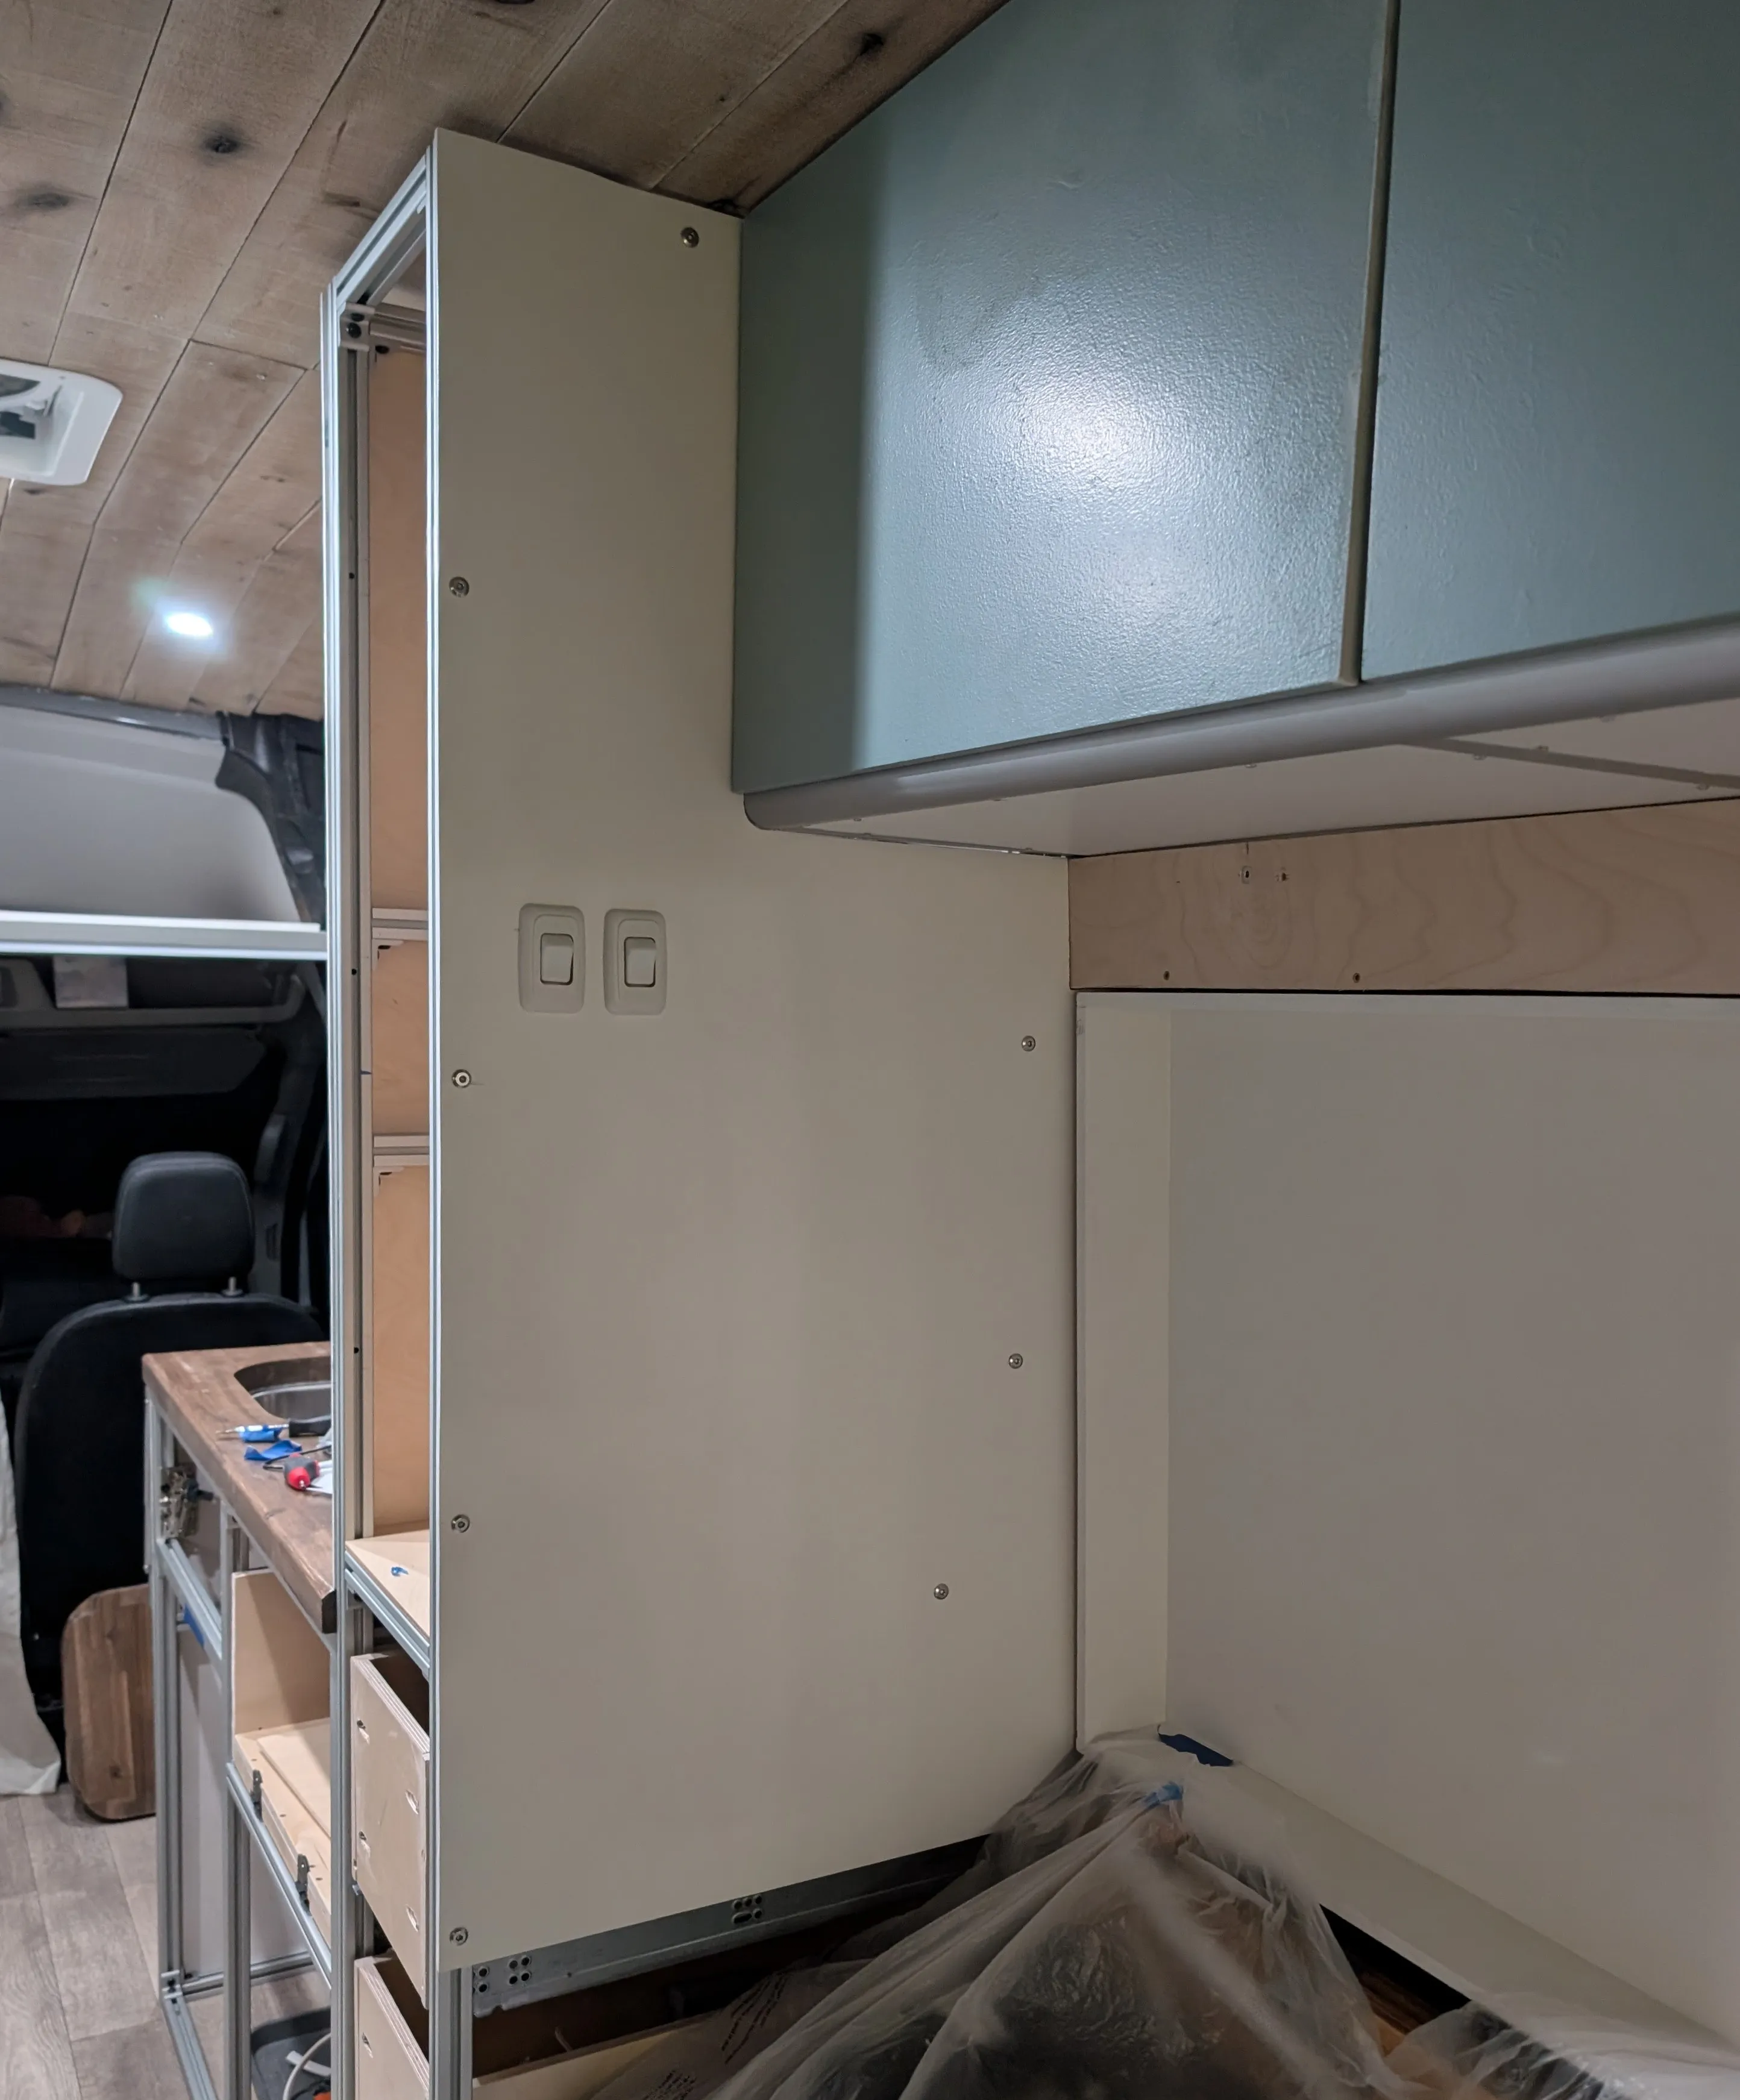
Lately there’s been a lot of time consuming filler going into Kep. Since he now has functioning drawers and lights, it’s time to add all the siding and drawer and cabinet faces. I’m not convinced this was the right color for him but I do think it matches well.
August 4, 2025
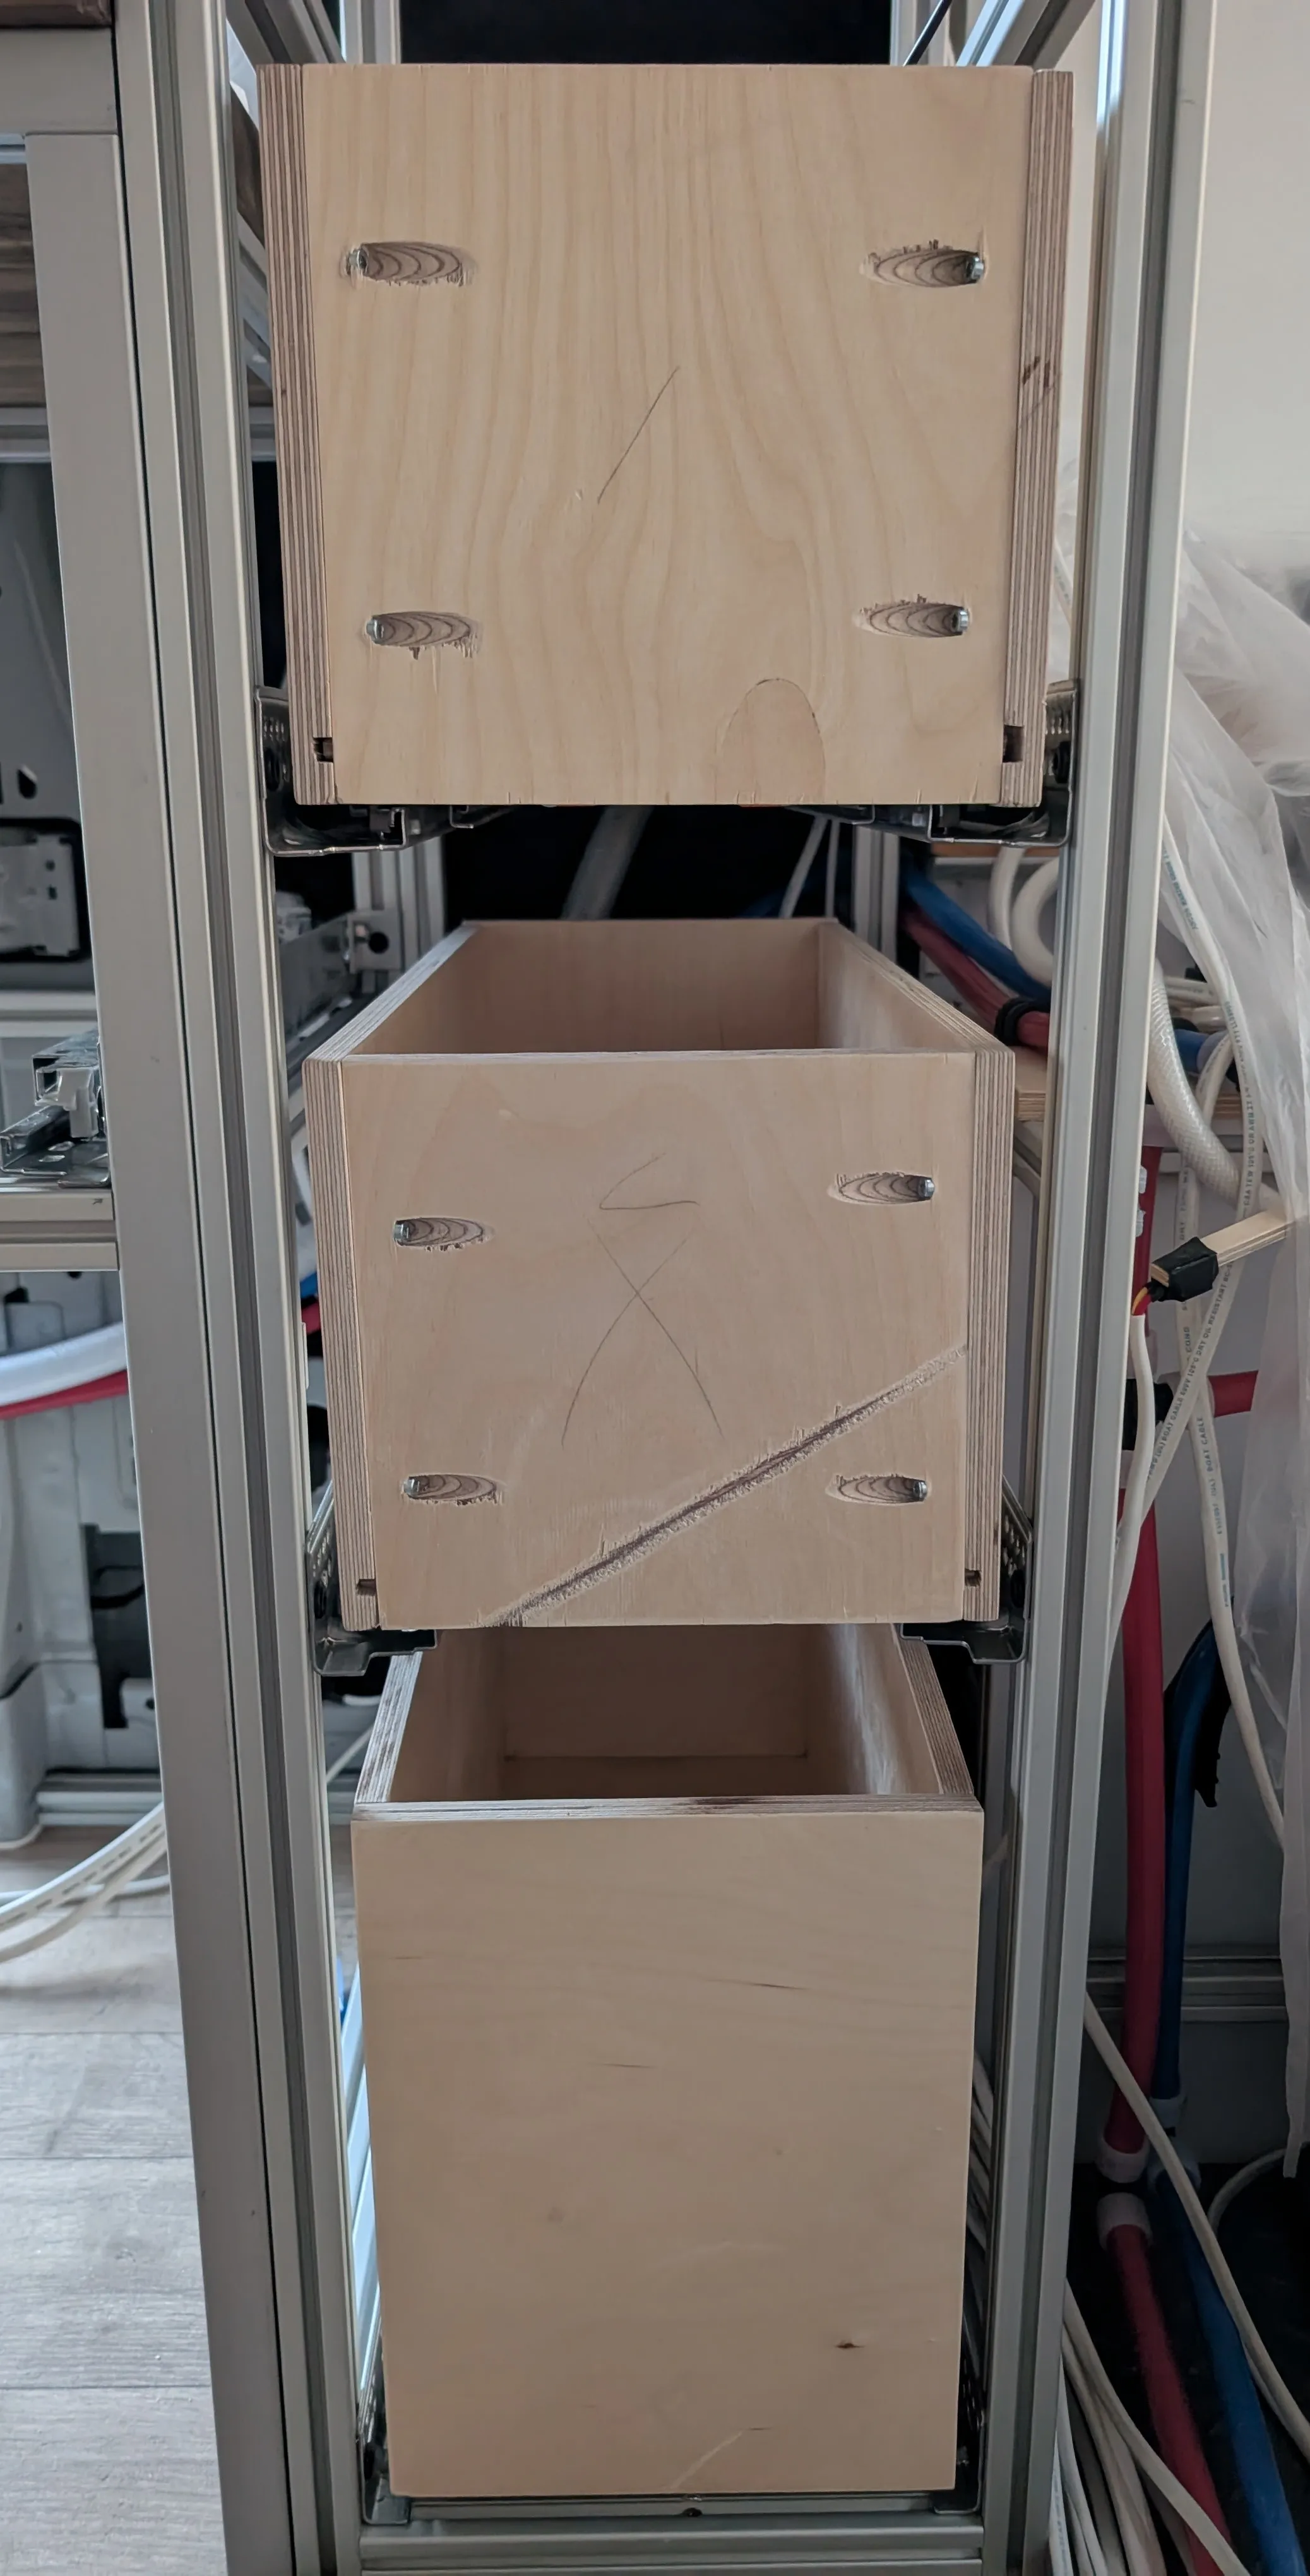
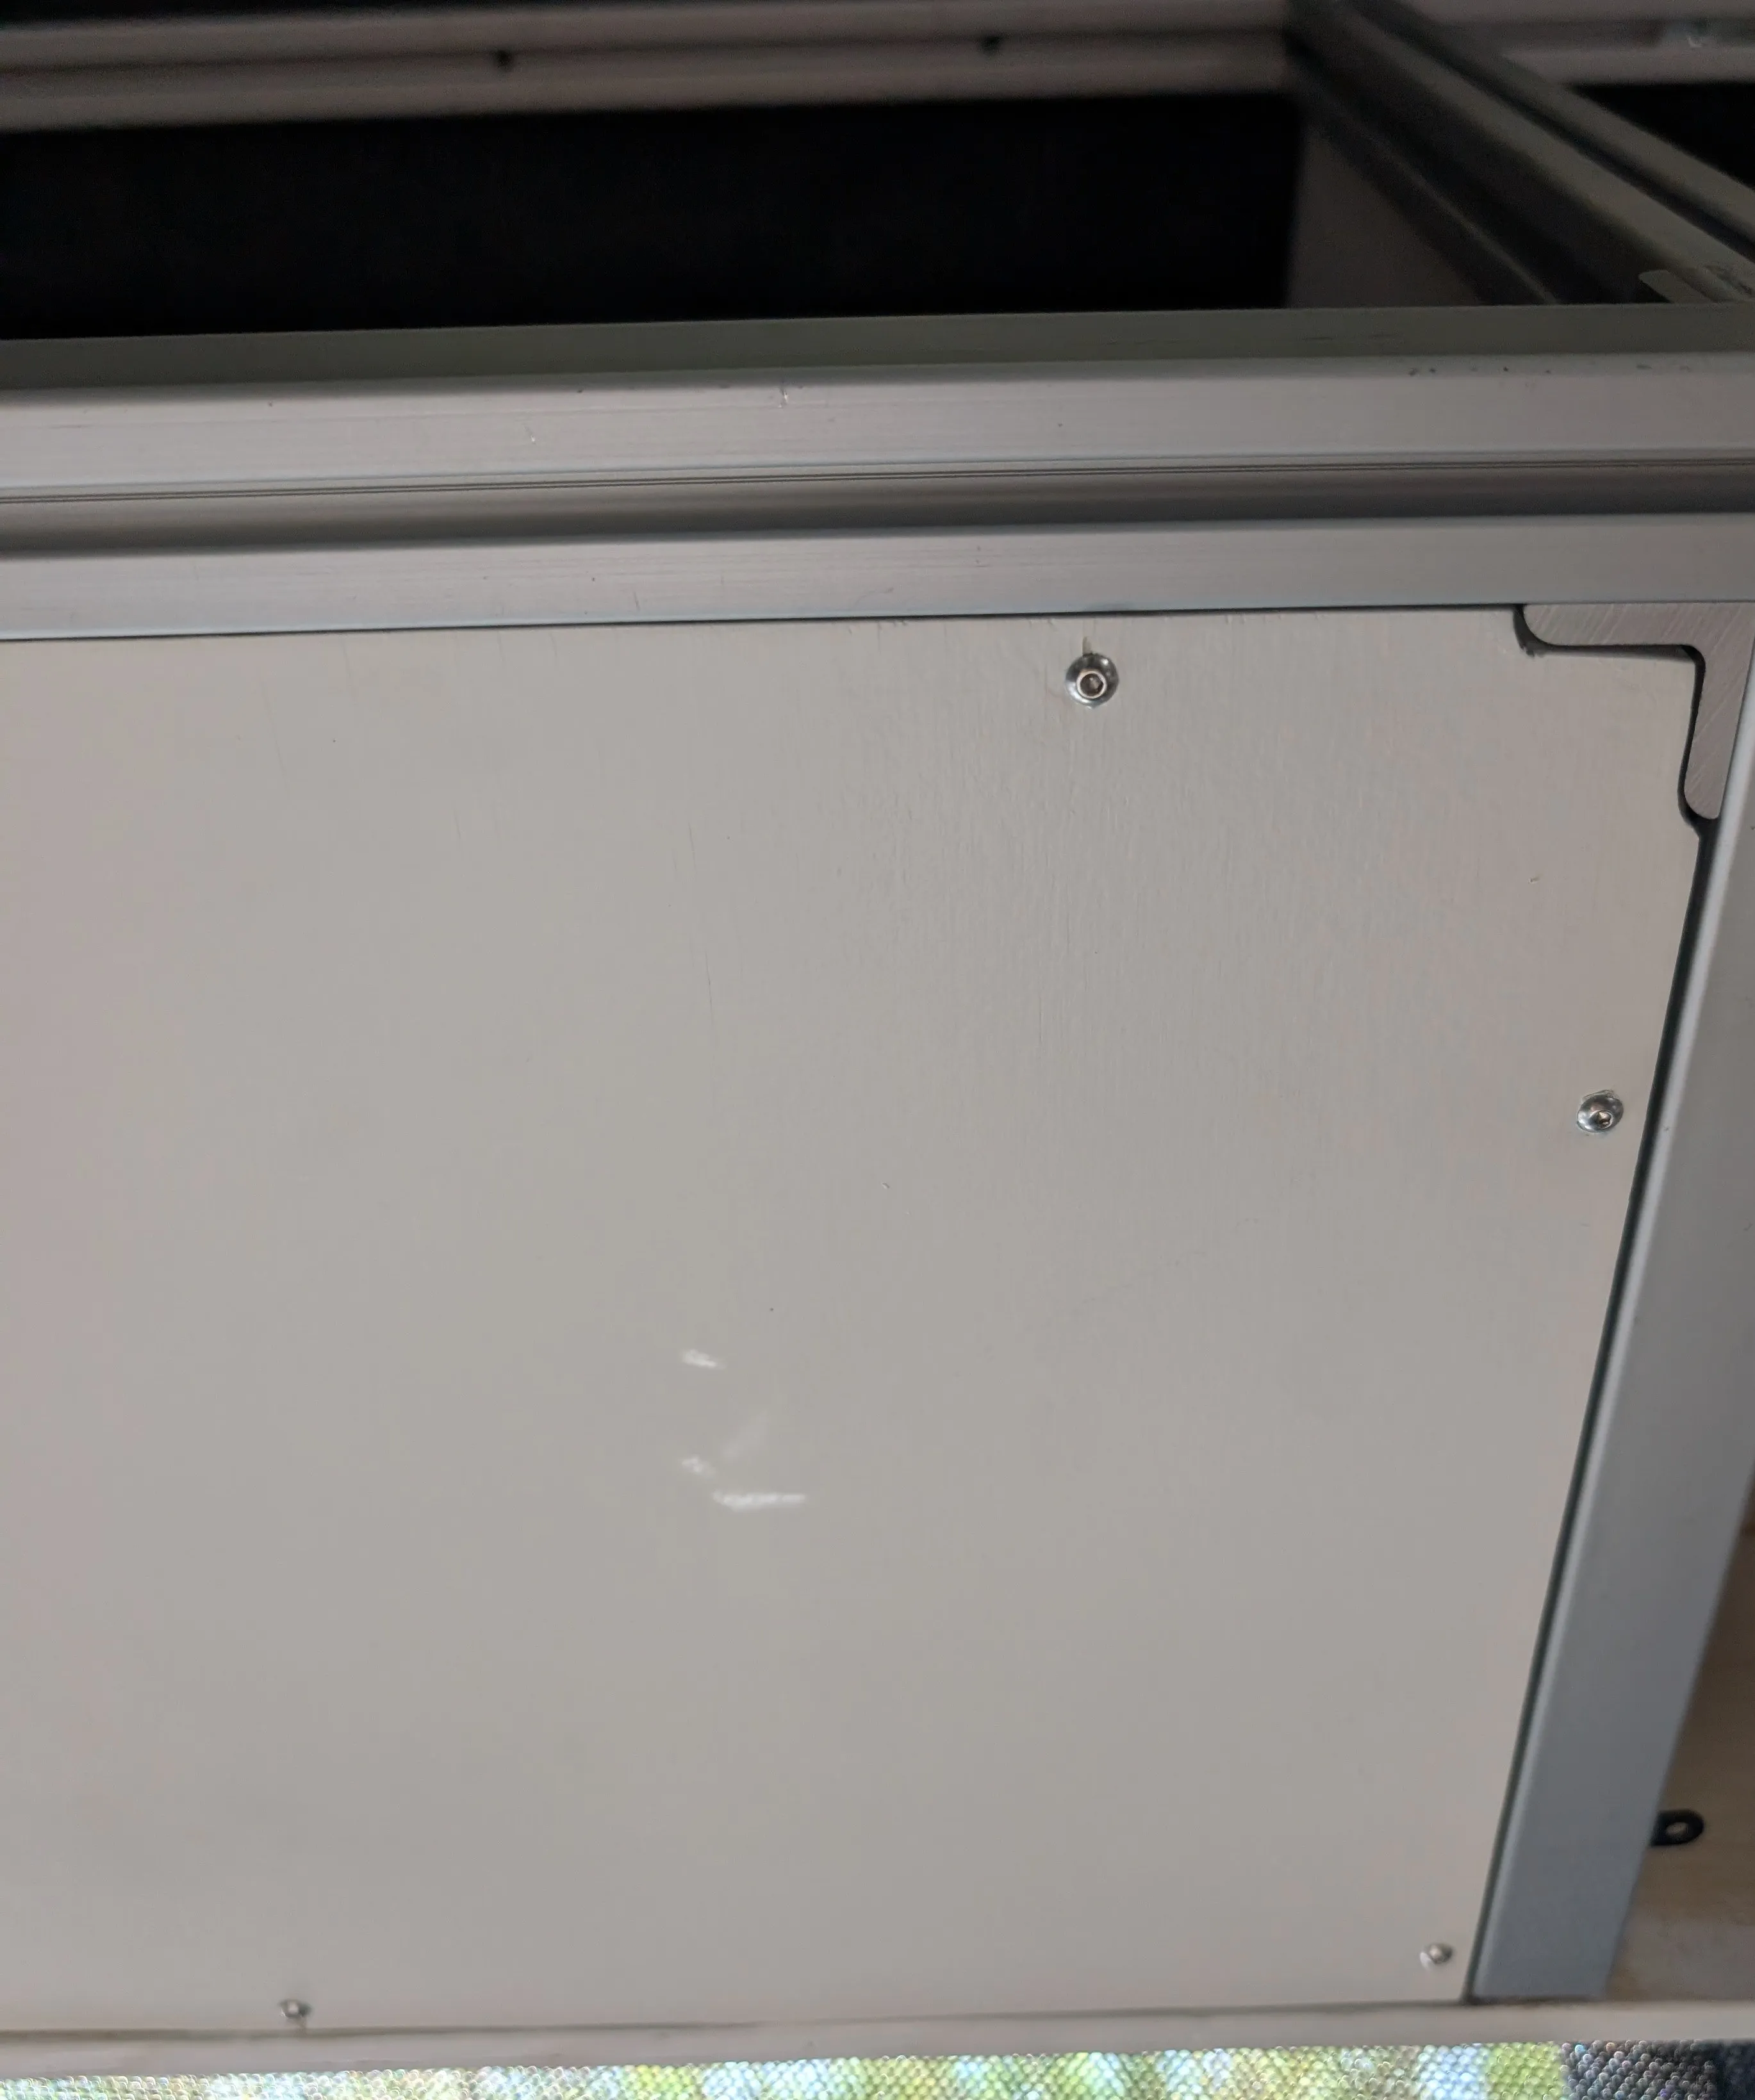
These drawer boxes that need to be painfully precise are now in the slides, one with a slight scar. There is one more bigger drawer that still needs work, but there will be a surprise feature with that one.
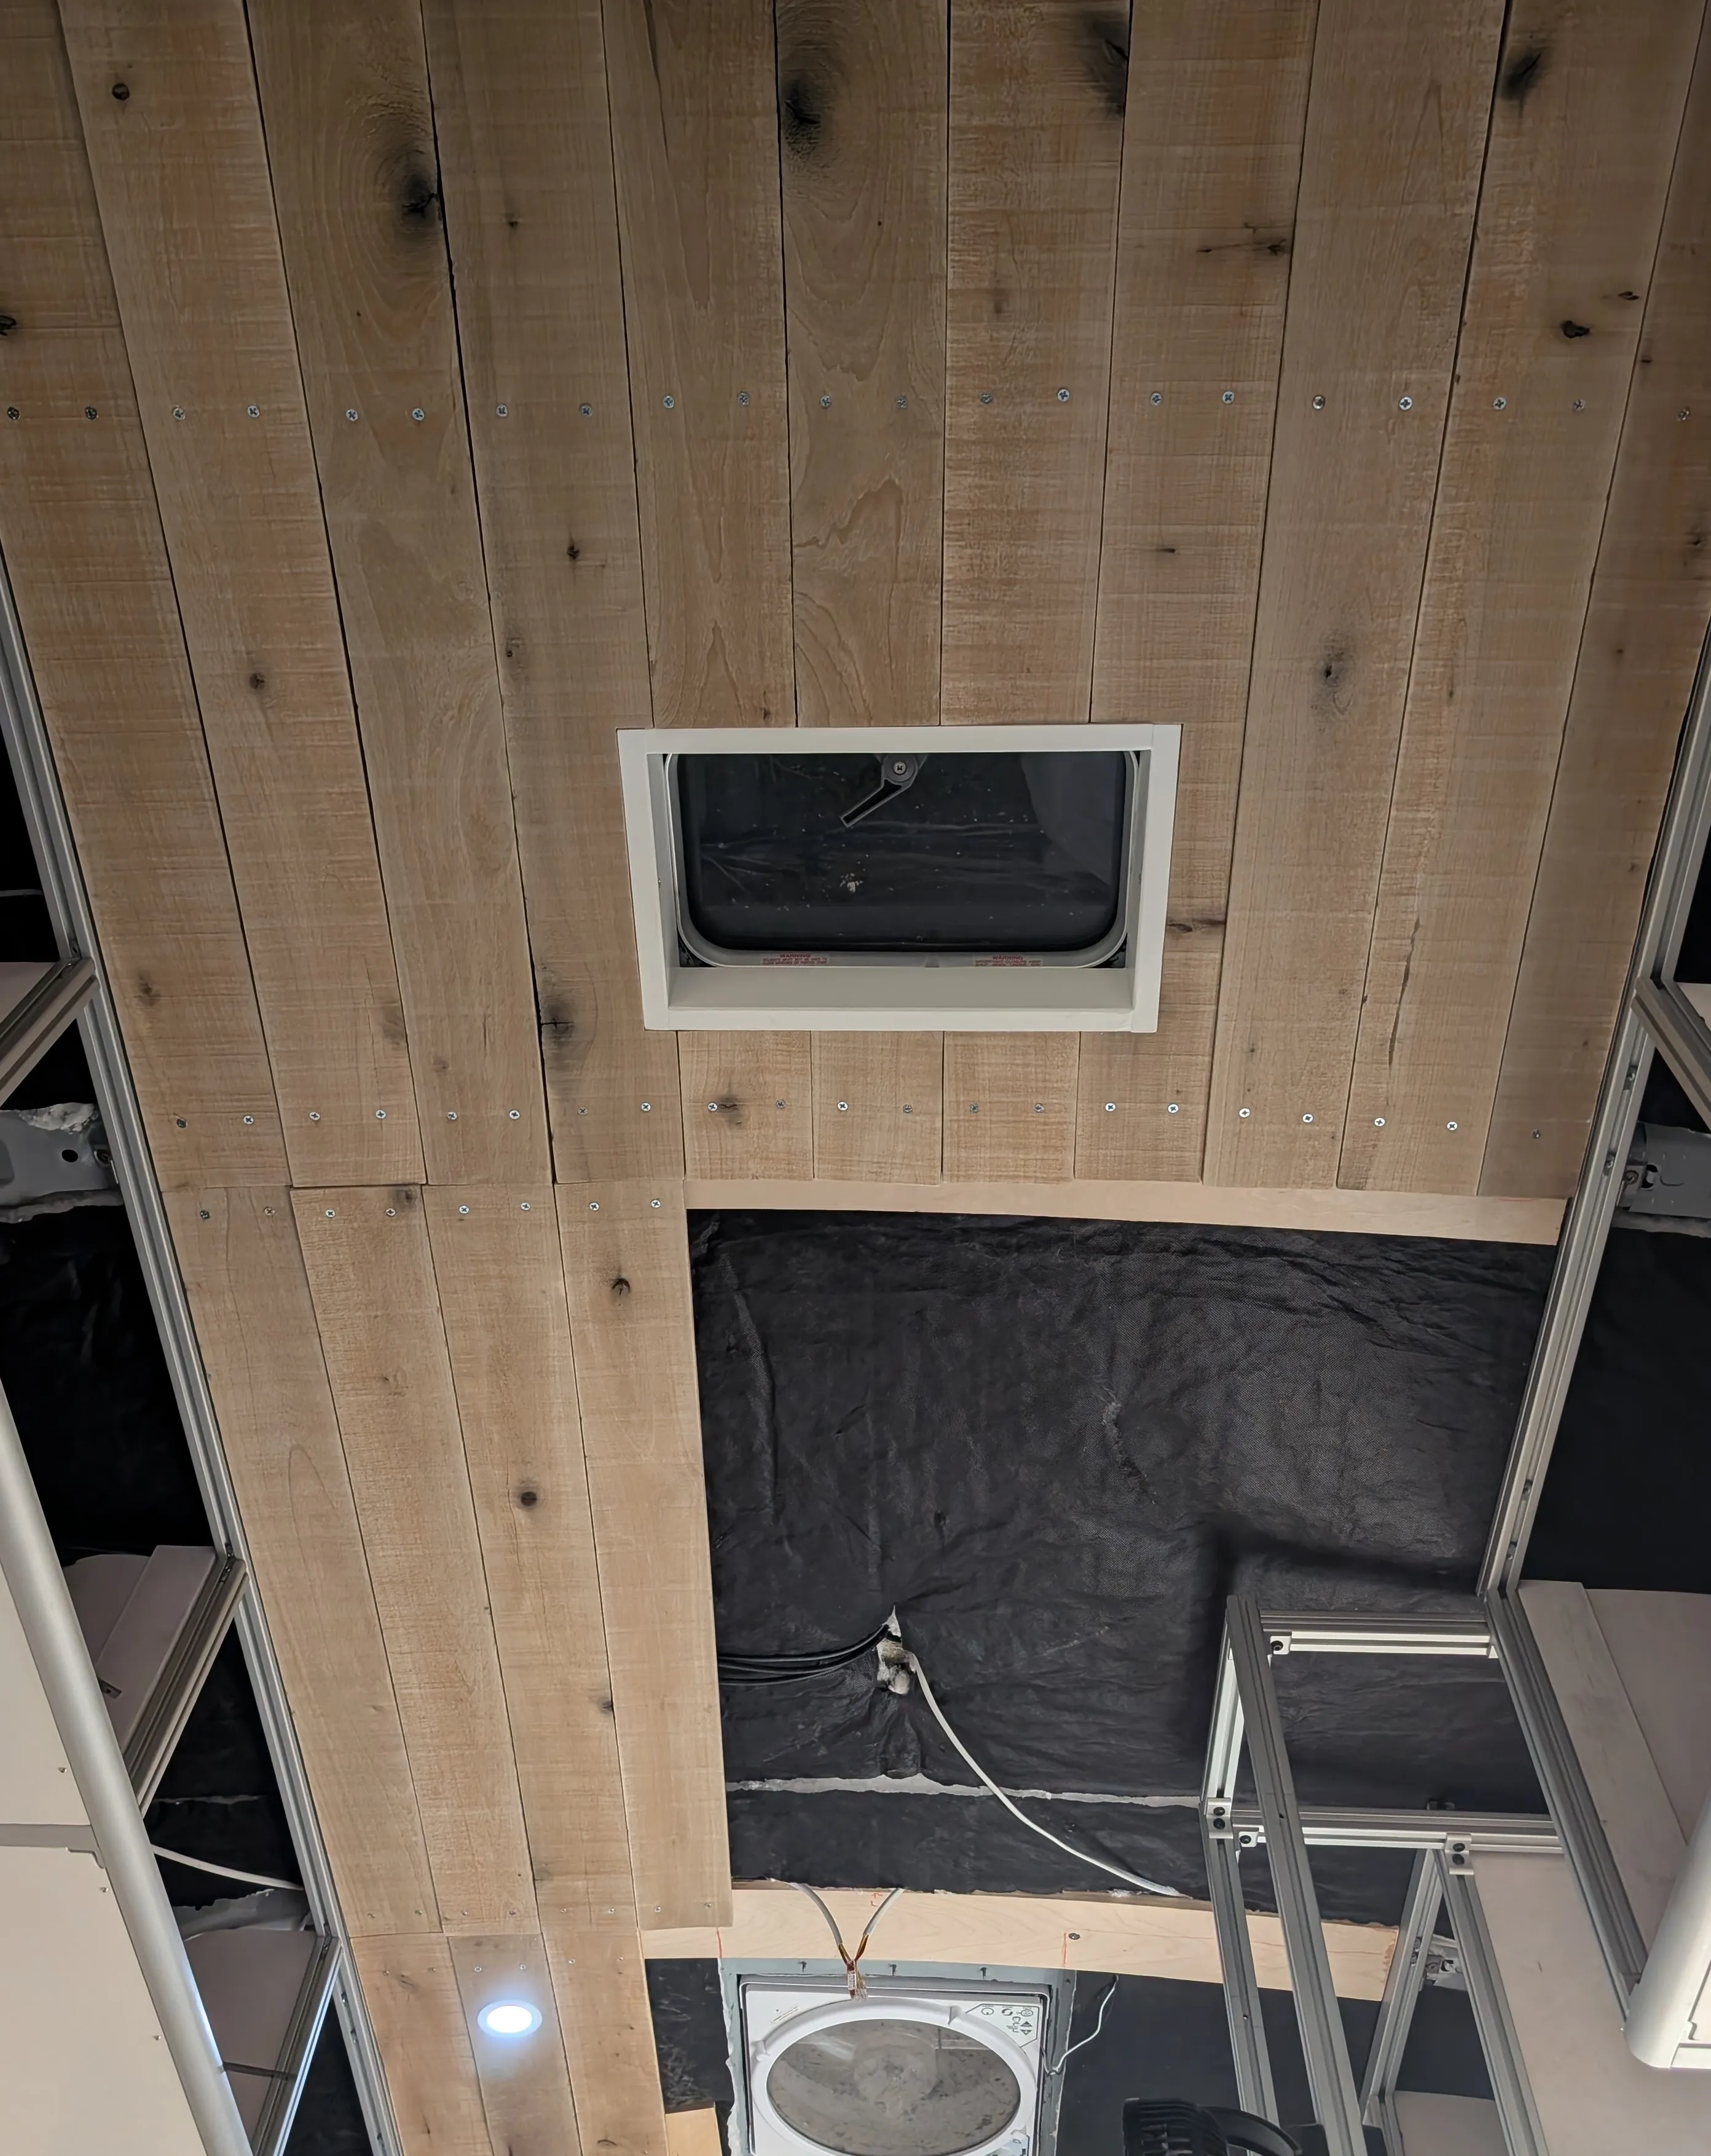
The ceiling will be made up of these weathered brown 1/2” planks. A lot of planning actually went into the placement and sizing of the planks in order to ensure that the planks span at least two furring strips. Unfortunately, this does waste a lot more wood. For a neater look, I made a frame for the skylight, which is held up with some silicone and two screws onto the ceiling planks.
July 24, 2025
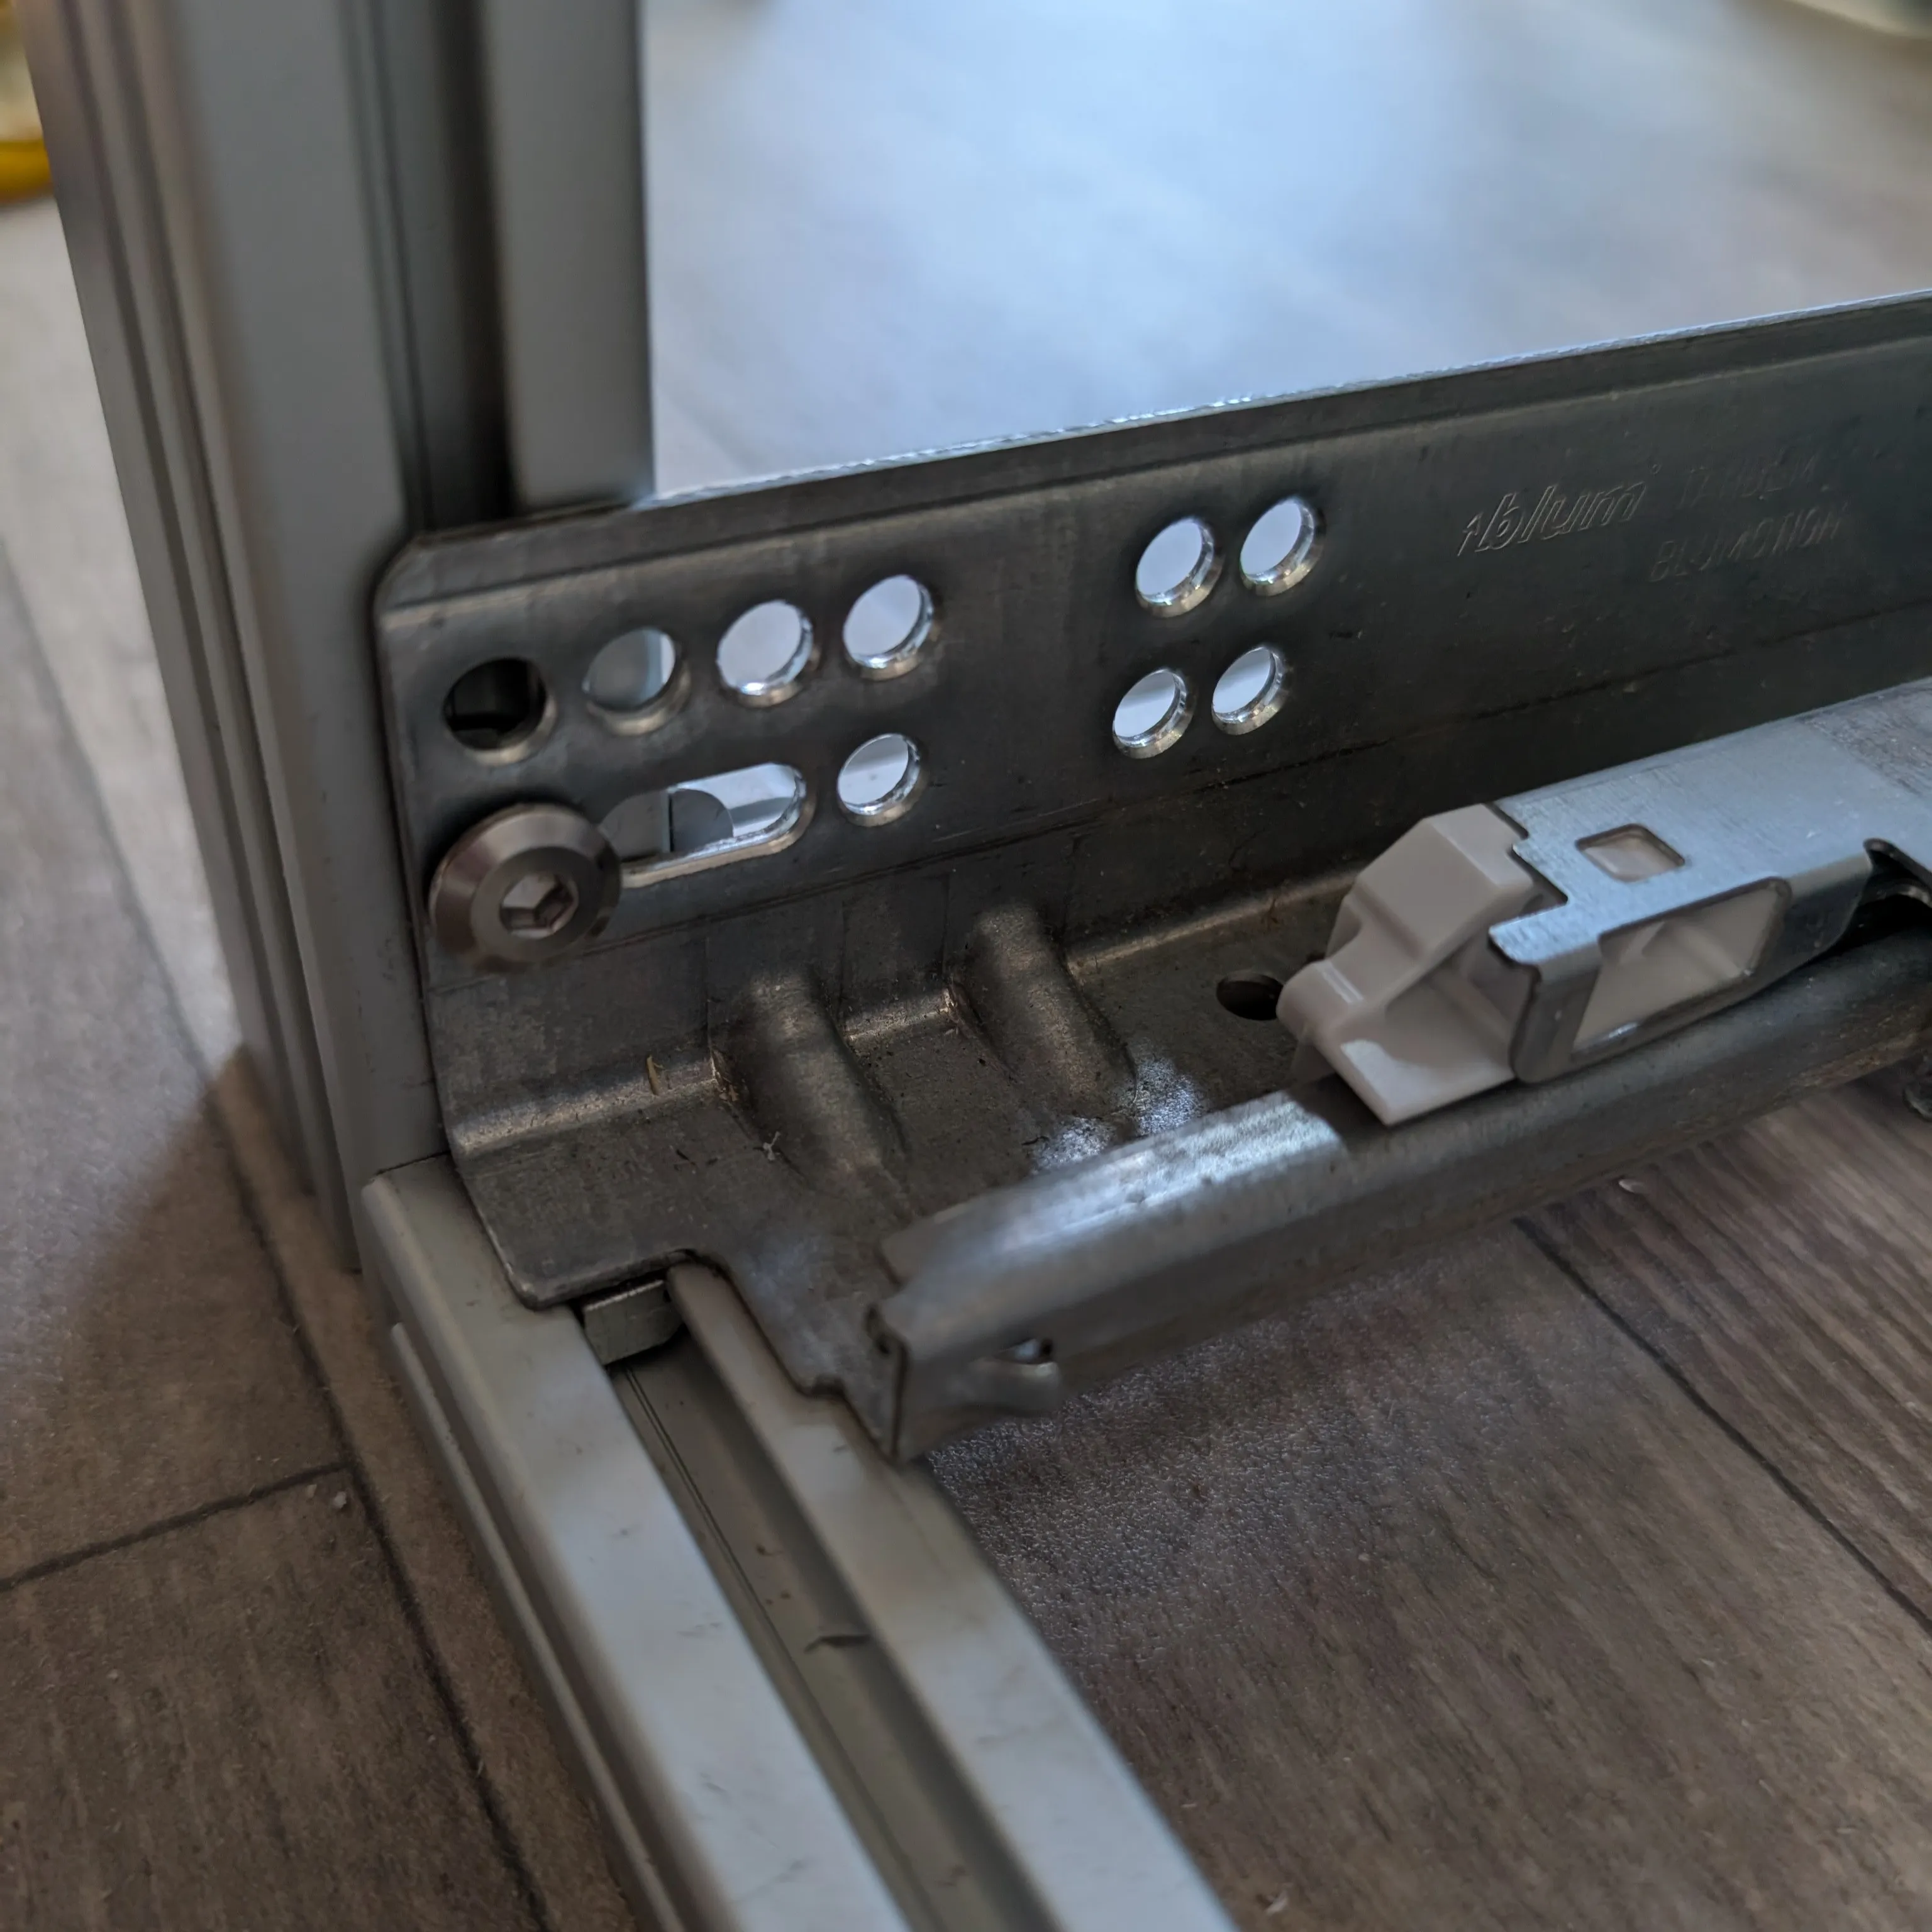
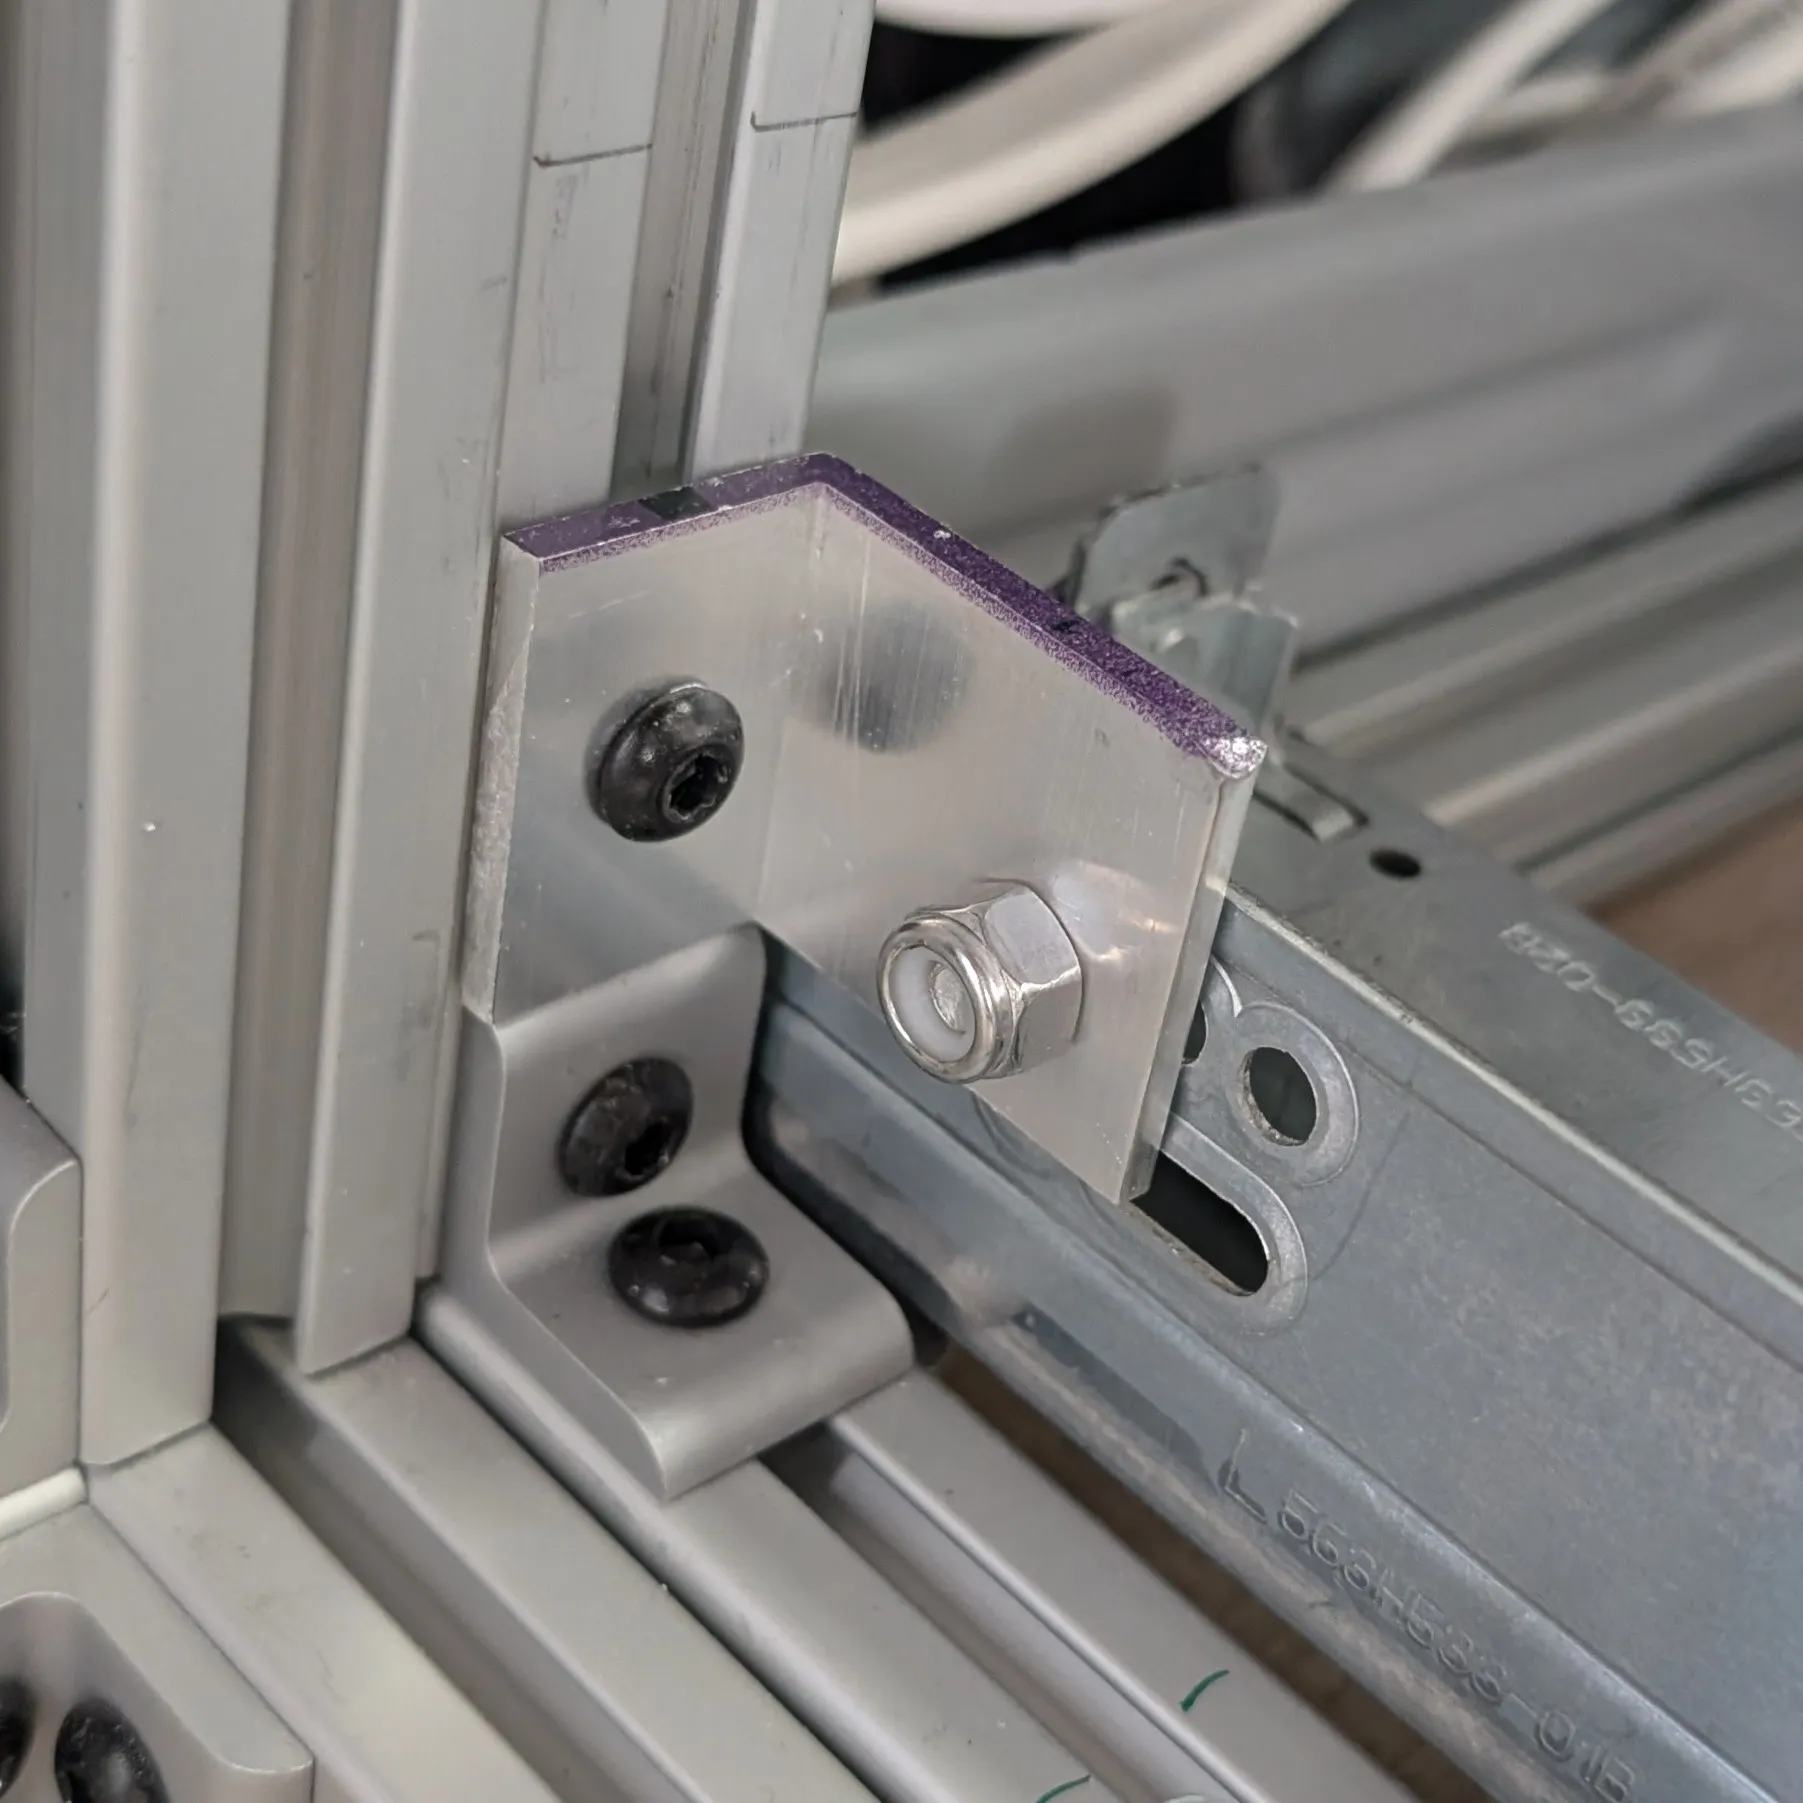
There’s not a lot of room for drawers but that’s okay because these slides are really heavy. The slides fit onto the aluminum perfectly where the frontmost hole aligns with the side of the frame at the perfect distance. For the back, I cut some custom brackets using a 1/8” thick and 1.5” x 1” angle and drilled 5/8” holes onto each side. I did have to enlarge the holes on the slides to 1/4”.
I’ve been working all over the place to get the finishing touches on Kep. These are the bottoms of the overhead cabinets made of 1/4” plywood. I found these mini brackets and inserts that take M3 screws which allows the bottoms to be inset.
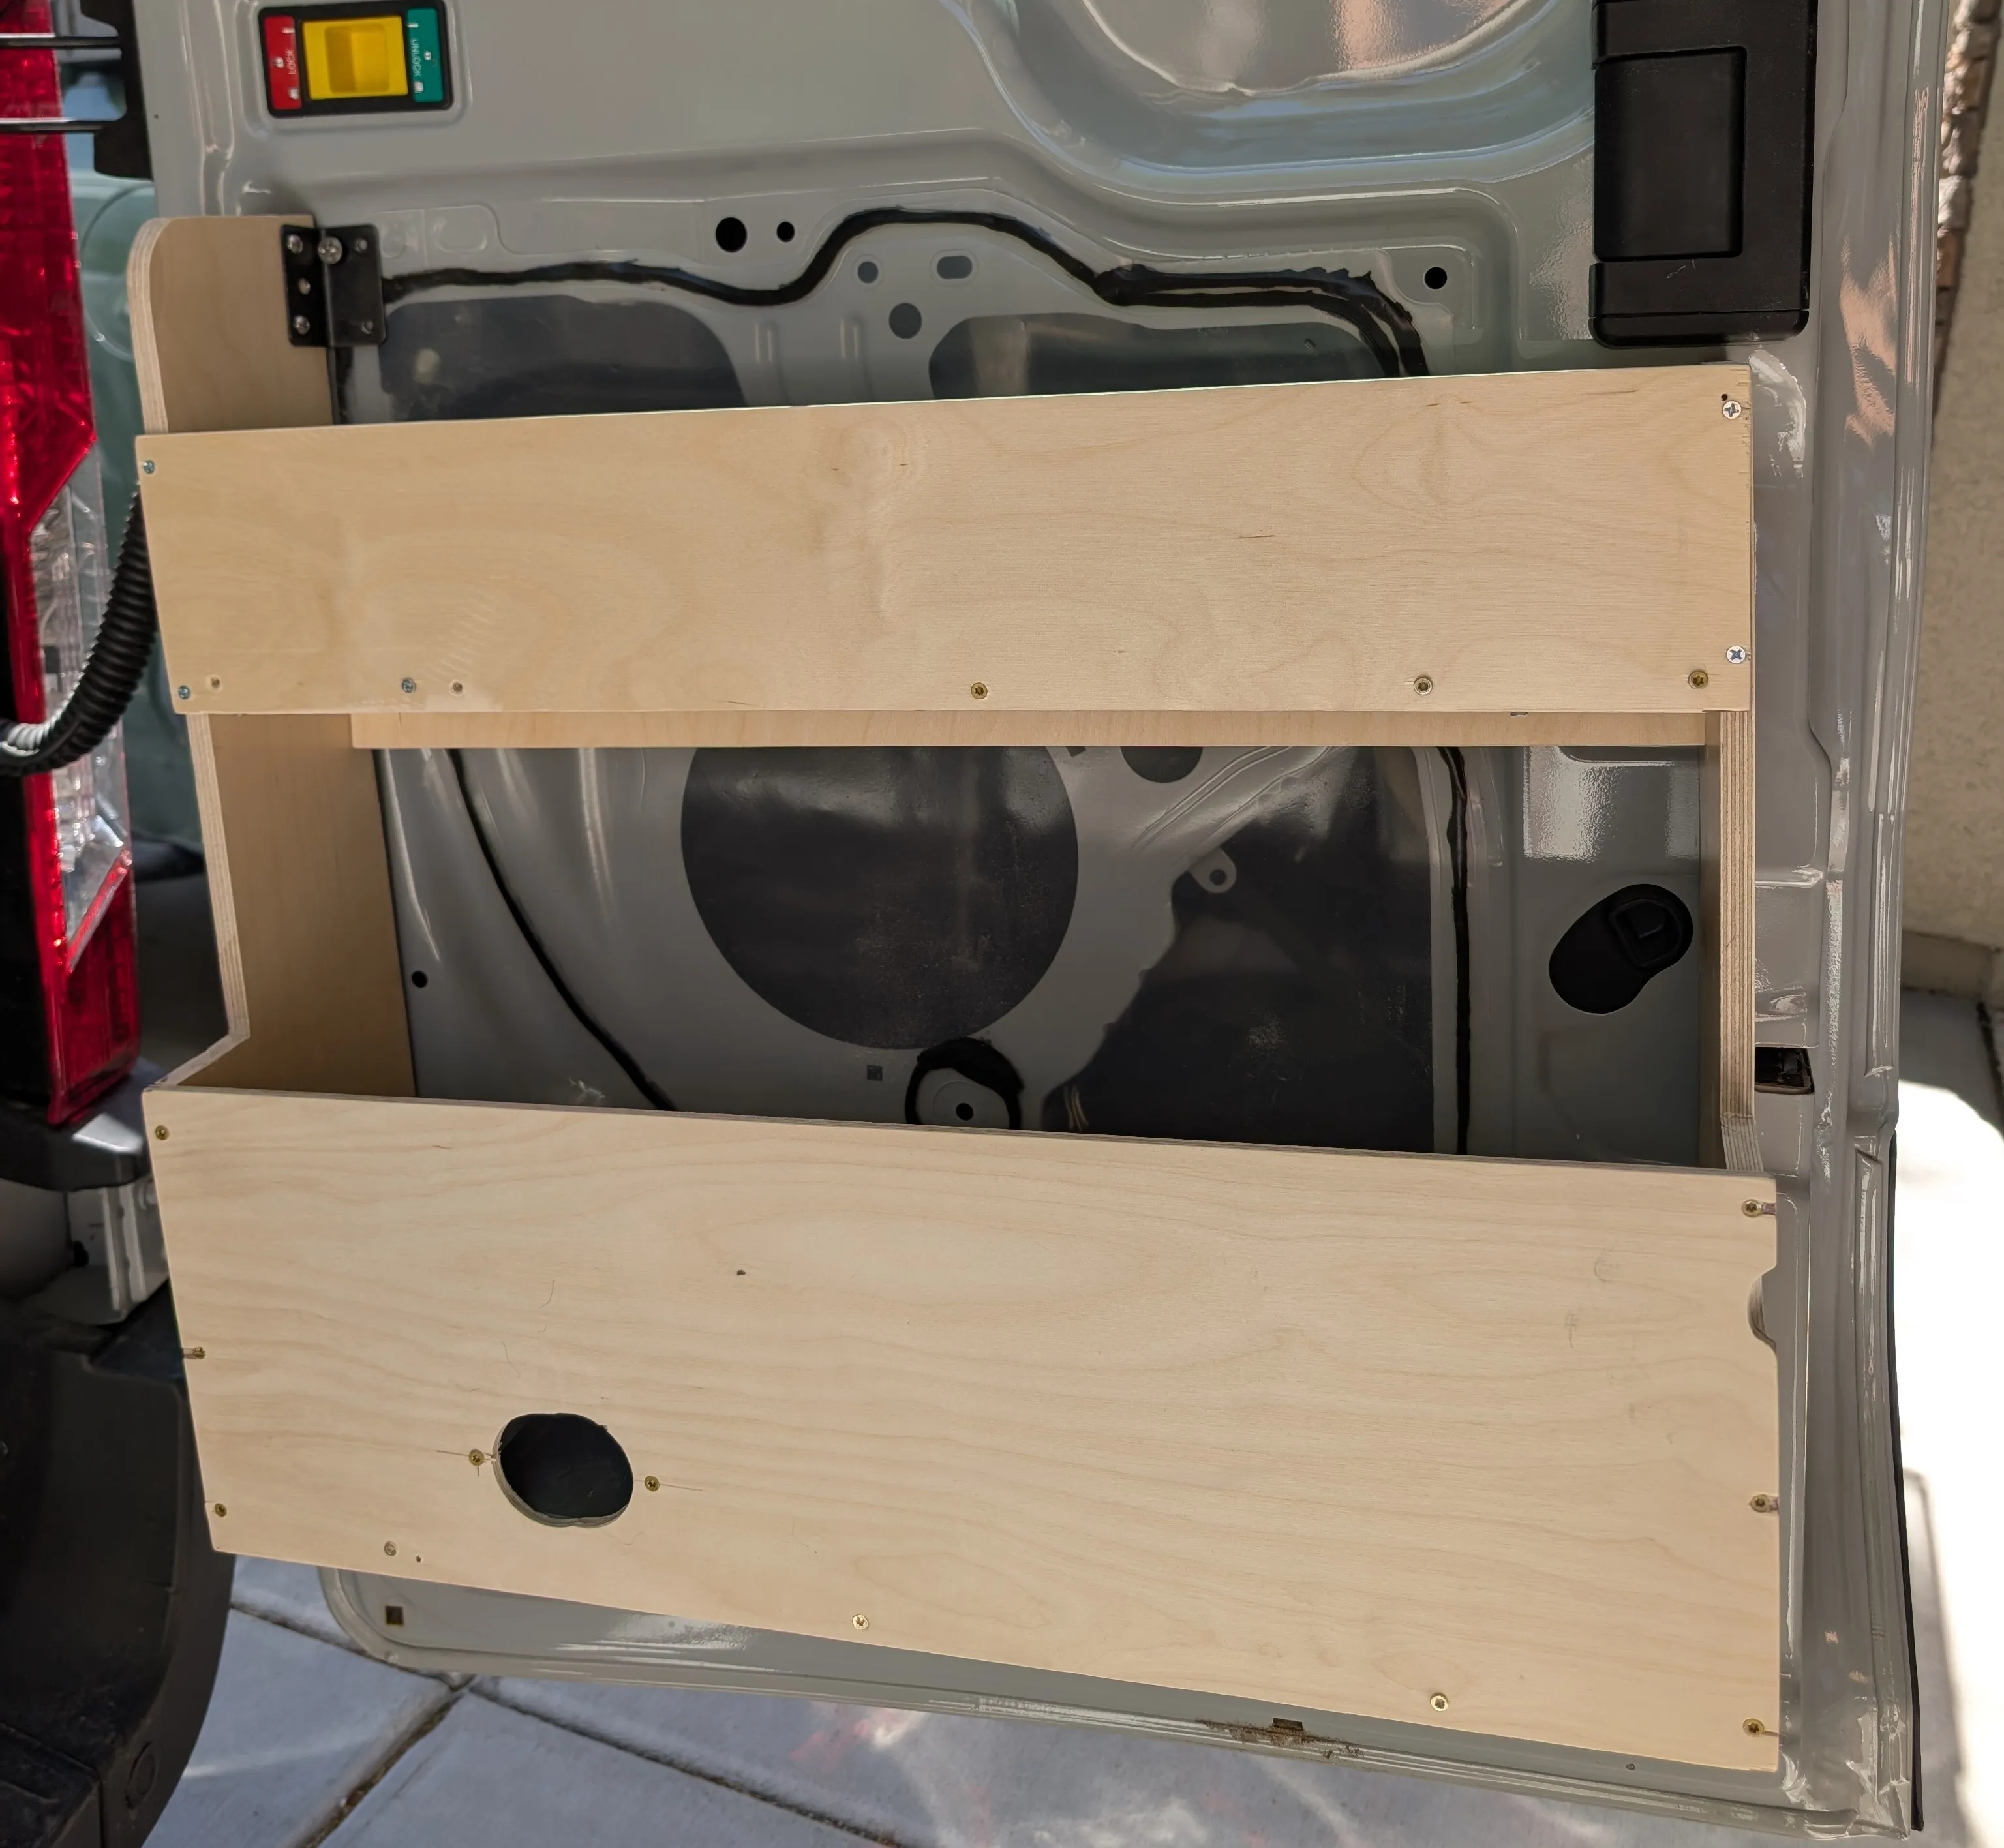
The back doors are well utilized with these pockets that were specially crafted to fit the contour of the door. There are several pre-existing holes for rivnuts to attach brackets for holding up the pocket.
July 22, 2025
Here’s a little break from building and some info on how to wire a dash cam in a Ford Transit. This was mostly so I could run a cable discreetly to the back door for a rear facing camera as well before covering up the walls. However, I wasn’t able to feed the cable down a long channel and into the conduit that connects to the door. The cable may just be left exposed for now.
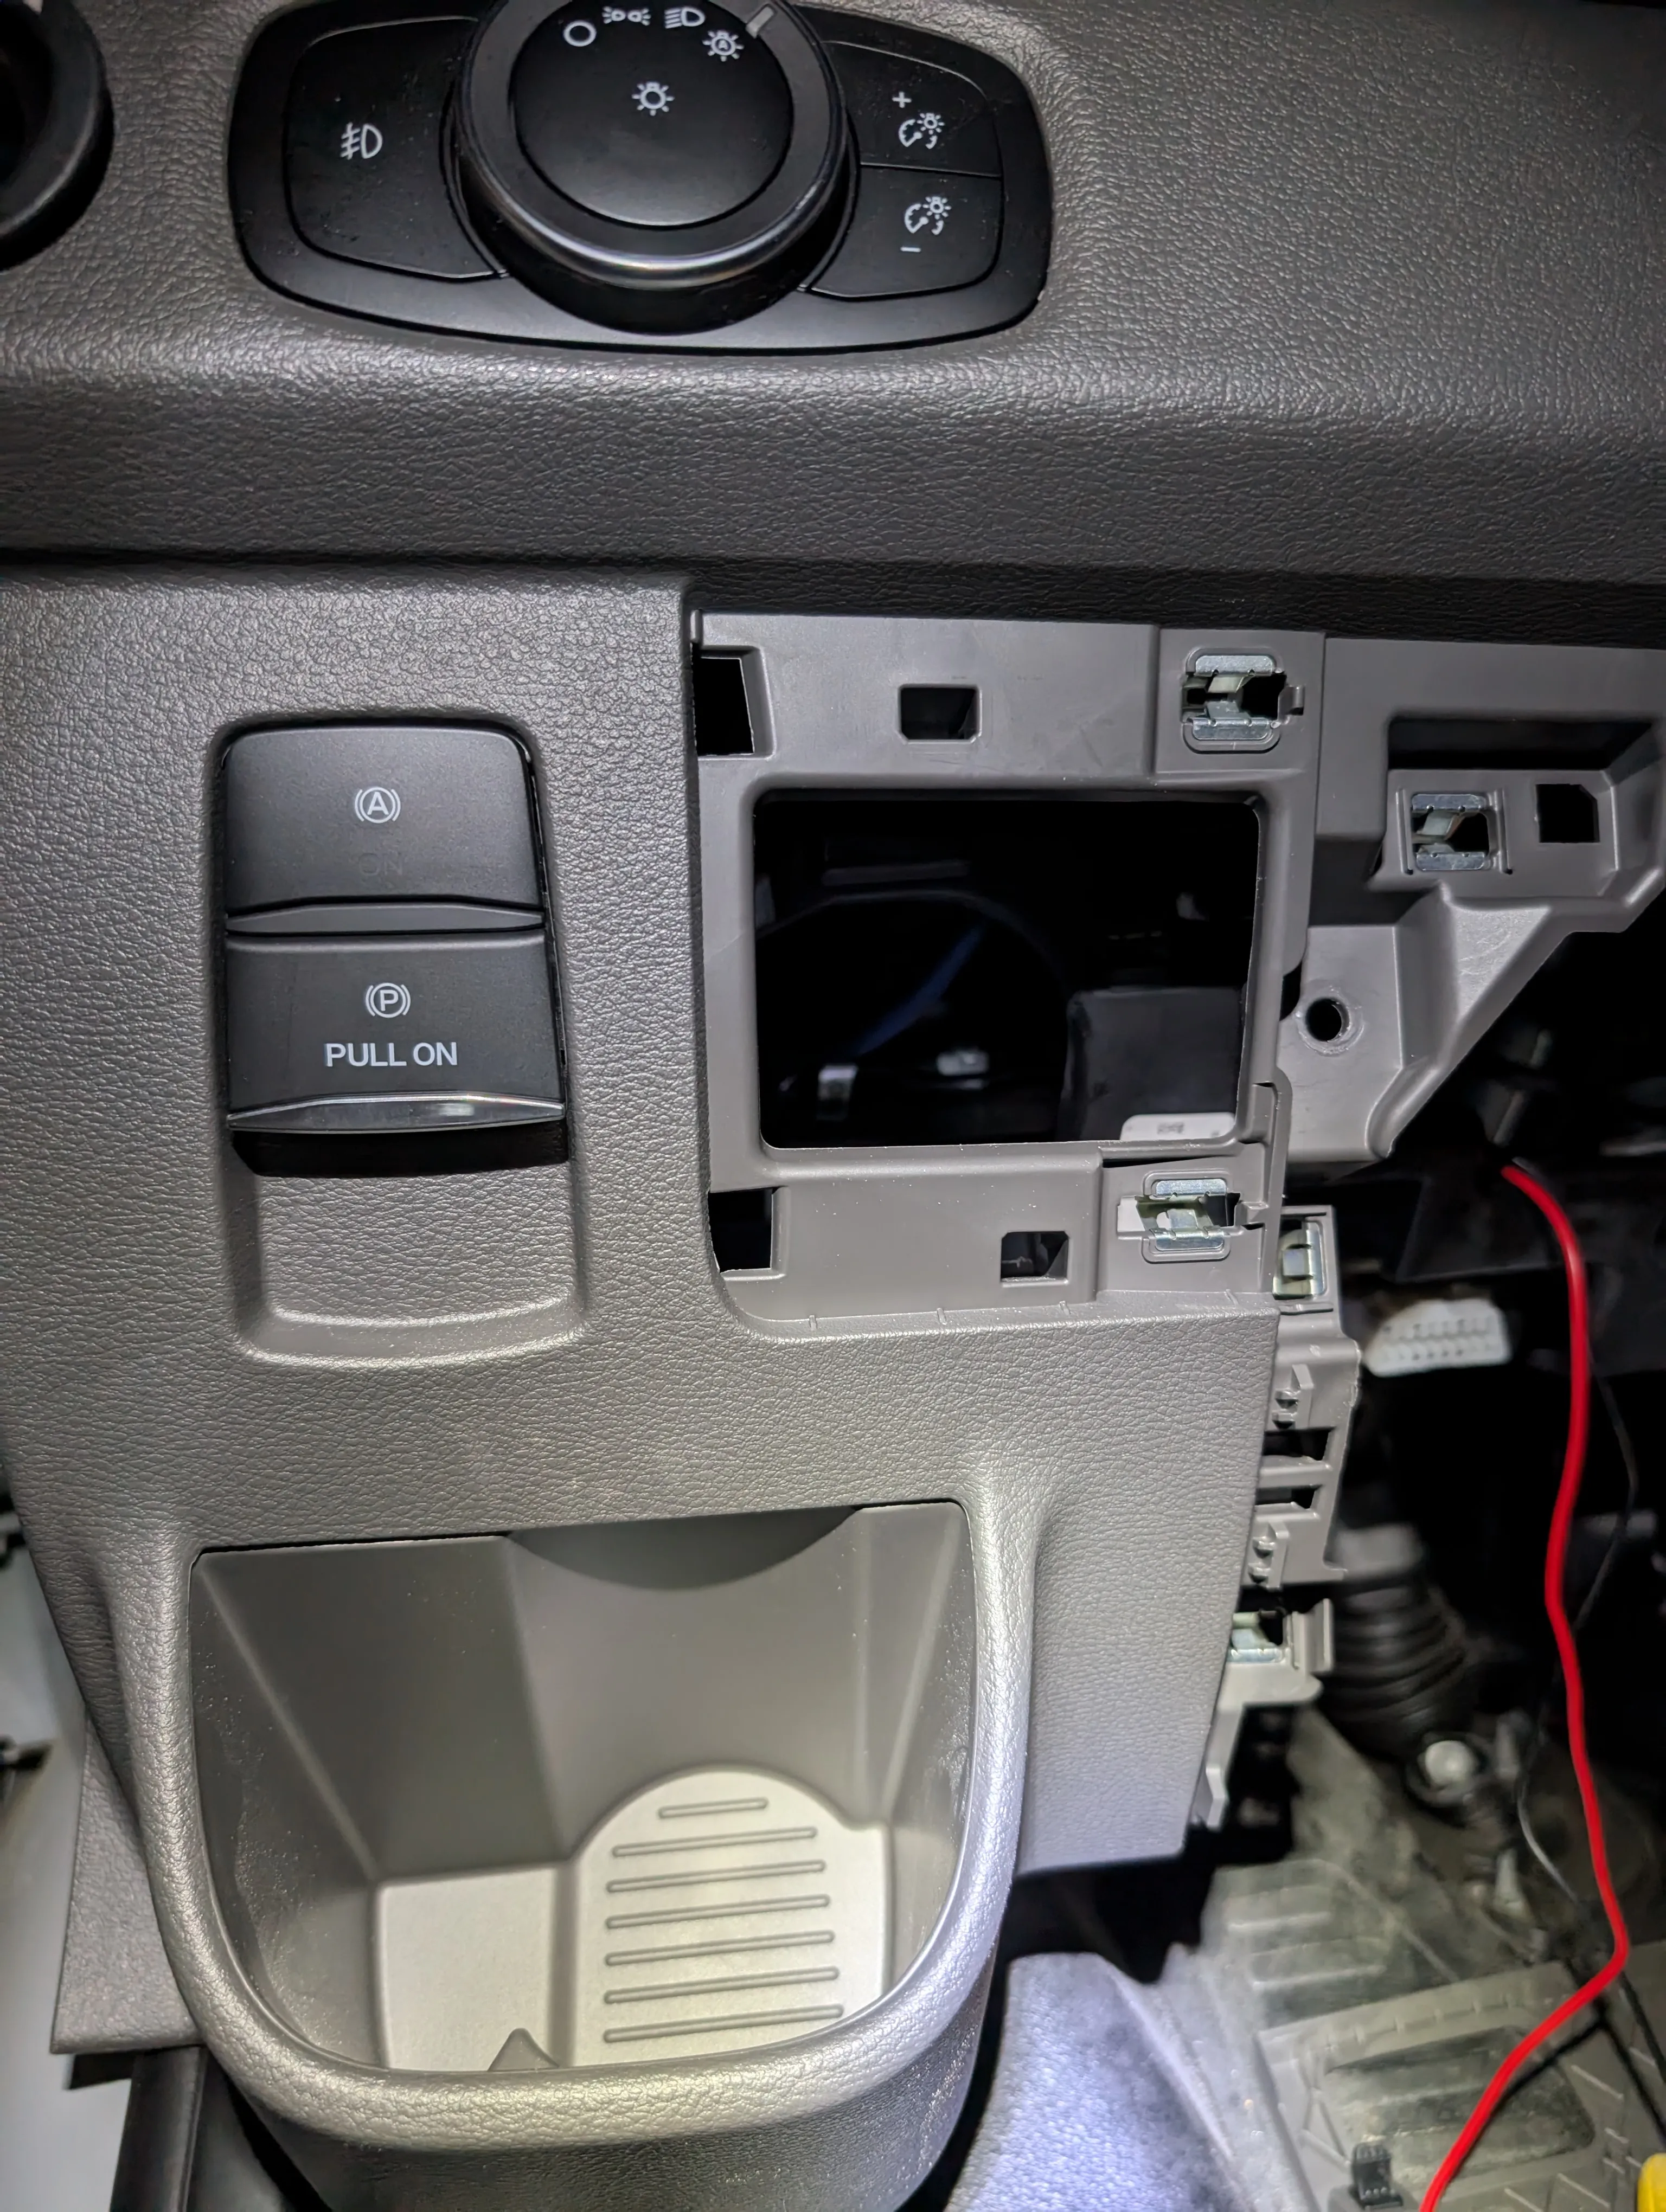
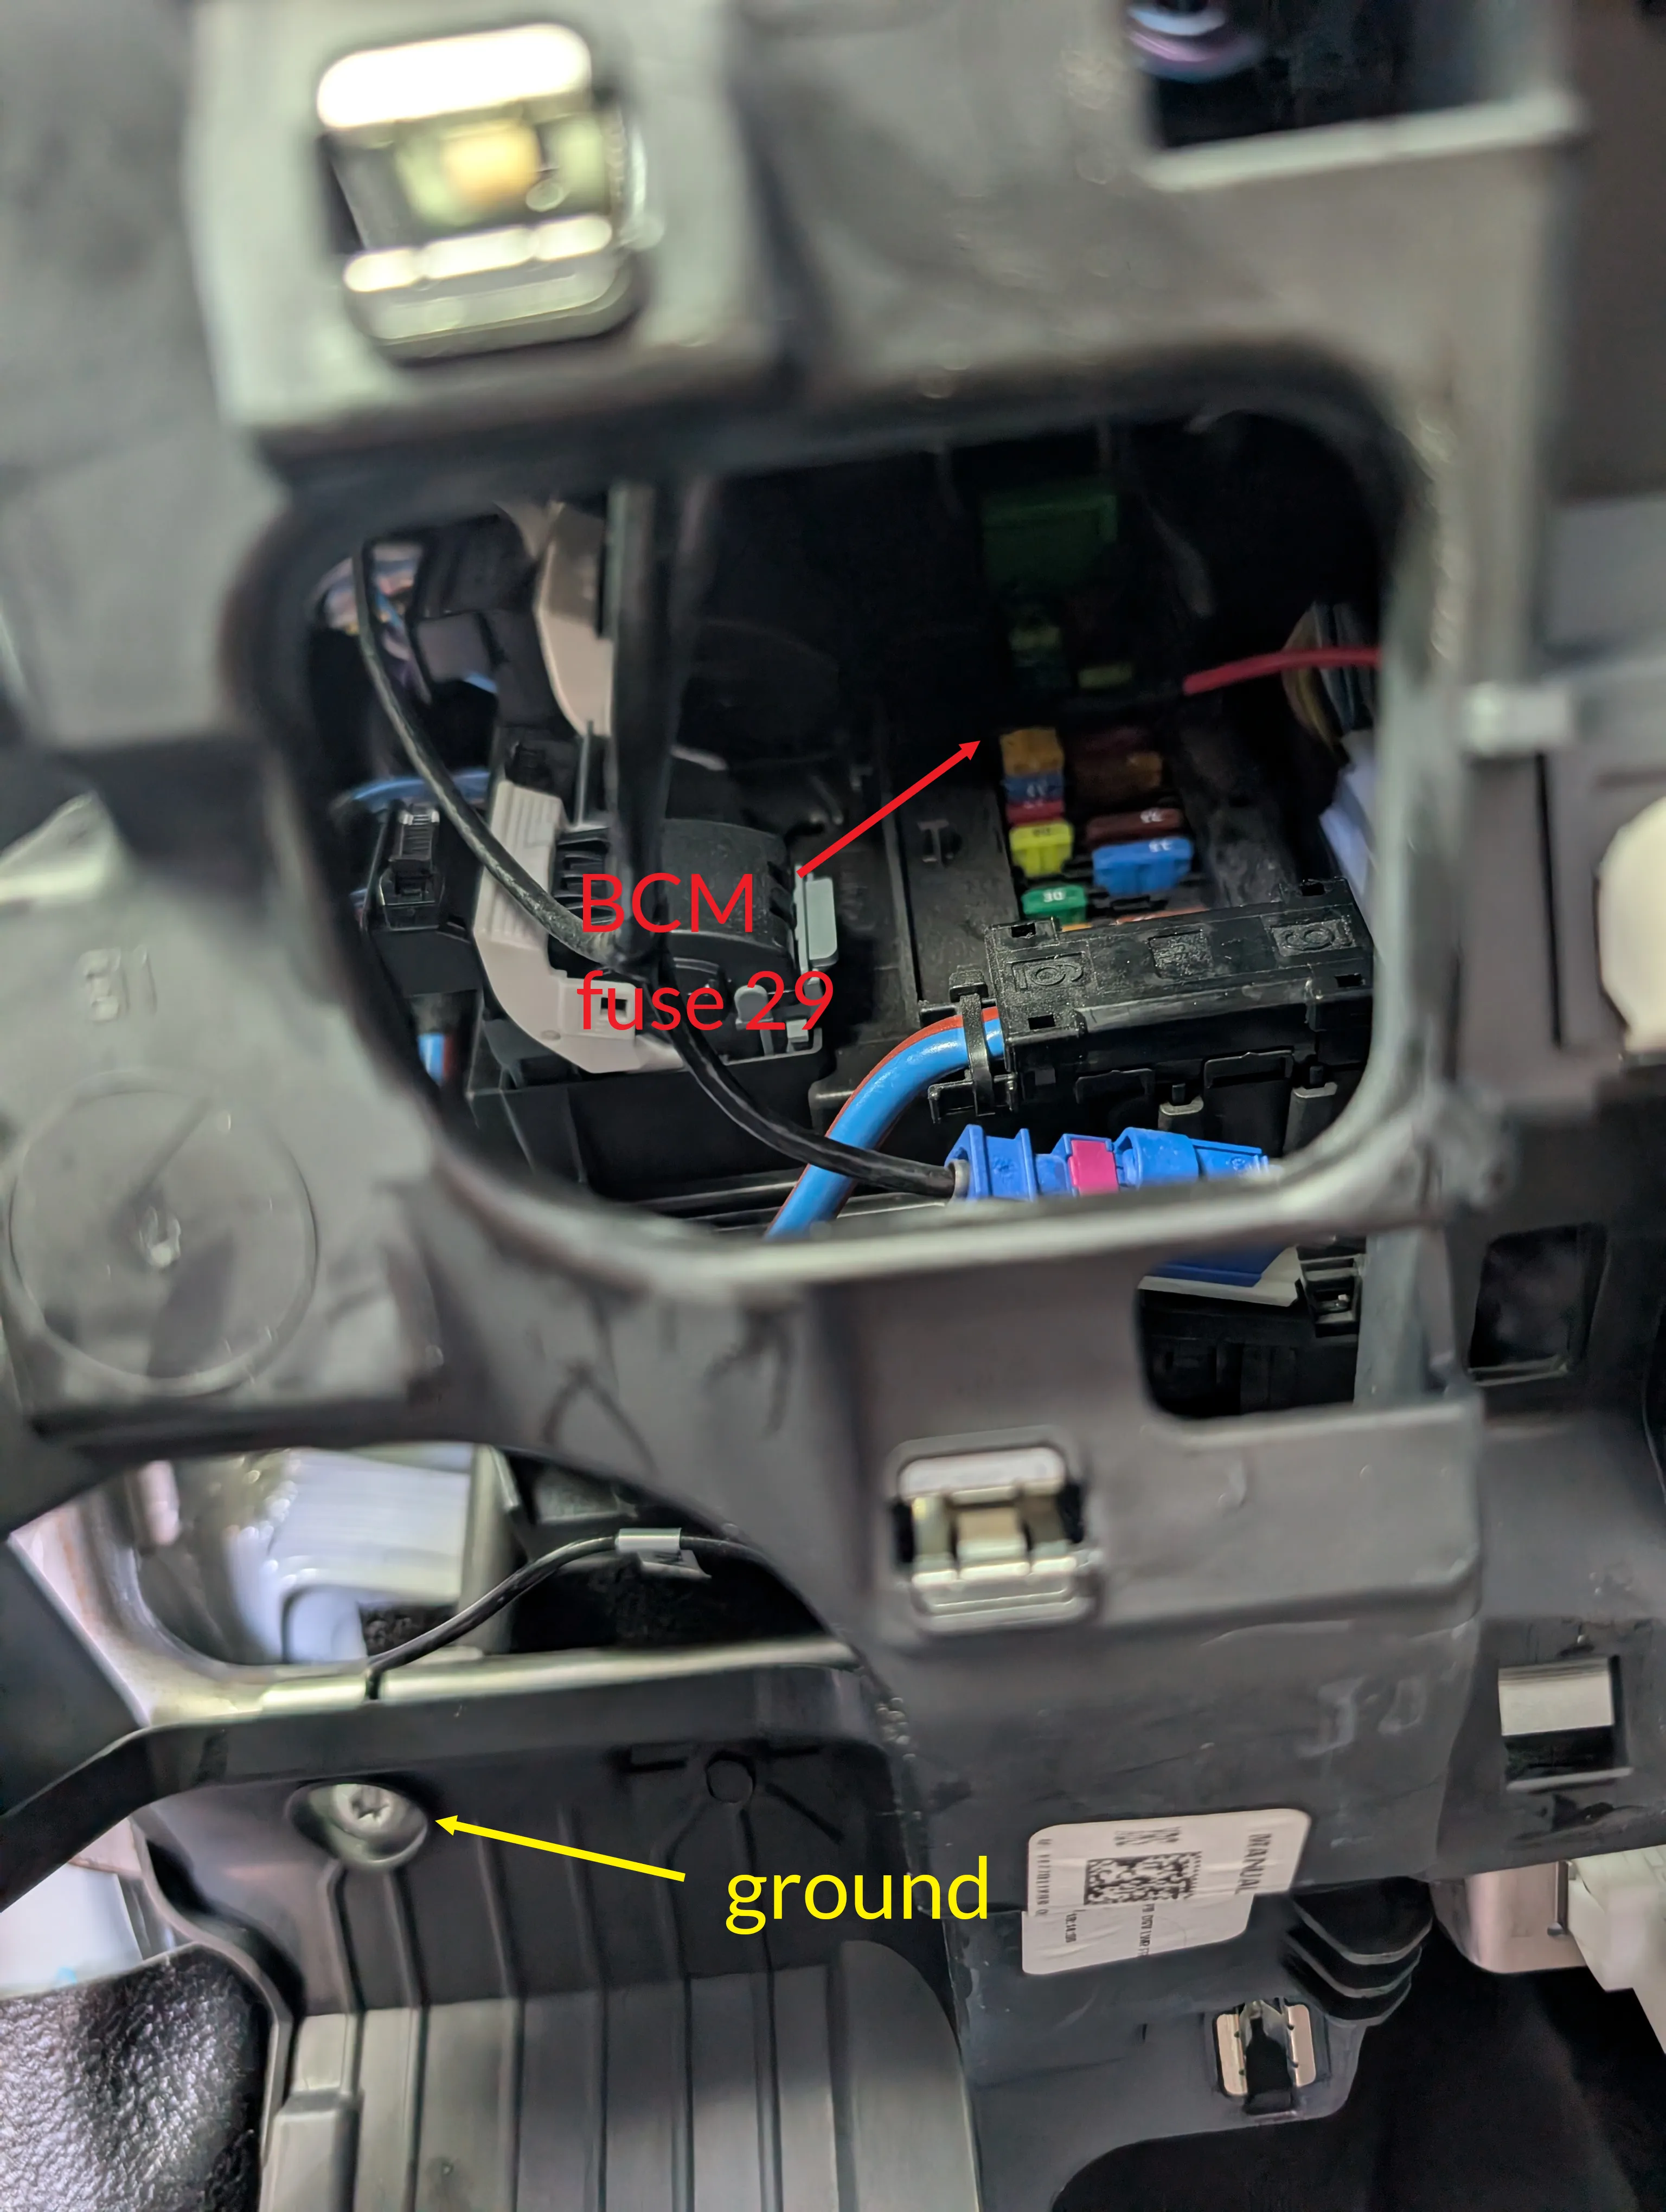
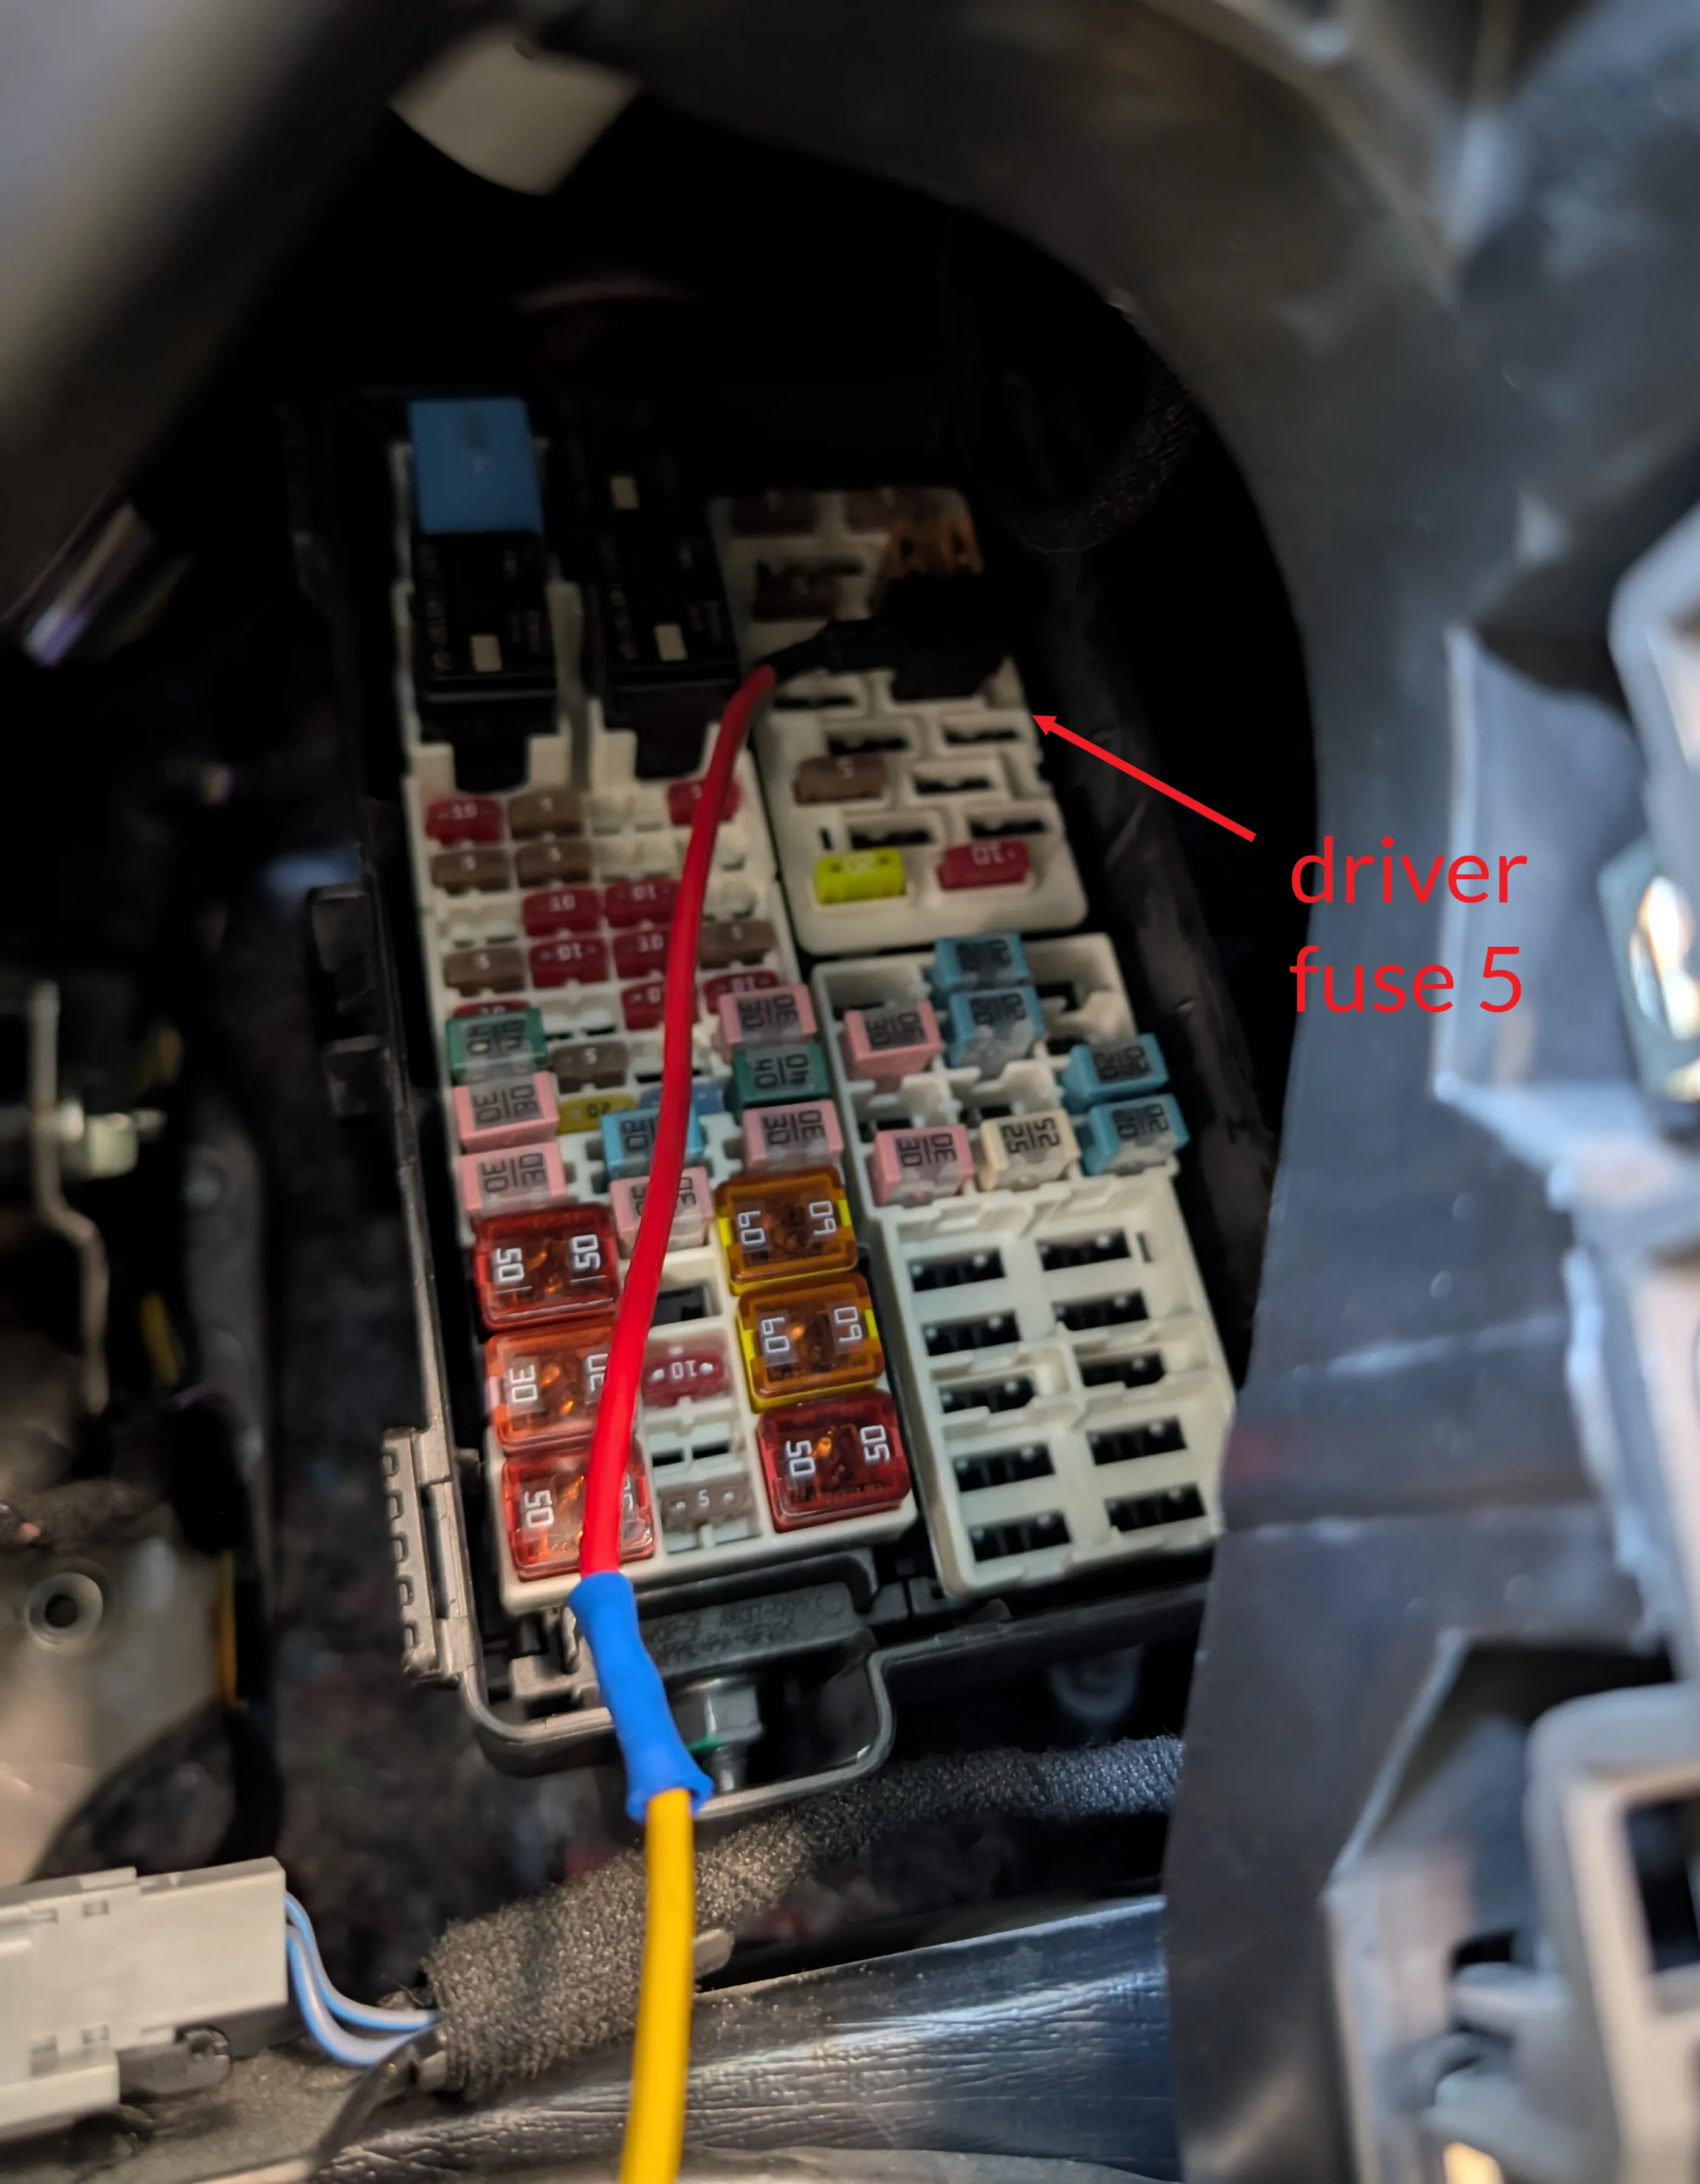
Ford Transits have 3 fuse boxes up front but not very conveniently placed. The driver compartment fuse box is located to the right of the steering wheel. Most of these fuses are only powered when the ignition is on and there are a couple different types of fuses so be sure to test them before crimping the wires to the dash cam. Fuse 5, a MINI fuse, is unused and a good option for the accessory connection. For the constant power connection, the BCM fuse box has several unused ports and most of these provide a constant 12V. Fuse 29 is a good option and is a MICRO2 fuse.
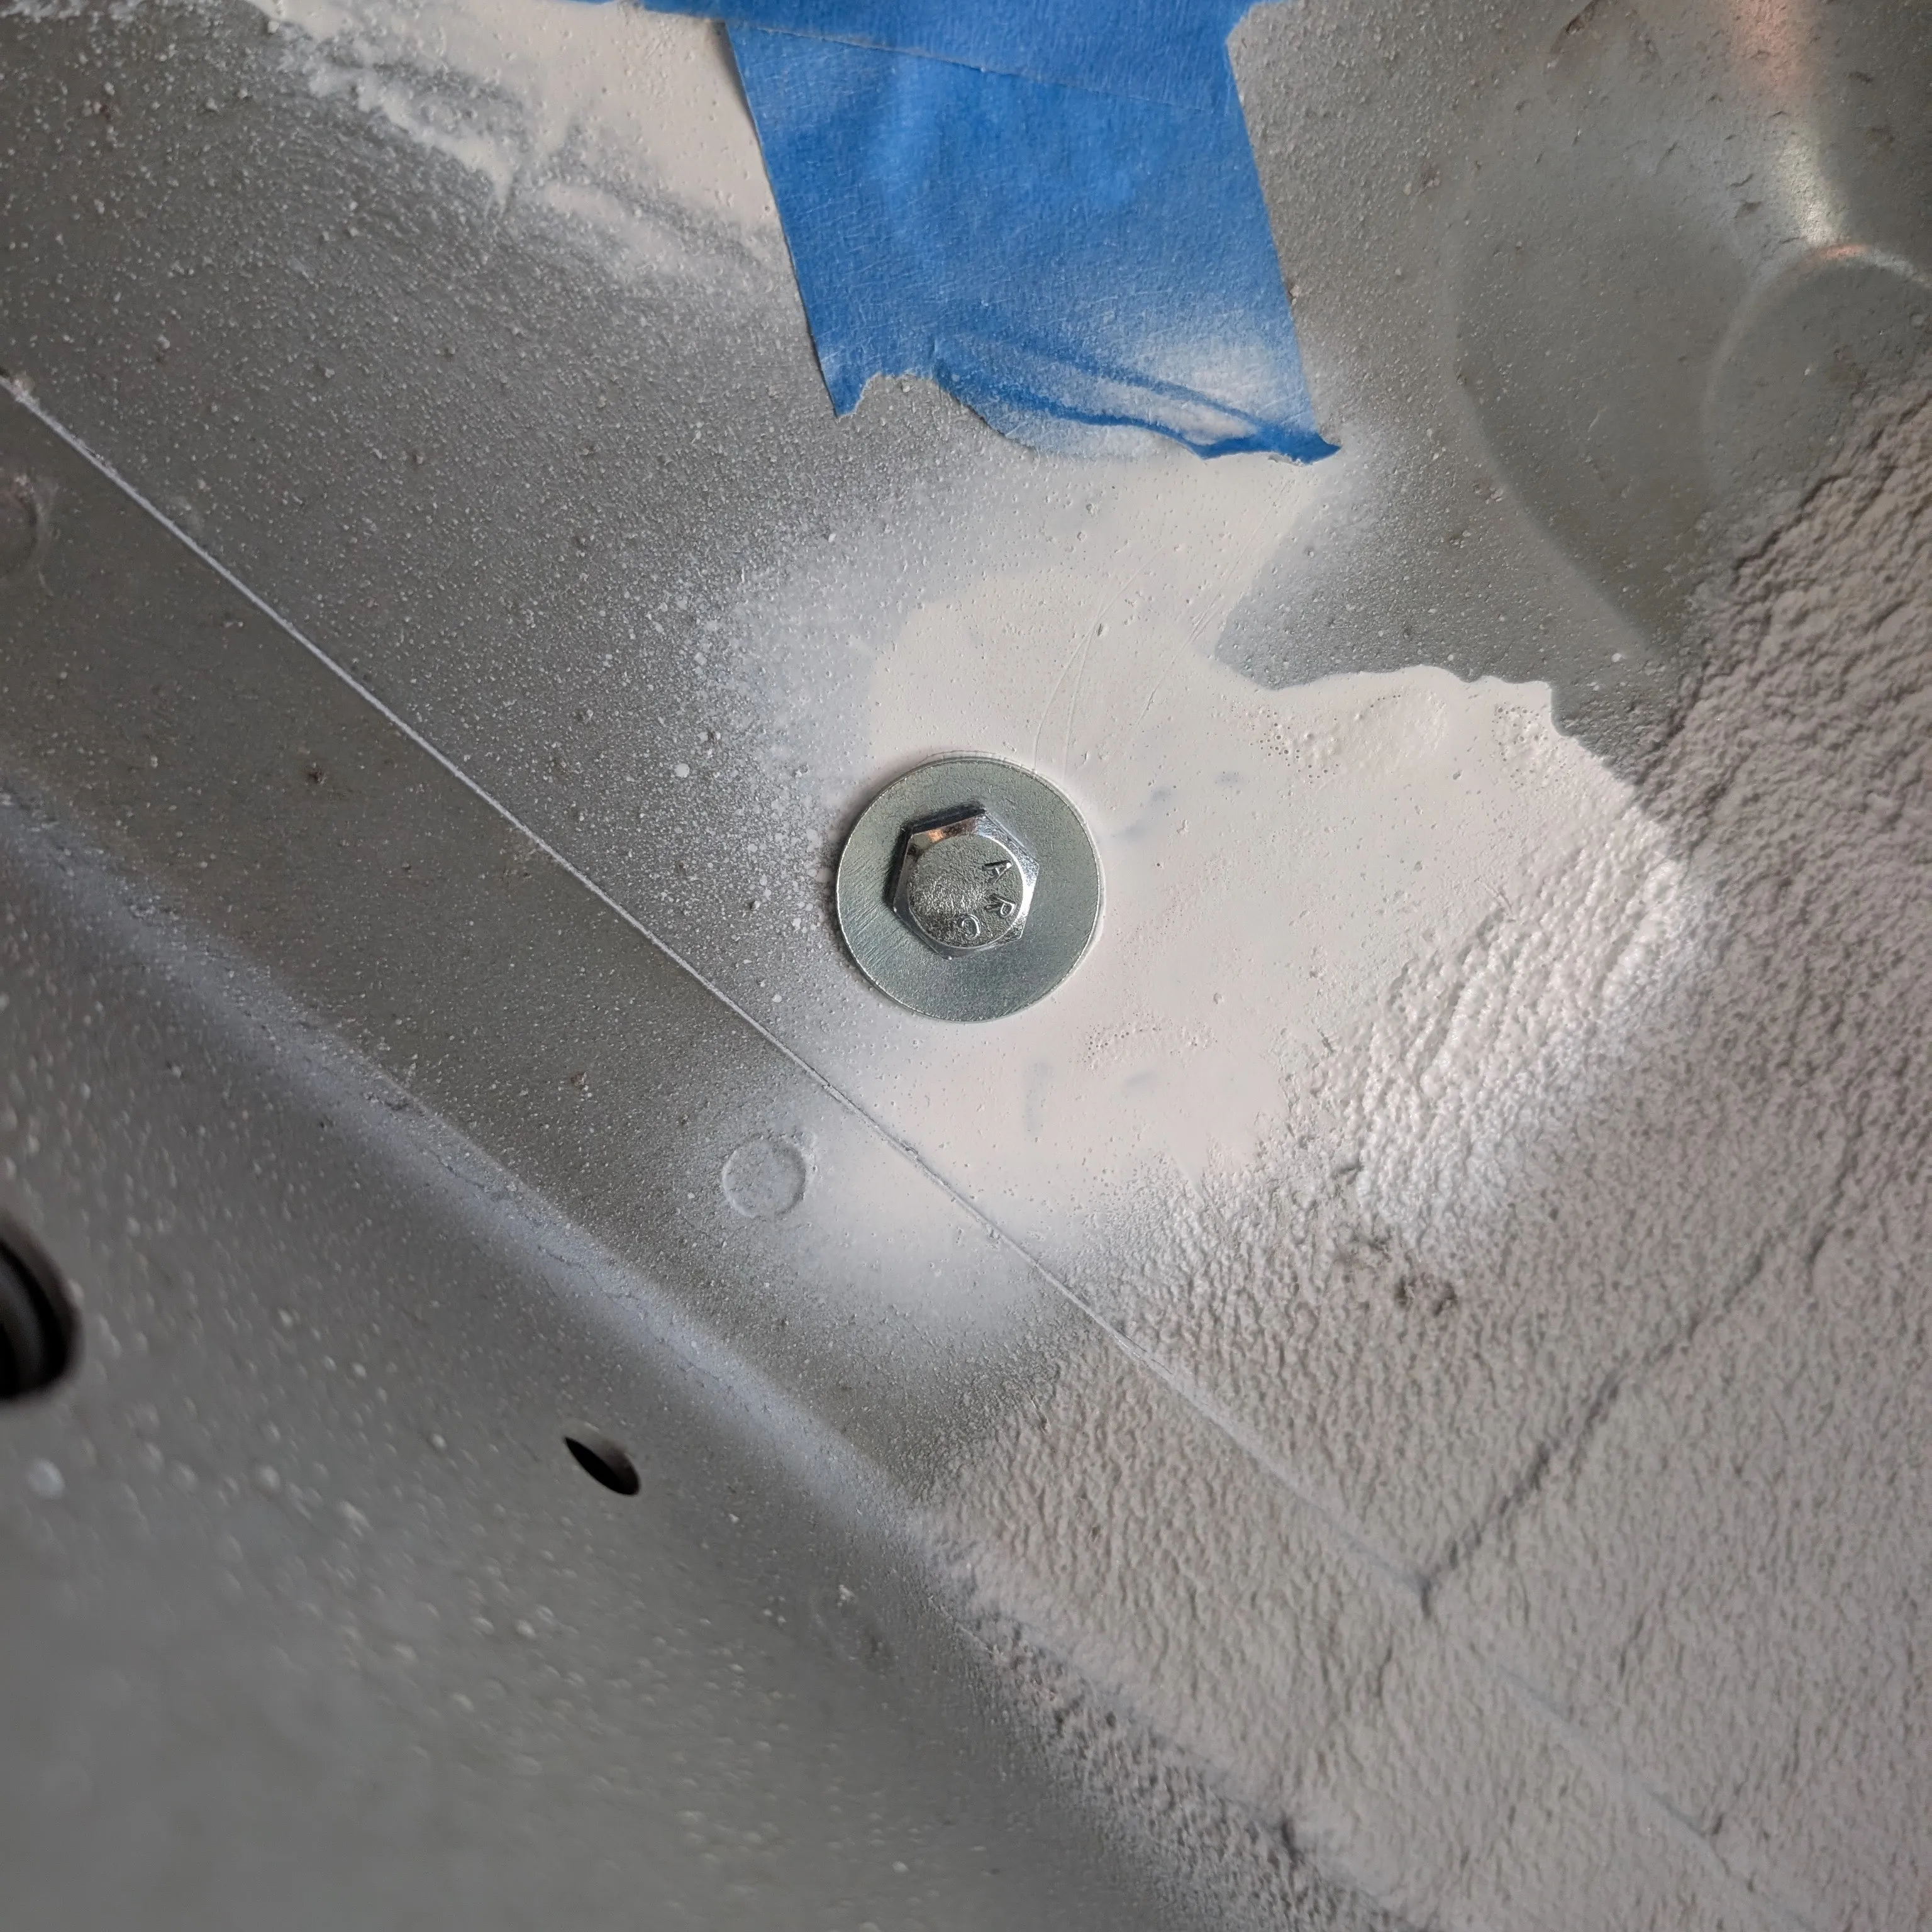
The toughest part was finding a good ground connection. I ended up having to remove the whole left panel to access this nice bolt.
July 20, 2025
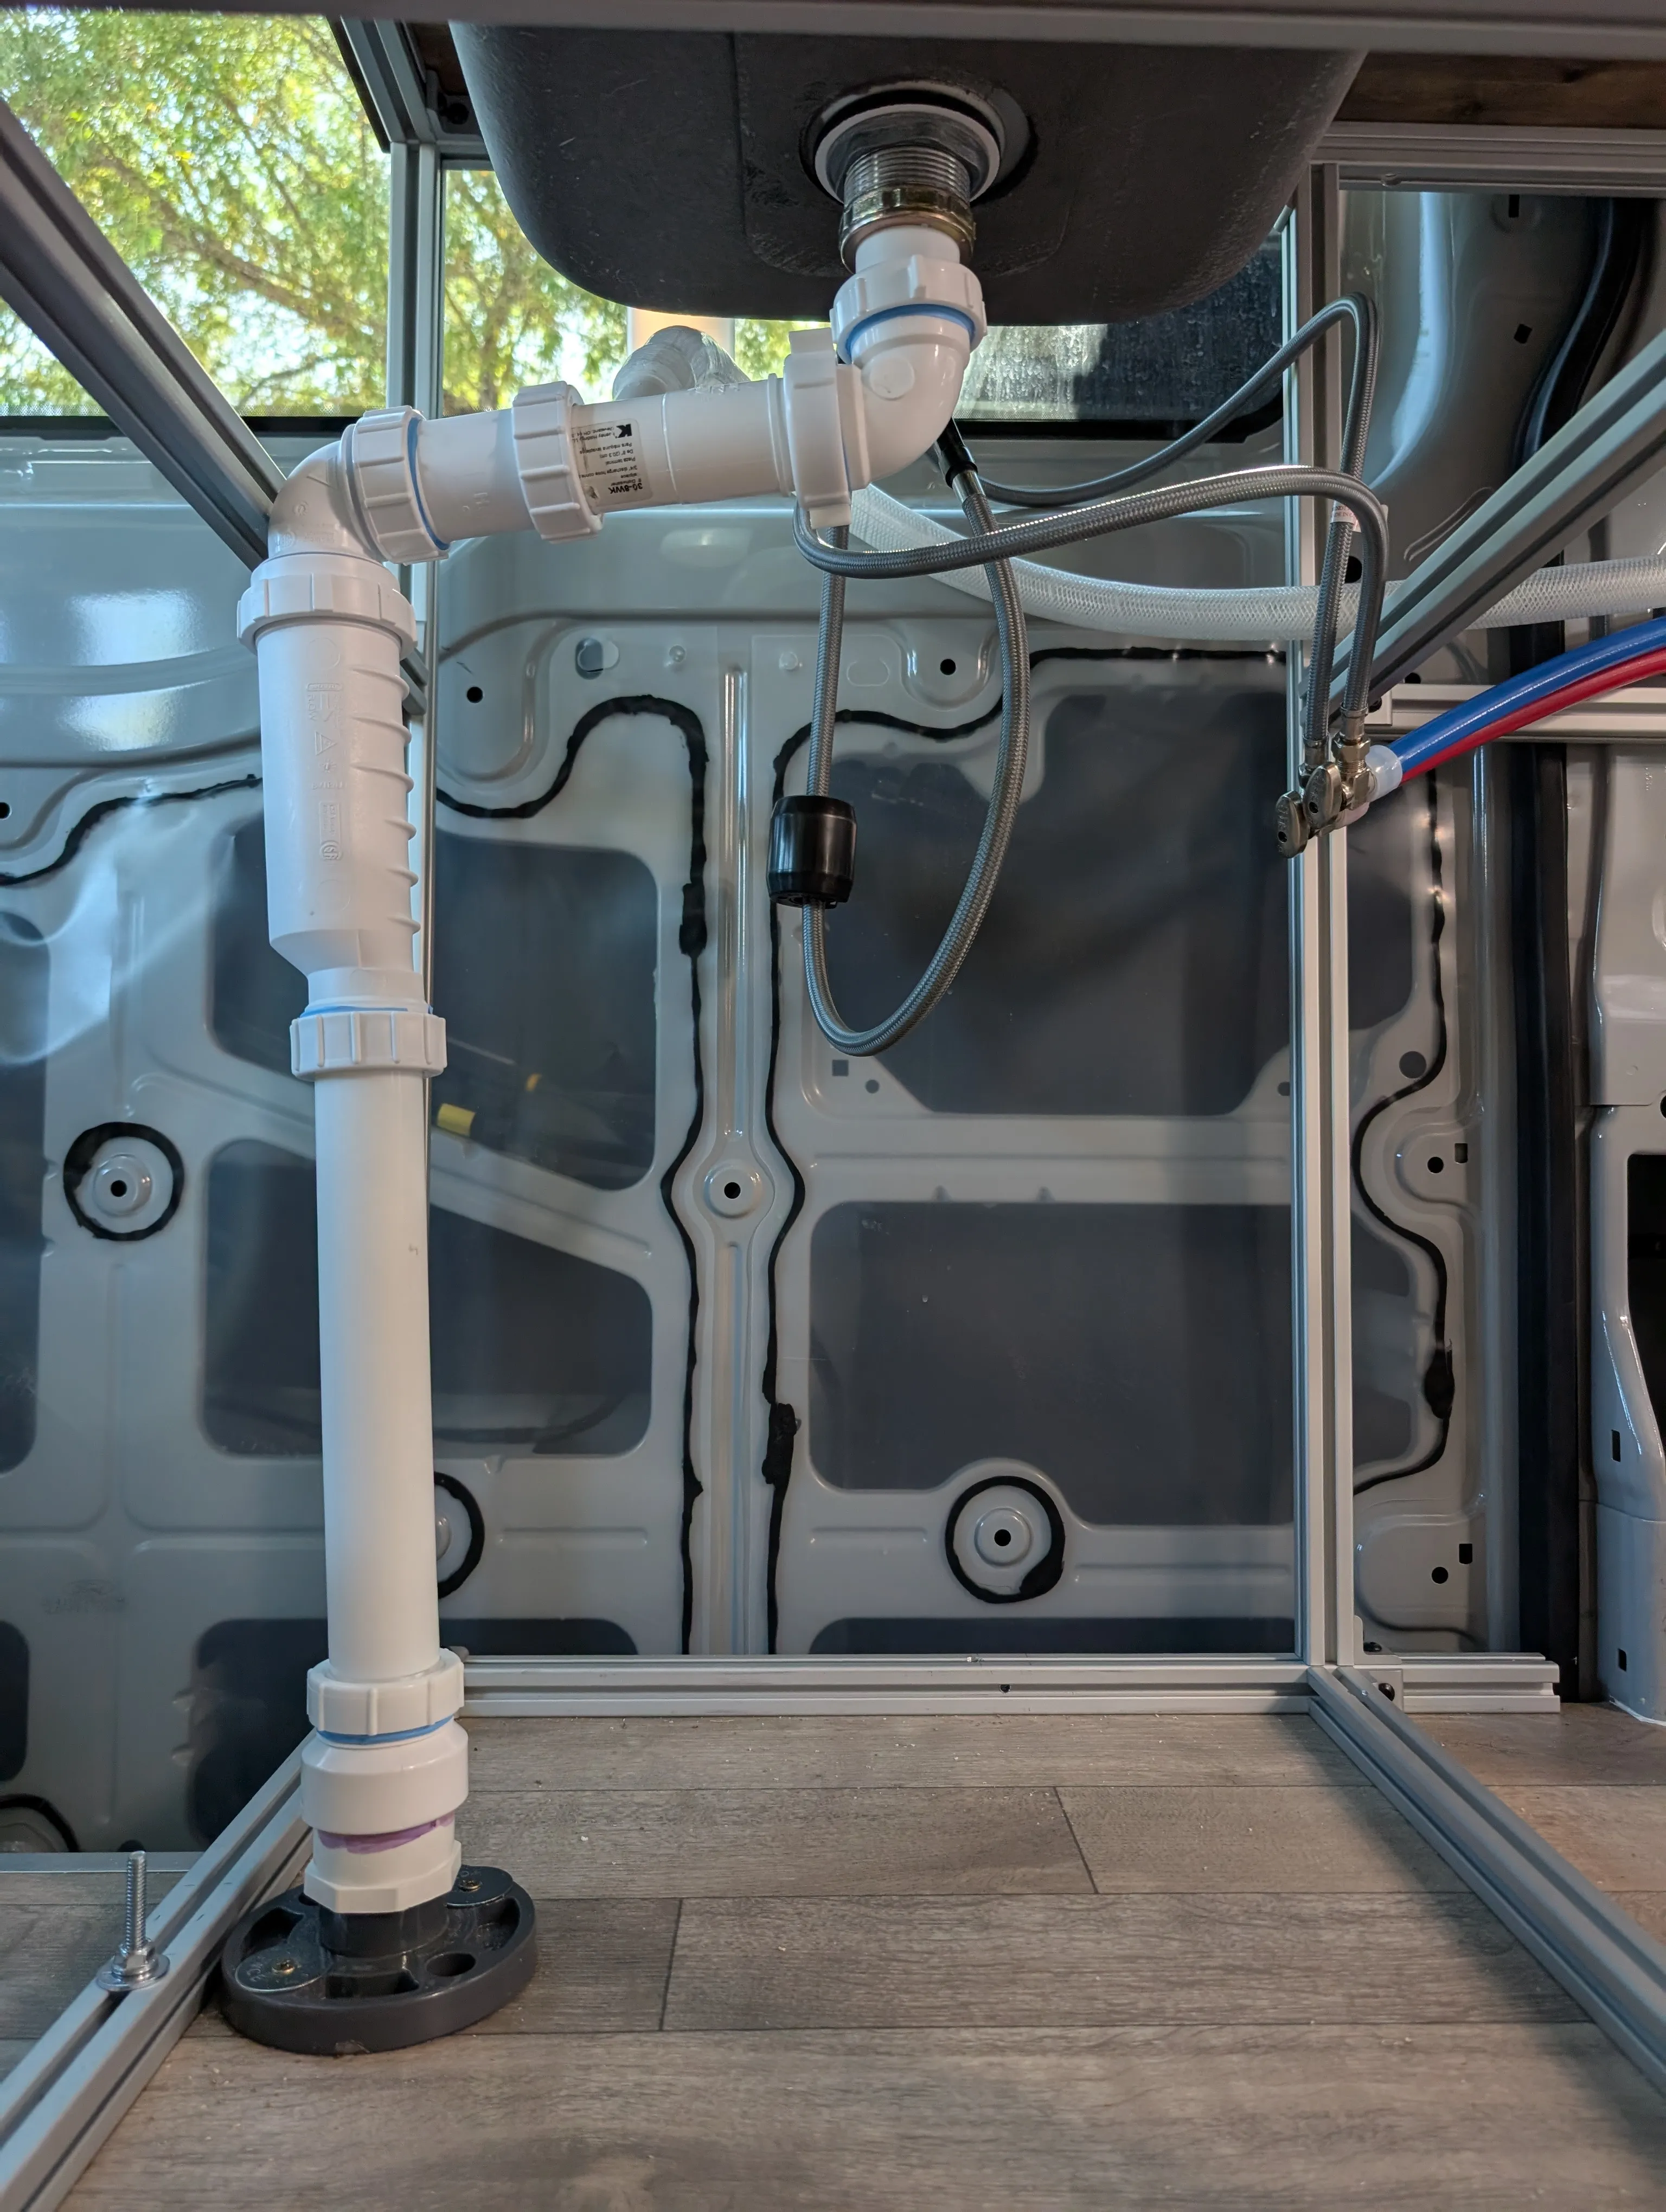
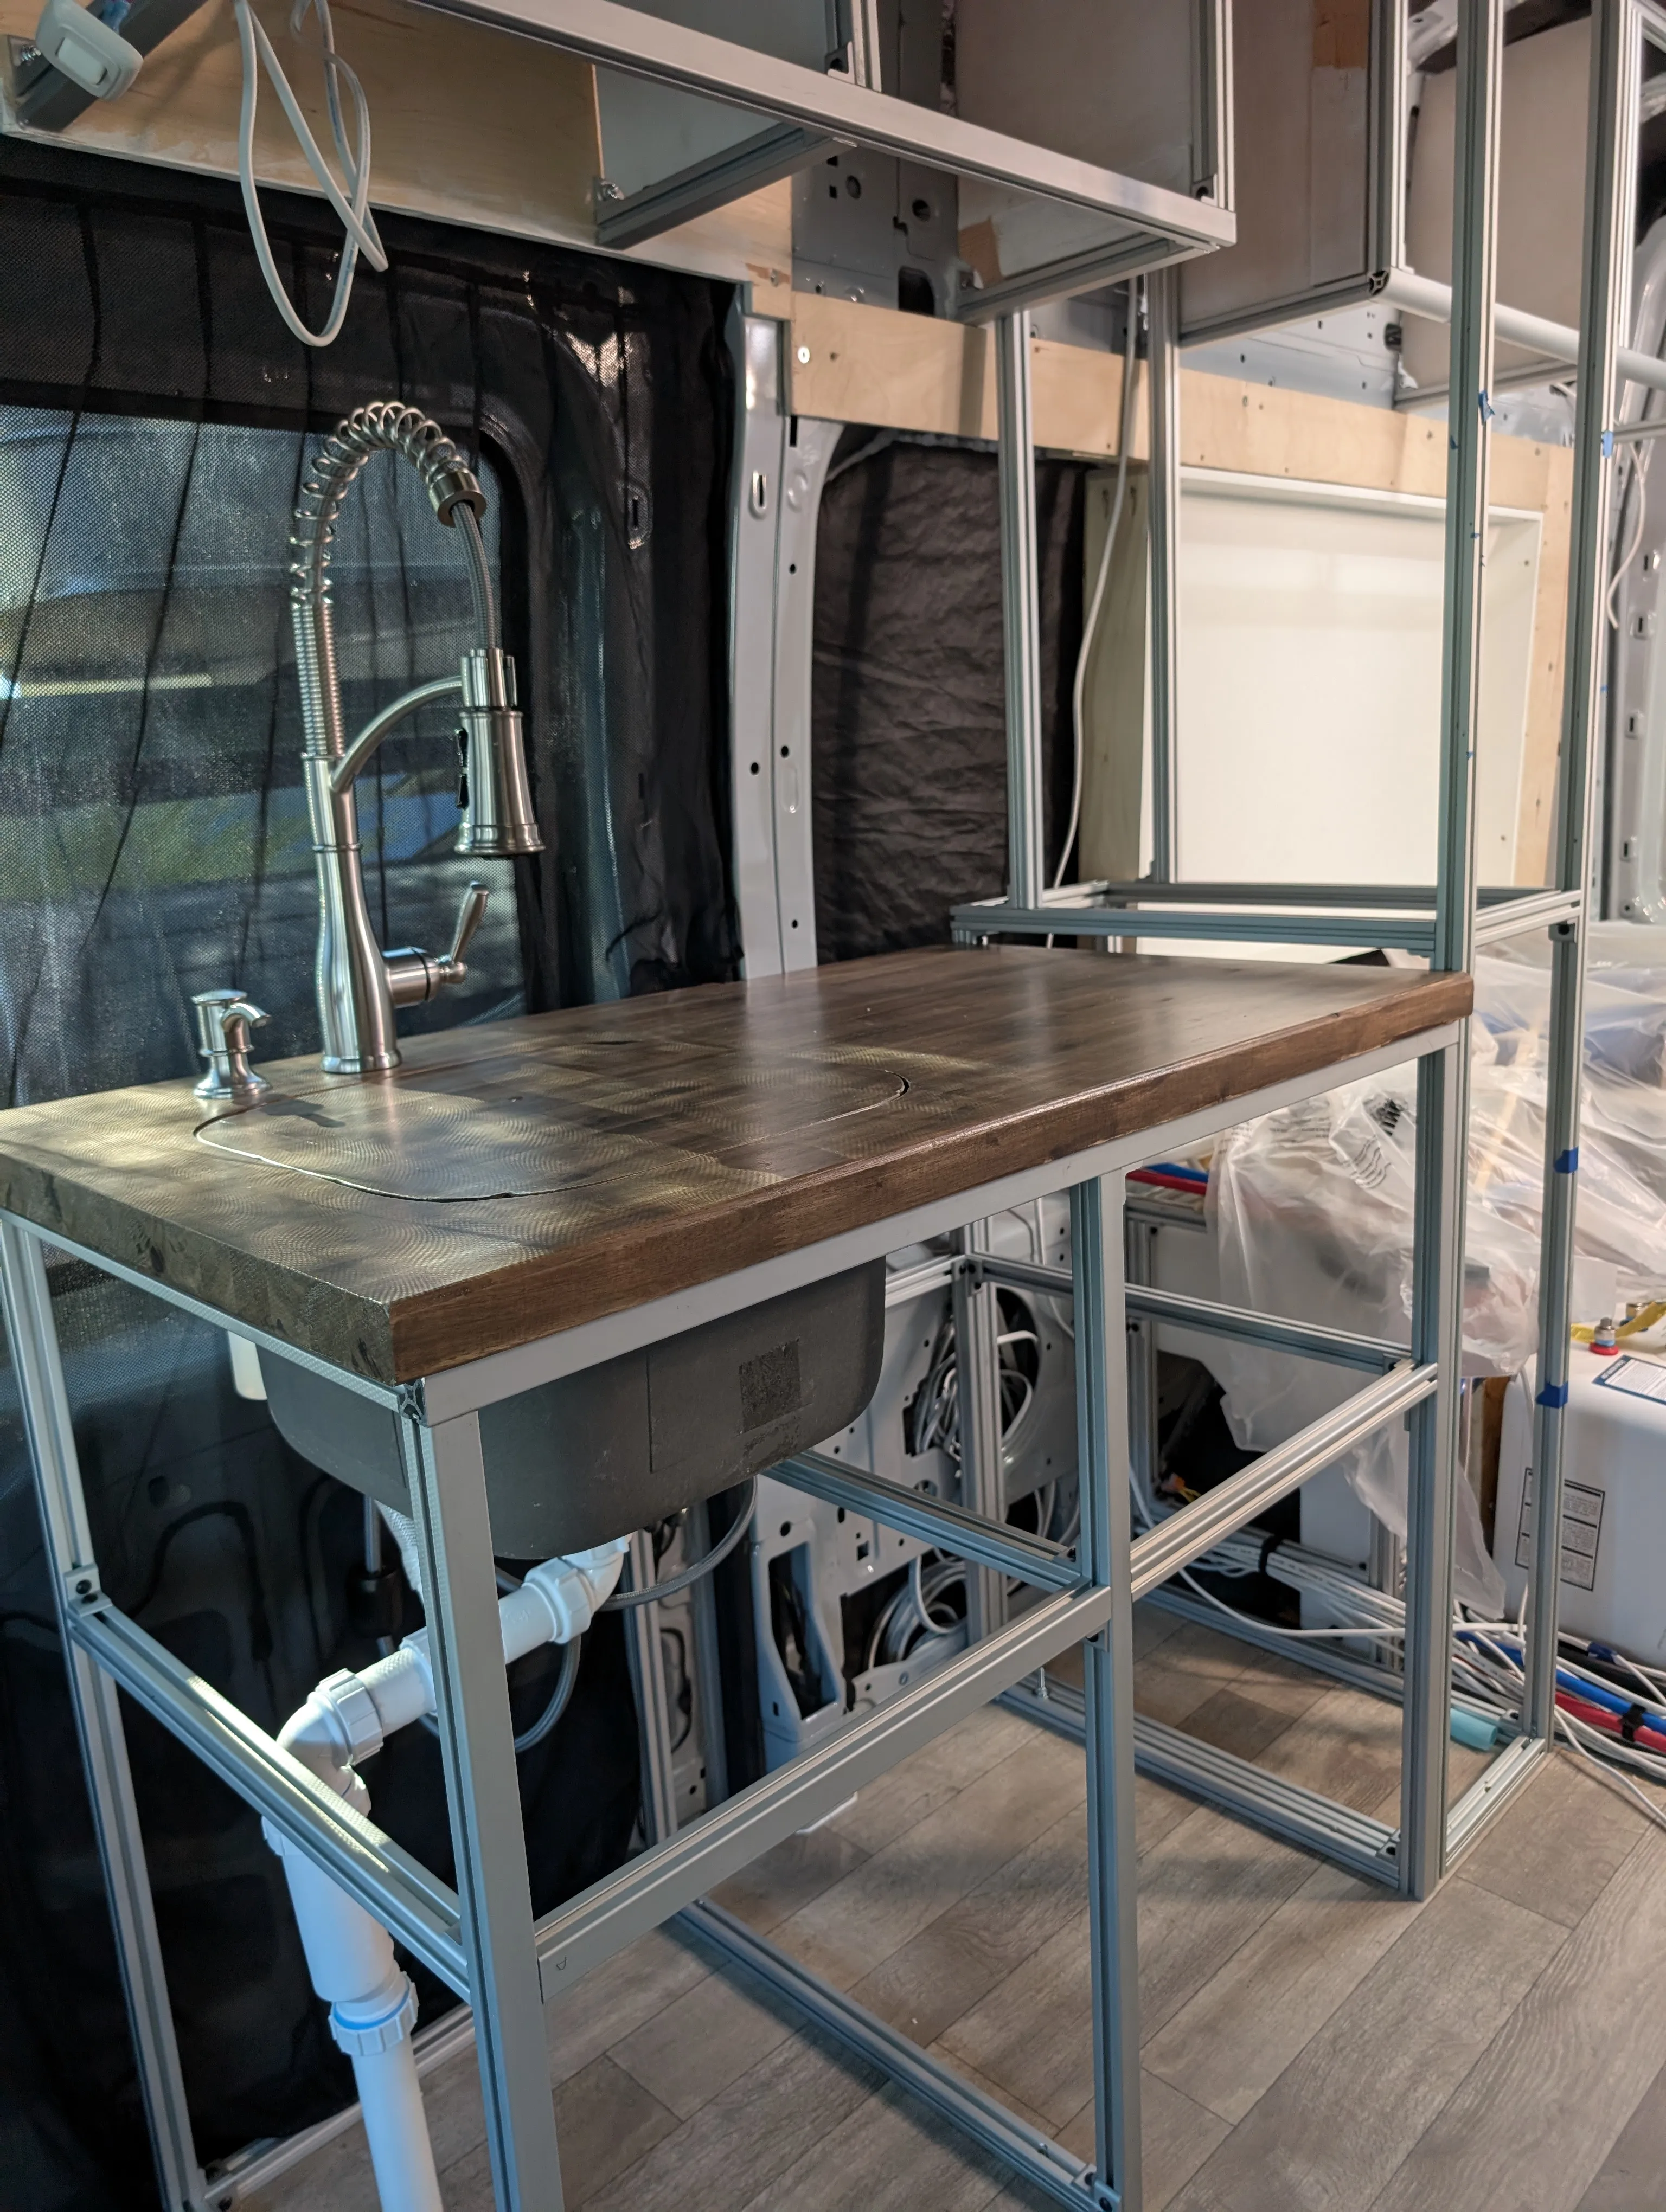
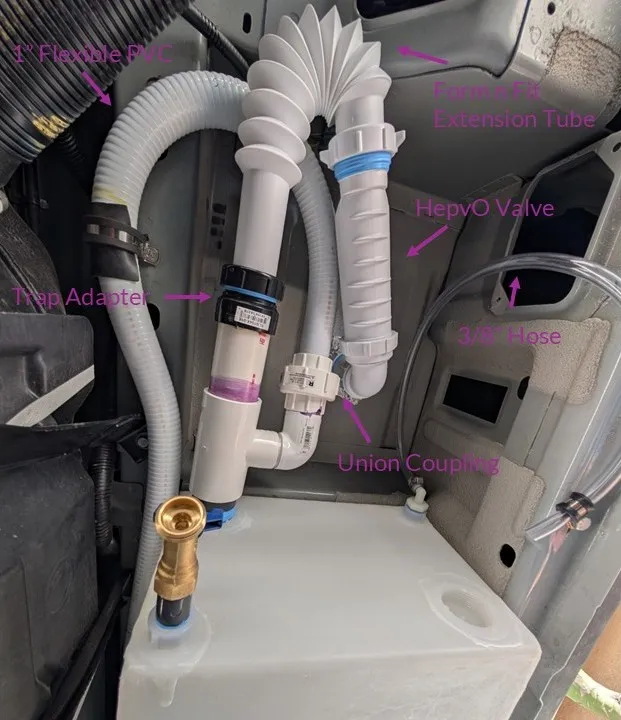
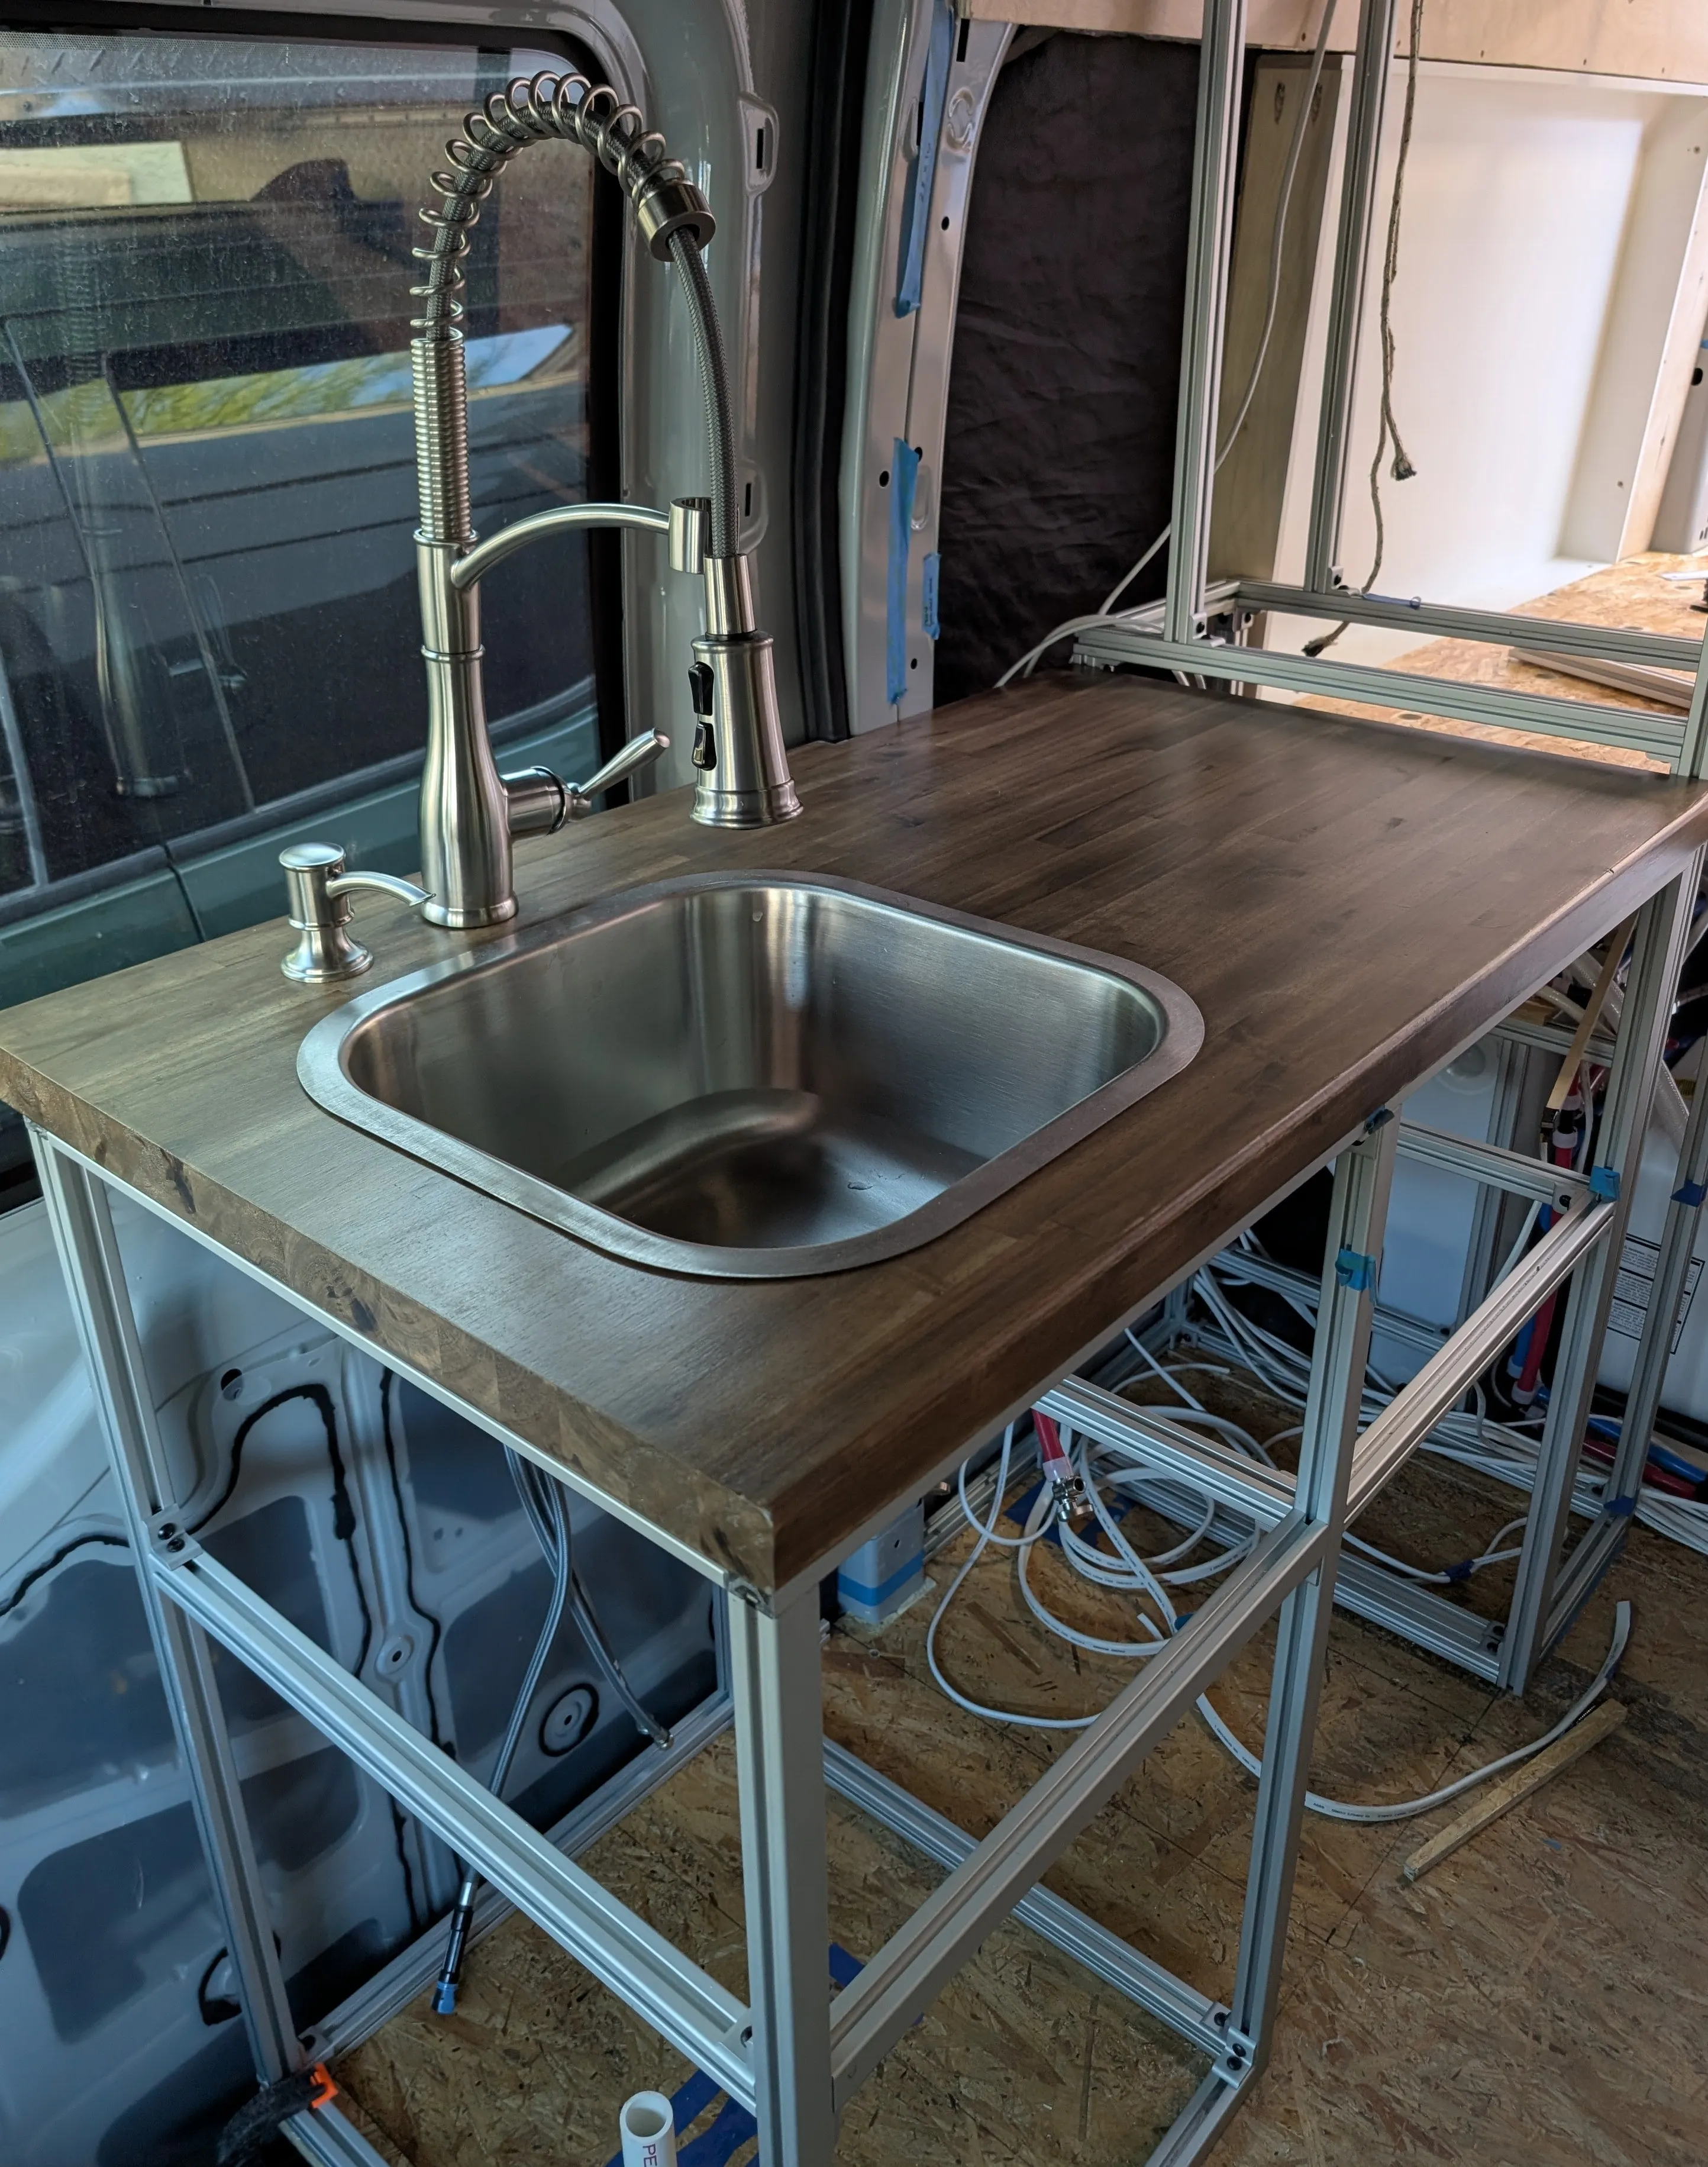
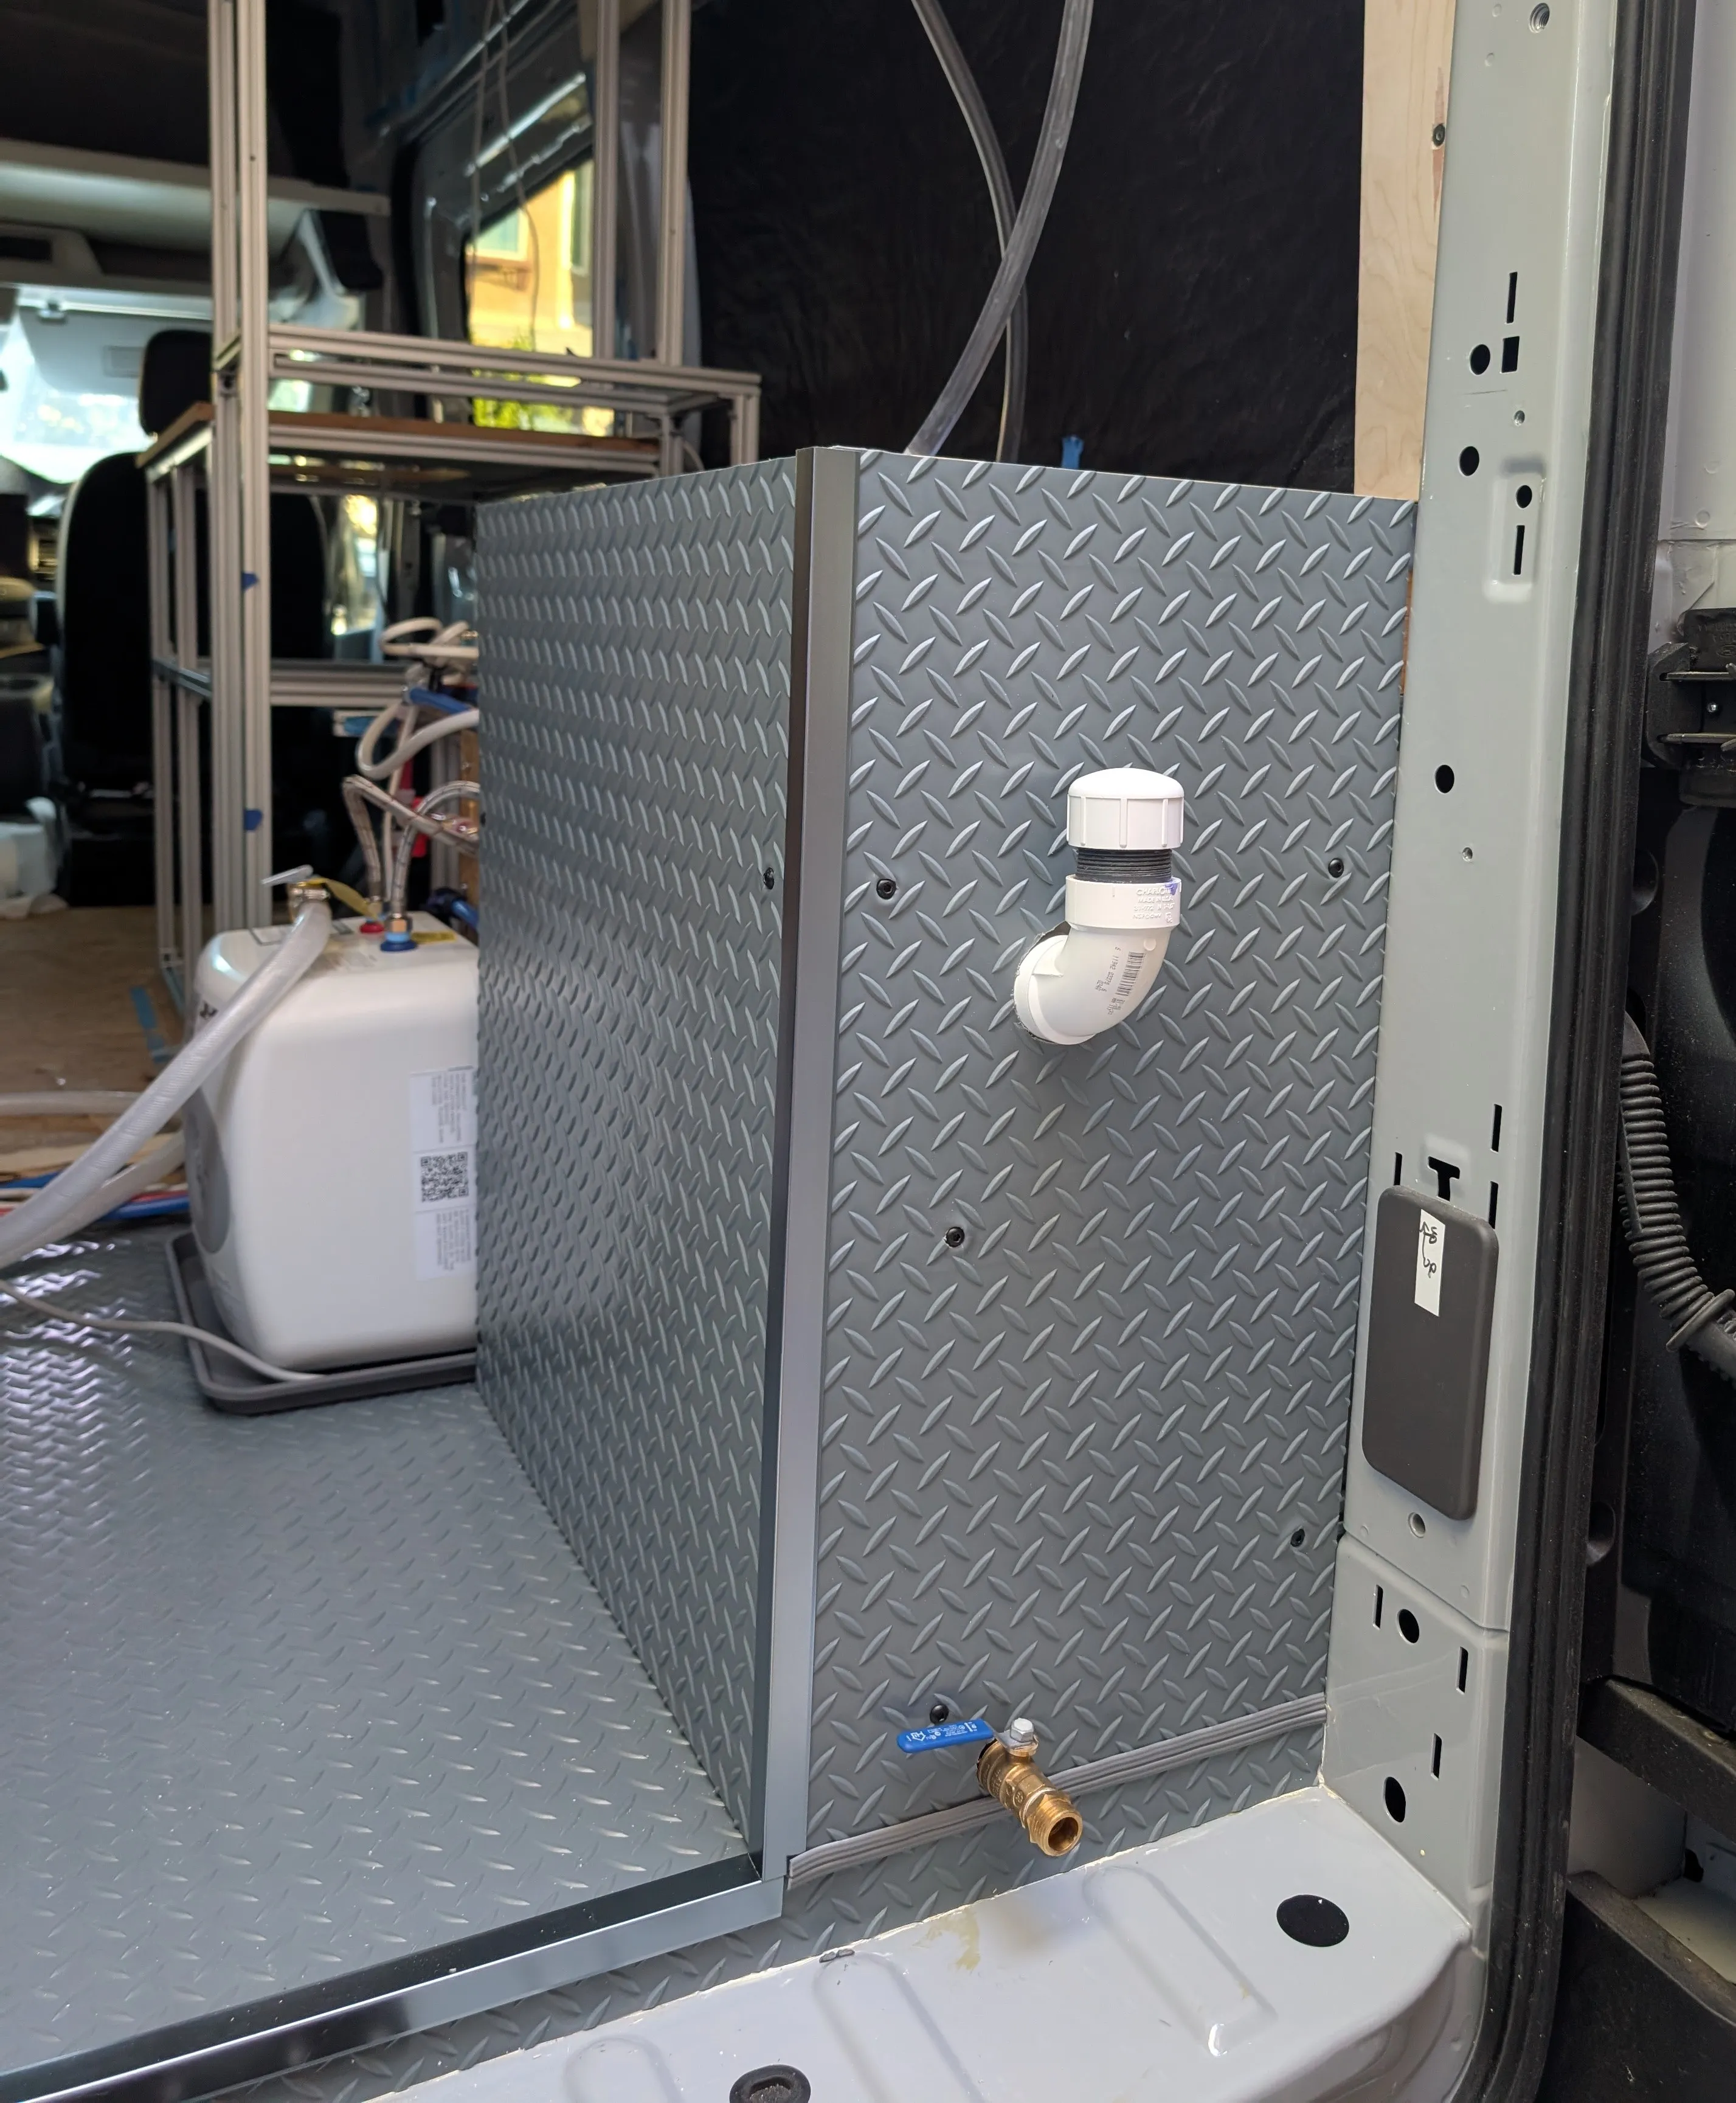
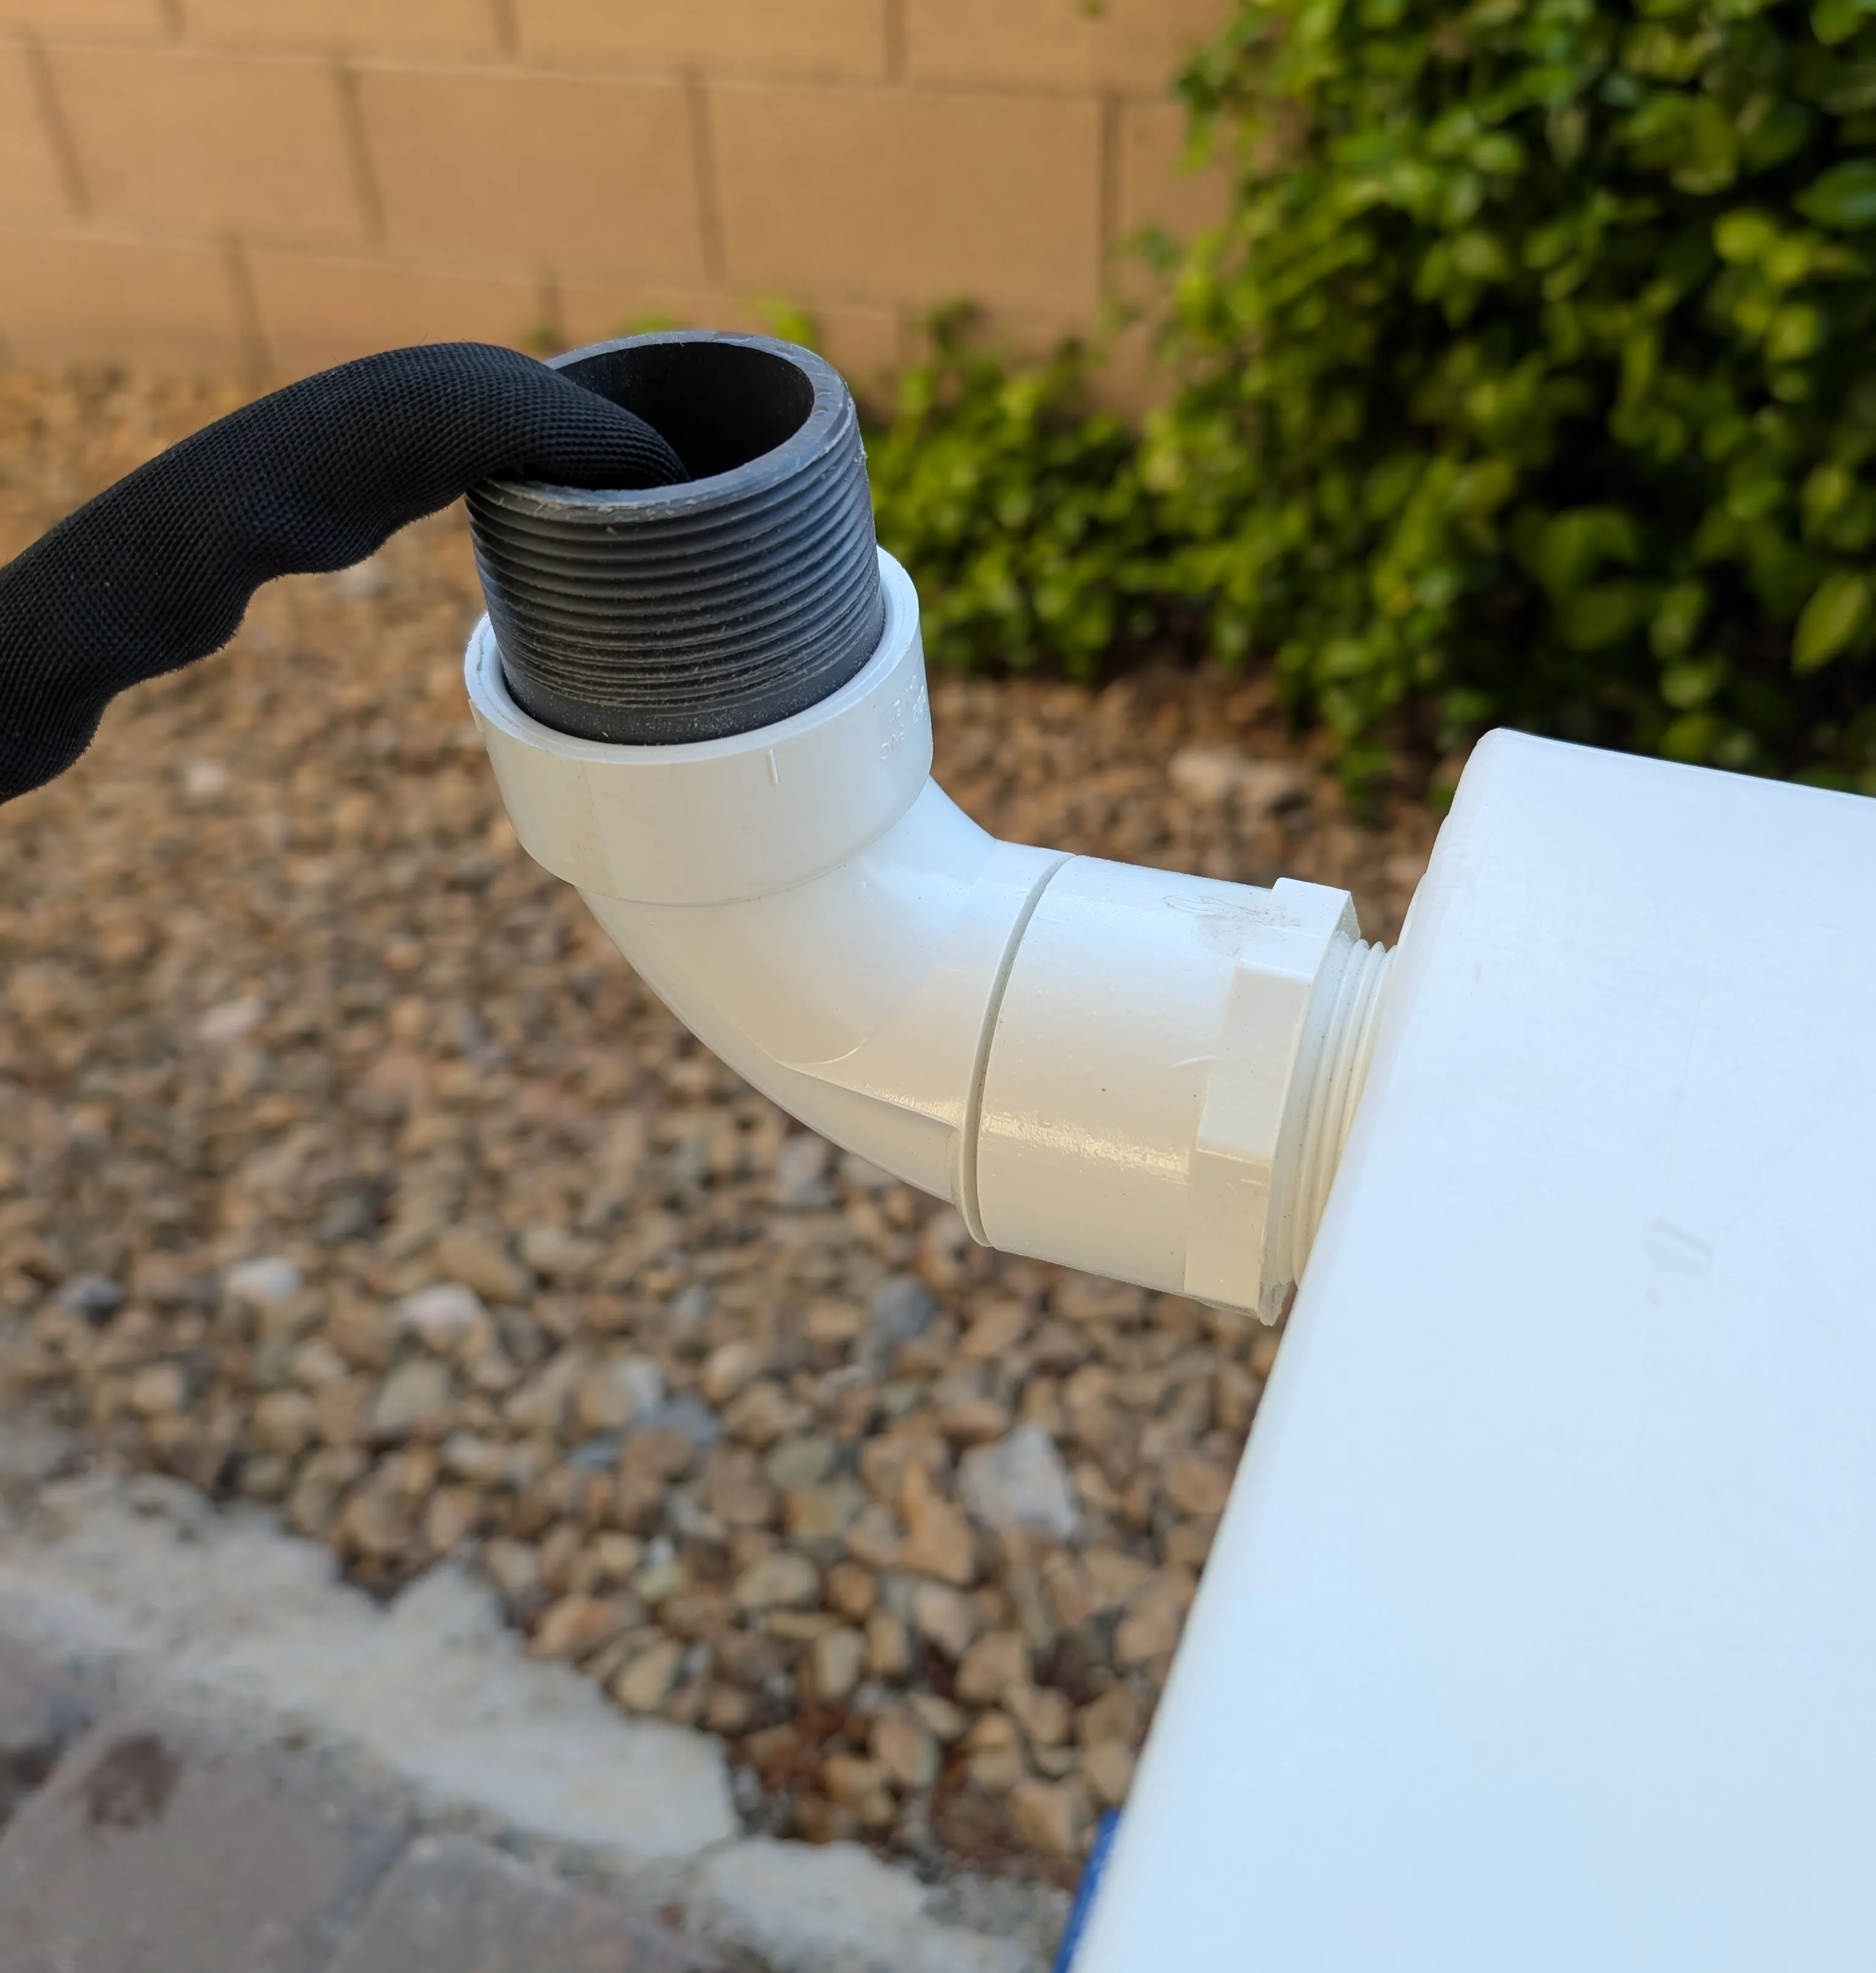
With the sink installed, I’ve finally wrapped up plumbing. From the sink drain, a small tail piece is connected to an elbow, which then connects to a Y fitting. I specifically chose this to also account for the release valve from the water heater, which uses 3/4” nylon hose and connects to the barb fitting. I then have another HepvO valve and an extender piece leading to a trap adapter. This then connects to a 1.5” PVC male to 1” PVC female adapter. A short 1” PVC pipe runs through the floor of the van via a 1.5” hole. I found a neat piece with a flange that I used to screw the PVC pipe into the floor to prevent any vertical movement.
I wish the pipes were a bit longer and I admittedly cut the tail pipe too short so I did have to stretch and bend the connections a bit. It still seems secure but it’s not too hard to replace later.
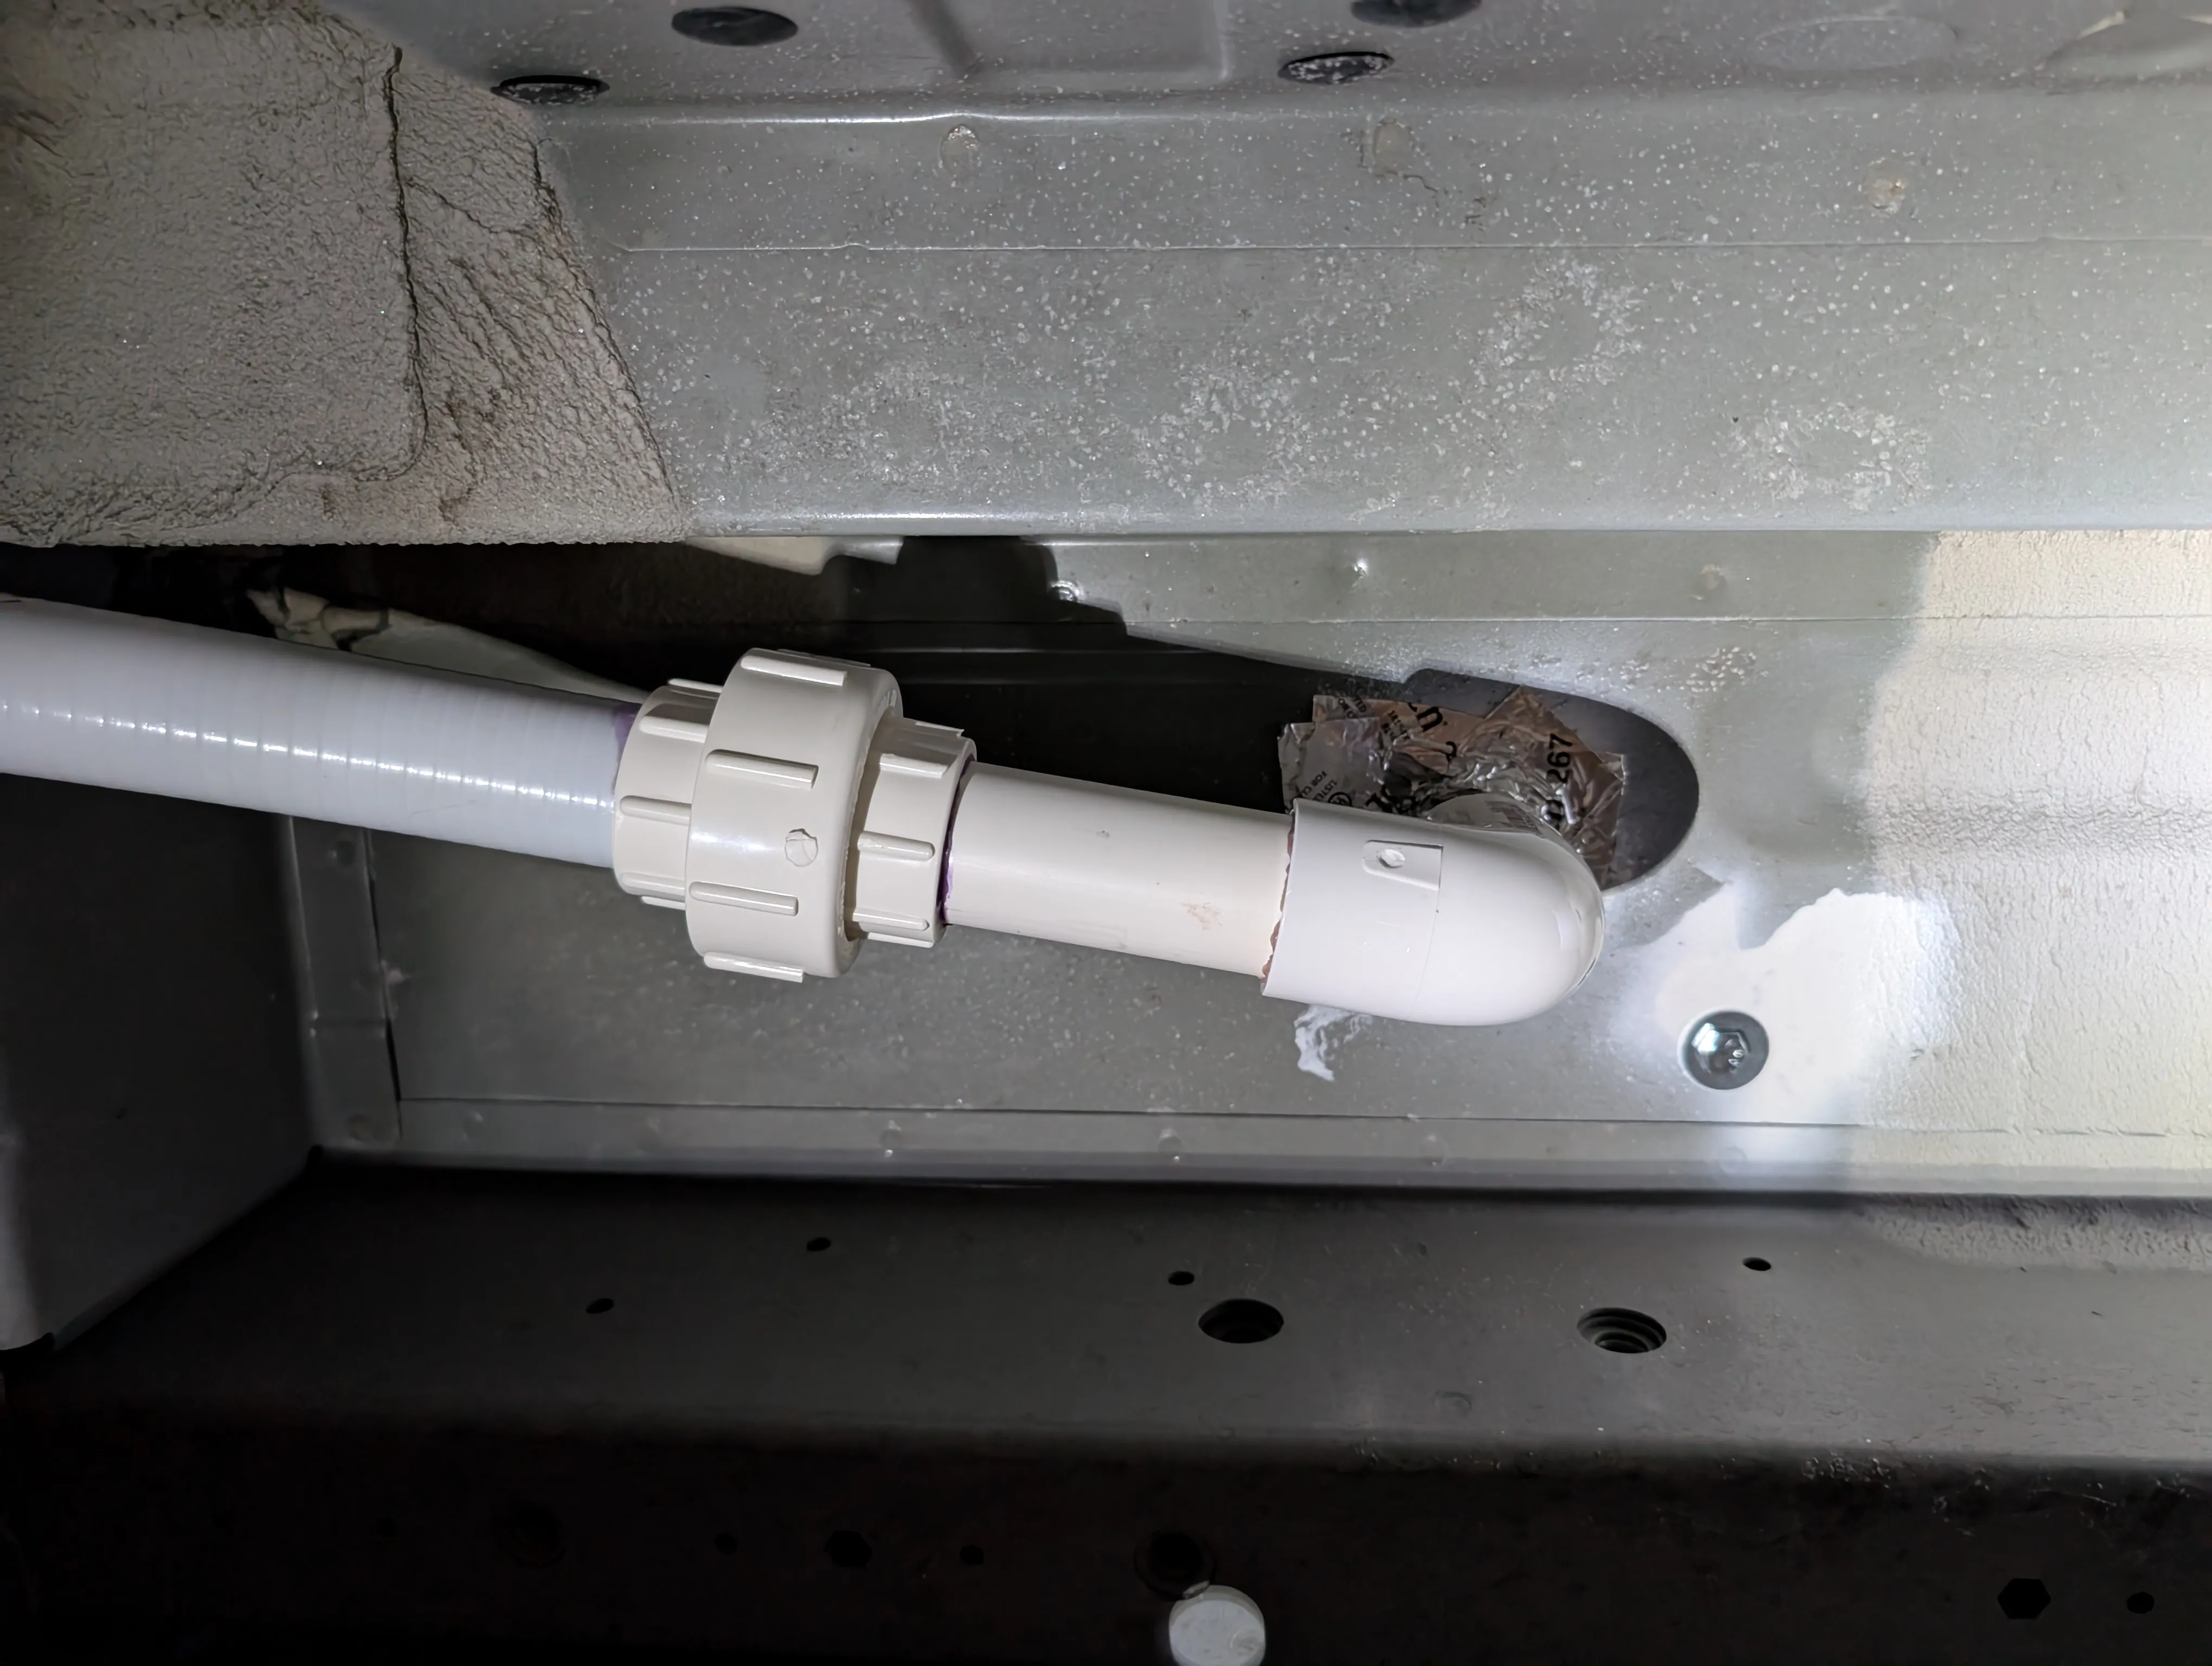
Under the chassis, the 1” PVC connects to an elbow, which then connects to more PVC pipe and a union coupling. This is where the flexible PVC begins and is routed through the back of the van to the grey tank.

This marks the end of my plumbing career.
July 19, 2025
The galley has finally been bolted down and is not going anywhere. Similar to the process with the overhead cabinets, I had to remove the bolts to apply loctite. It’s quite the hassle to redo so I’d recommend if you know what you want from the beginning, just add loctite from the start. However, it does cure in about 5 minutes and is not reusable so if it ever needs to come off, the bolt needs to be cleaned and the loctite needs to be reapplied.

The galley is bolted to both the chassis floor and the chassis walls with the usual 1/4-20 bolts. The ones to the floor were using 4.5” long bolts and were a bit long but that shouldn’t affect anything. Warning: tightening the bolts too much will cause the floor to bend upwards.
July 15, 2025
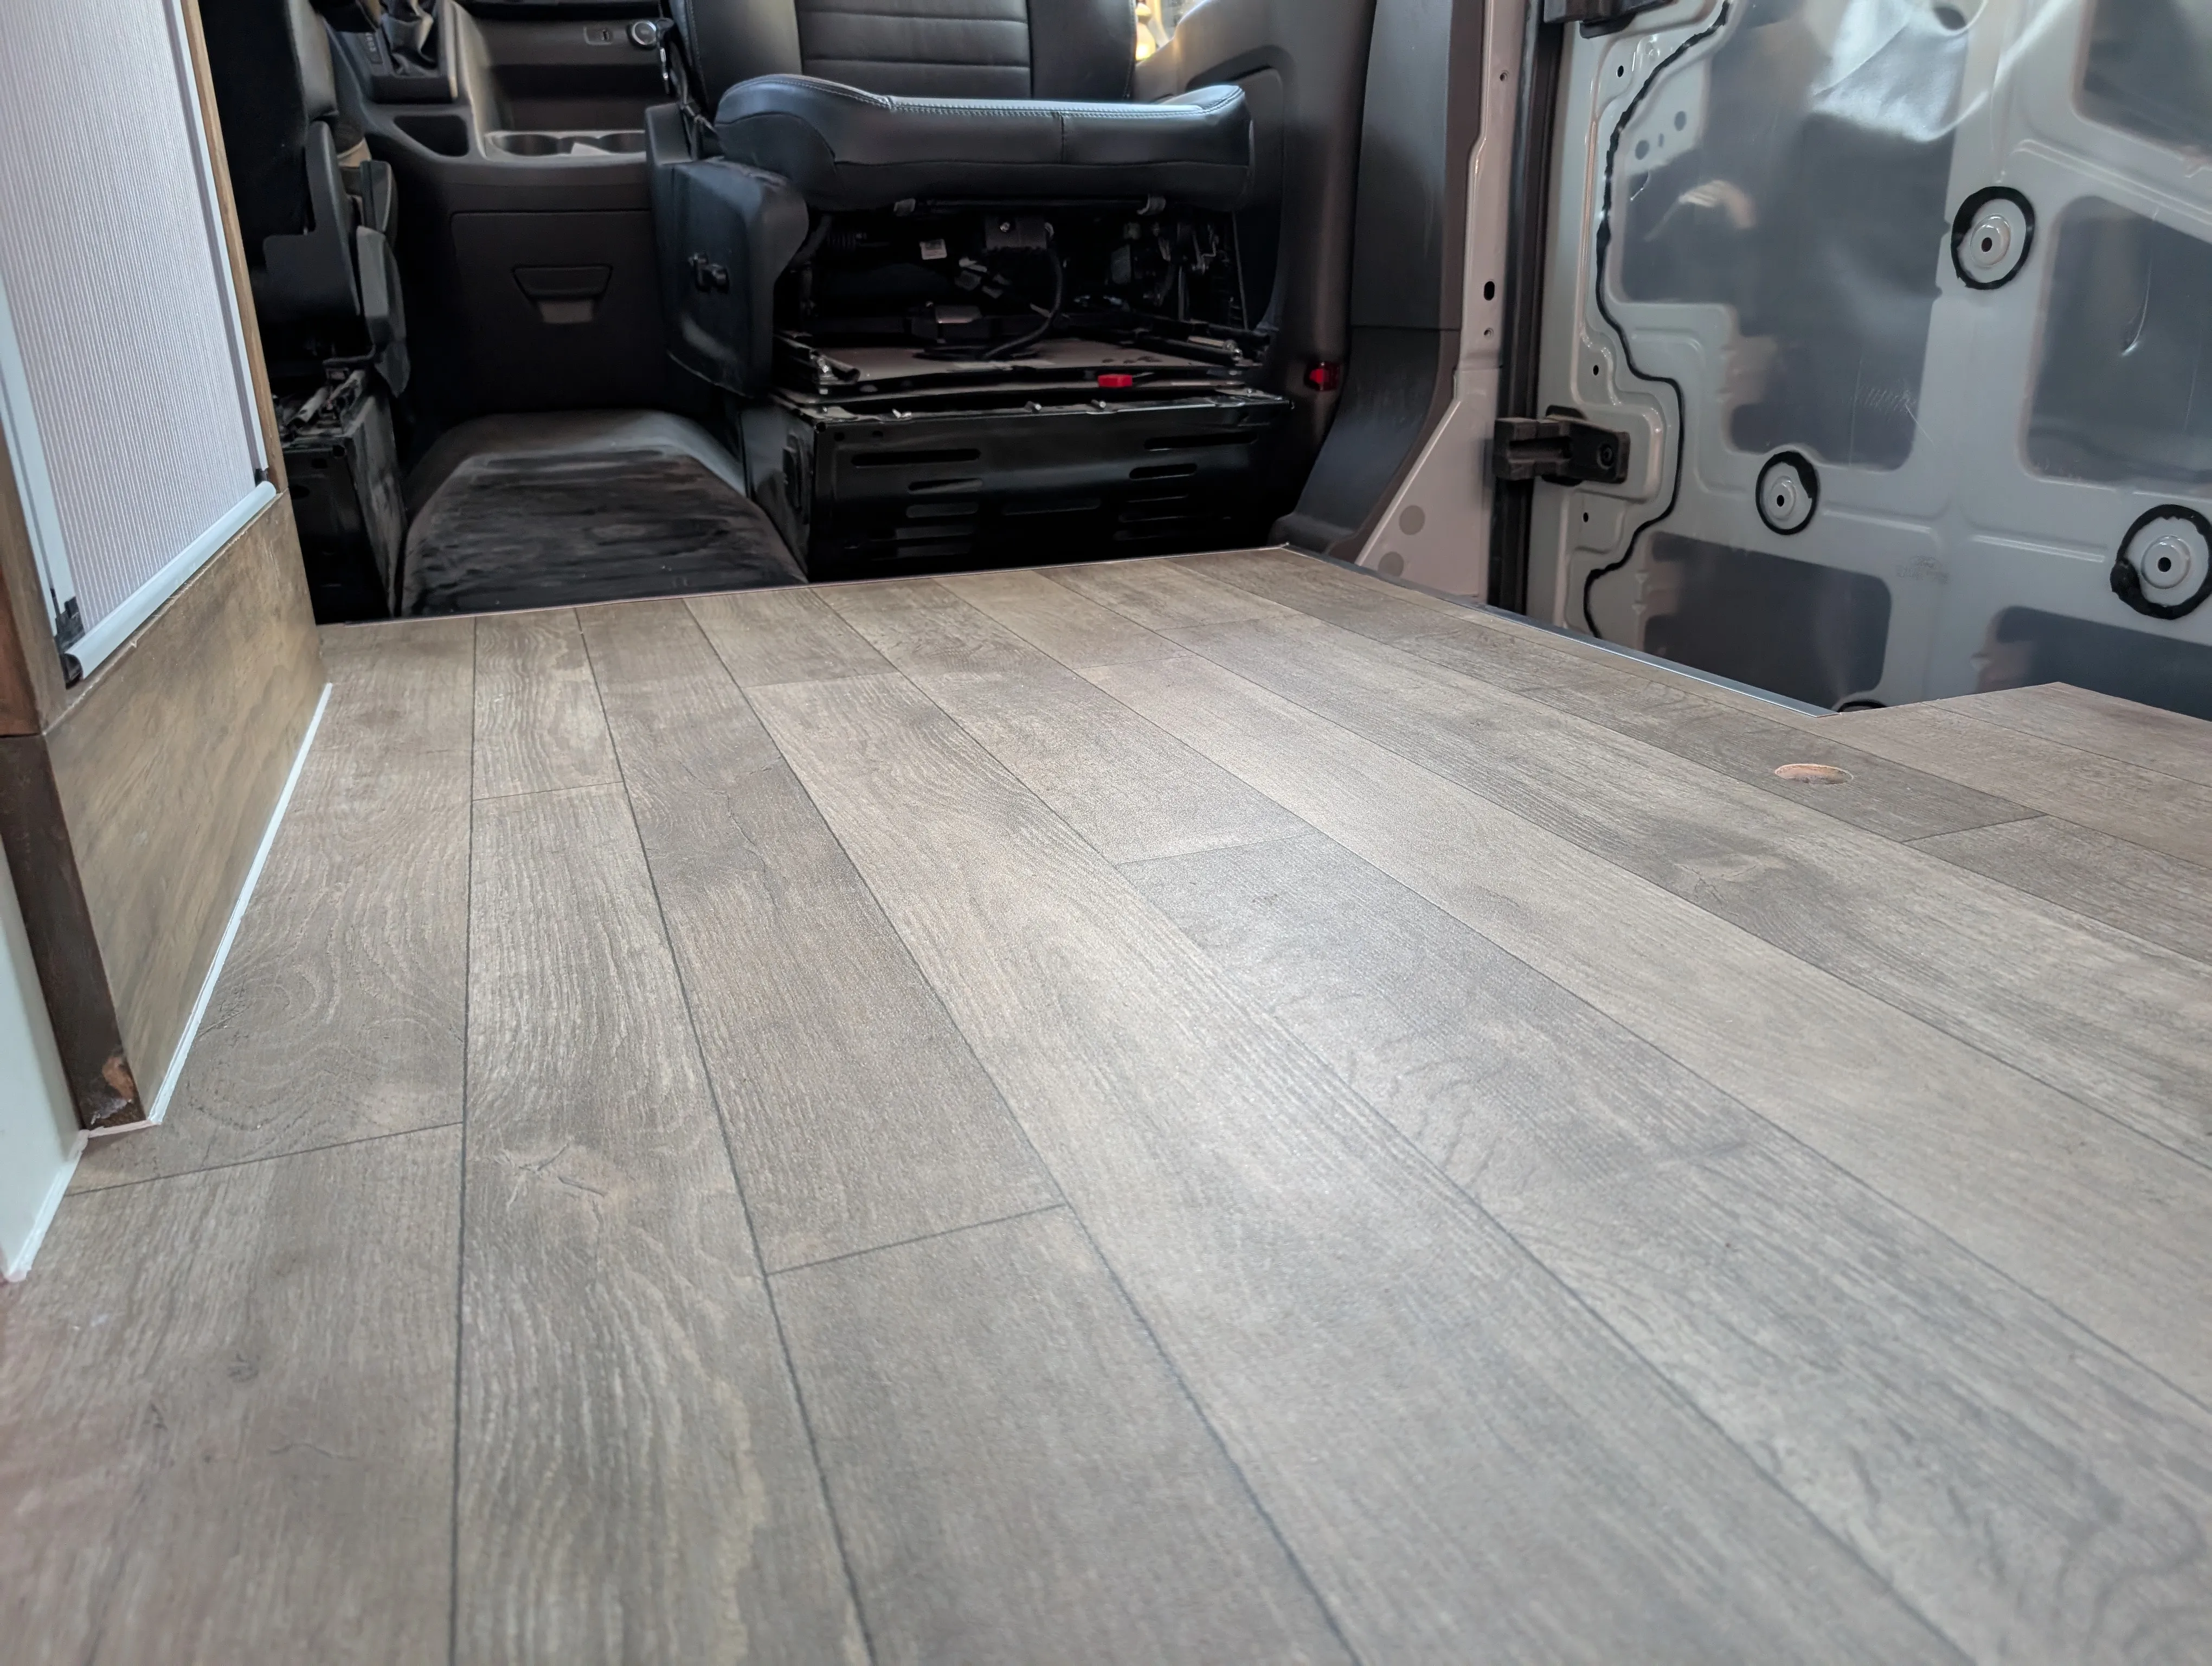
Kep now has proper flooring so he’s starting to look like an actual living space. It’s a greyish brown wood patterned sheet vinyl that I got from some warehouse. I installed the sheet in a similar manner as the garage floor and as you may have noticed, my caulking skills have vastly improved. Some extra trim from the shower was used on the step and the edge of the floor to create a finished look.
July 12, 2025
The overhead cabinets are officially mounted. I redid all the connections to add loctite and also added the 1/4” plywood dividers that fit perfectly into the slots. Each horizontal point is bolted to the side of the chassis while the top is held up wherever there is a support beam.
July 10, 2025
There were many twists and turns with the grey water lines due to the non ideal location of the holes but everything is finally connected and Kep now has a fully functioning shower. The hole from the drain is sealed wtih some foam and mastic tape. From the drain, I connected a short tail piece as the floor is about 2.5” thick and then connected the HepvO valve. There is then an awkward bendable piece that connects to a trap adapter and then to the tee and into the tank. The other end of the tee connects to a 1” flexible PVC pipe that routes behind the gas tank to the sink drain.

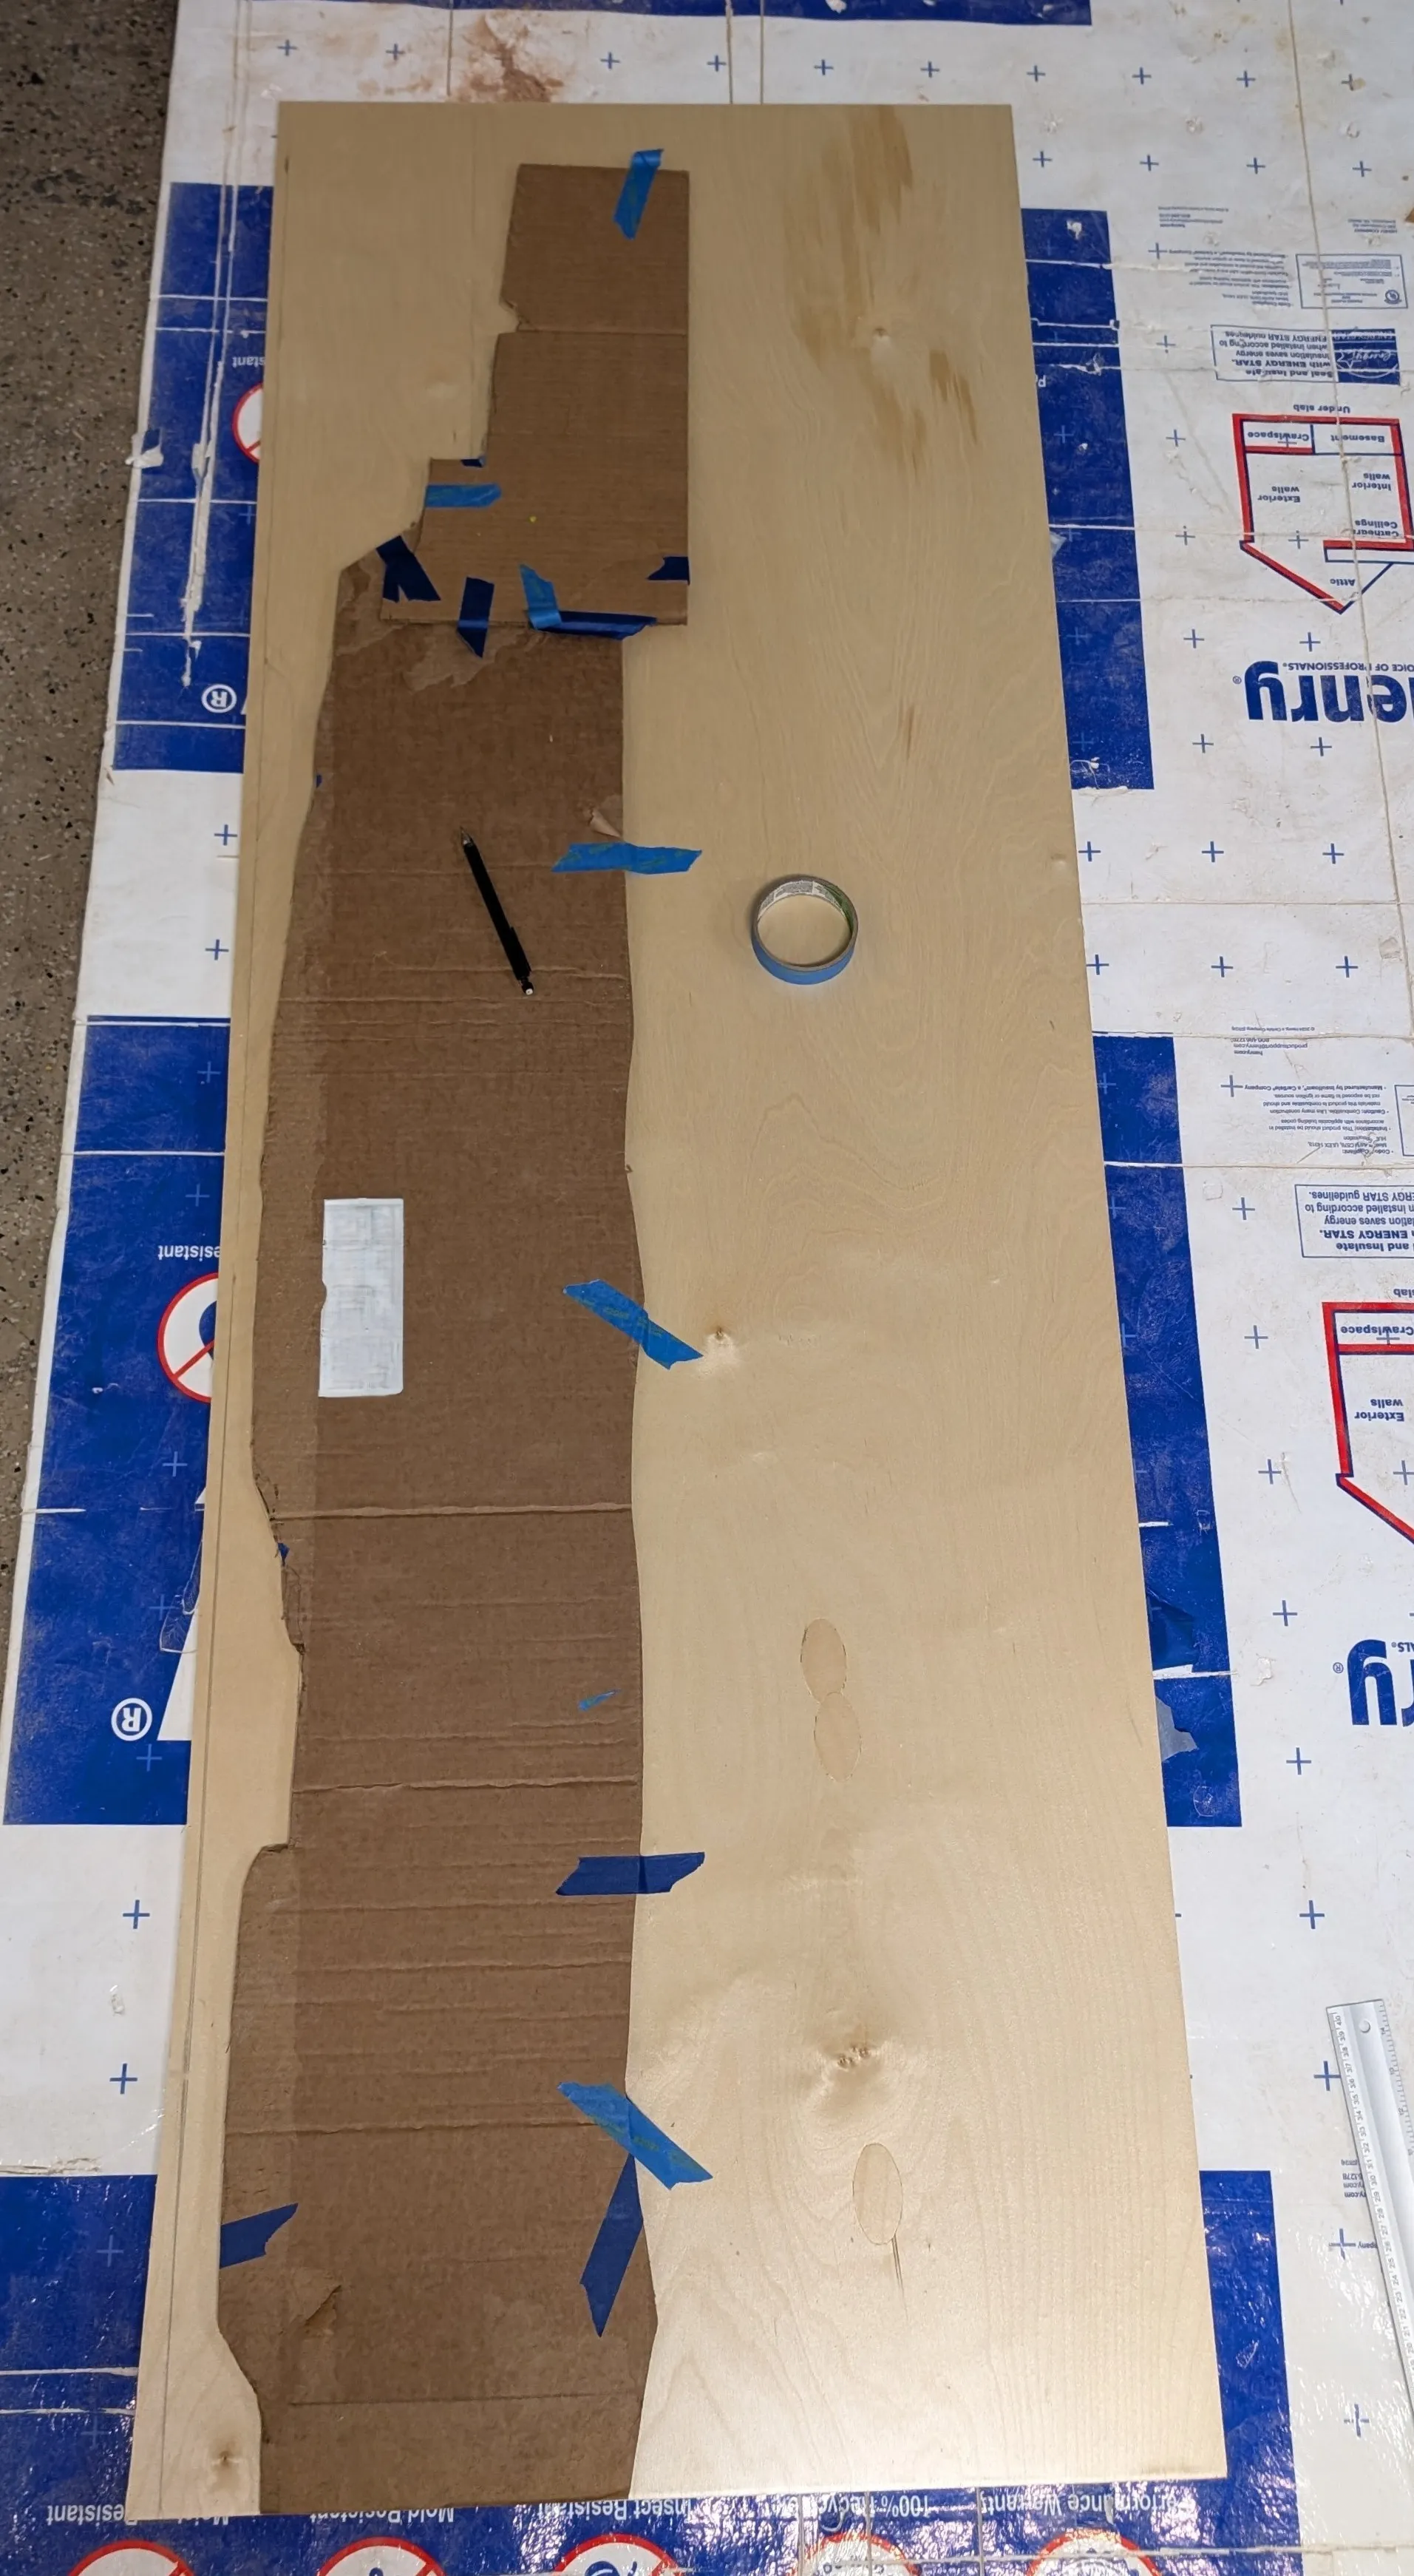
Now that the hard part is done, the tedious woodworking begins. This is the divider wall that will separate the garage from the living space and the cutout is for a door. The door is a bit on the larger side but it should at least be able to open.
July 6, 2025
Sneak peak at the kitchen countertop! It’s stained with the same stain as the shower door frame and has 4 coats of polyurethane. The edges were also rounded using a router for a smoother look, but also to cover up a bad cut. This is 1 1/2” butcher block (I ended up having to get a new one) and is quite heavy. Before this, Kep got his midway checkup and weighed 7k lbs (with a near empty tank of water), which makes him about 2k lbs below his limit. It costs $14 at a CAT Scale and anyone can drive up to weigh. Considering the rest of the build is mostly wood, this is a bit concerning.
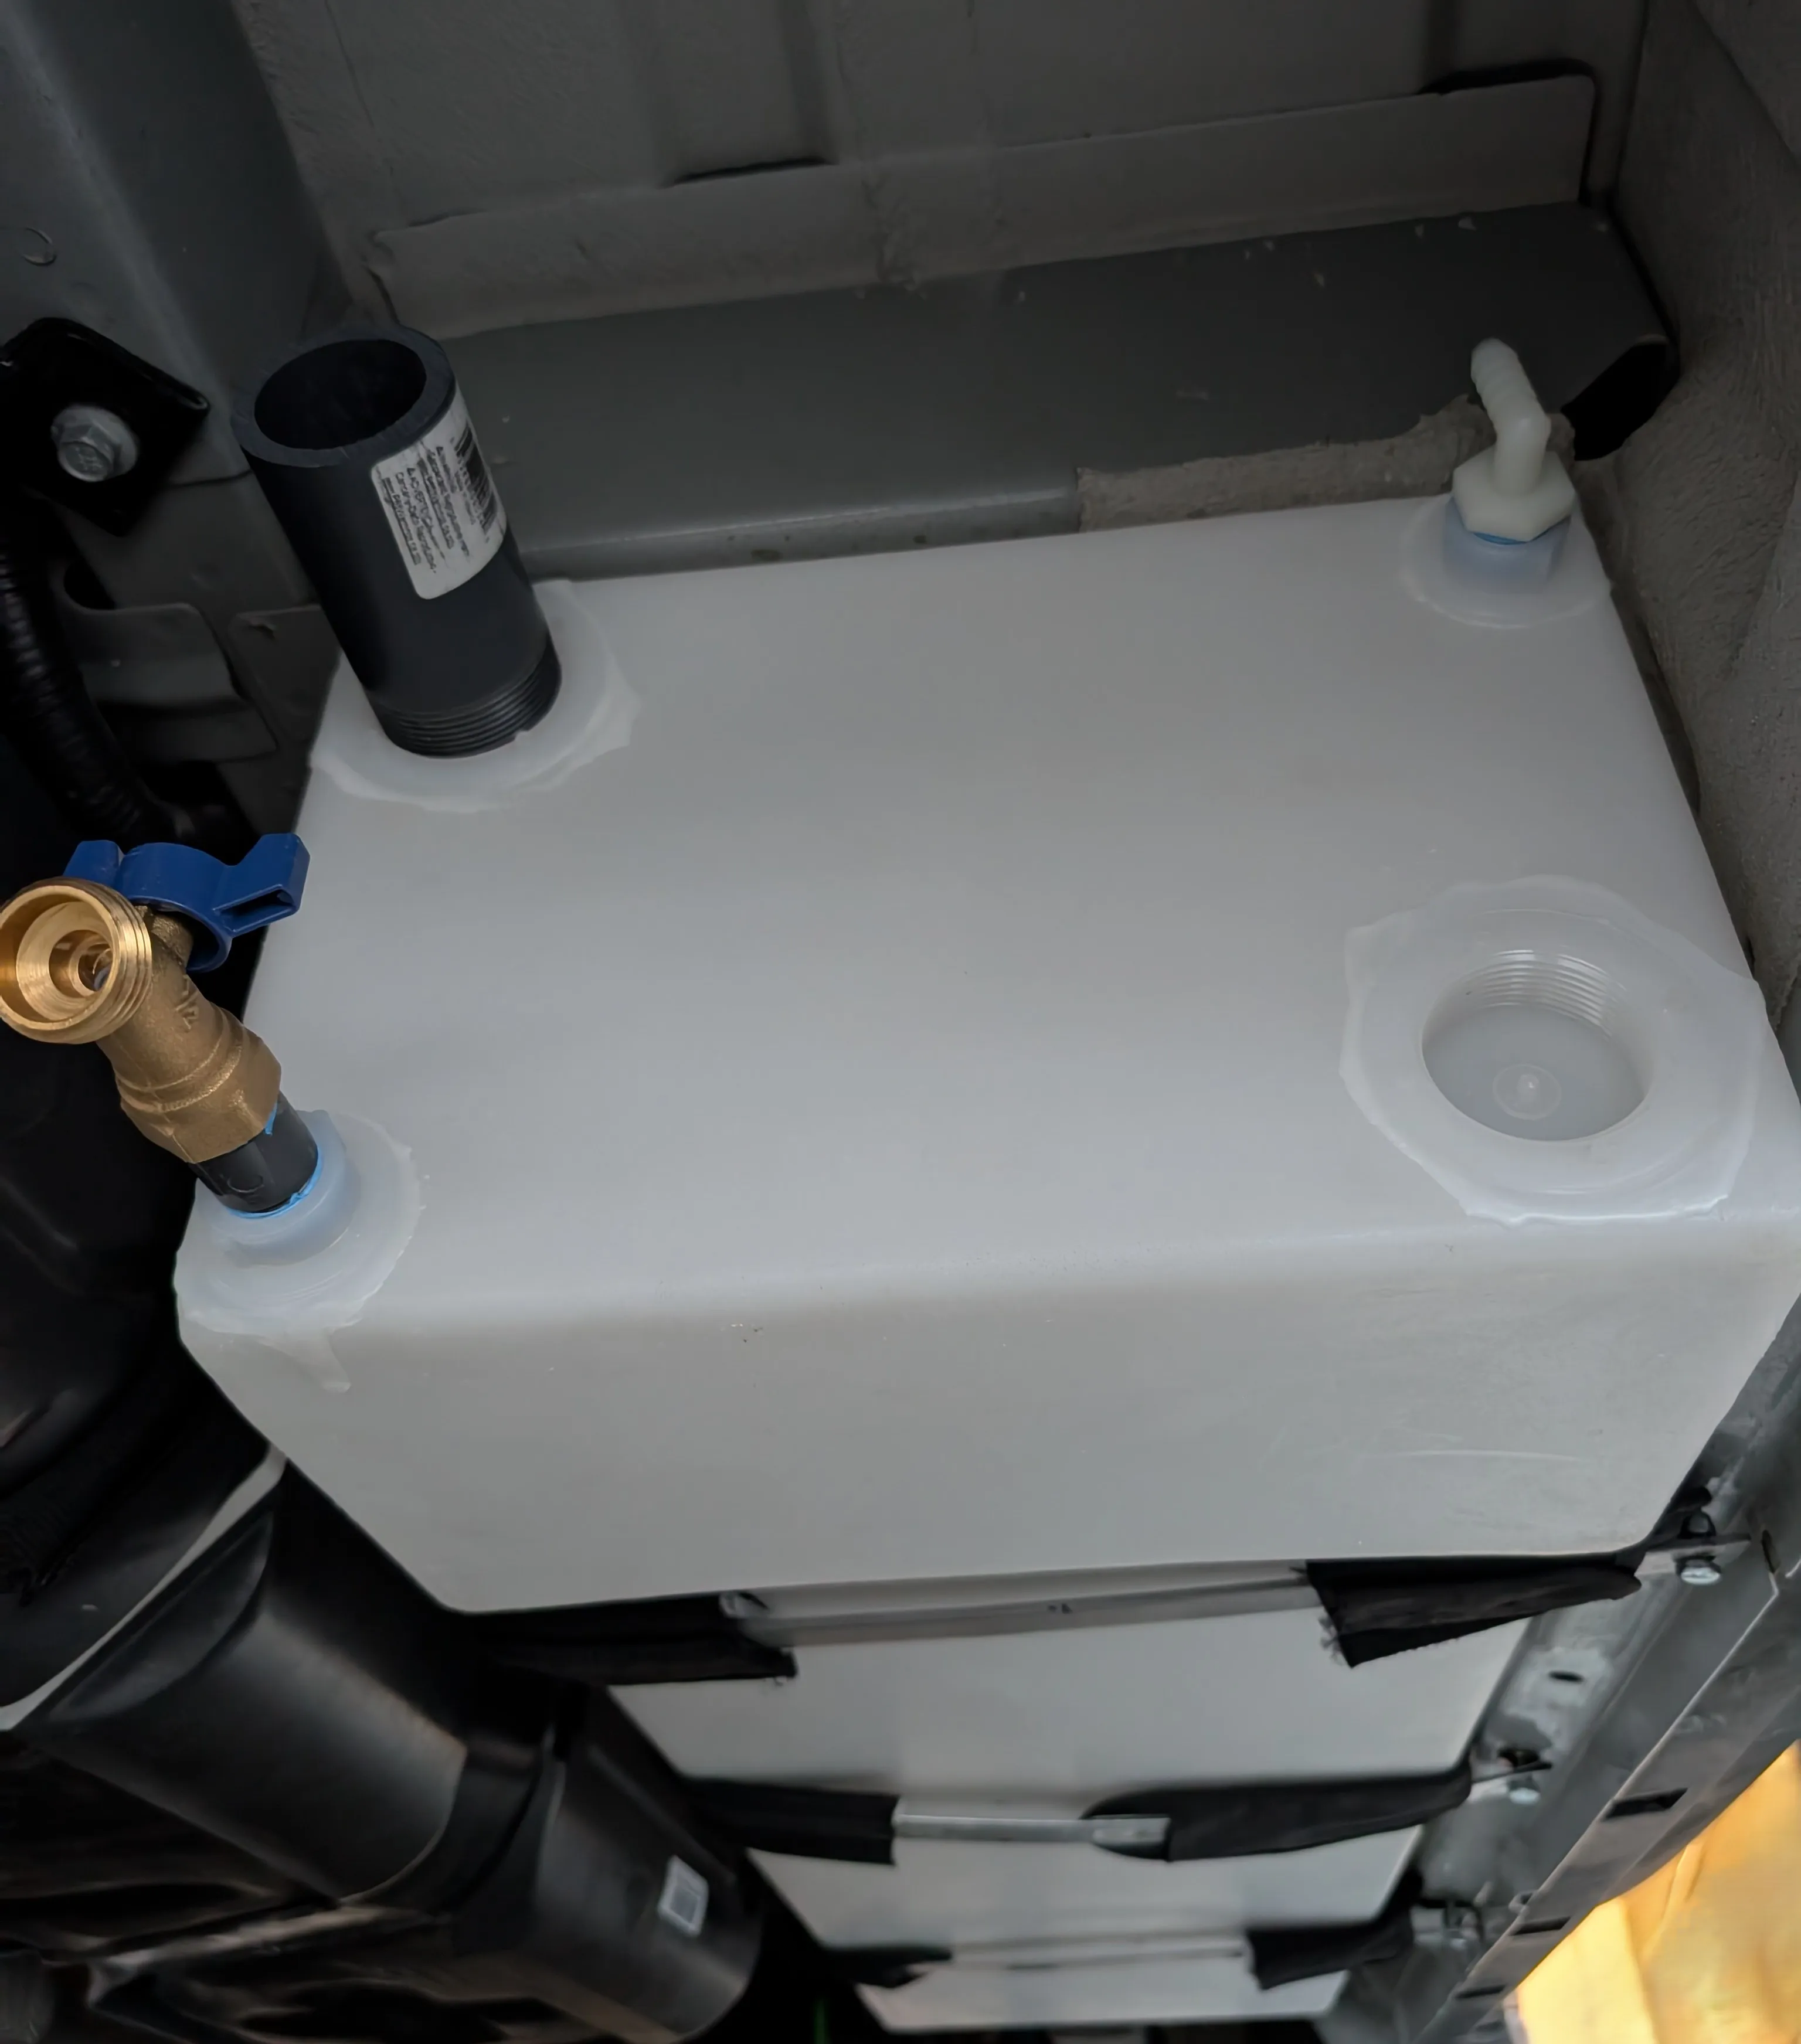
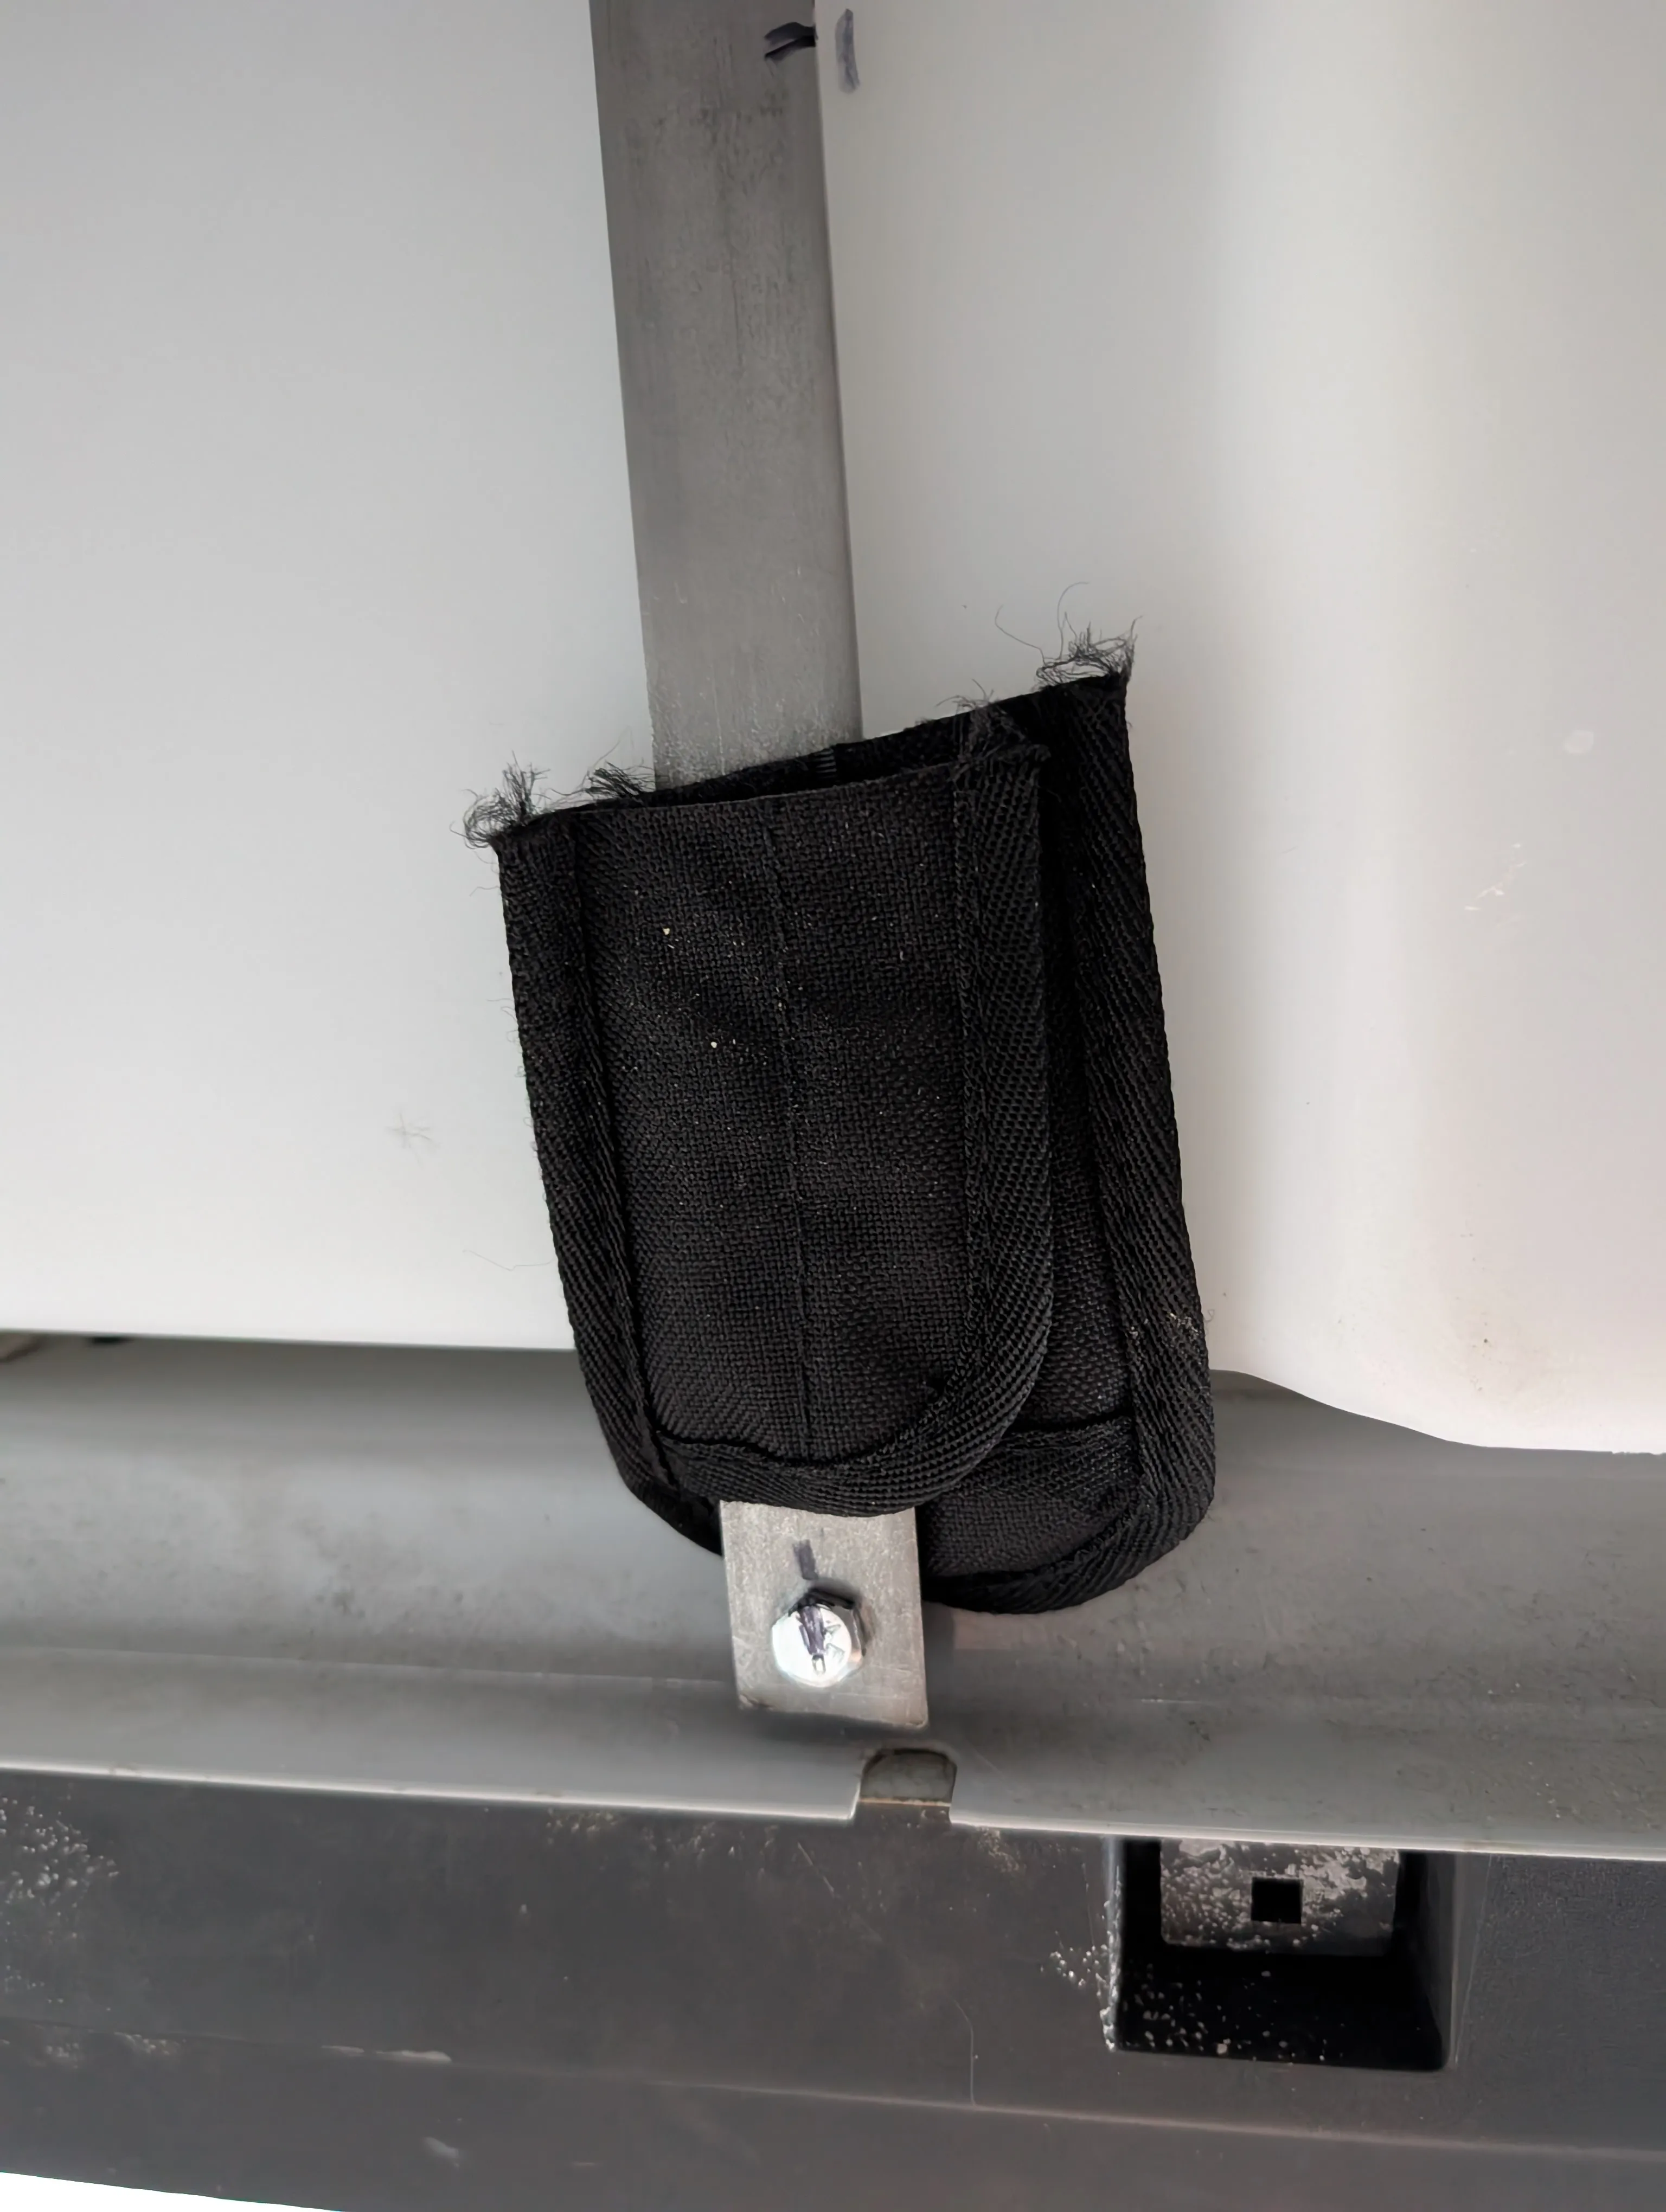
Getting started on the grey water system, I’ve mounted a 16 gallon tank to the bottom of Kep on the driver’s side utilizing the existing holes. These are a great size for the 1/4-20 rivnuts so they don’t need to be enlarged. The brackets are custom made from 1” steel beams bent a few times to fit around the tank and wrapped with shoulder straps to prevent the metal from cutting into the plastic.
July 2, 2025

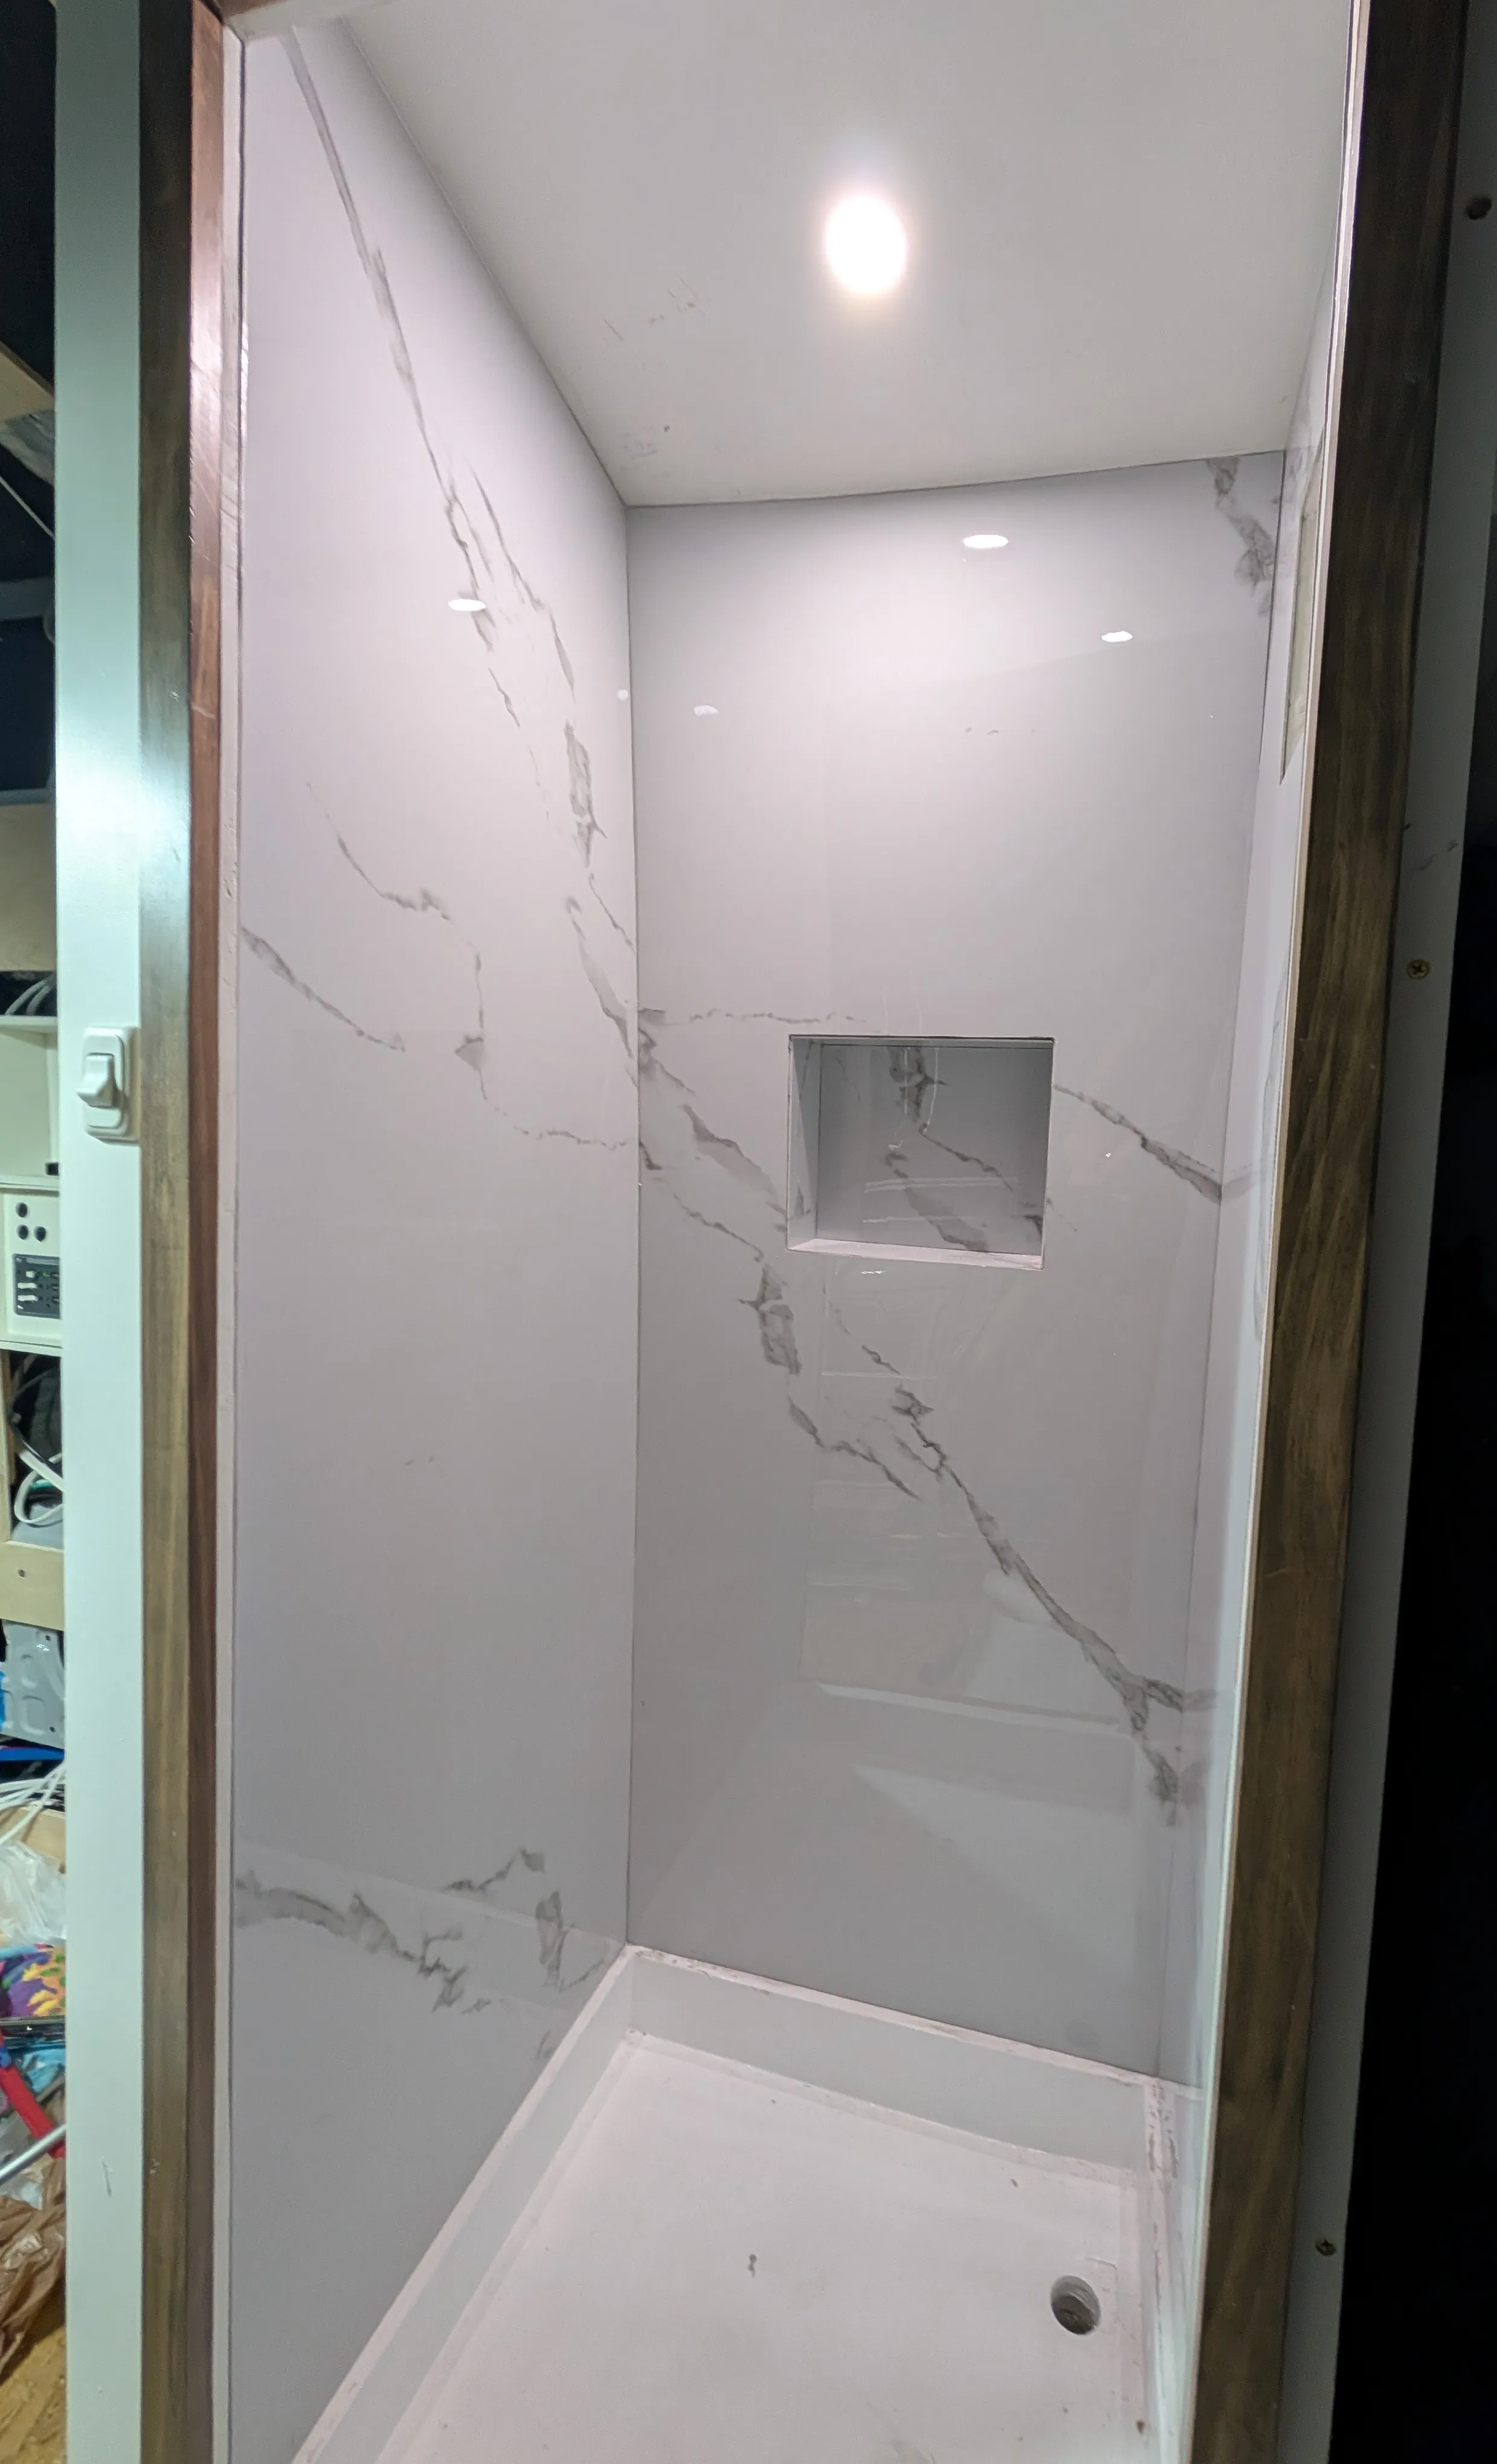
After several shower updates, I can finally say that it is so so close to being done. It just needs some final touches (railing for the shallow shelf and a curtain of some sort for the deeper shelf) and the drain.
Obviously my caulking skills need work and I probably should’ve used tape but I learned of this tip an hour too late. It probably would’ve made things go a lot faster as well. Pro tip (I’m not the pro): Use painter’s tape around the area that needs to be caulked. This will make wiping off the excess caulk a lot cleaner. Then remove the tape immediately after so the caulk doesn’t dry with tape underneath.
The bumpouts for the bed turned out nice. It’s a really simple 4” deep box with 1/4” plywood backing which will make the total length of the bed 6’4”.
June 29, 2025
This wraps up the garage. I’ve added some more walls and trims to give it a cleaner look. I realized my plans for the LED strip lights in the garage have been derailed so I’ll have to find another solution.
June 28, 2025
The shower is coming along after hours and hours of fitting in these wall panels. The PVC sheets I got earlier were cut with a jigsaw (with the plastics specific blade) and glued to the walls using Sikaflex construction adhesive. There was a lot of back and forth to get the right size as I ended up having to do a lot of trimming. Once one sheet goes on, the other sheet adjacent to it has to be a bit smaller than originally measured as one sheet takes up 3mm plus a bit more due to the glue. A better approach would be to measure, cut, and glue one sheet at a time instead of measuring and cutting all at once. The sheets are also quite brittle and easy to snap. I ended up breaking part of the wall by the shelf but it may forever go unnoticed. It was impossible to get the patterns in the marble to line up due to how the sheets had to be cut. Unfortunely, this is very noticeable.
An update on that liquid rubber… during the whole process, the shower pan got scratched up and ripped off the rubber in several areas. I wouldn’t have expected anything less. Looks like it’s getting one more coat.
June 25, 2025
PEX A Plumbing Retro:
- Be sure to push the pipe all the way into the fitting before it closes up.
- Don’t cut the roll of pipe until after the connection is made. If possible, feed one end of the pipe to the correct location, connect, and then cut. That way any inaccurate measurements will not result in a wasted piece.
- The pipes can be bent to a certain radius using a heat gun and it is better to try to bend it than adding a 90 degree fitting. Fittings are expensive and add extra points of failure. It also restricts the flow of water. Be sure to plan out the location of the pipes in case there is enough room to just bend the pipes. Not cutting the roll until after a connection is made can also aid in spotting these locations.
- It’s easier to cut the pipes with the cutter opening facing upwards.
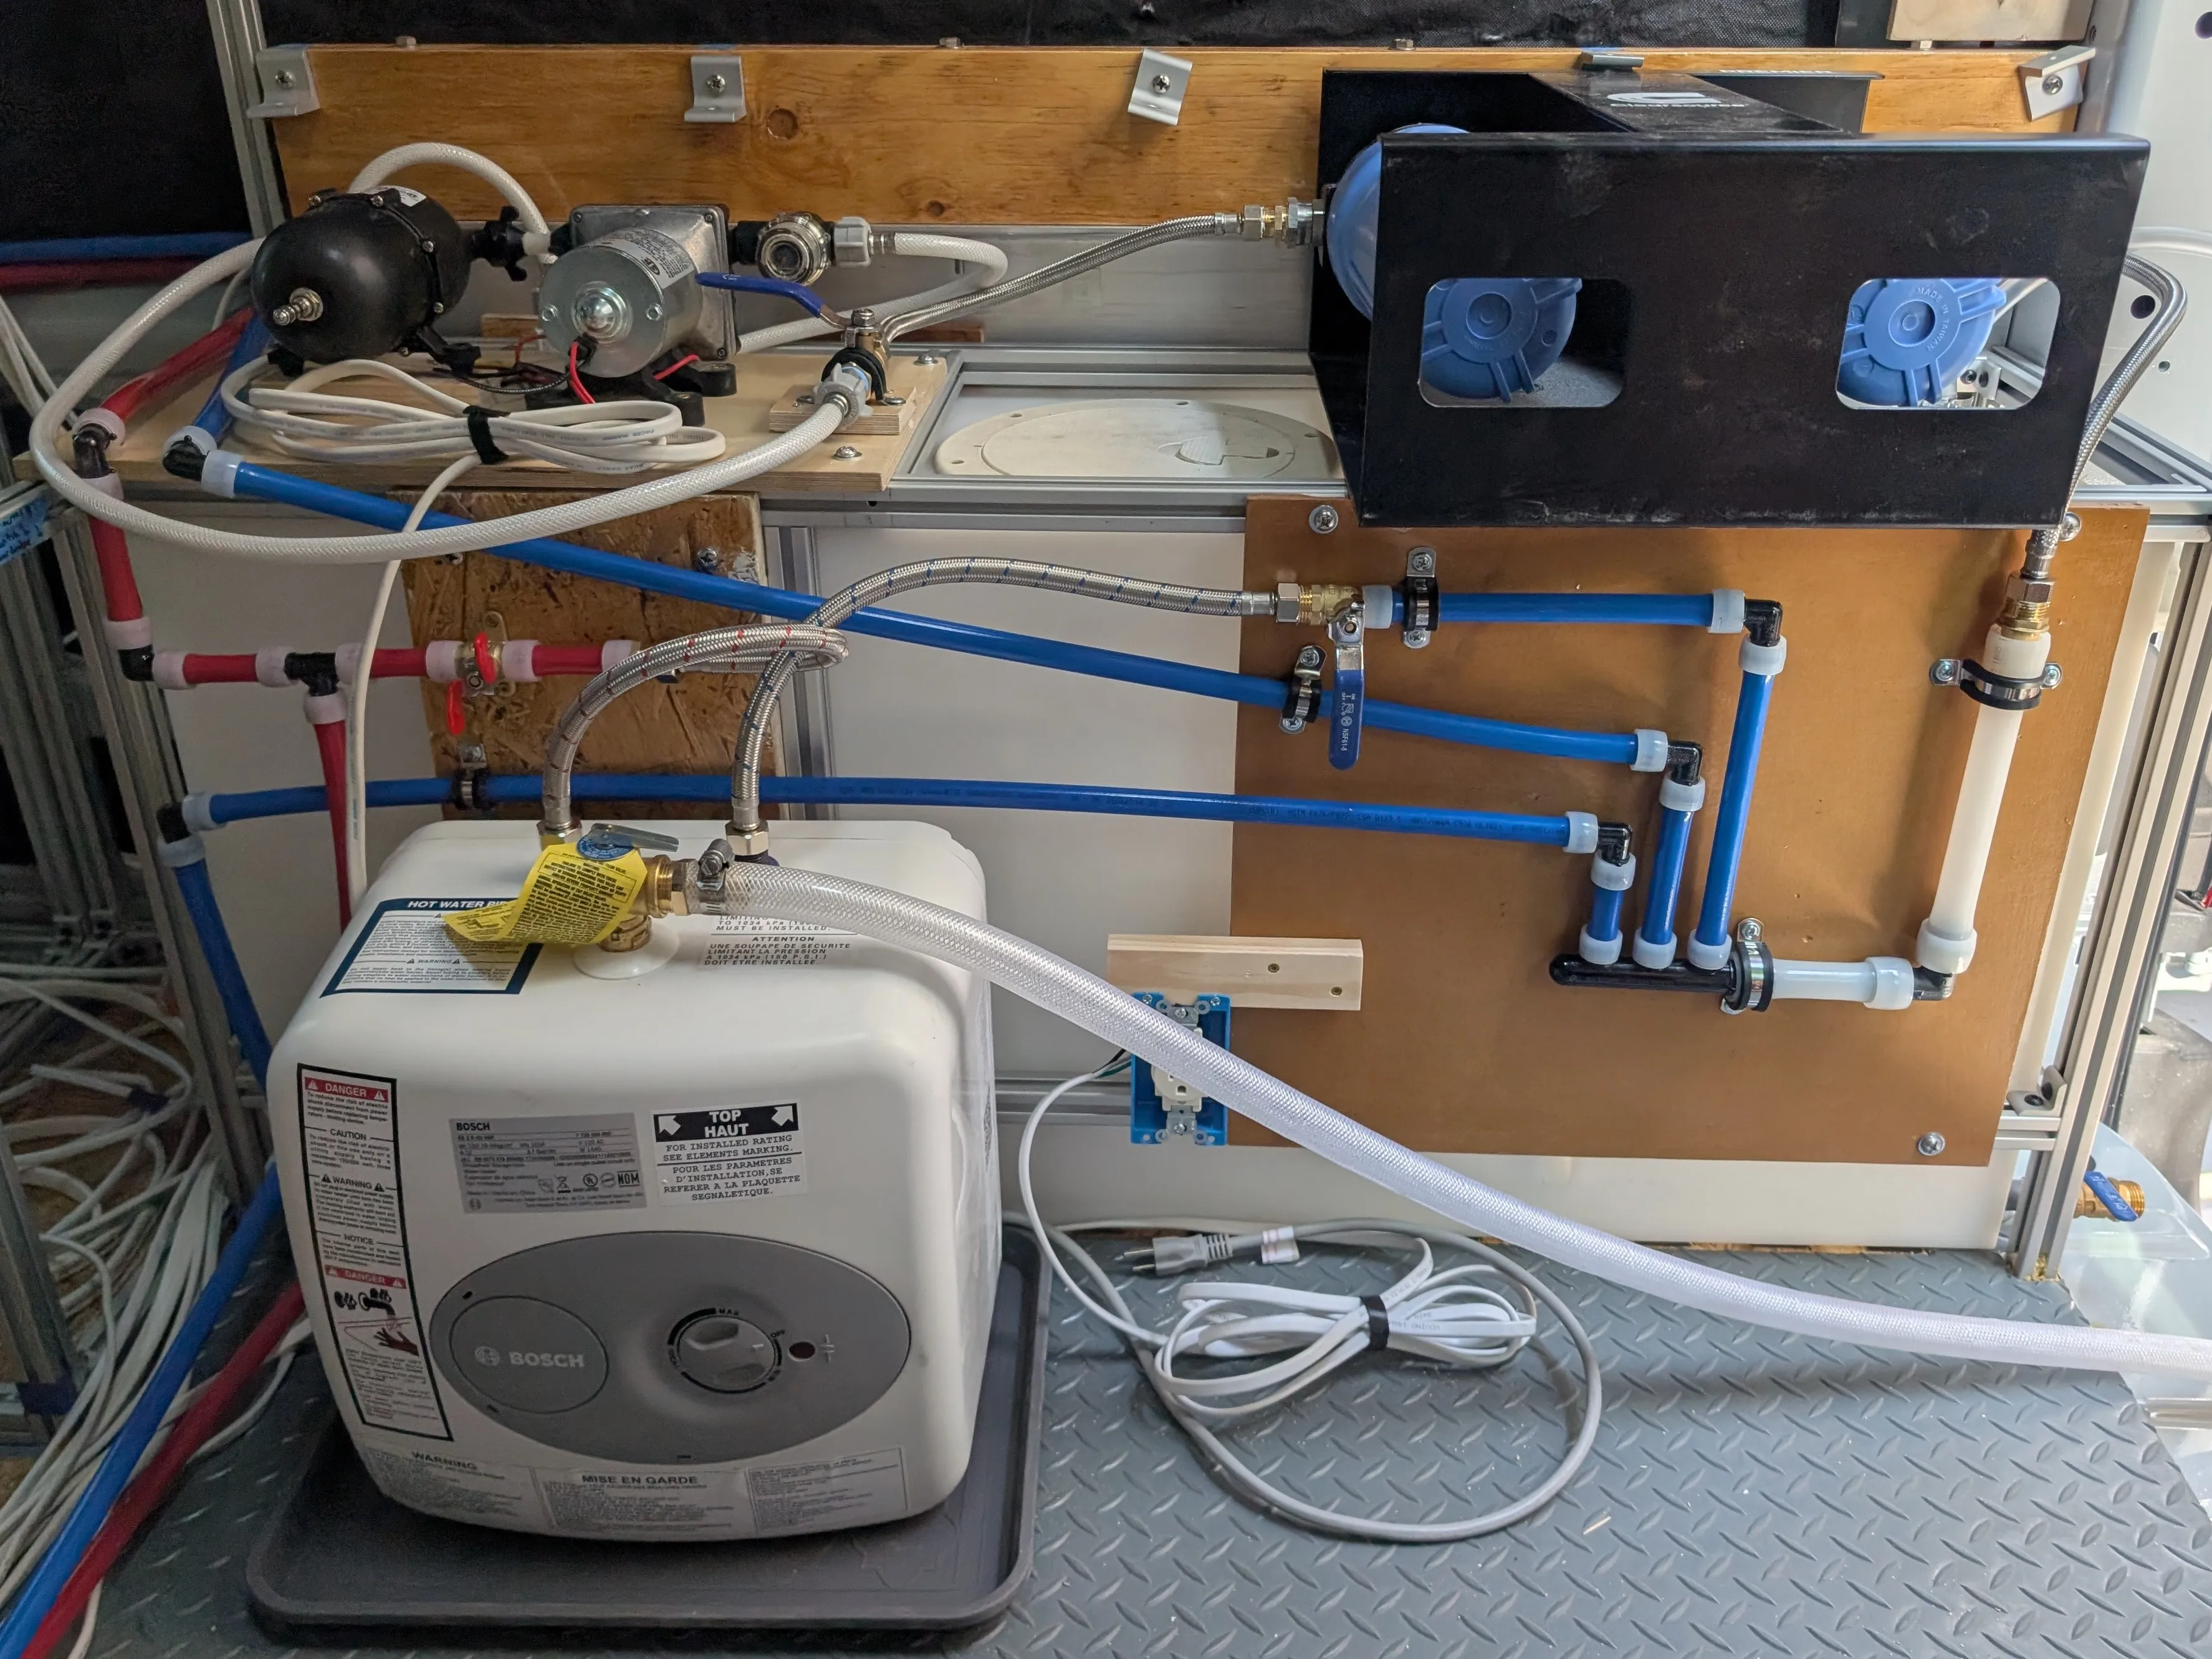
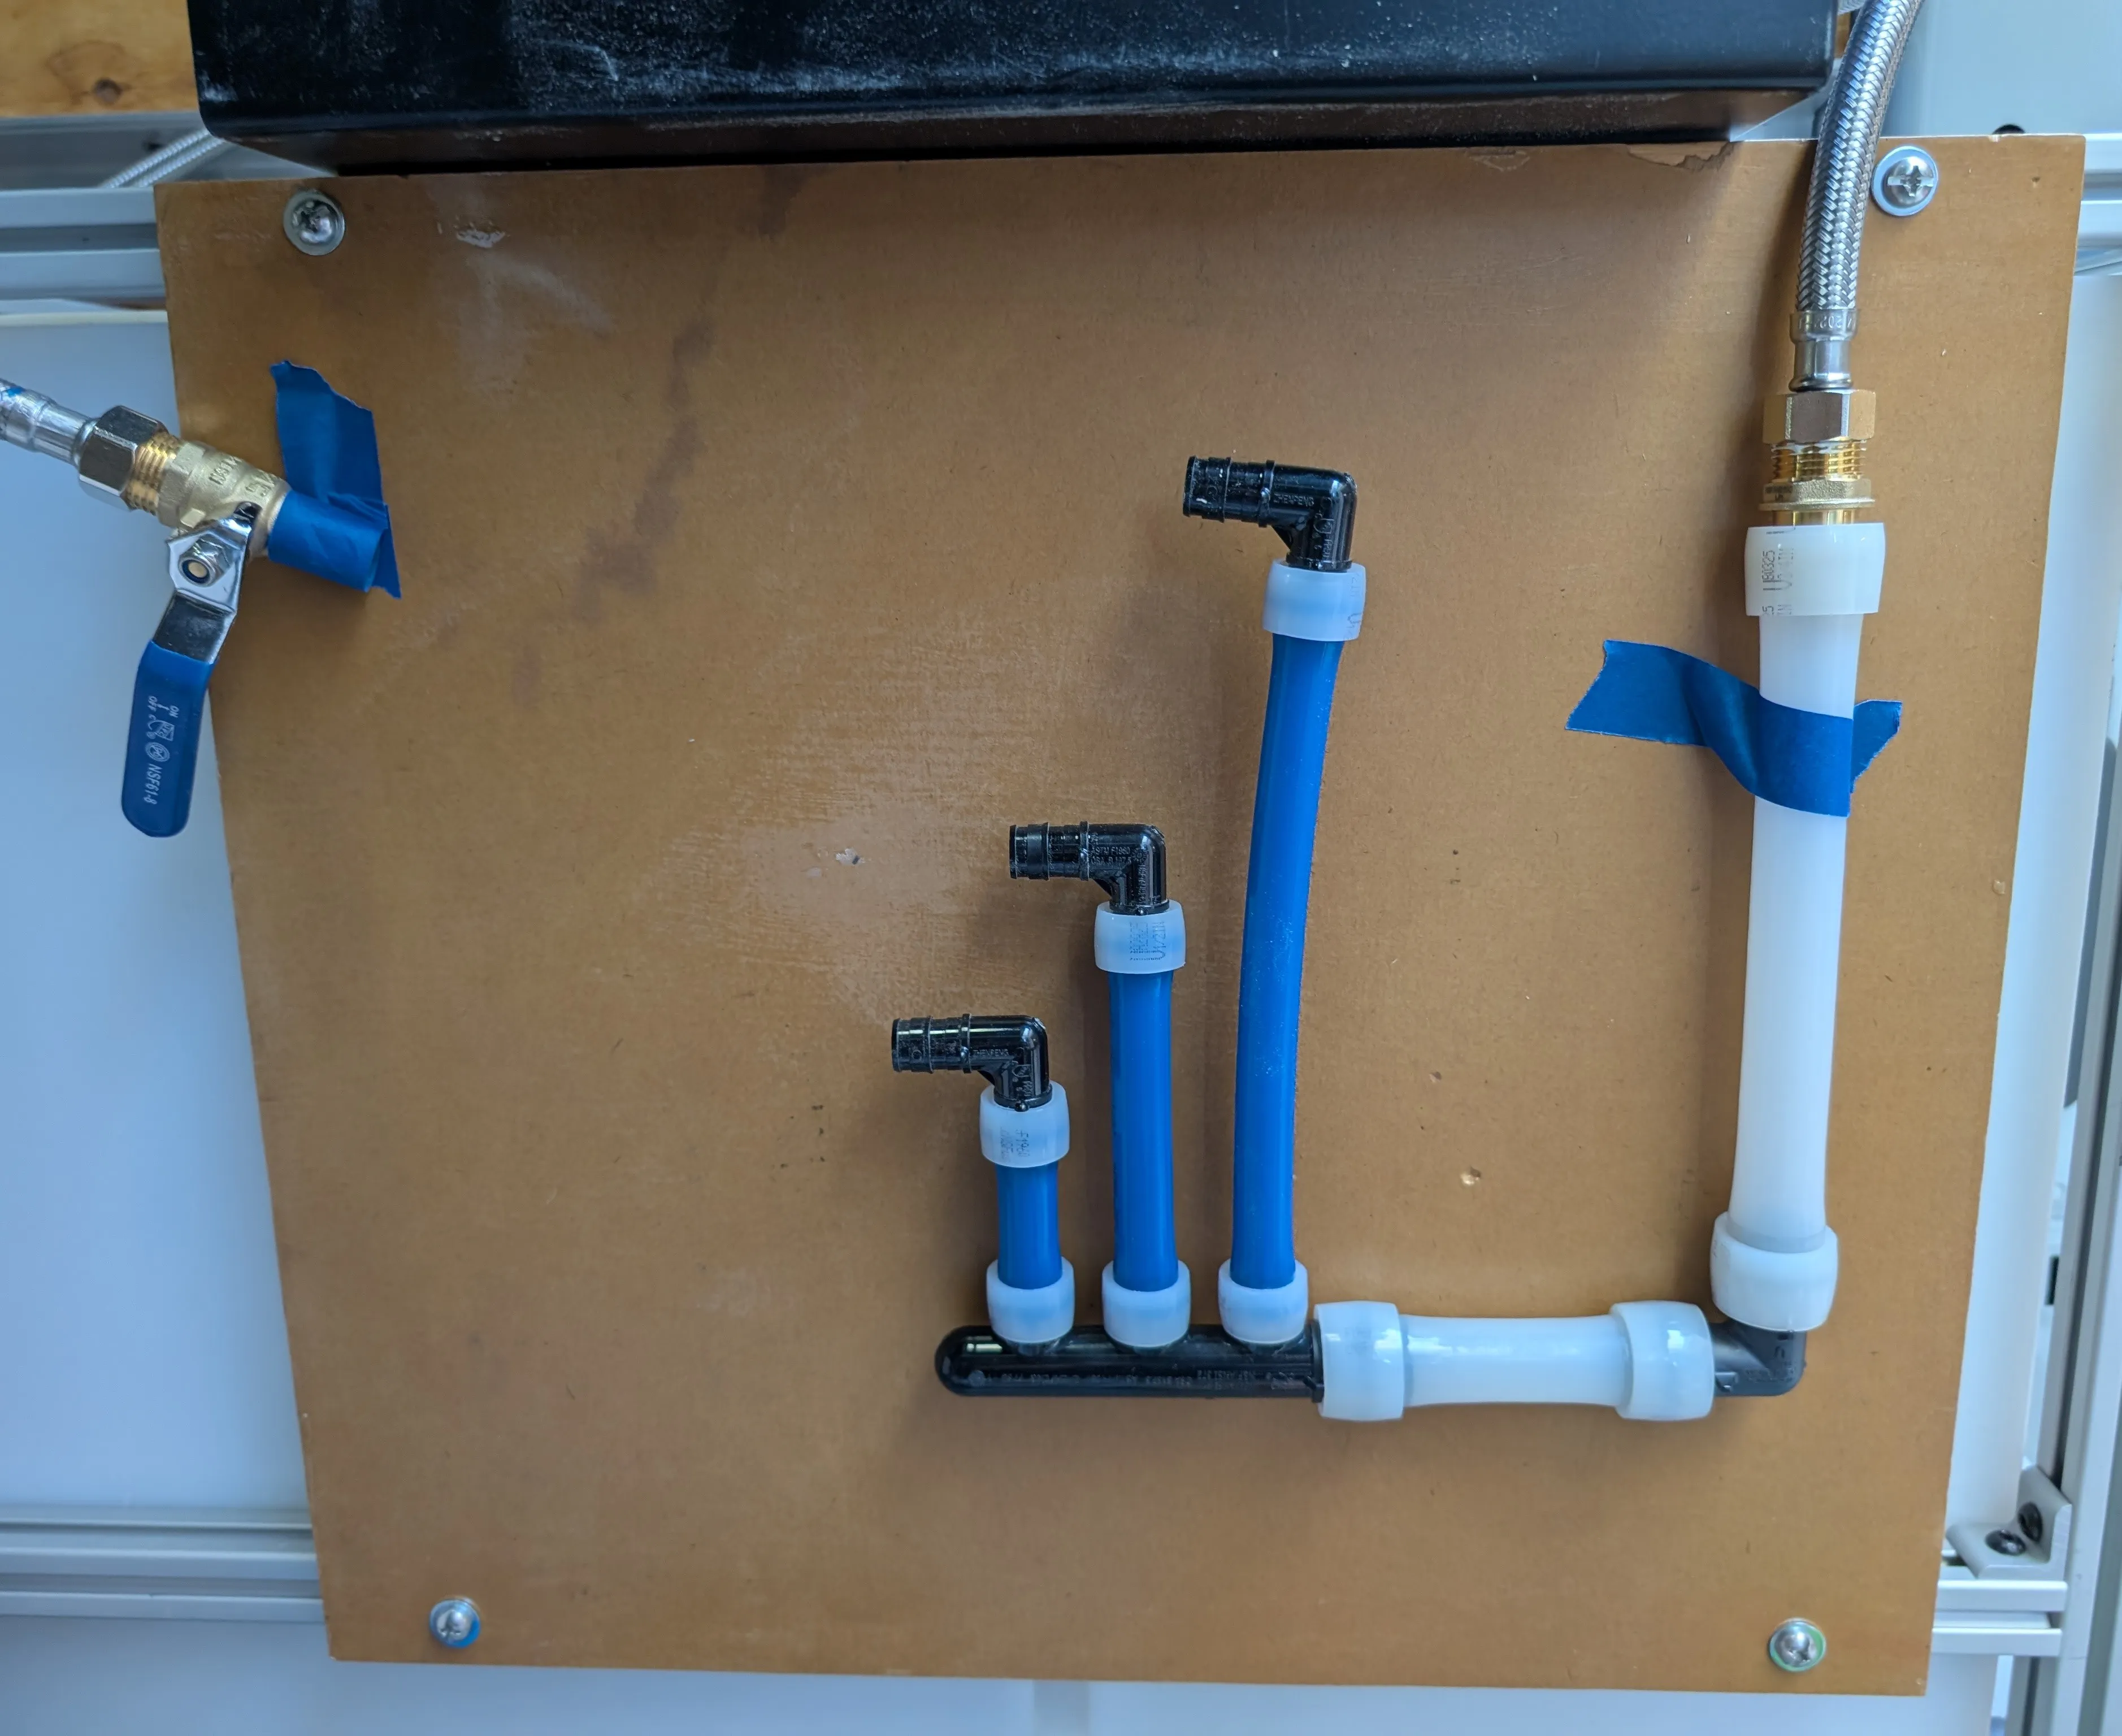
After a week of fumbling around, water is finally flowing. This is my first attempt. As you can see, I ended up using a bunch of fittings after seeing other van builds and feeling how stiff the pipes were. Turns out, heat loosens them up. I’m sure you can spot several other questionable decisions.
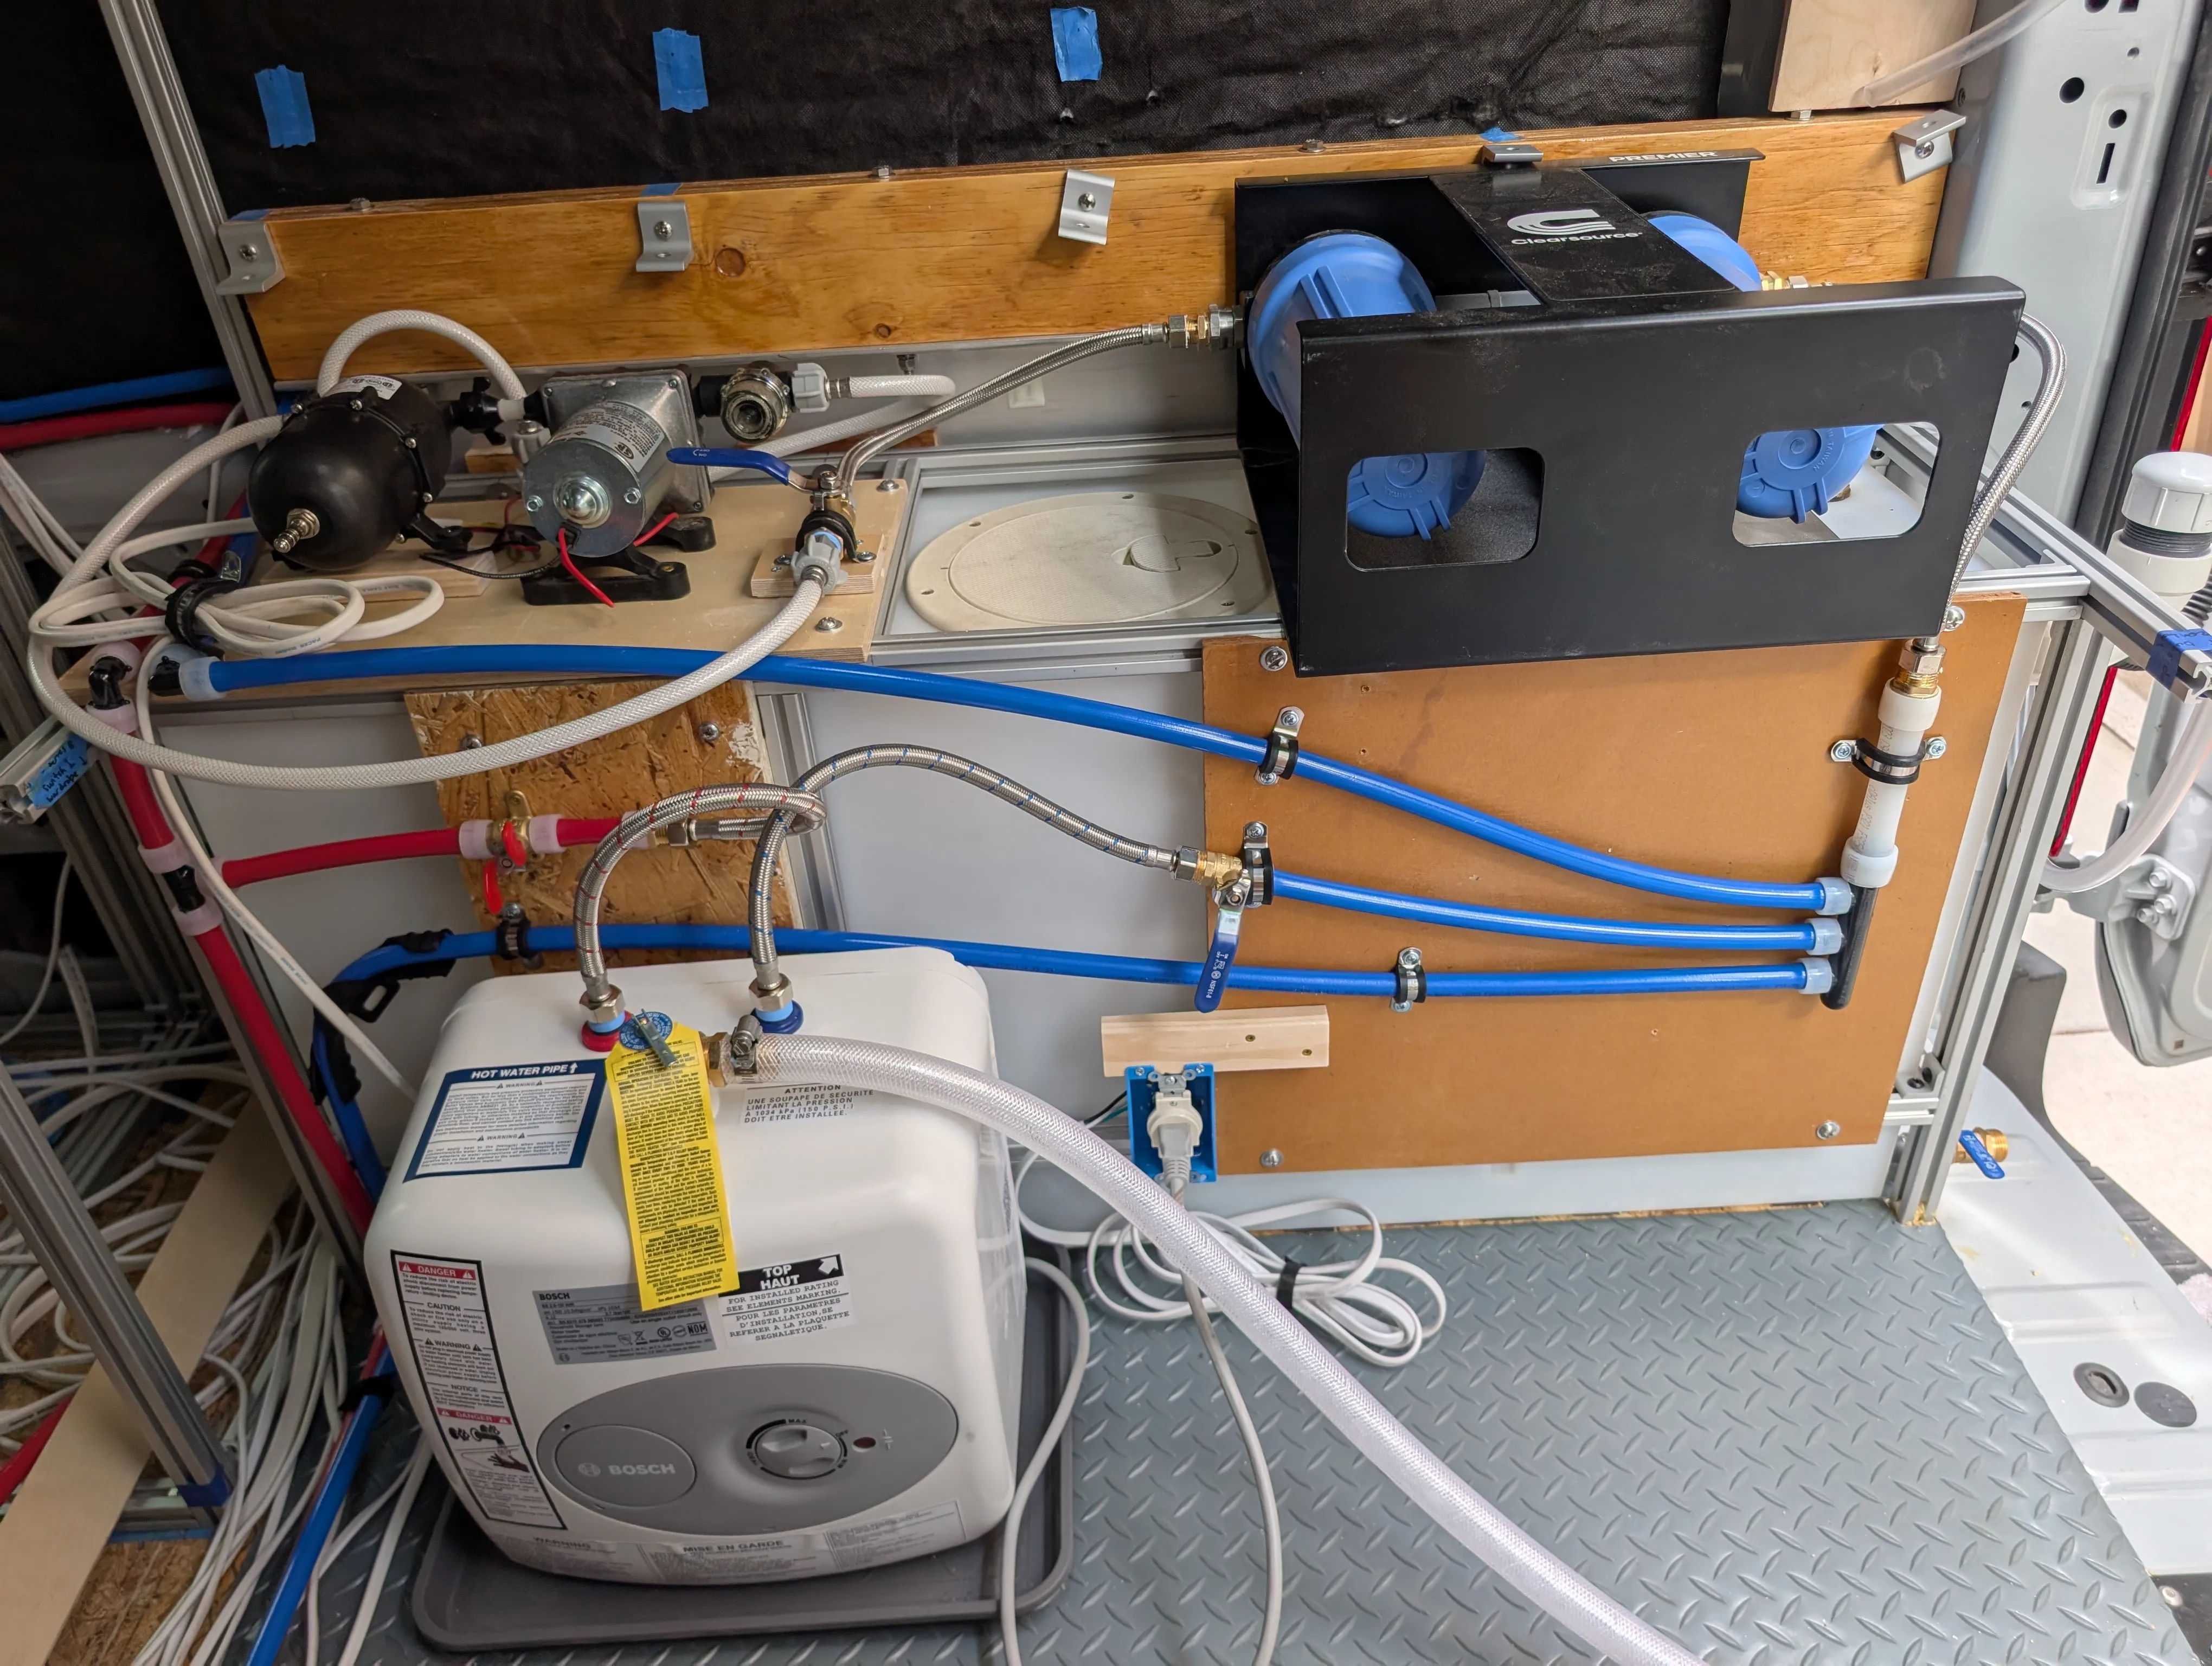
Well I couldn’t let those slide (except for the outlet being right under a potential leak point…) so here’s take two. There actually was a slight leak in the 3/4” (white) PEX connection because it wasn’t pushed in to the fitting all the way so I had to redo that part anyway. The good news is, the clean water system is now complete and leak free after a few days of leaving the system pressurized.
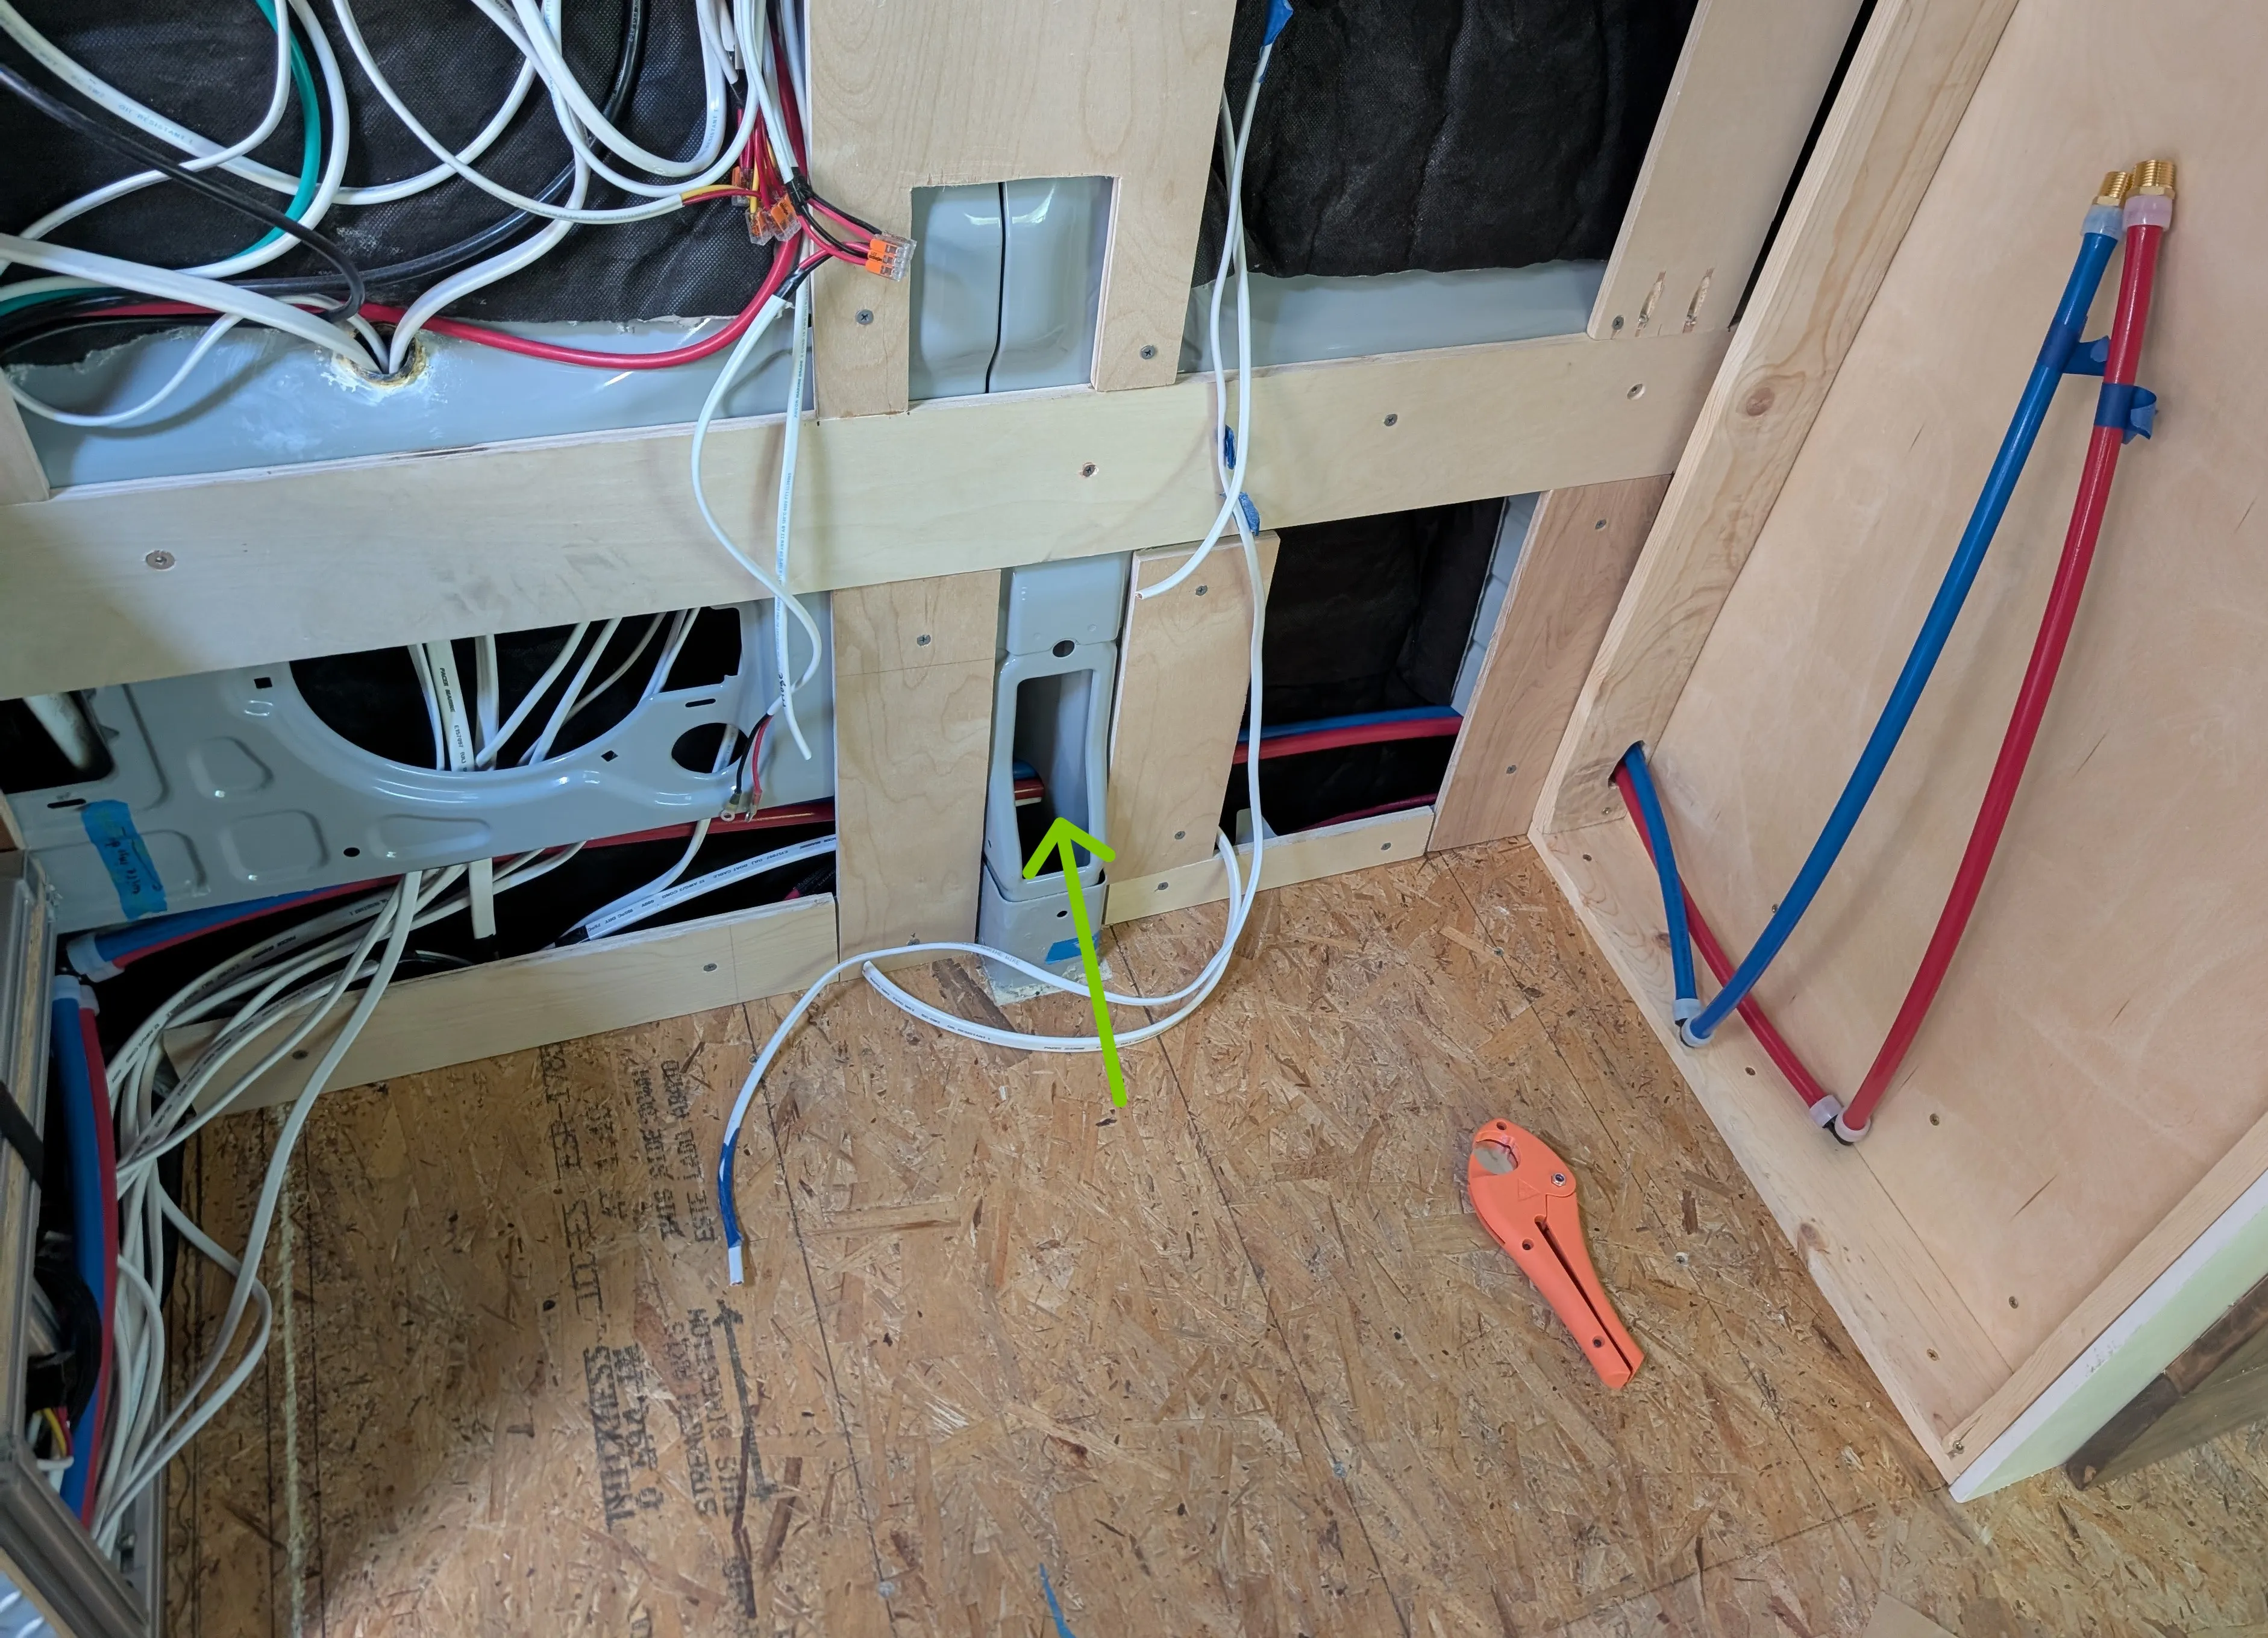
These are the lines that run to the shower. They run through the existing holes behind the sheet metal. There is one sharp area that may be of concern down the line but there’s not much room to add a grommet. To my future self - I told you.
June 20, 2025
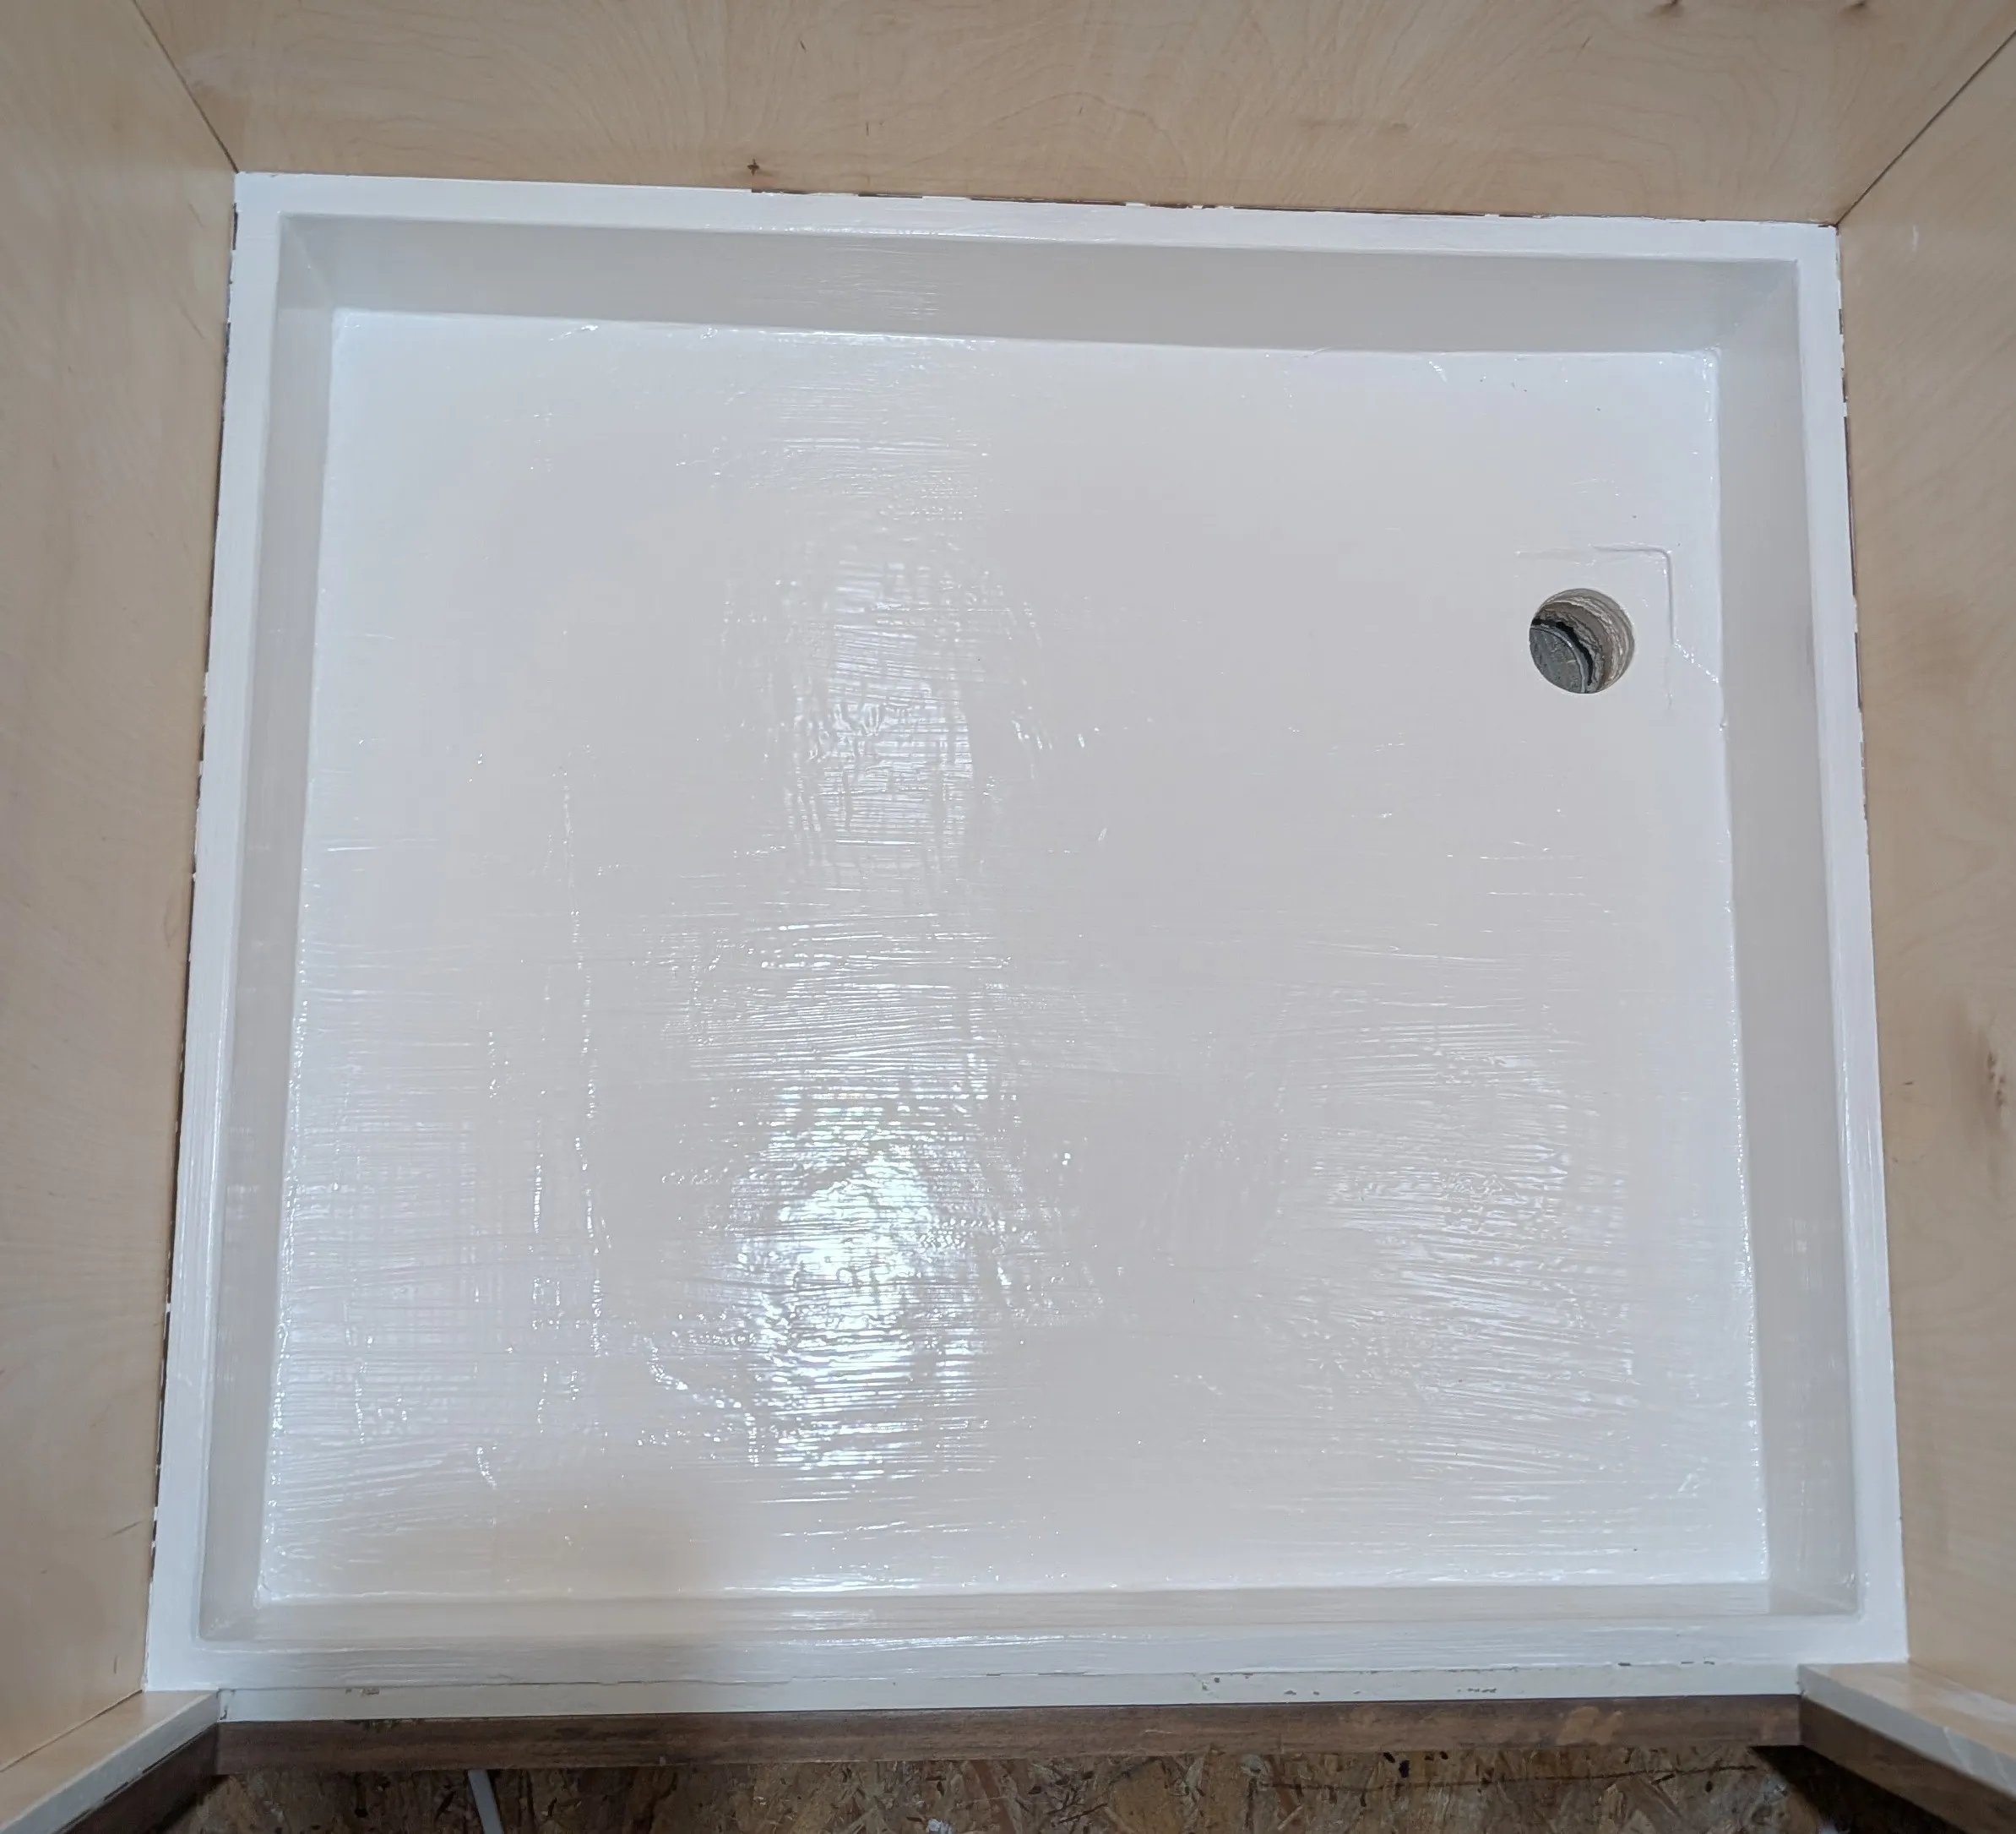
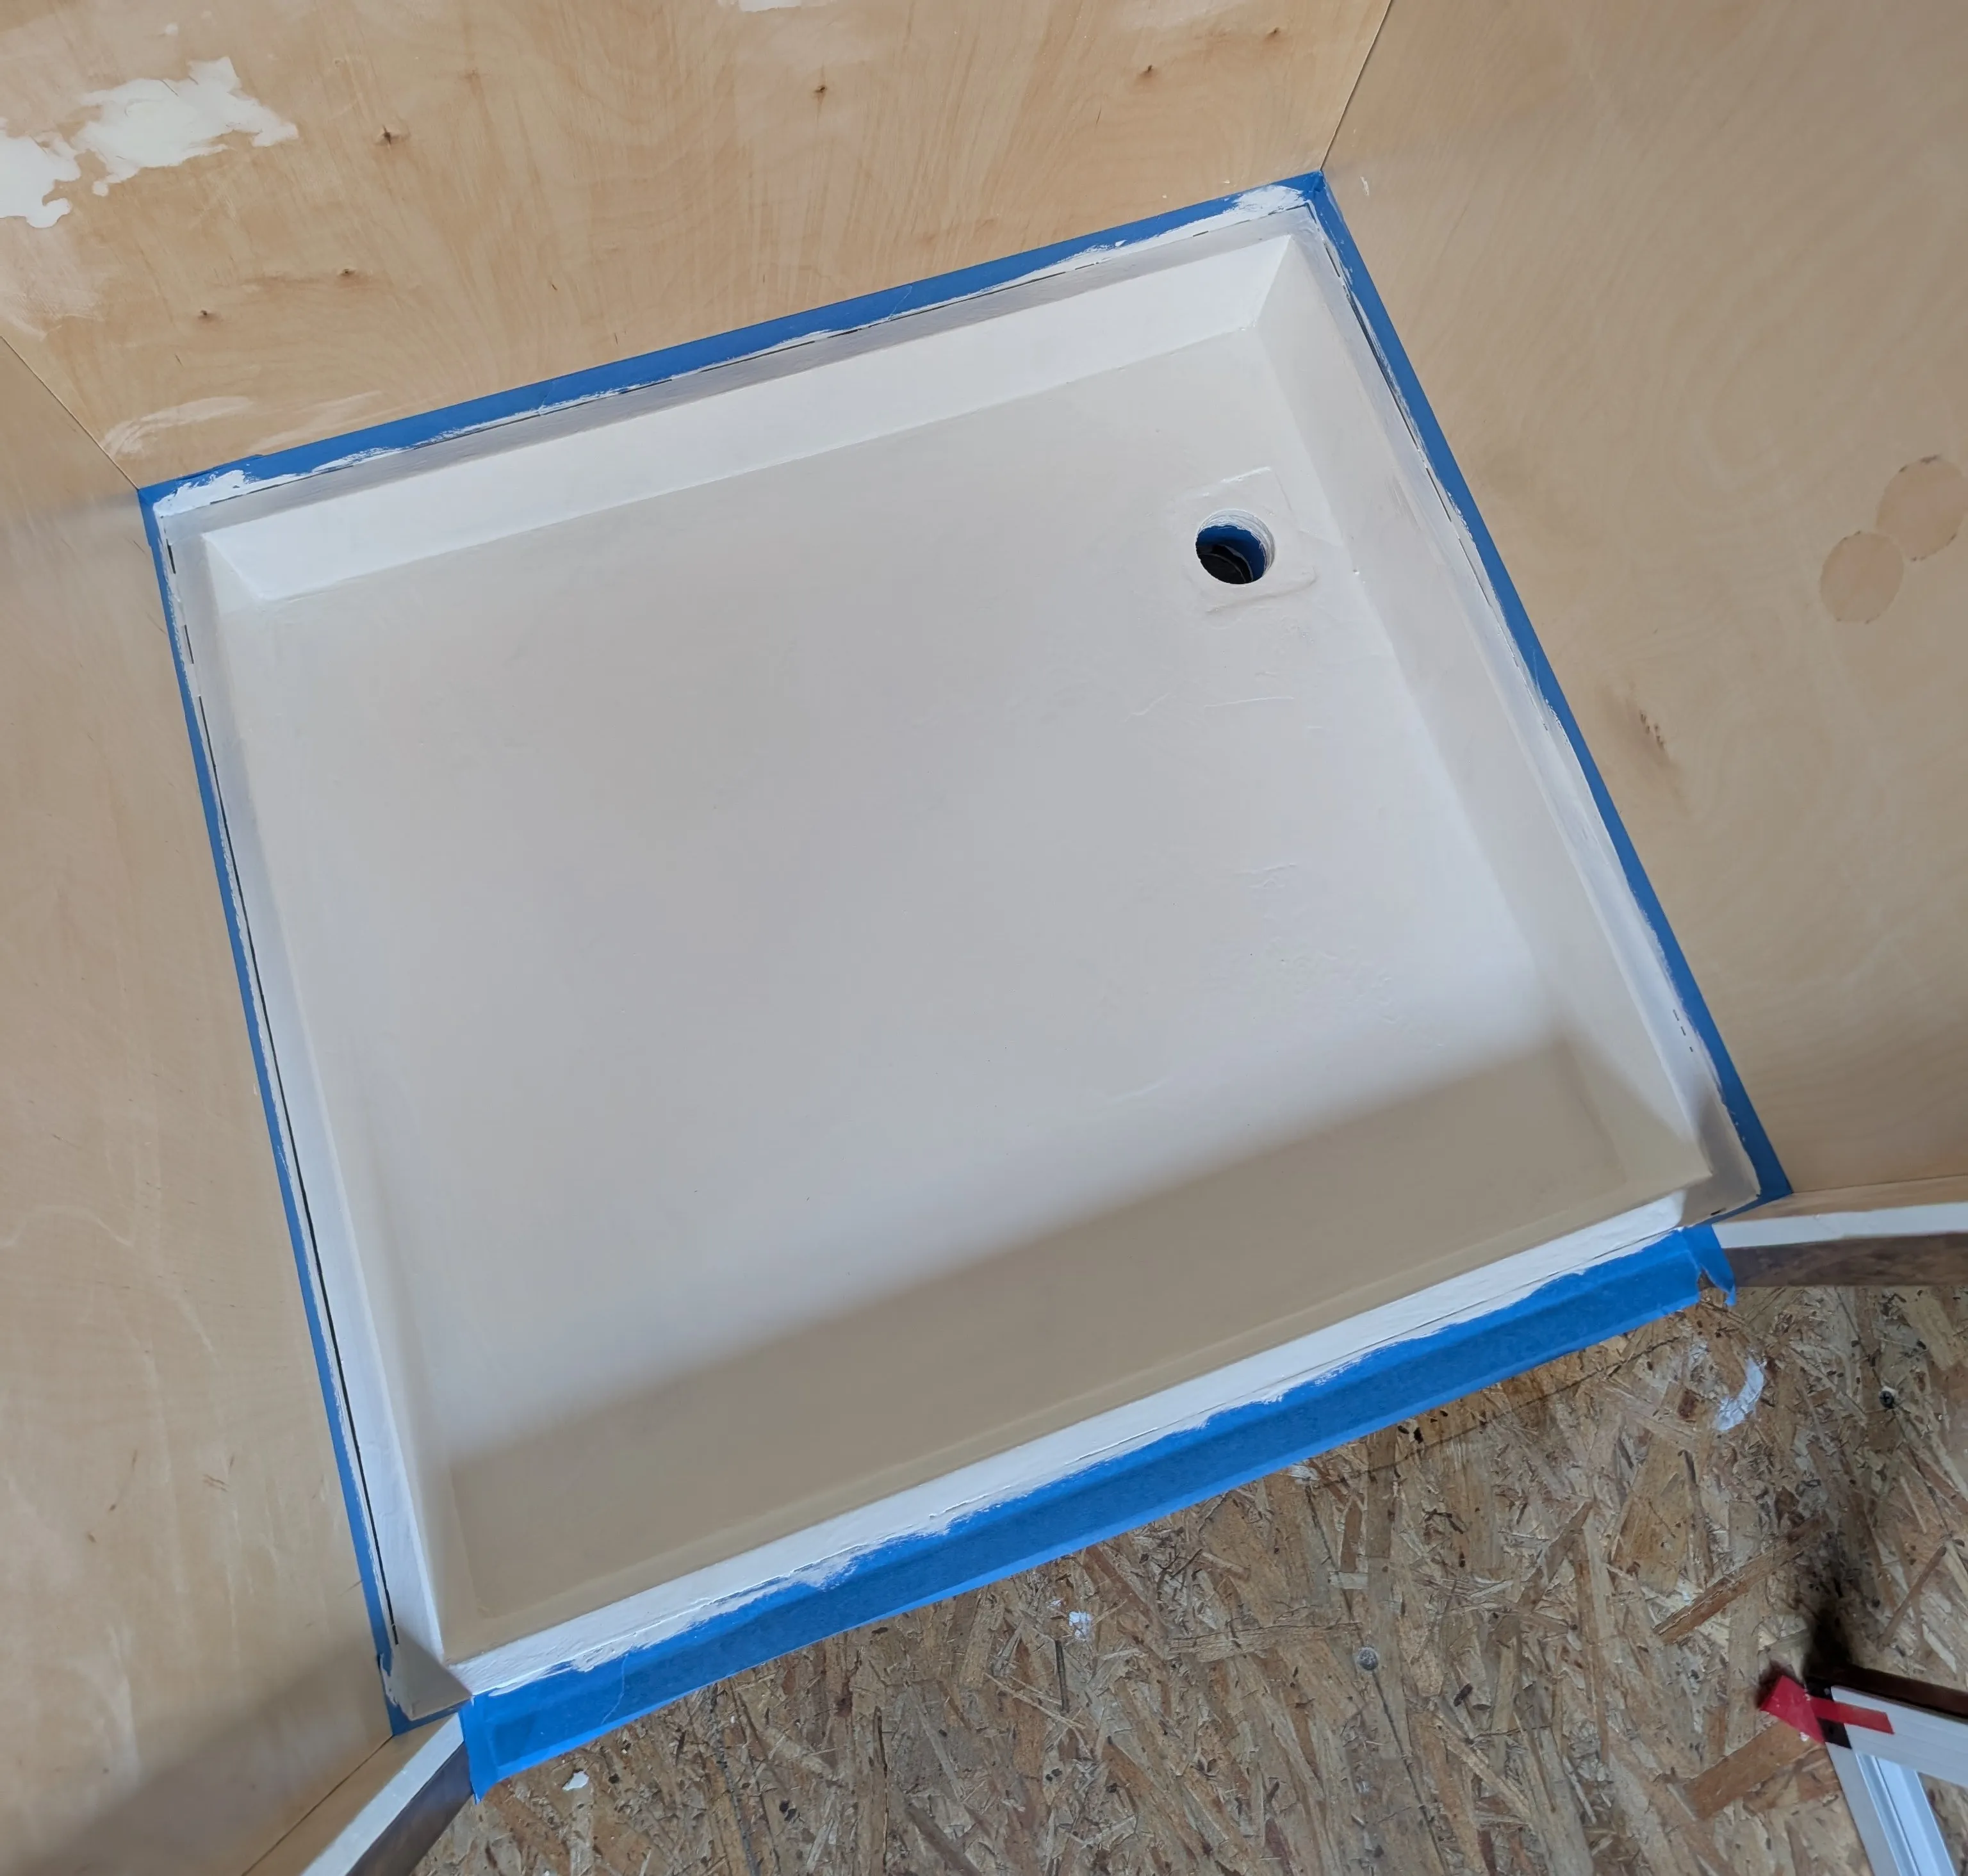
The shower pan is now dry with two coats of liquid rubbish. You can definitely see streaks from the brush so I’m a little disappointed in the results but I did not have high expectations for it. As far as waterproofing goes, this seems to work so far.
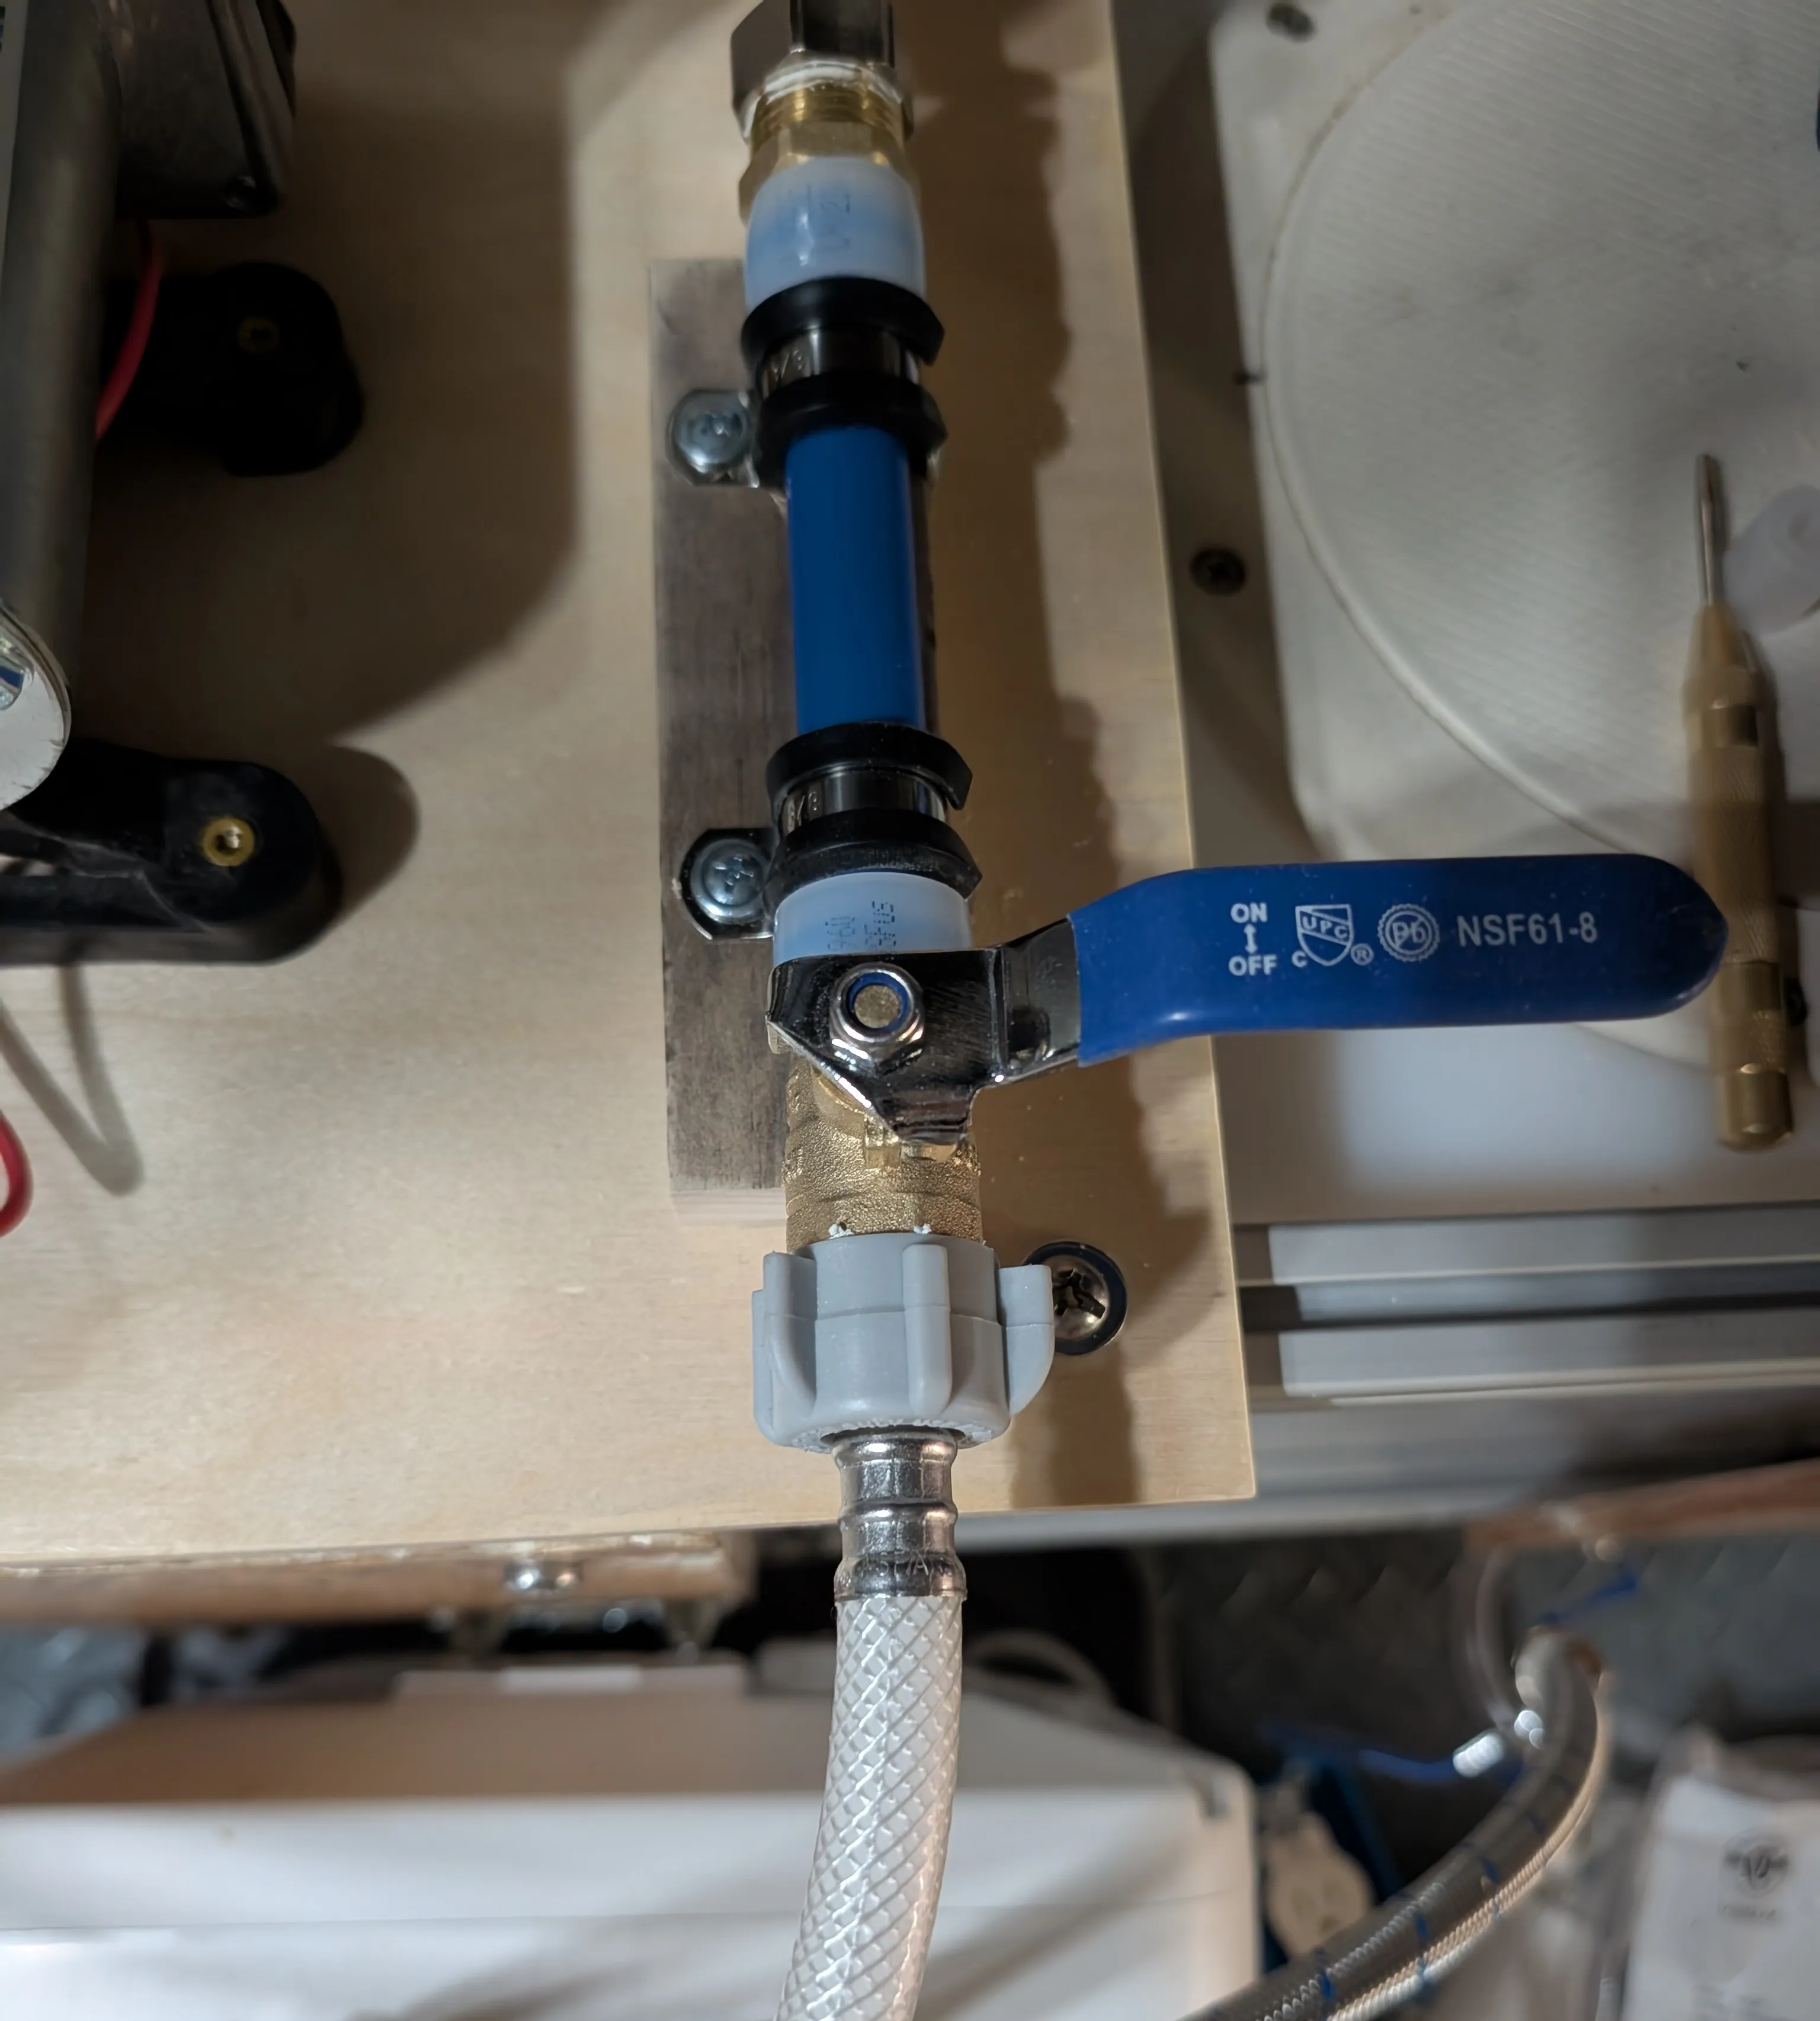
I’m falling a bit behind on the plumbing largely due to the fact that it’s way less fun and I keep messing up. I see a future with more PEX purchases. I would have been able to test out the water pump and pressurized part of the system today but when making my final connection, I realized this was not acceptable. As you can see the bottom connection, which is the pump silencer, is plastic, and the top connection, the shut off valve, is brass. I spent a good deal of time trying to figure out how to make use of this valve when I really just wanted a valve with both ends being 1/2” male NPT. Turns out that wouldn’t have worked either. Generally, you shouldn’t have a plastic female end and a metal male end because plastic expands and it’ll just leak. The other way around is fine though. Then I remembered the silencer kit came with male to male adapters, so I guess they really do serve a purpose.
June 19, 2025
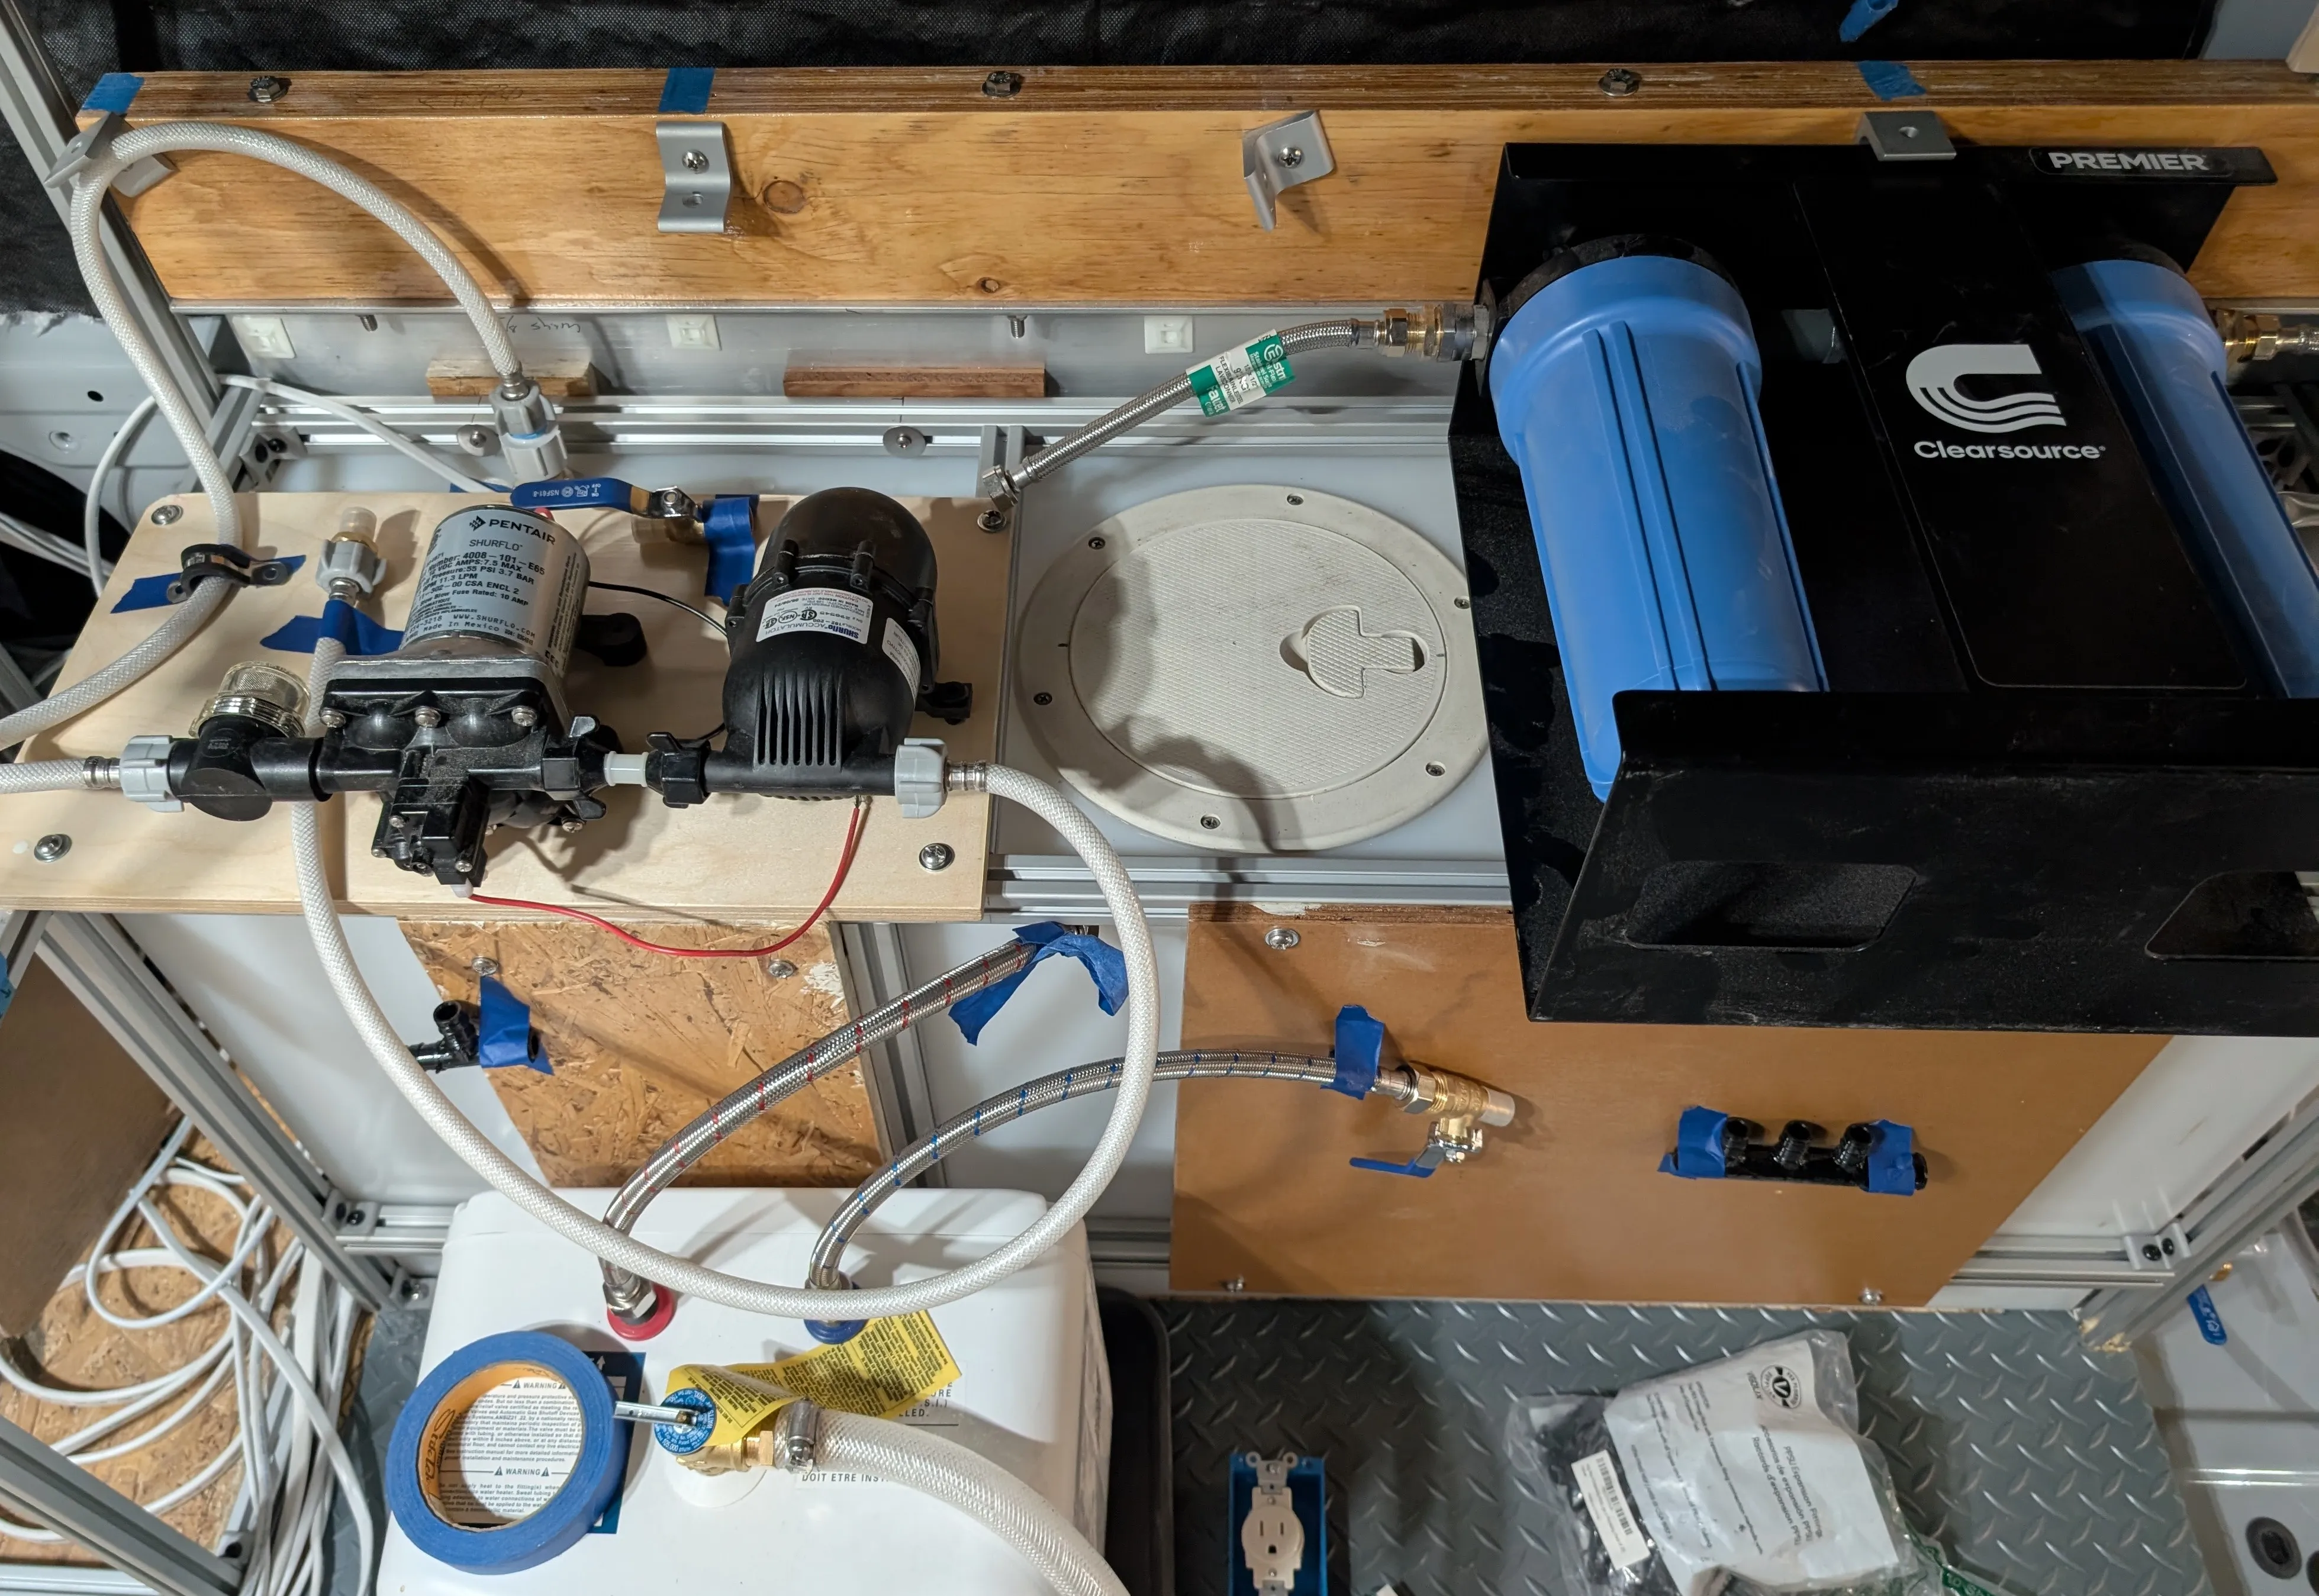
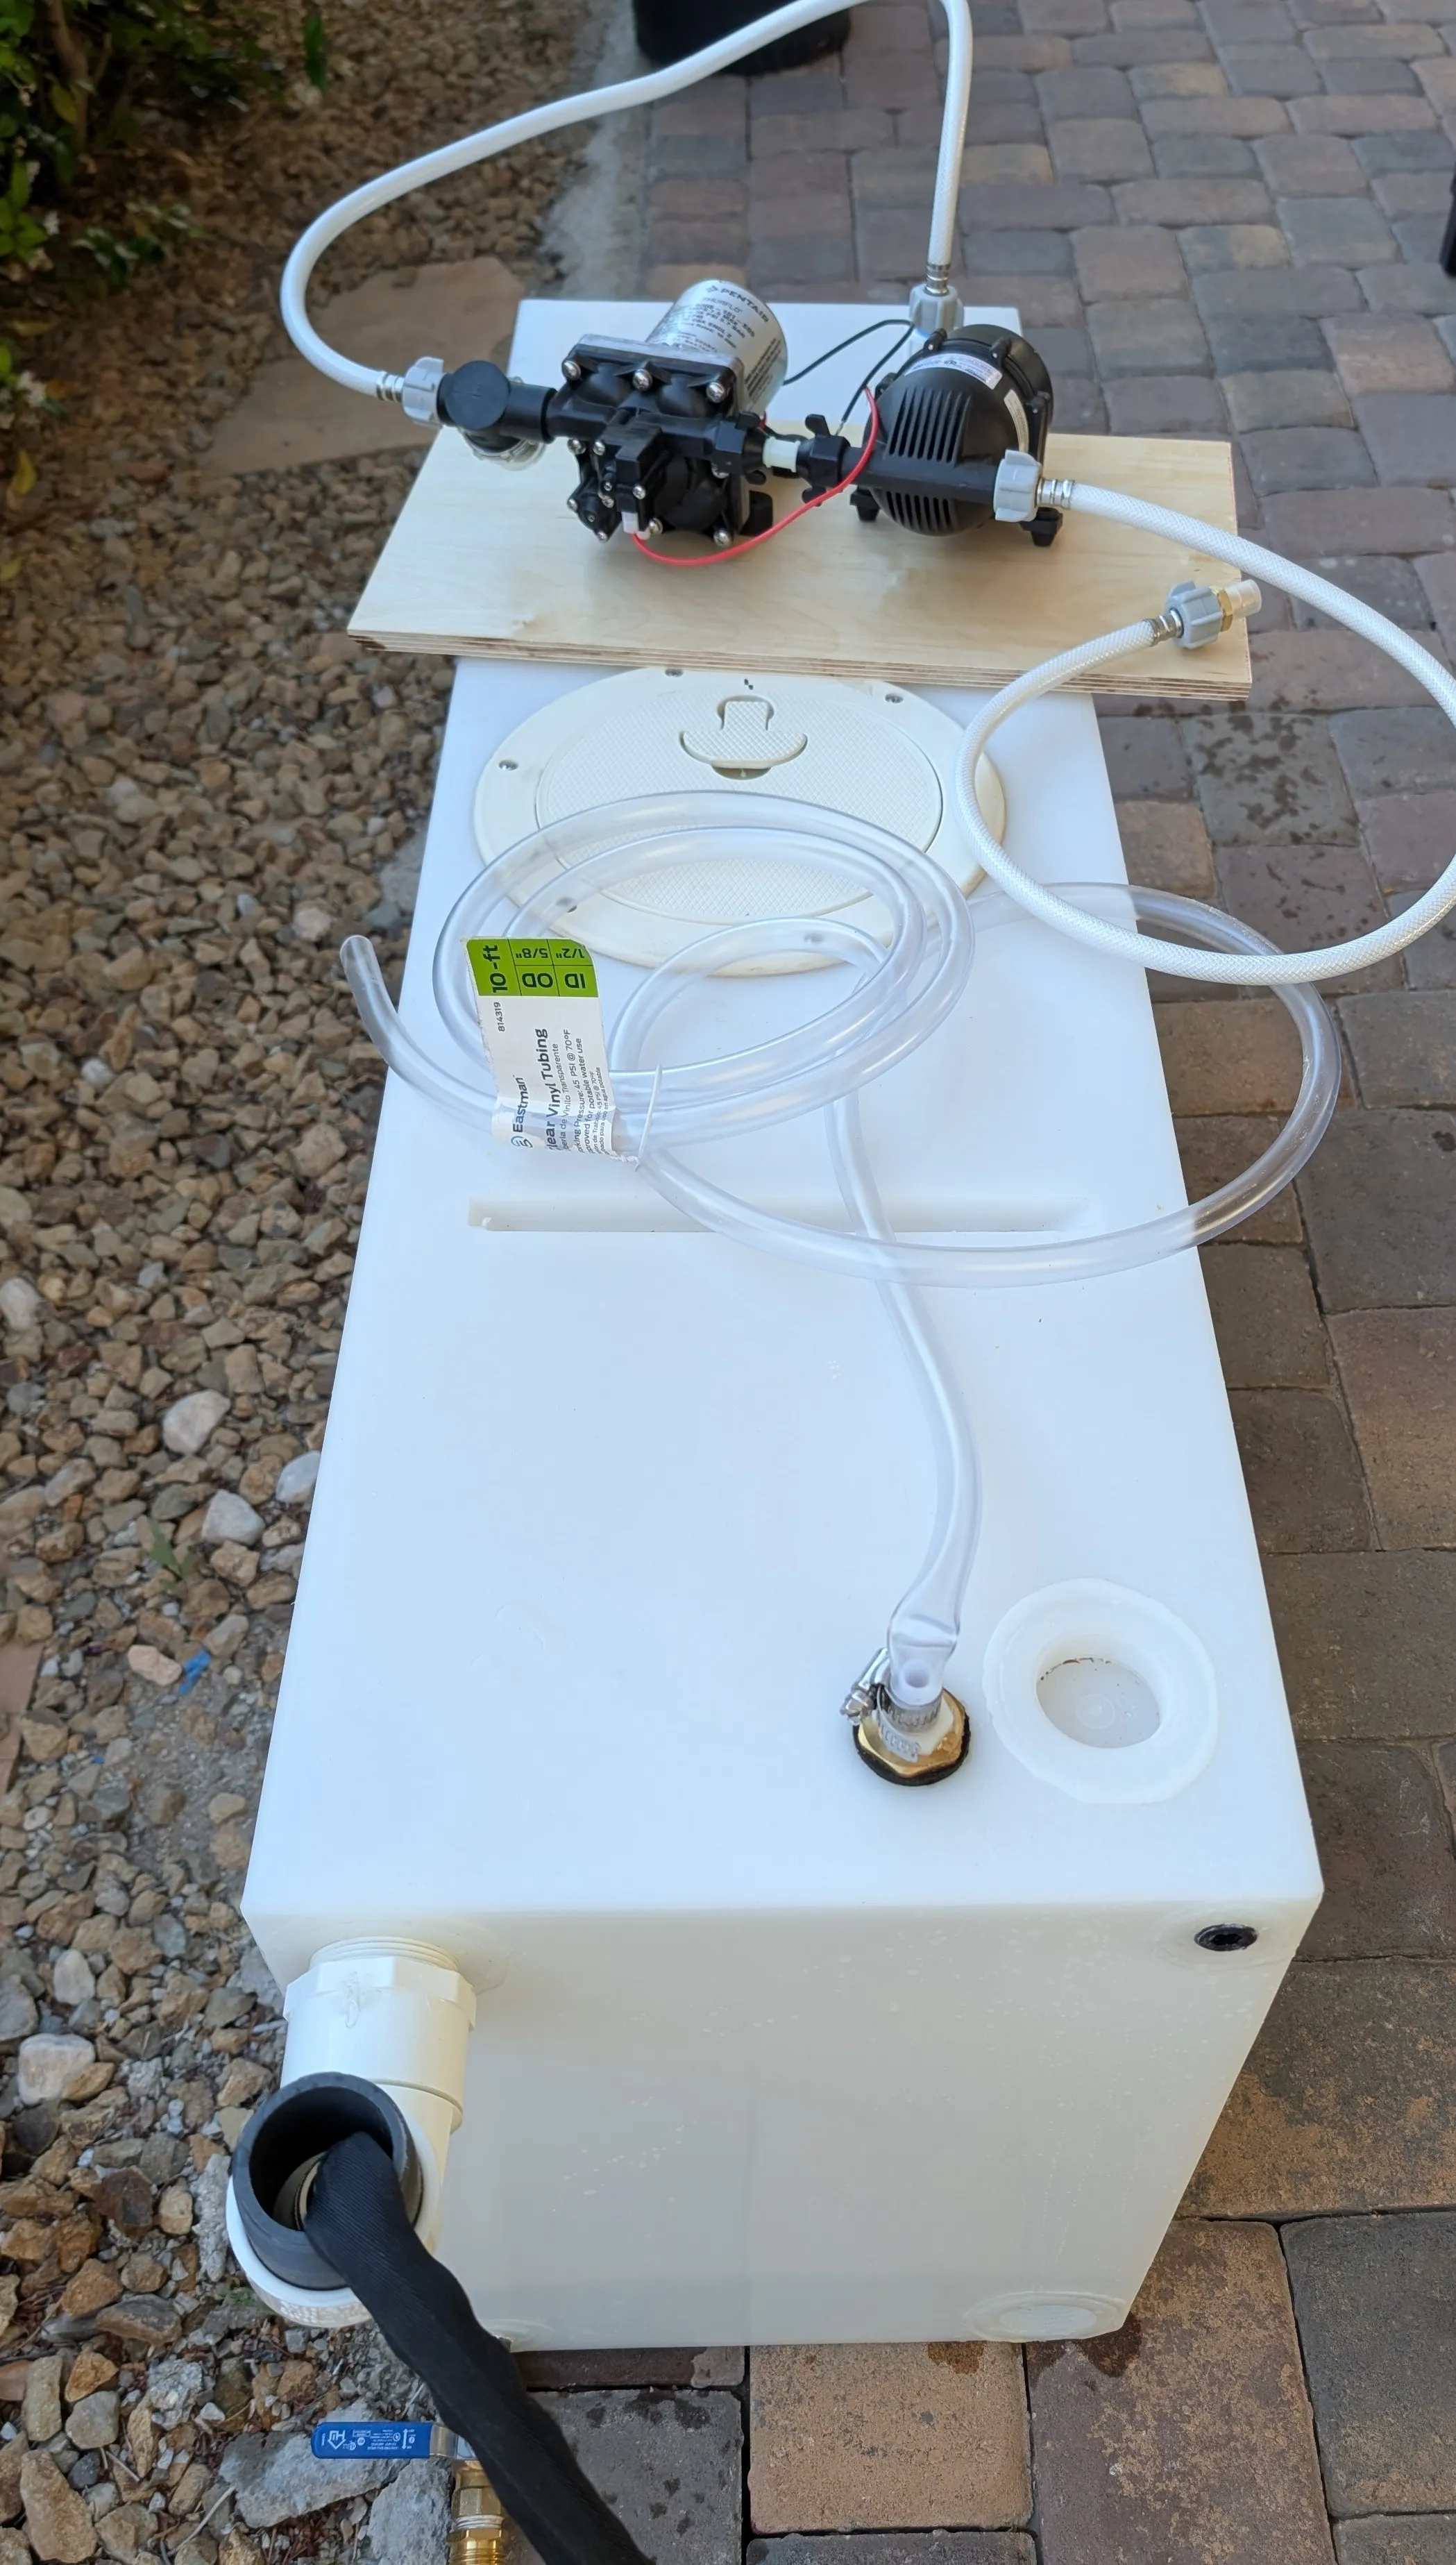
This will be the overall layout for the water system. The tubing will consist of PEX-A for the main routing and braided faucet lines for easy removal of components. From the water tank, there is one end of the pump silencer > strainer > pump > accumulator > the other end of the pump silencer > shut off valve > water filter > manifold that will split off into water heater, sink, and shower lines.
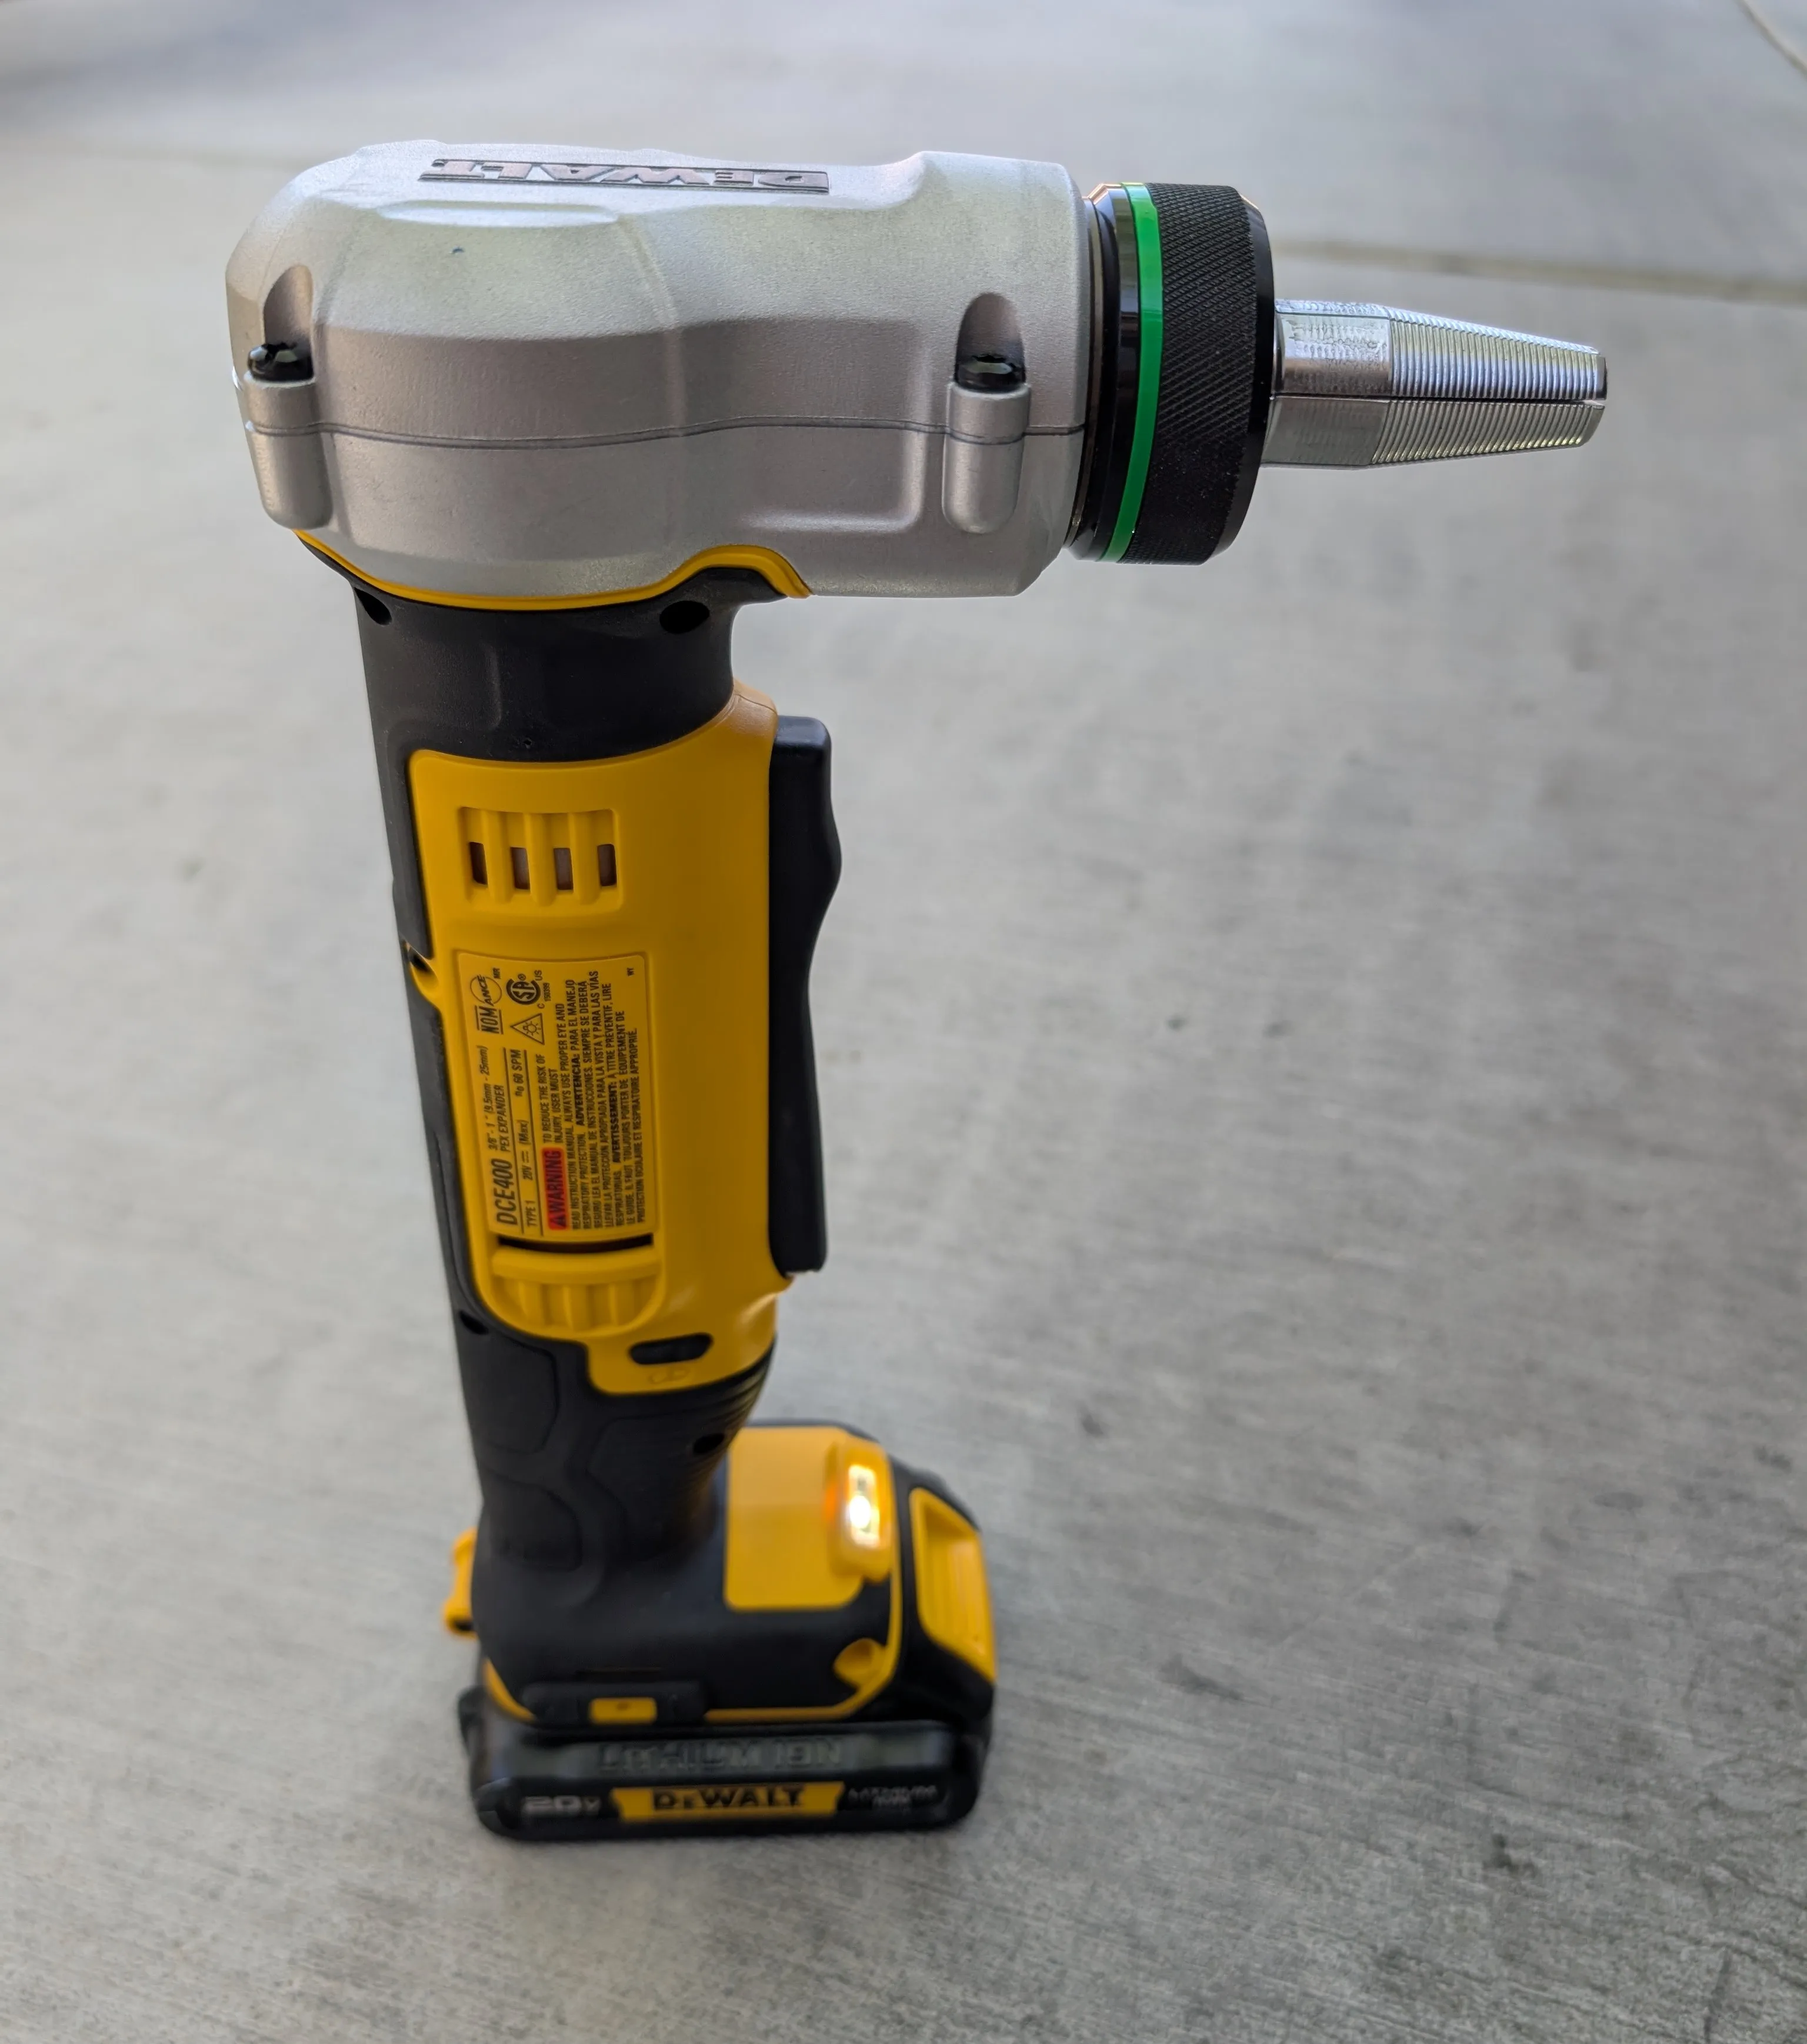
I’ve started putting together the PEX-A tubing and messed up the first time so I had to redo it. It’s actually pretty simple and quick with a mechanical expansion tool. The tool just rotates and opens up the end of the tube so that the fittings can go inside. PEX-A is pretty stubborn, so it’ll close right back up and create a secure bond. For the 1/2” tube, I found that 5-6 expansions work well while the 3/4” requires 8-9. Unfortunately once it’s on, it’s on for good and you’ll have to cut it off to remove it. I also learned last minute that there are minimum lengths that the tubes can be, which is about 5 times the diameter.
June 18, 2025
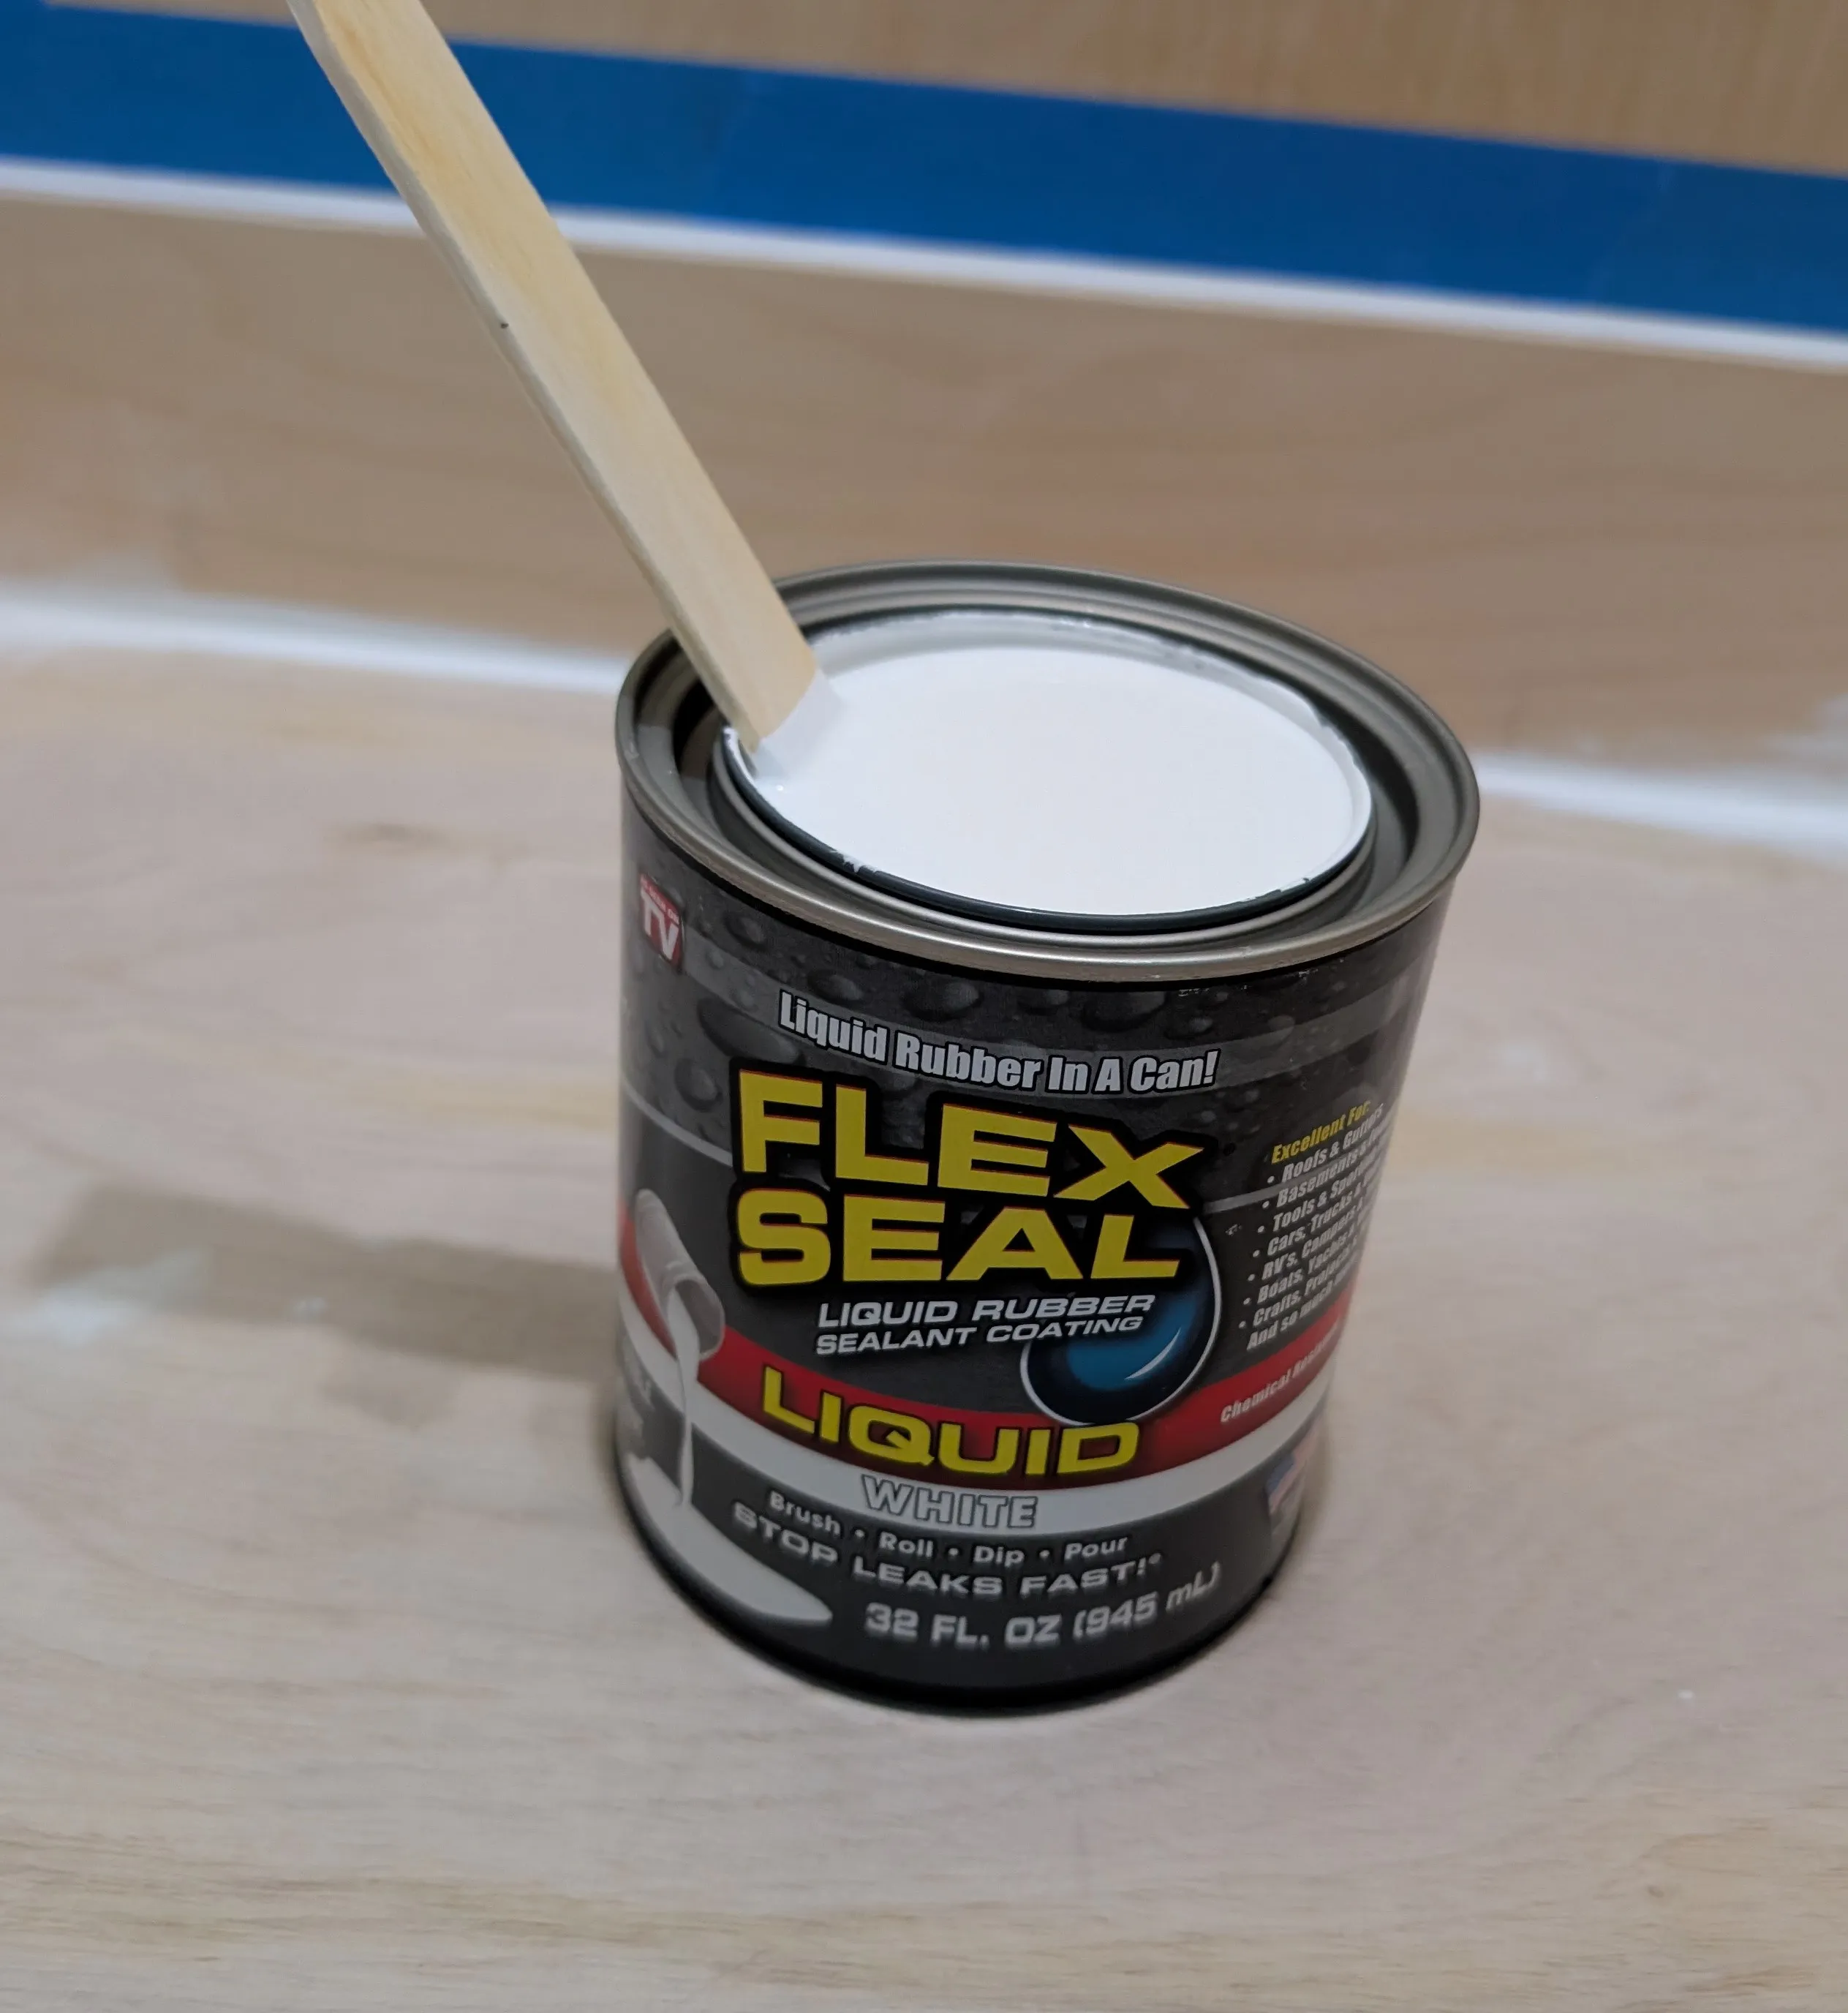
At this point I’ve prepped the shower pan for waterproofing and sealed the joints with some paintable sealant. Let me introduce you to liquid rubber, an incredibly thick chemical ridden goop. With long exposure, this stuff starts to smell minty and there’s no doubt people have gotten high off of this. The can even looks like a 90s TV ad. What could go wrong?
The first coat is done but it looks like I’ve left uneven streaks. I thought this would be self leveling but I’ll find out when it dries.
June 16, 2025
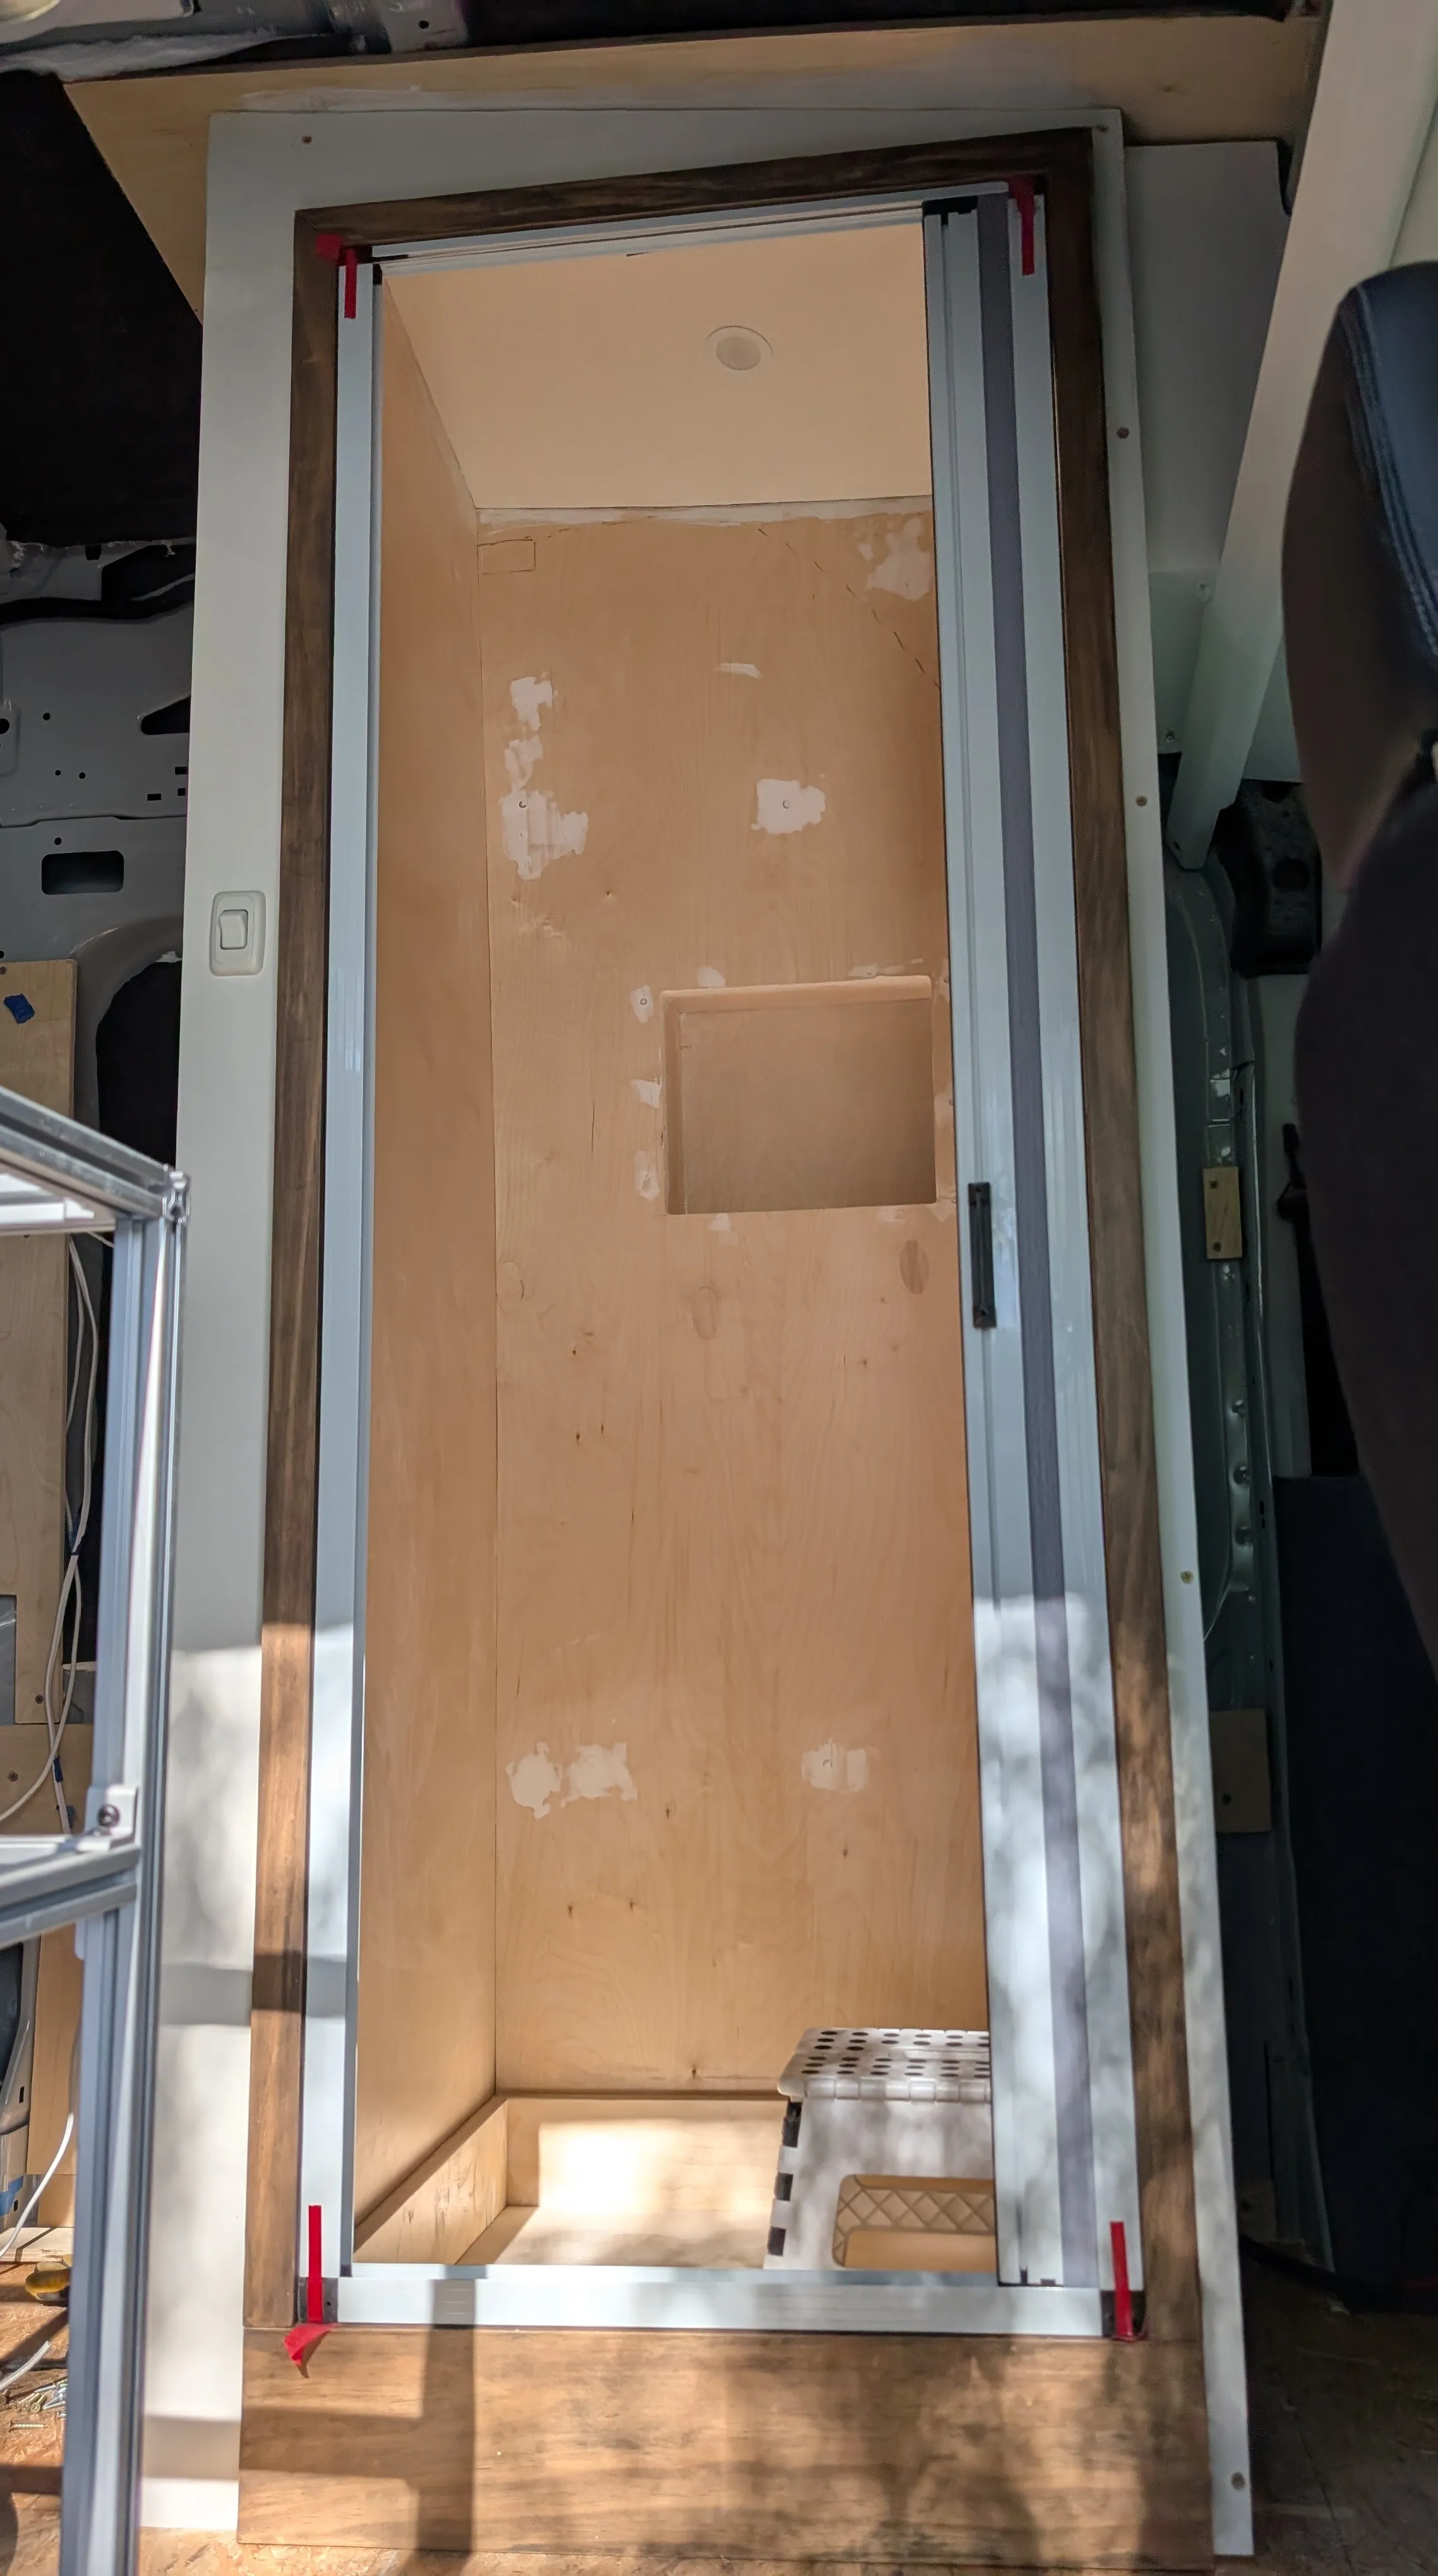
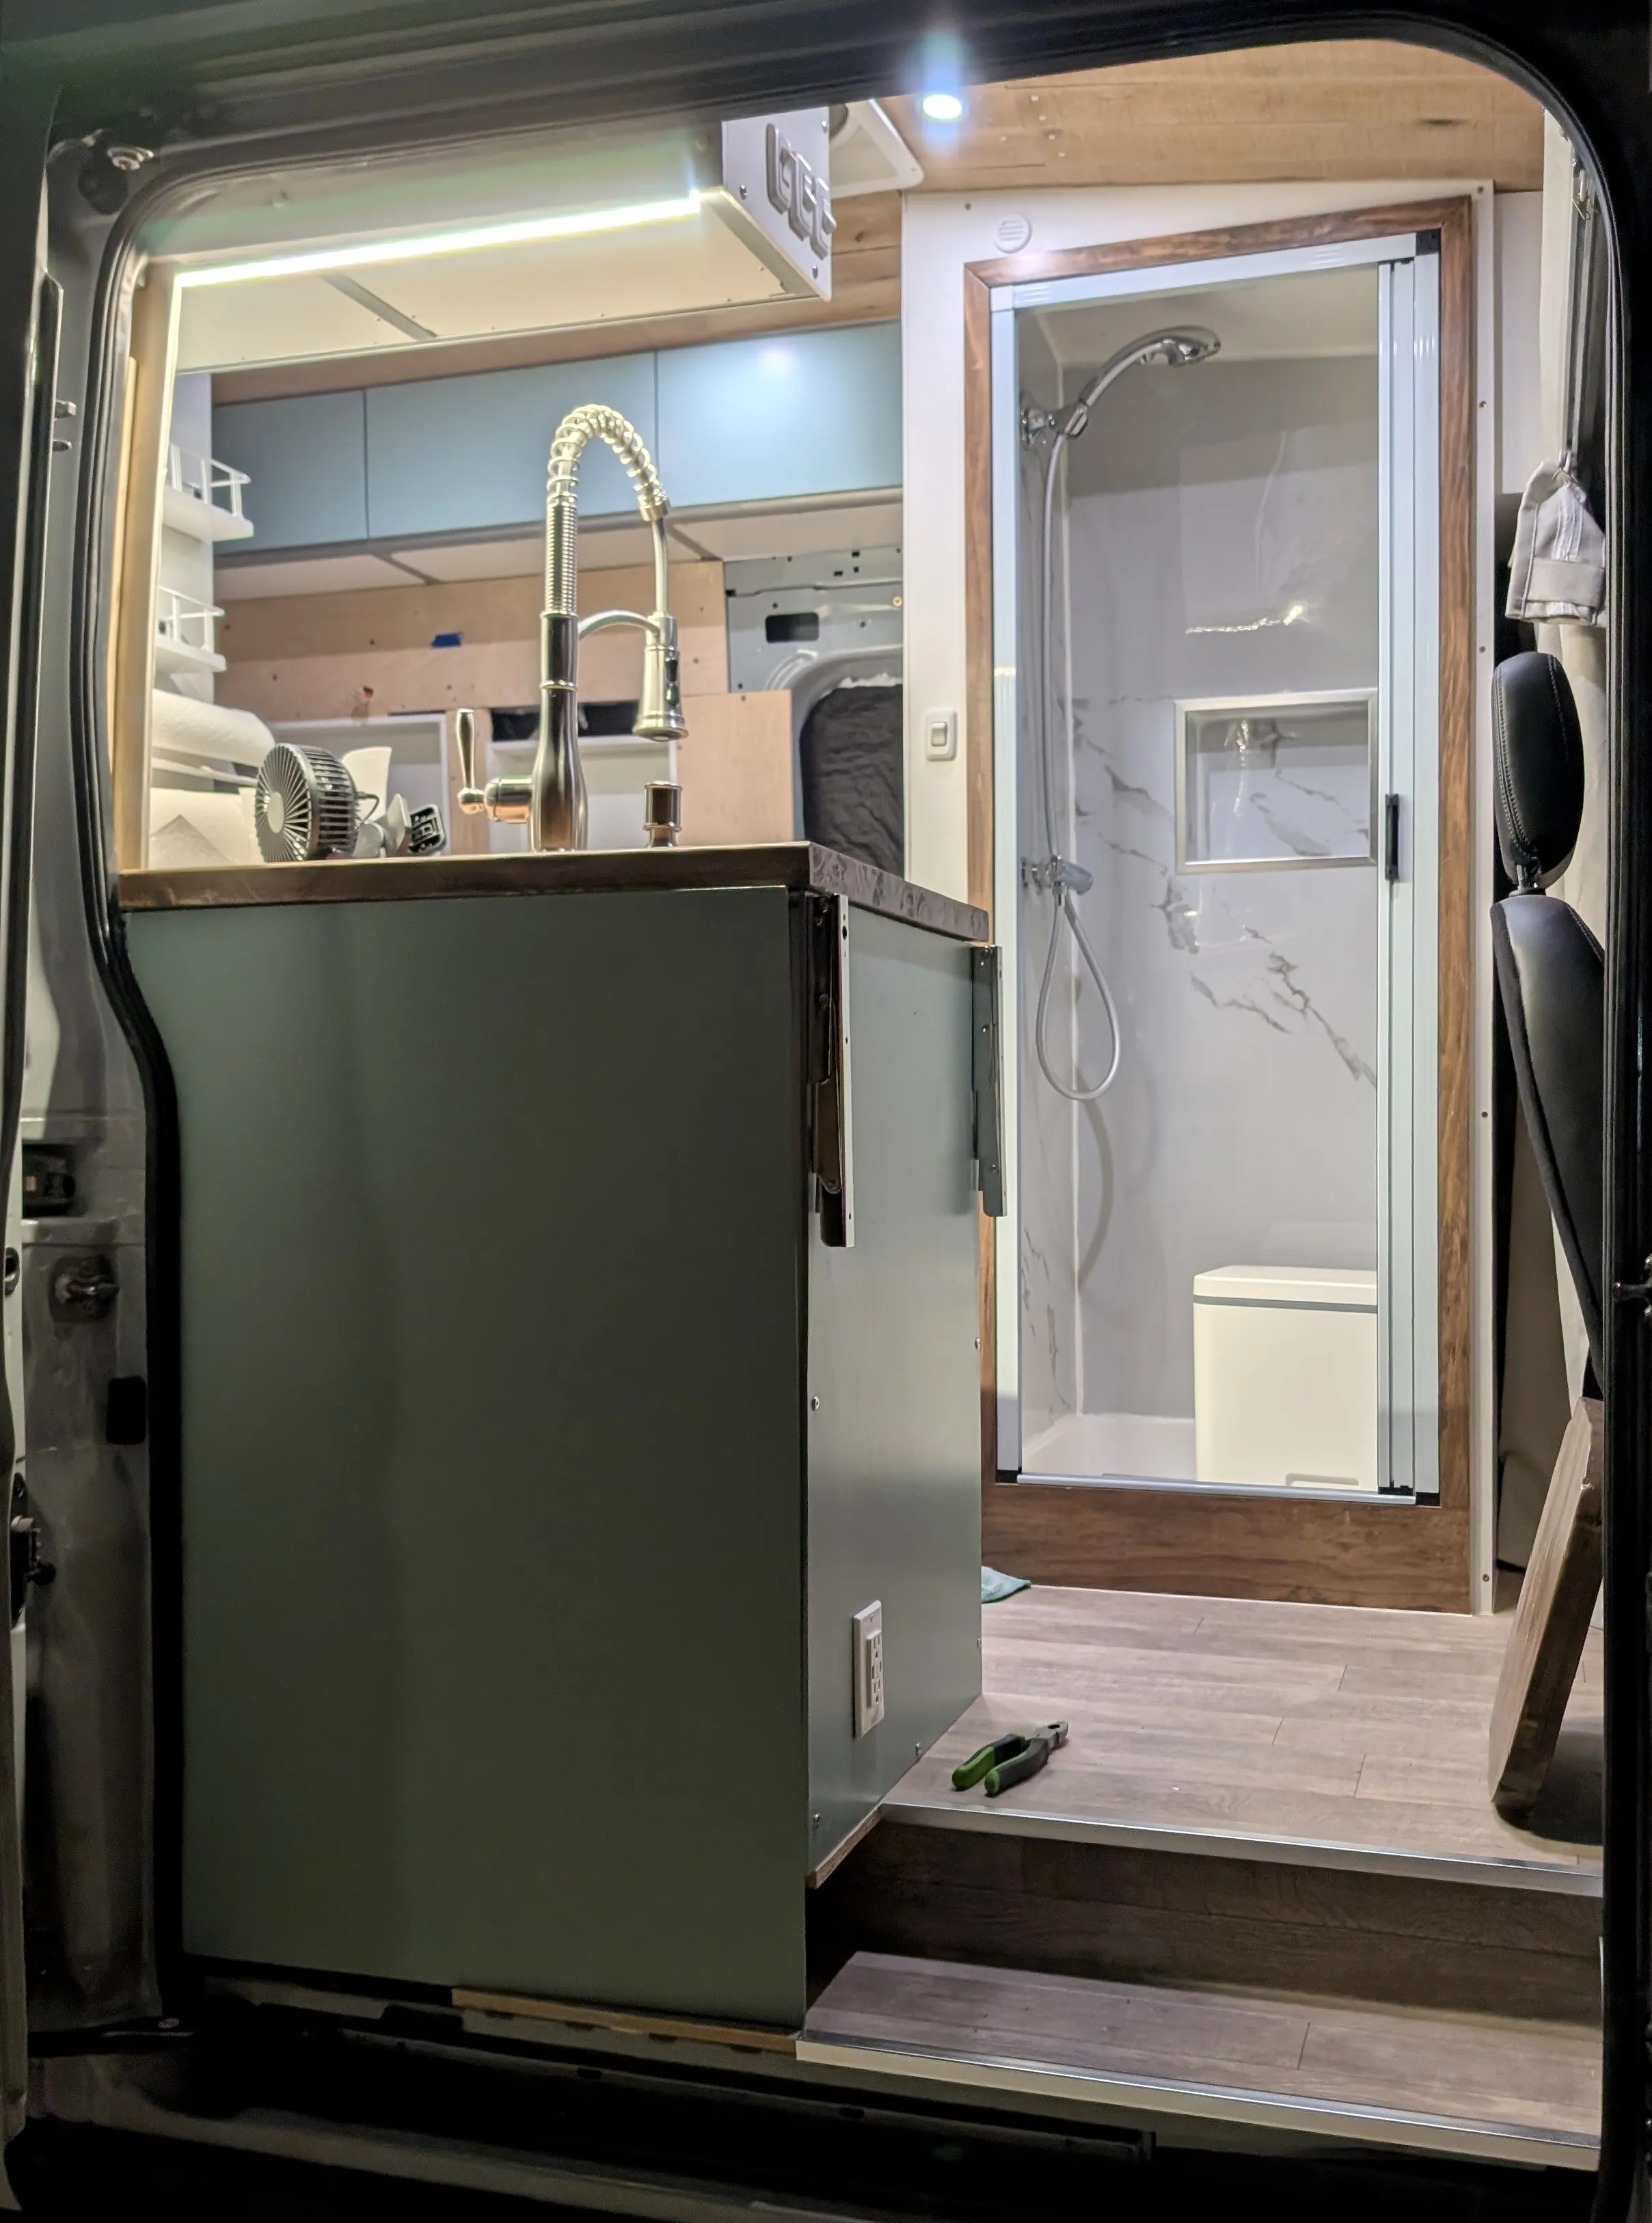
The shower now has a door frame and a light (and a makeshift toilet).
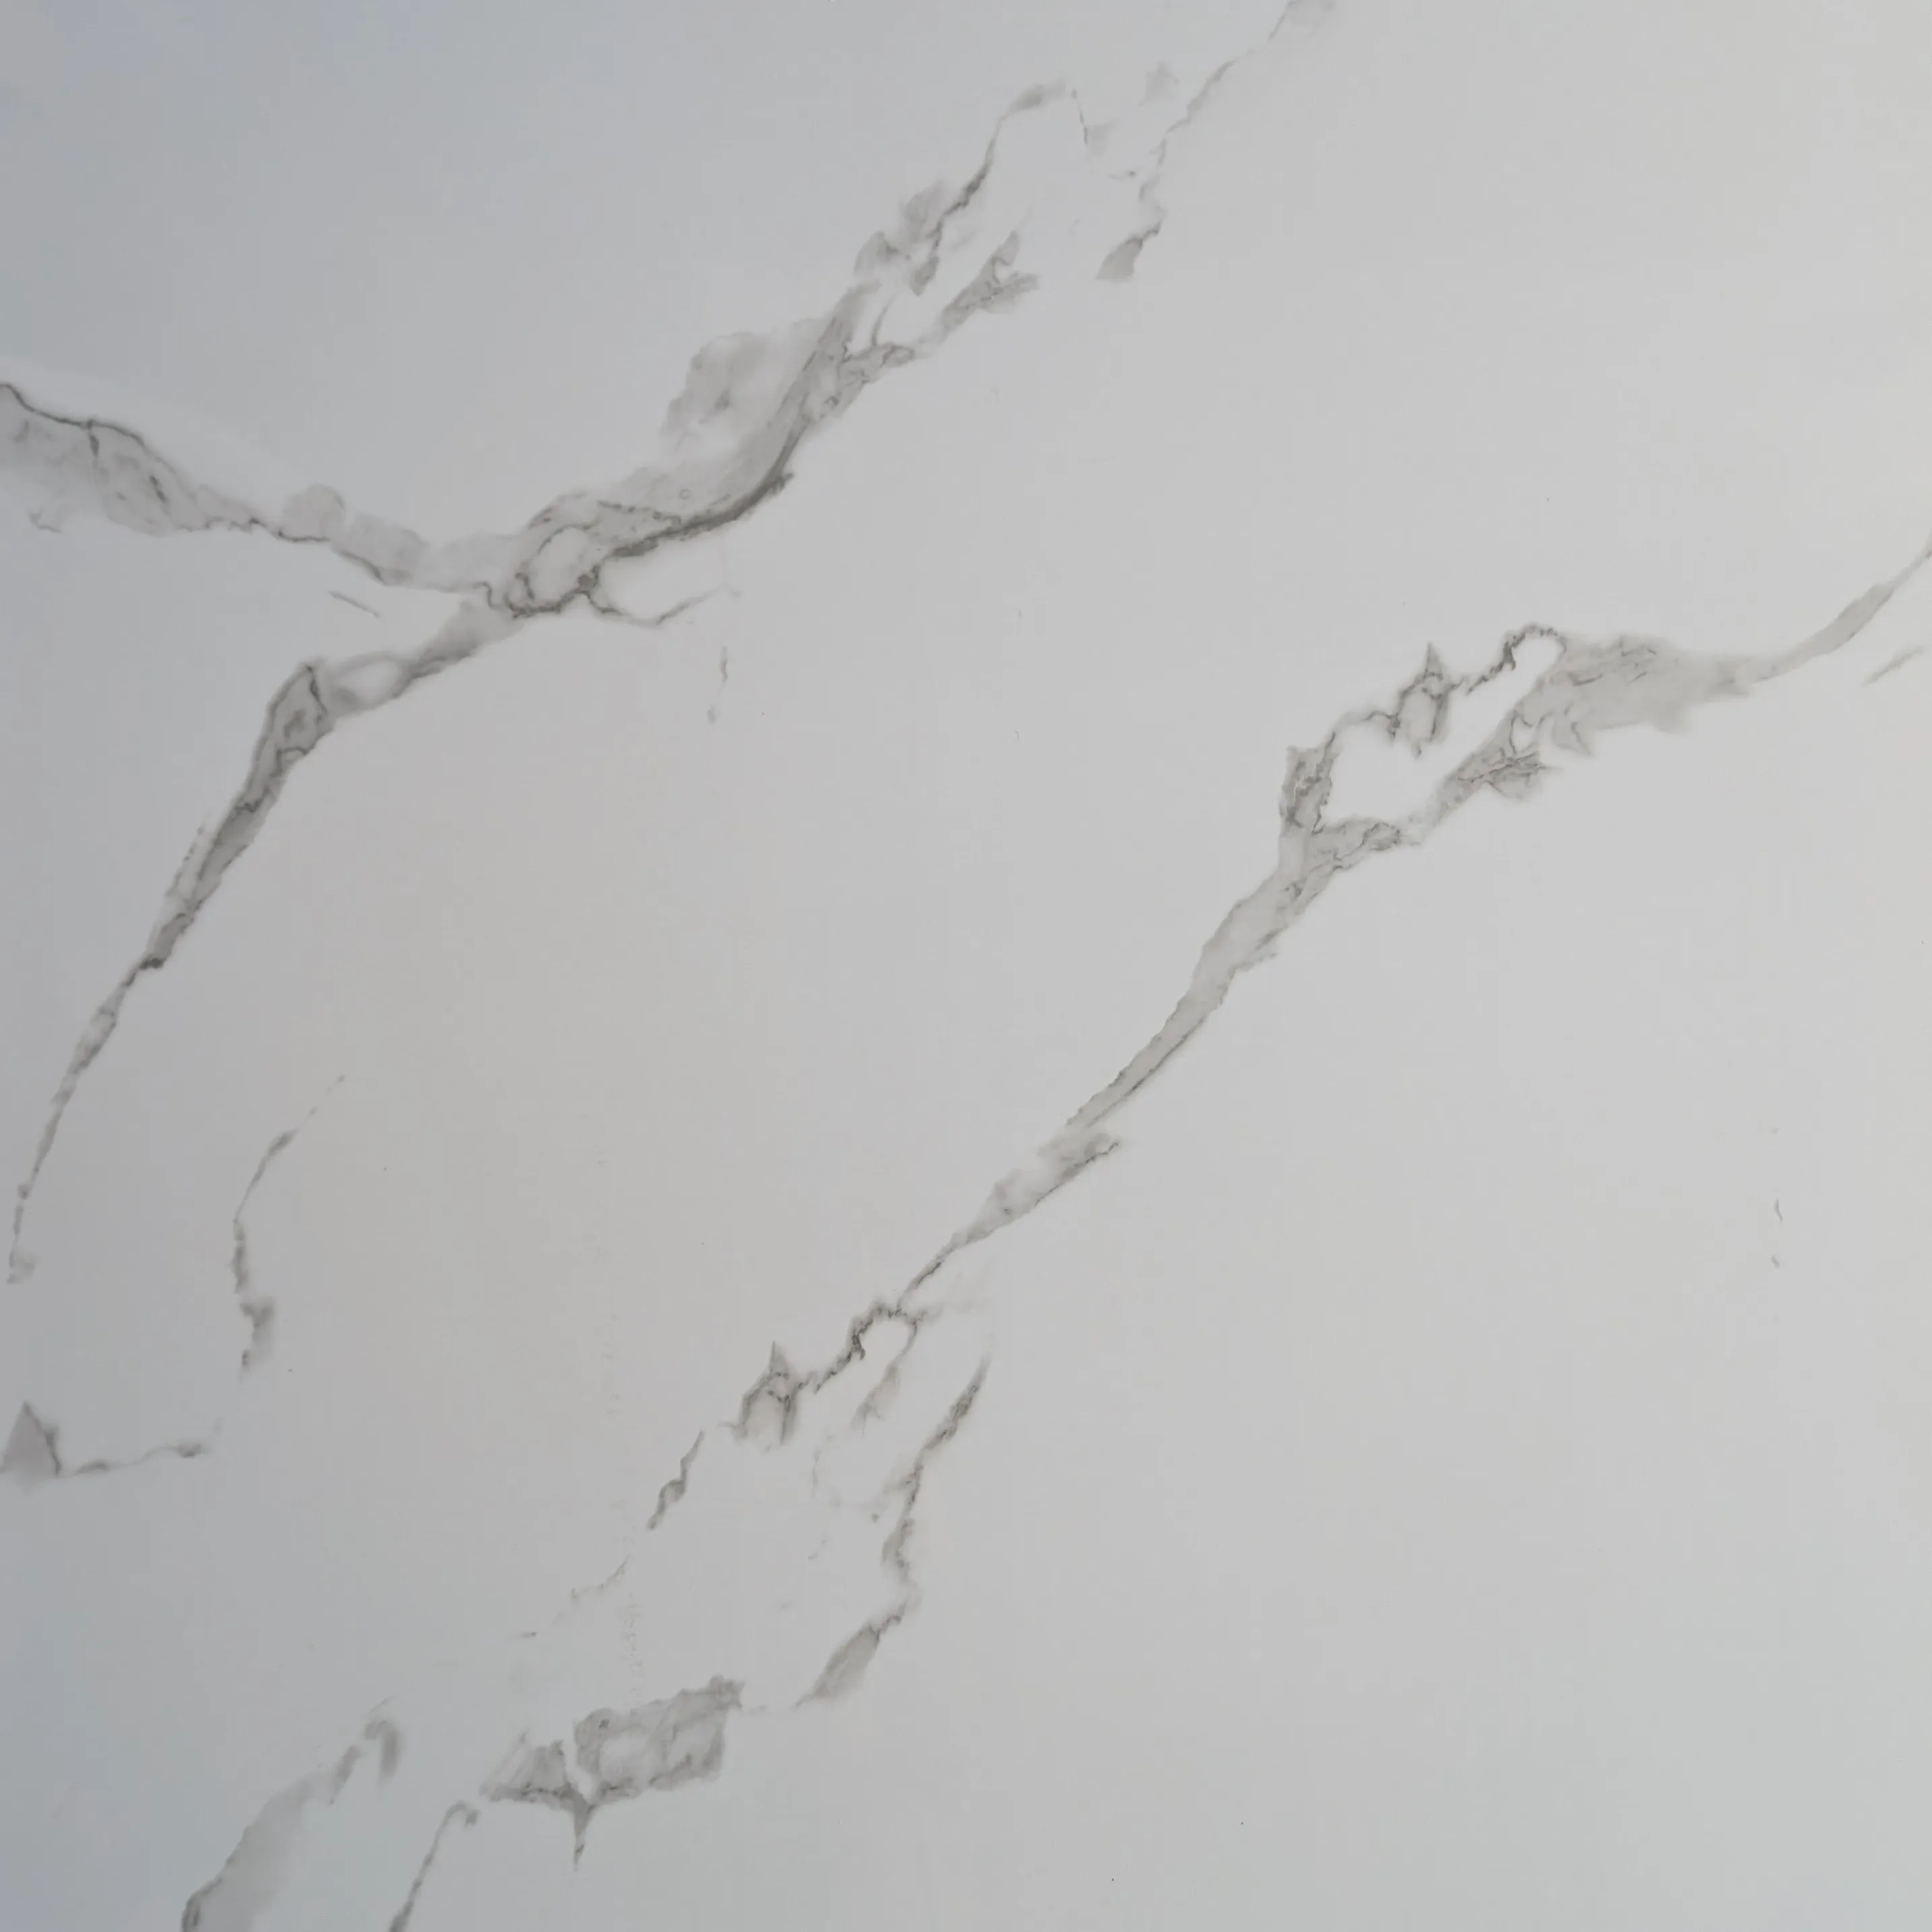
Here’s a sneak peak of what the interior walls will look like. I found someone who sells PVC sheets from their garage. There were a lot of marbly designs but none were plain white. I didn’t want to go too overboard with the colors and patterns in such a small space so I went with the simplest option.
June 12, 2025
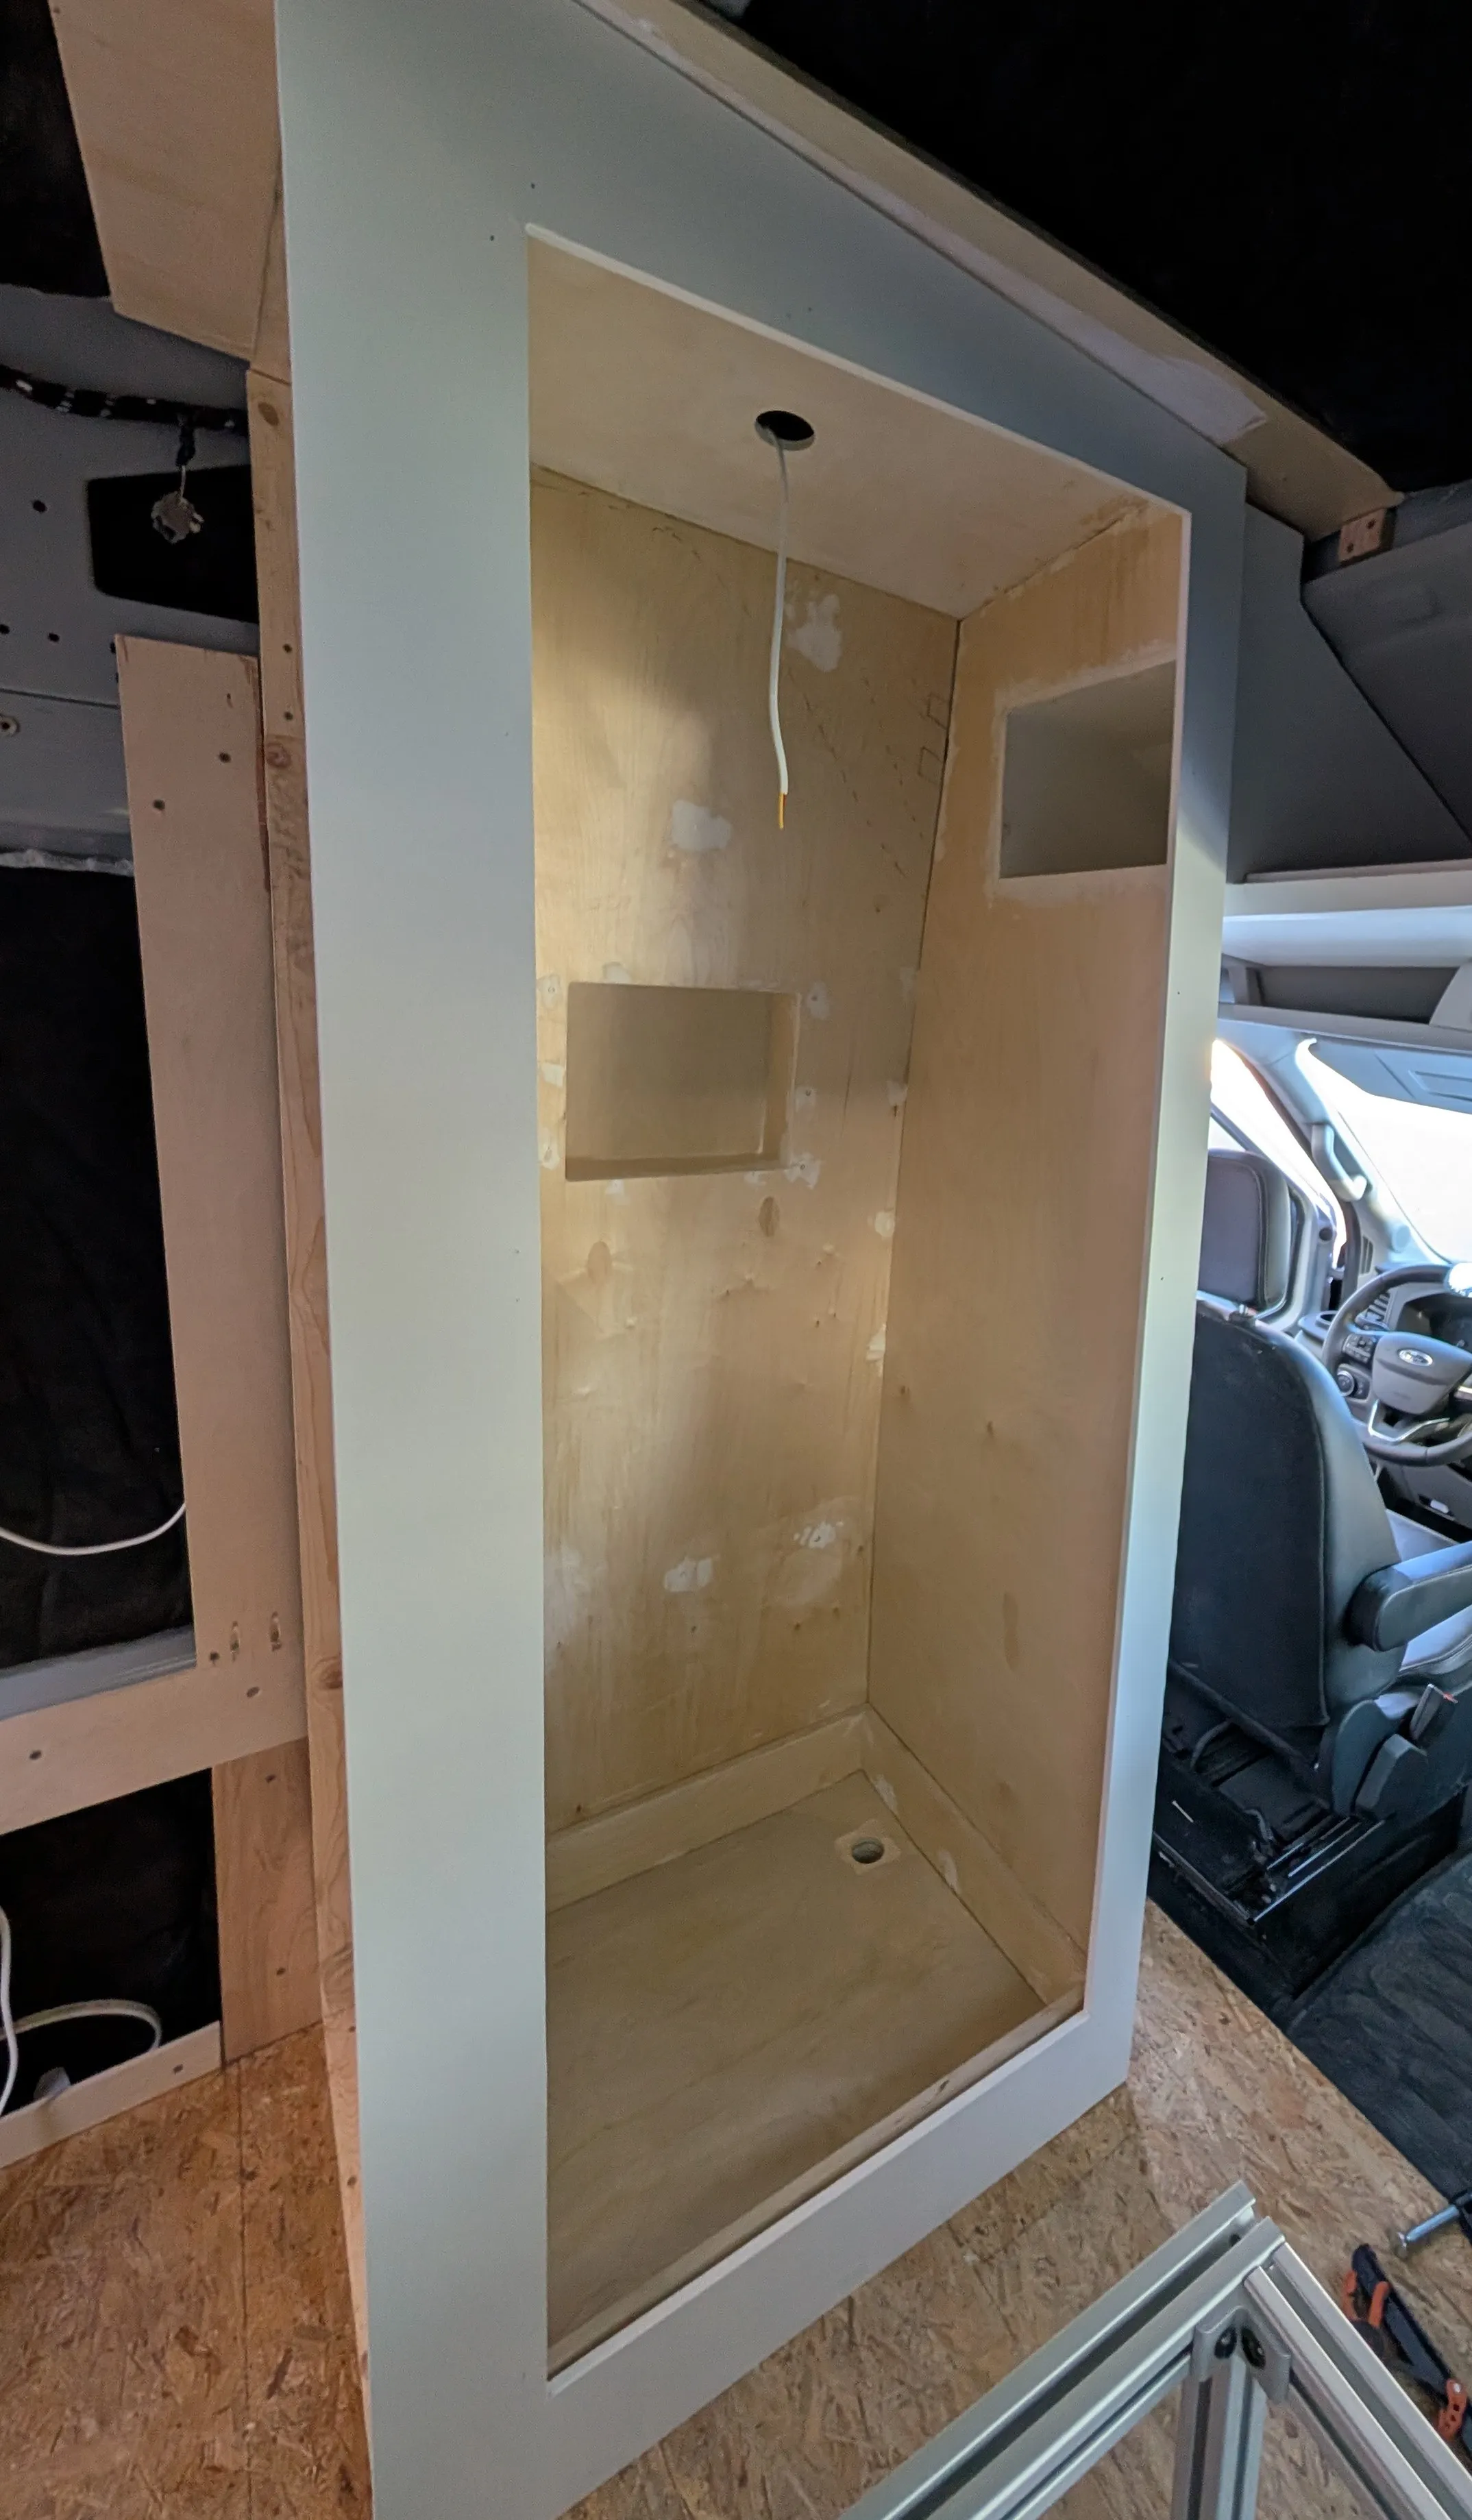
Here is yet another shower update. The walls are done so this gives a pretty good idea of the size of the shower. It is roomier than I imagined and the overhead shelf turned out really nice. So, half of the overhead will be accessible from the galley and the other half will be within the shower. One thing I had to accept when building Kep is that nothing will ever be straight or square or level.
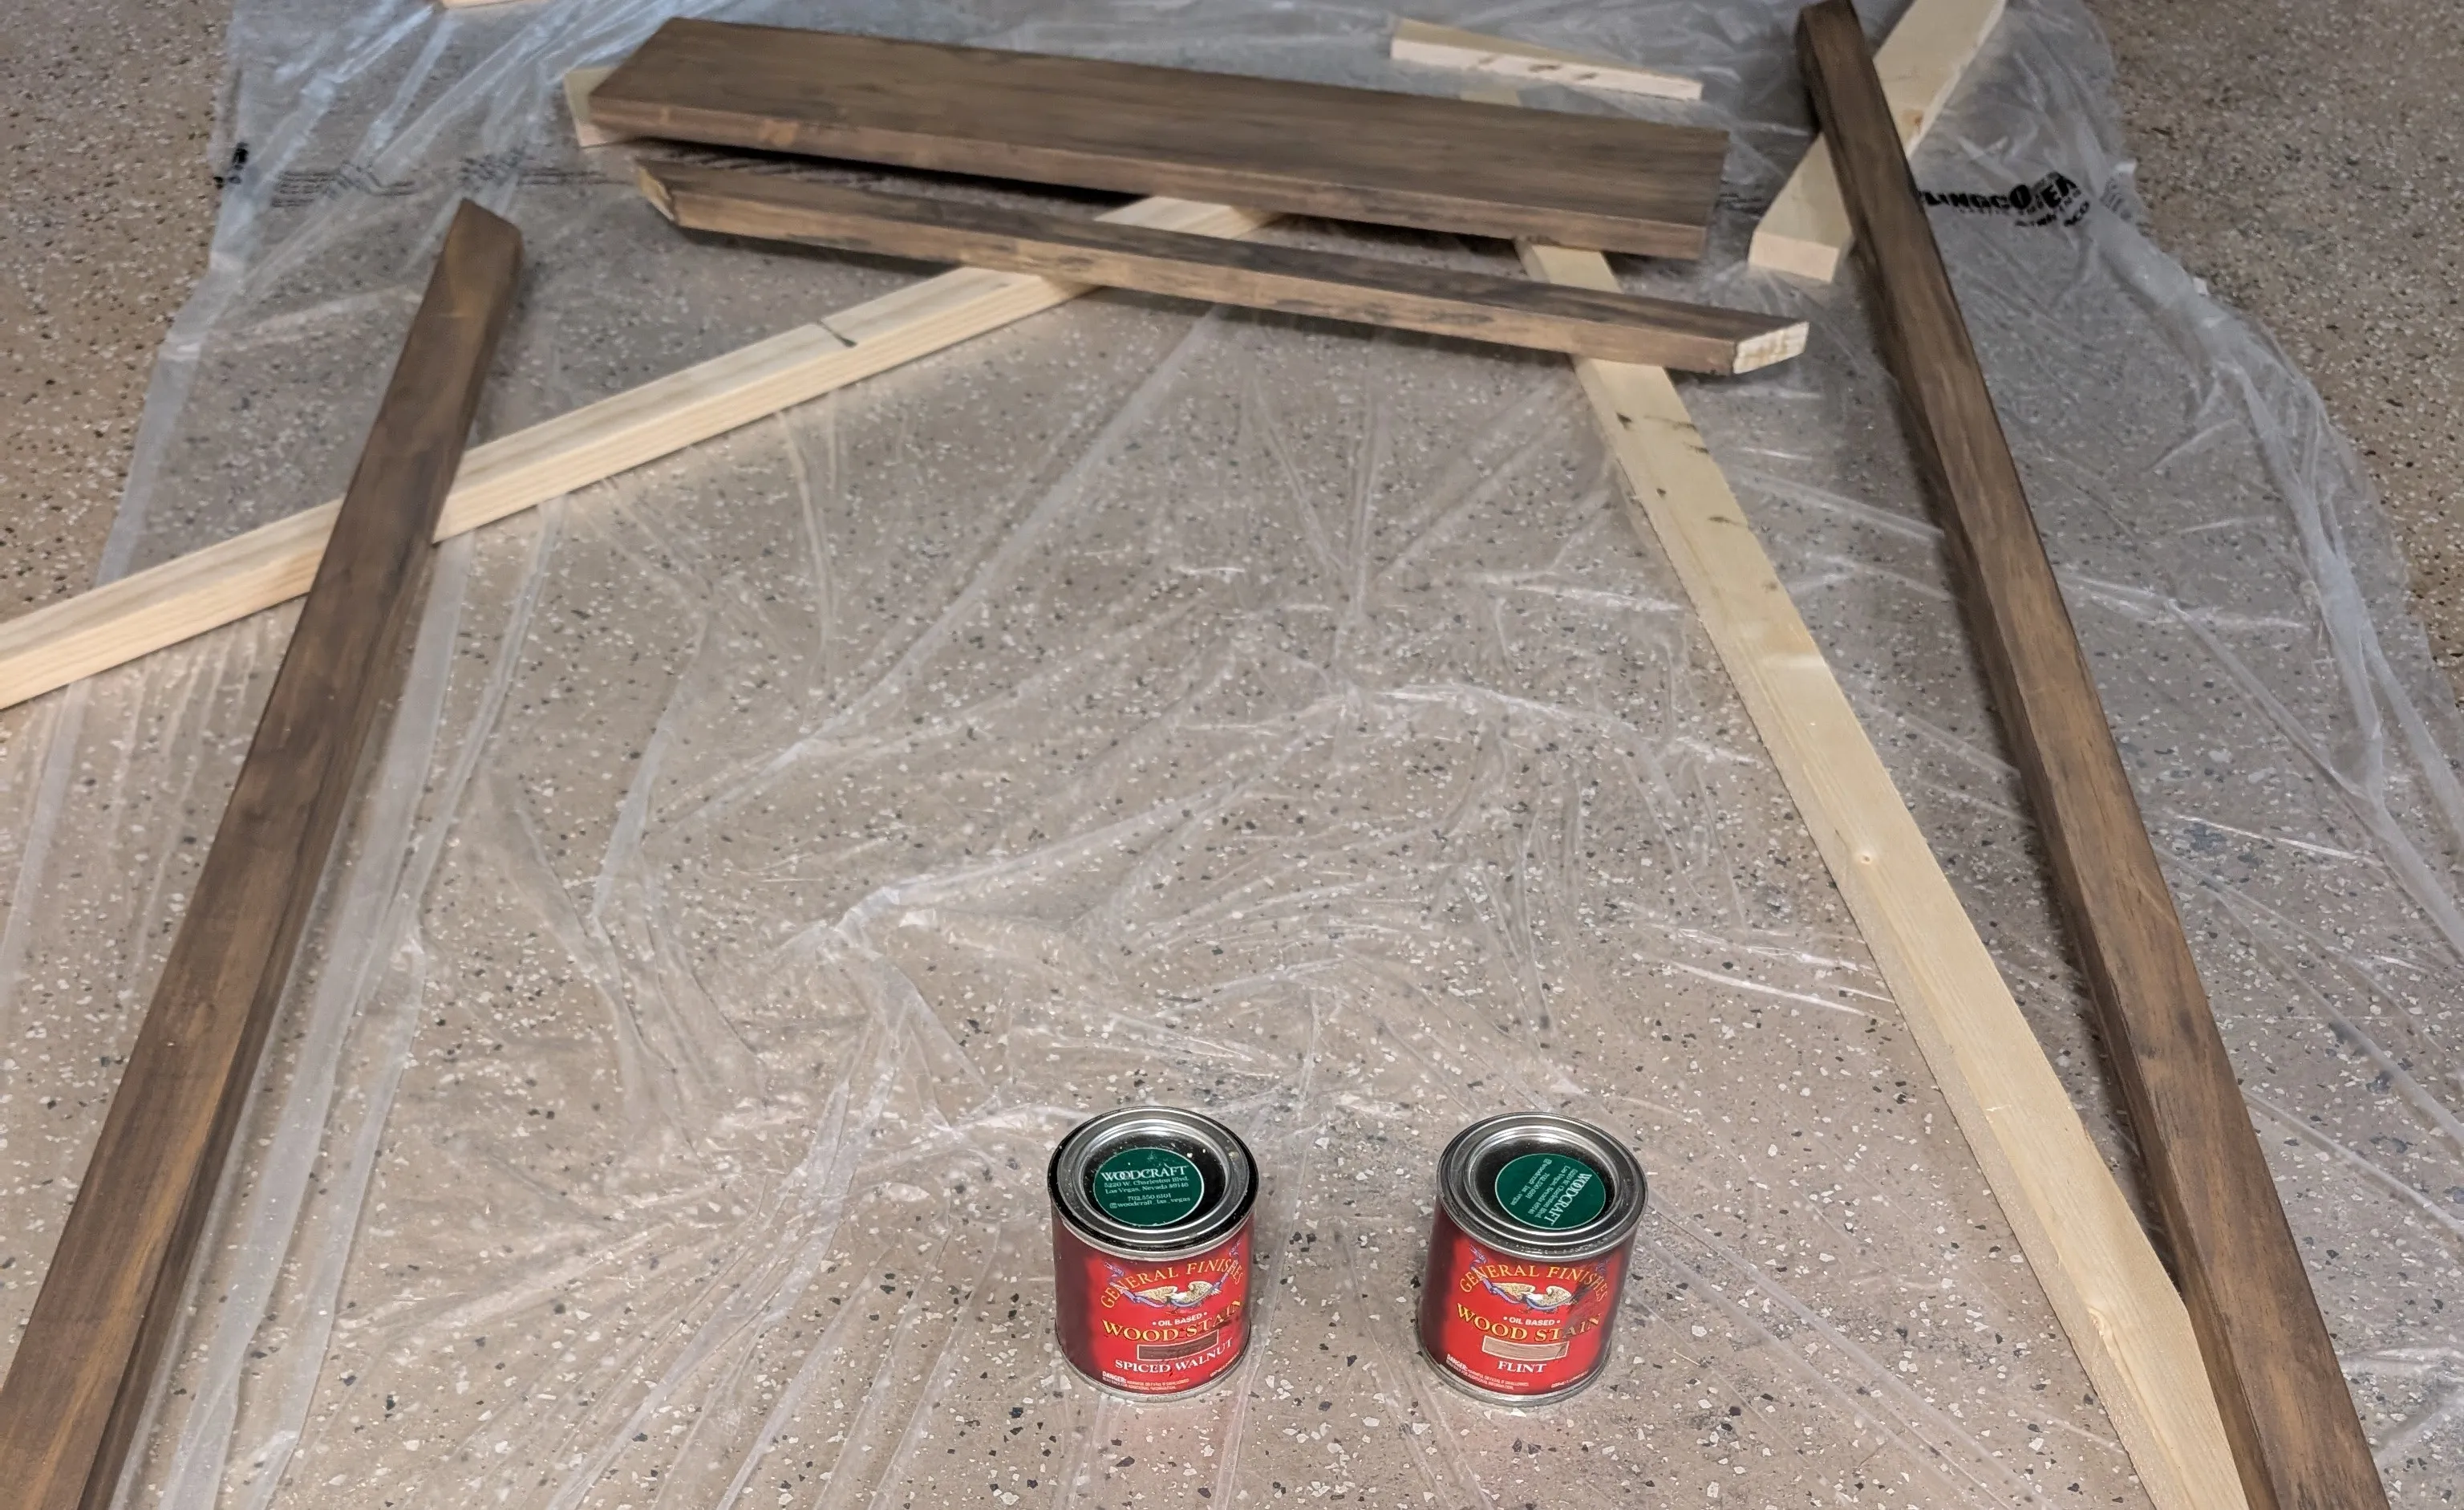
I’ve settled on this brown wood stain to use as an accent color. I ended up mixing two colors and it turned out to be a darker greyish walnut shade, at least on these pine wood pieces. It’s an oil based stain from General Finishes and was quite easy to apply. I would definitely recommend buying smaller cans and trying out the stain first because it looks different compared to in store. This is the door frame to the shower. Some exciting things to come as Kep’s personality is showing.
May 30, 2025

The base of the shower pan has been screwed into the floor and a 2” hole drilled through the van. To get the slope, there are strips of wood of different thicknesses such that the top sheet of plywood will sit at an angle. I was hoping to bend the plywood so that the lowest point is at the drain but it was pretty difficult to bend and this method is a lot easier. It’s quite heavy, which is a downside to building your own shower pan. Fixing the leak in the water tank access hatch was unsuccessful. It’s slightly better with some plumbers grease but I’ll have to resort to taping up the hatch as access to it will be infrequent.
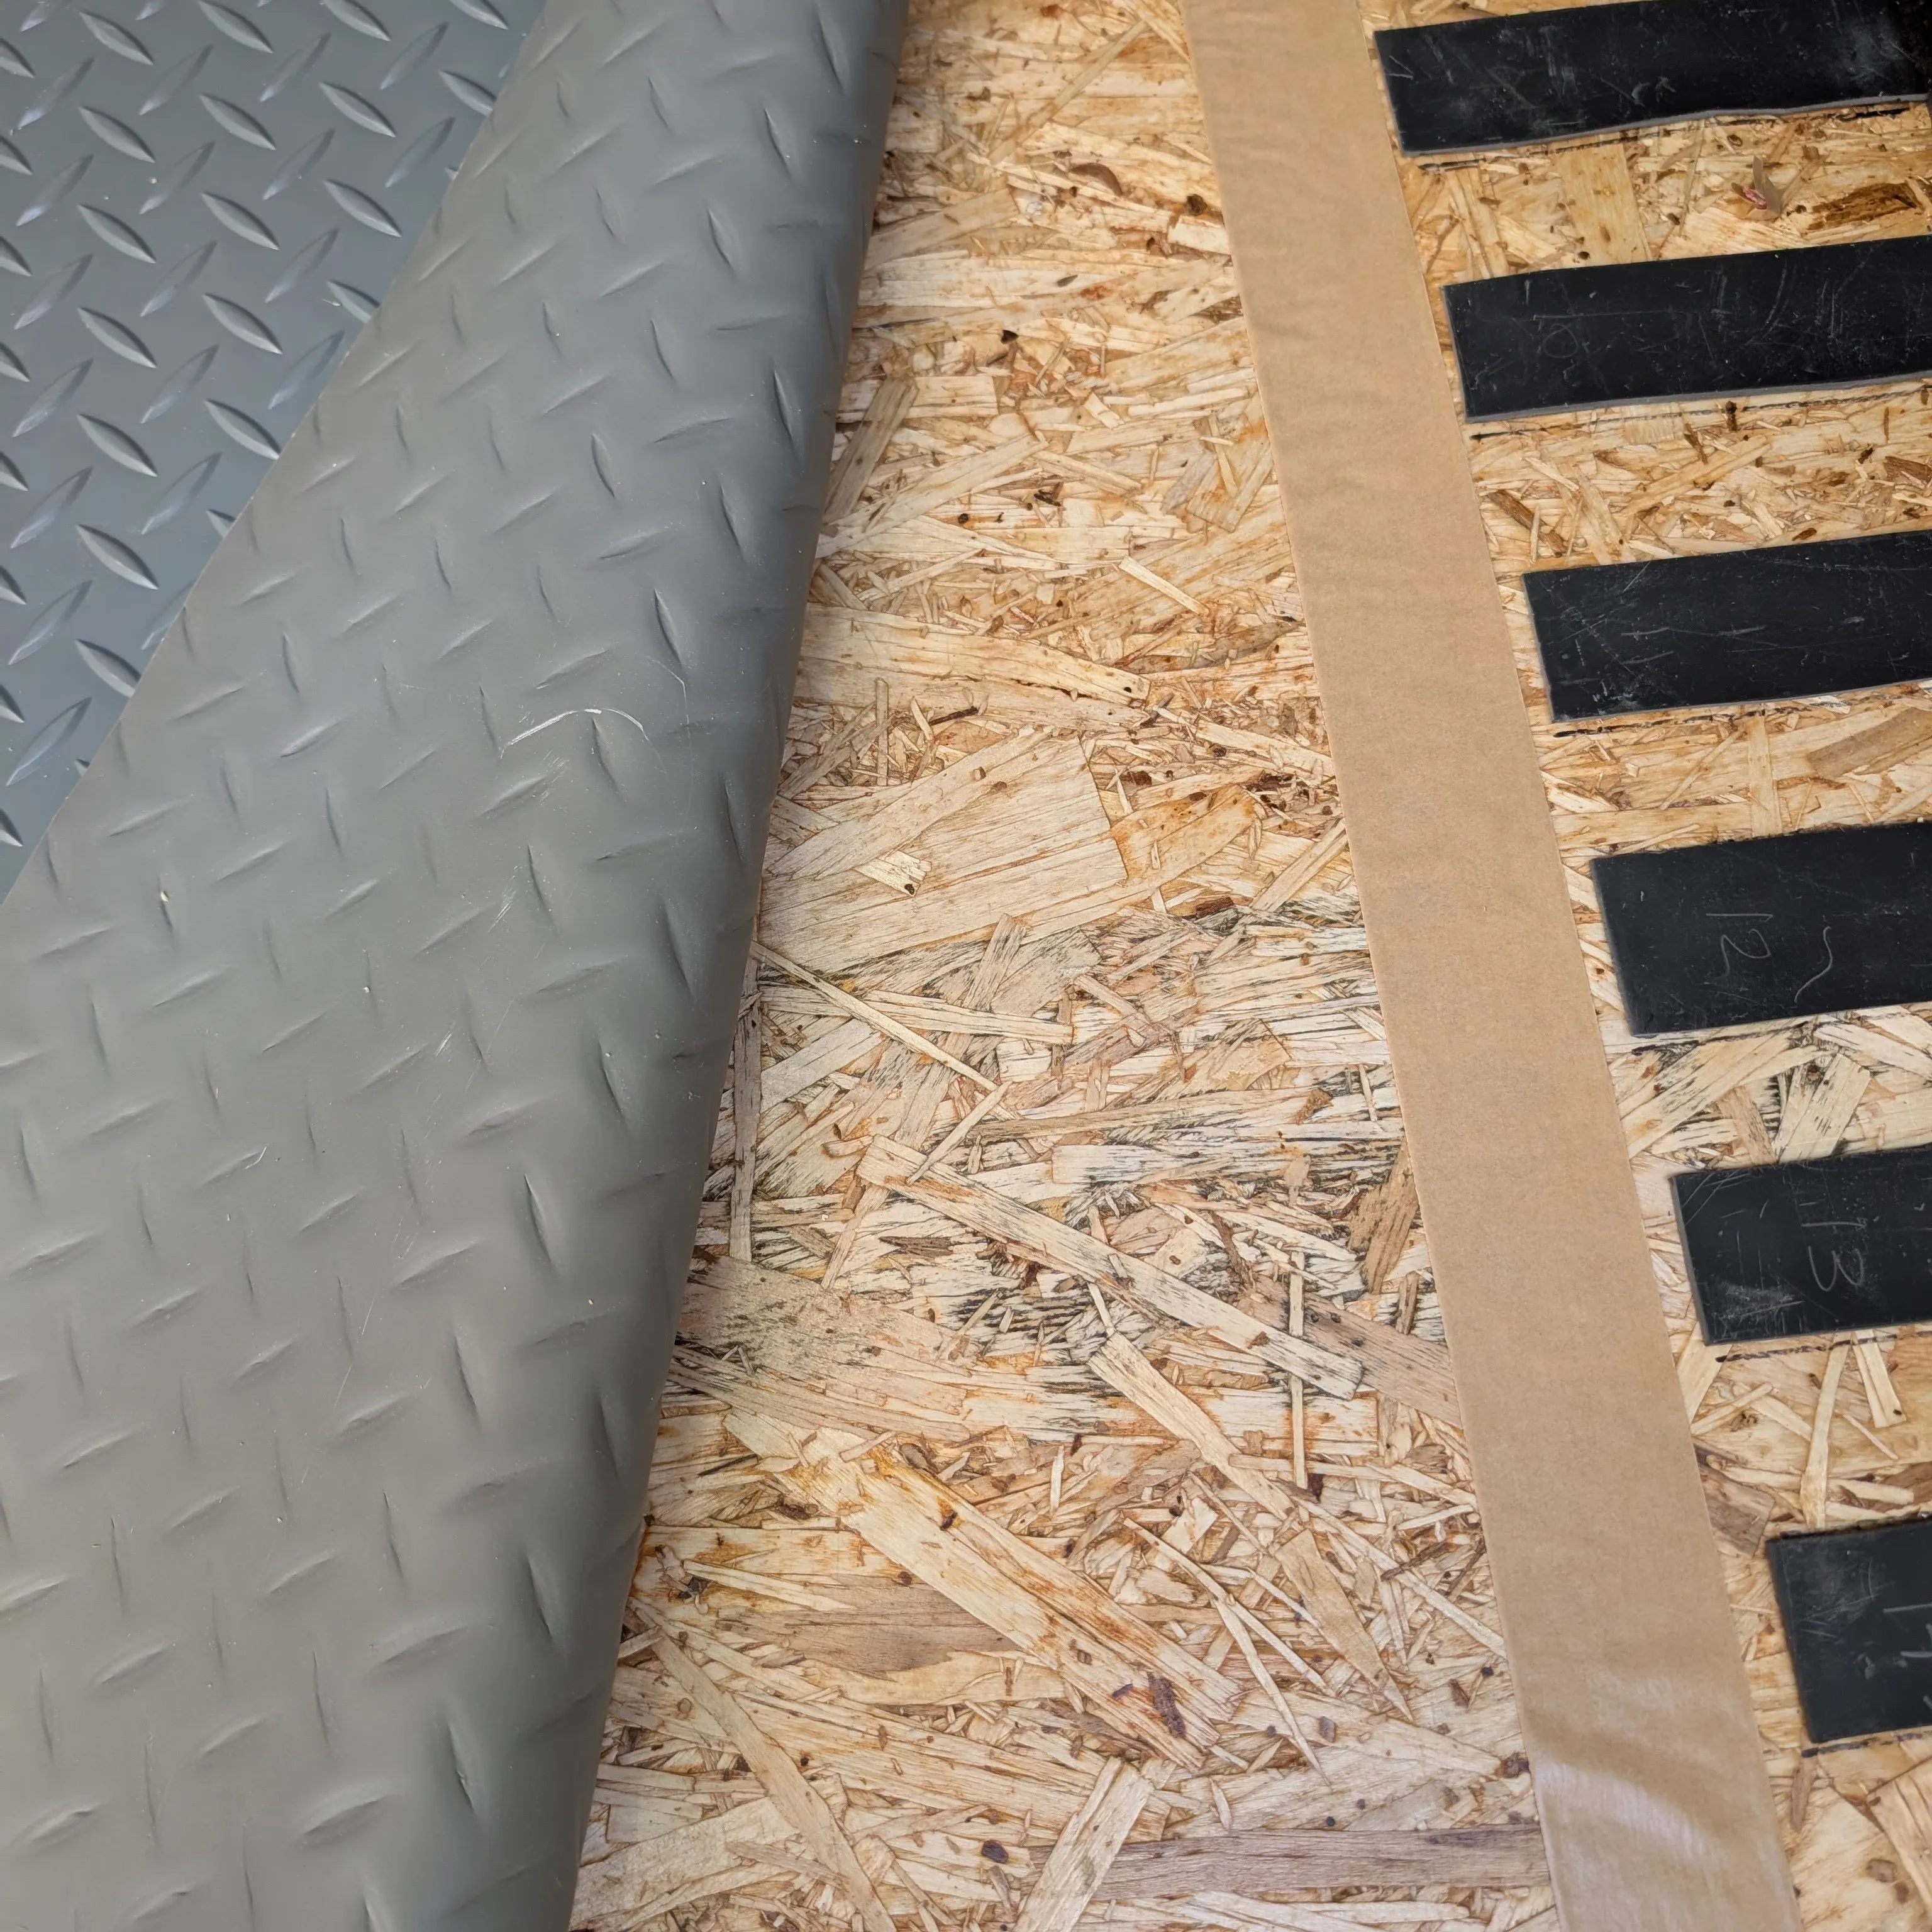
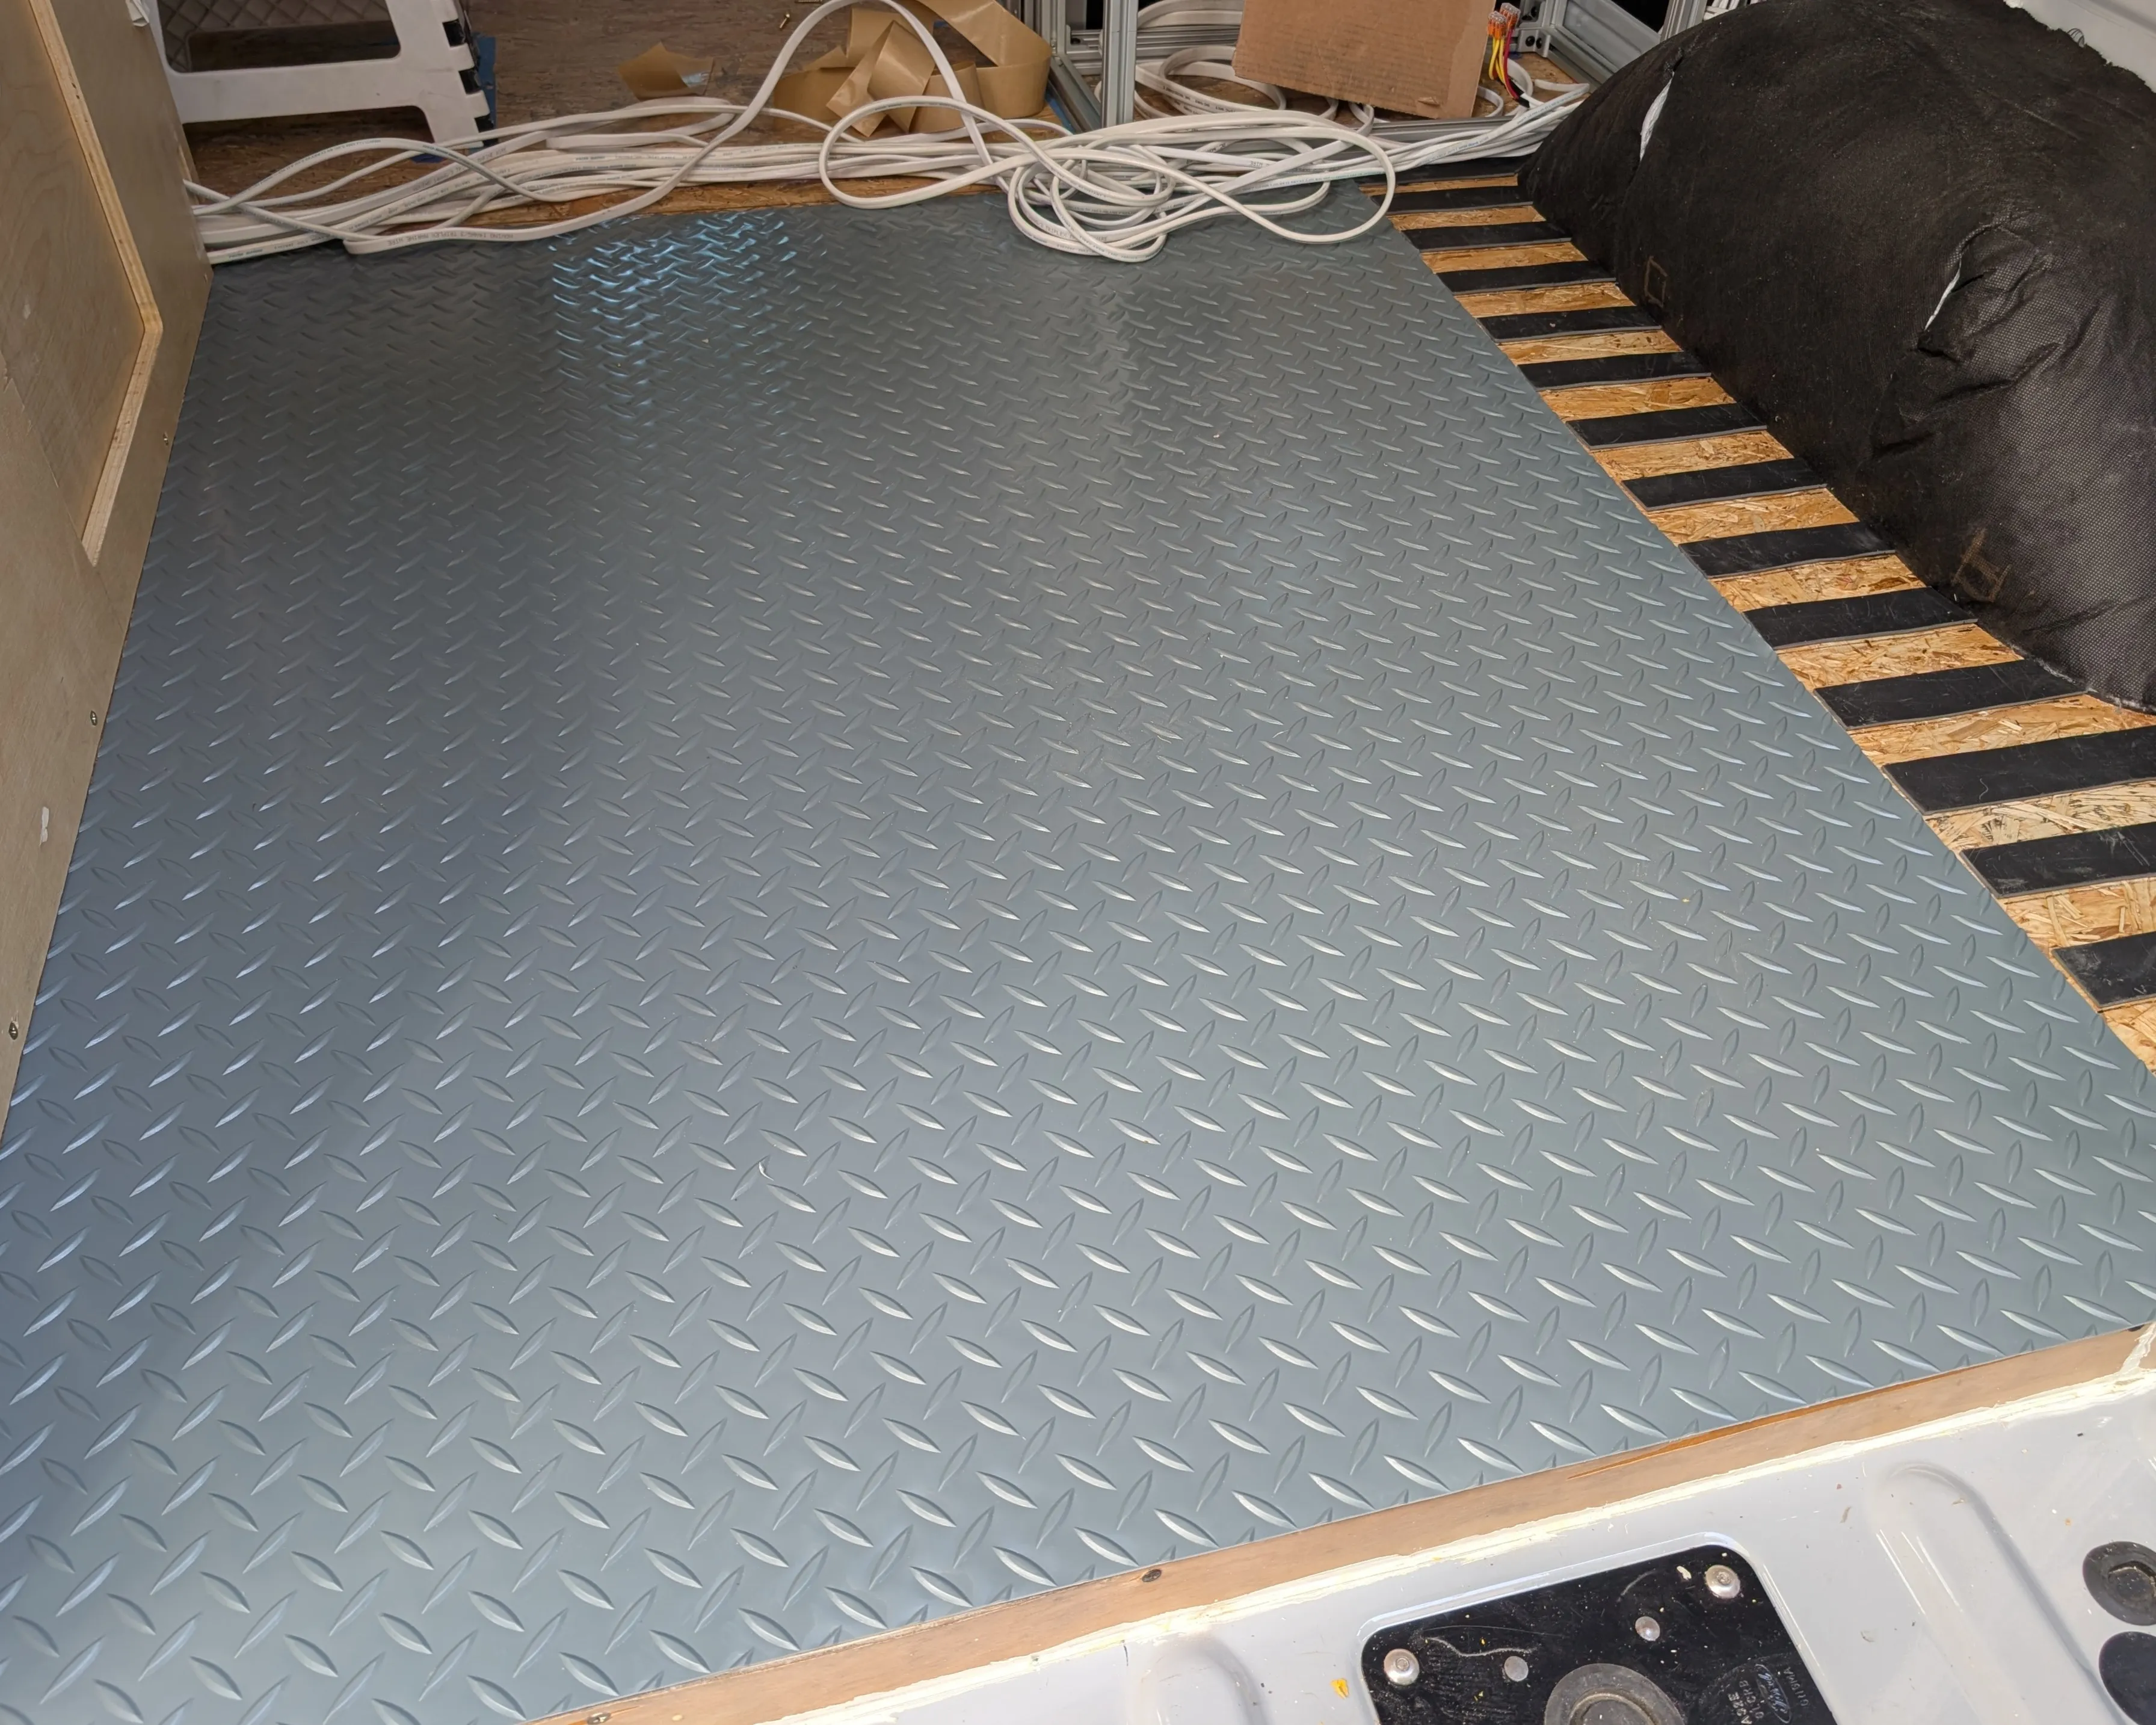
In the garage, I’ve laid down this sheet vinyl flooring with this neat diamond pattern. It’ll provide good grip for any items I store in the garage and help keep the area clean. I plan on wrapping it around the sides of the battery encasing as well, but I did not buy enough. Now that I have this on the floor, I can put the water tank back and build the water system on top. I just added some vinyl adhesive tape to the edges of the sheet to secure it down. I think glue is a bit overkill as this stuff stays down pretty well without any adhesive and it’ll be easier to replace in the future.
May 22, 2025
Meanwhile, I’ve been working on building the shower walls. I used the scribe to trace the edges but turns out since the wall is curved, it’s hard to square it and let’s just say the results were… tragic.
Two of the walls are now done. The wall against the chassis is 1/2” plywood and had to be bent to avoid the wires on top and to match the contour of the van. I glued the piece to the wall and added a couple of nut and bolts where I could to ensure a tight connection. Then I attached some tek screws where I thought necessary. I think the bolts really helped keep the wall attached. The other wall is 3/4” plywood. If you look on the top left of the wall behind the passenger seat, you may notice some patching done. I ended up cutting too much and glued some pieces of plywood onto it. To my surprise, it actually holds up really well and thankfully the hole was at a non-essential location.
May 20, 2025
I’ve finally acquired all (and returned several) of the plumbing supplies and planned out the water system. Most of the connections are done with 1/2” pipes and NPT threads. There are some places where I had to use 3/4” and the water filter also comes with 3/4” garden hose threading, which is different. I tried to avoid adding adapters to everything as that would increase the points of leakage but it’s been hard finding the right connectors.
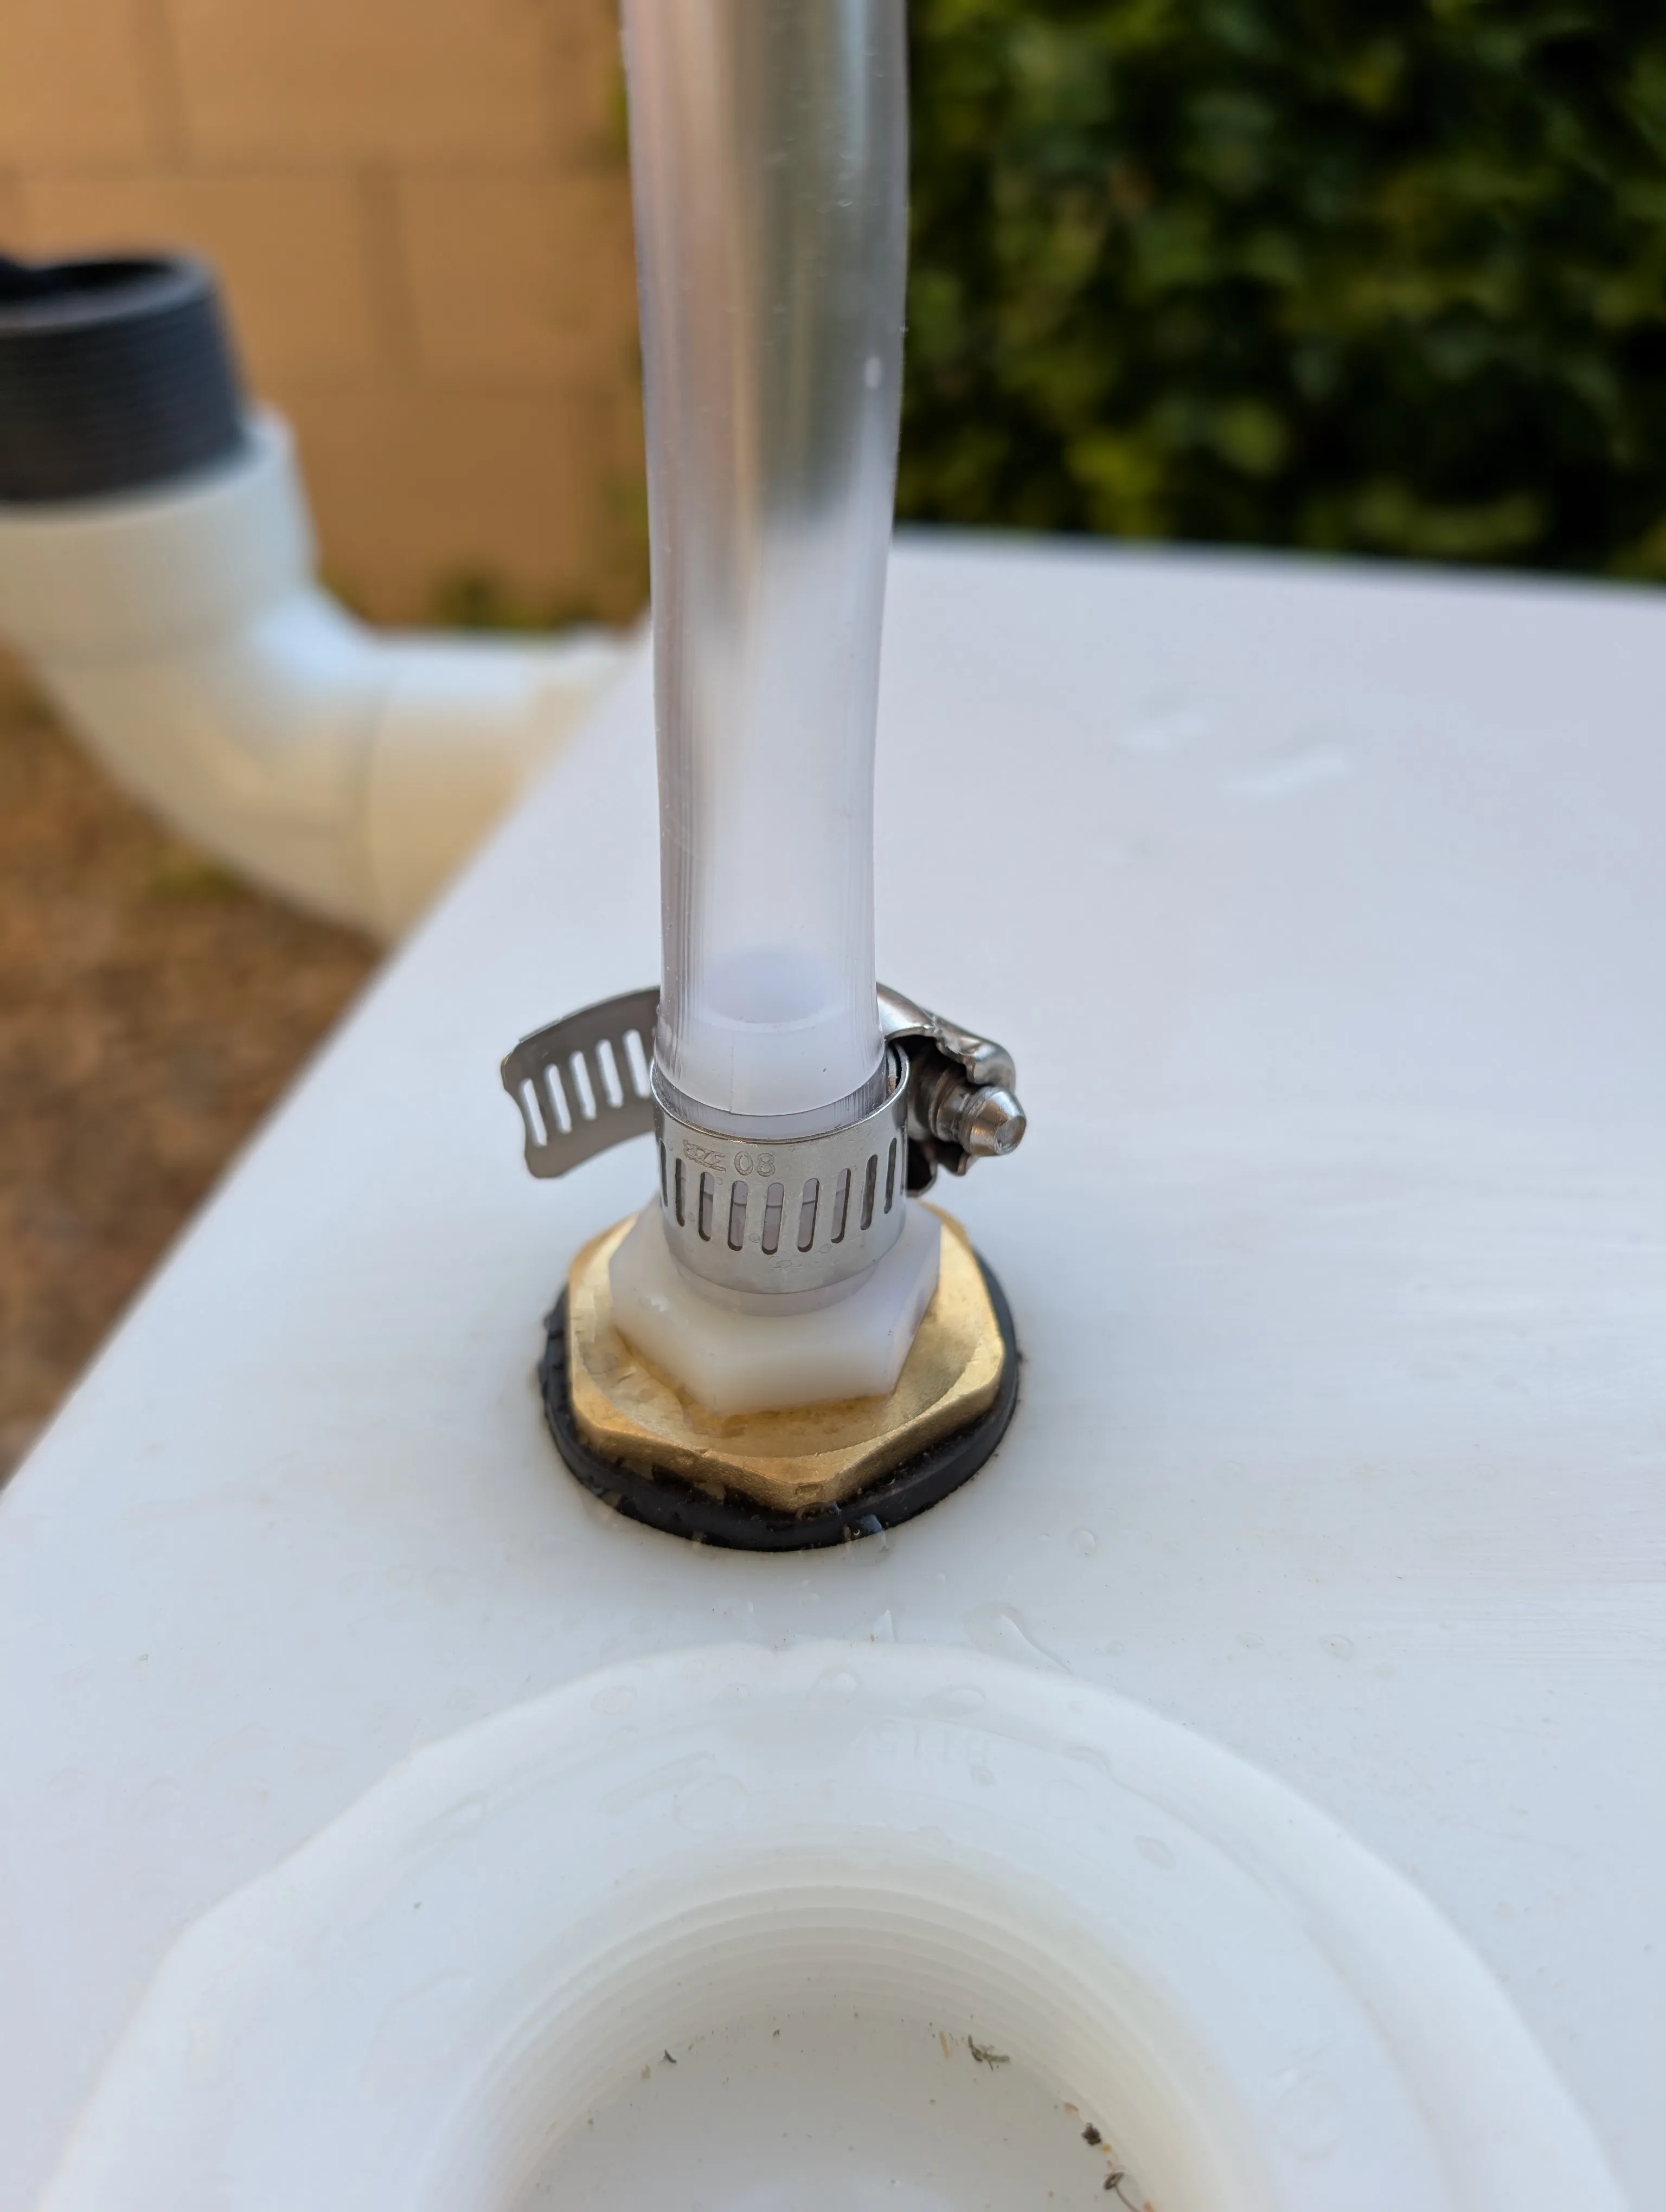
For the fill port, I kept it simple and used some 1 1/2” PVC pipes to create an opening for dumping water into the tank. I also added a 1/2” nylon vent tube for allowing air to enter the tank when draining. There is also a 1/2” braided nylon tube inside the tank that connects to the top and out to the water pump. A full diagram is on the way.
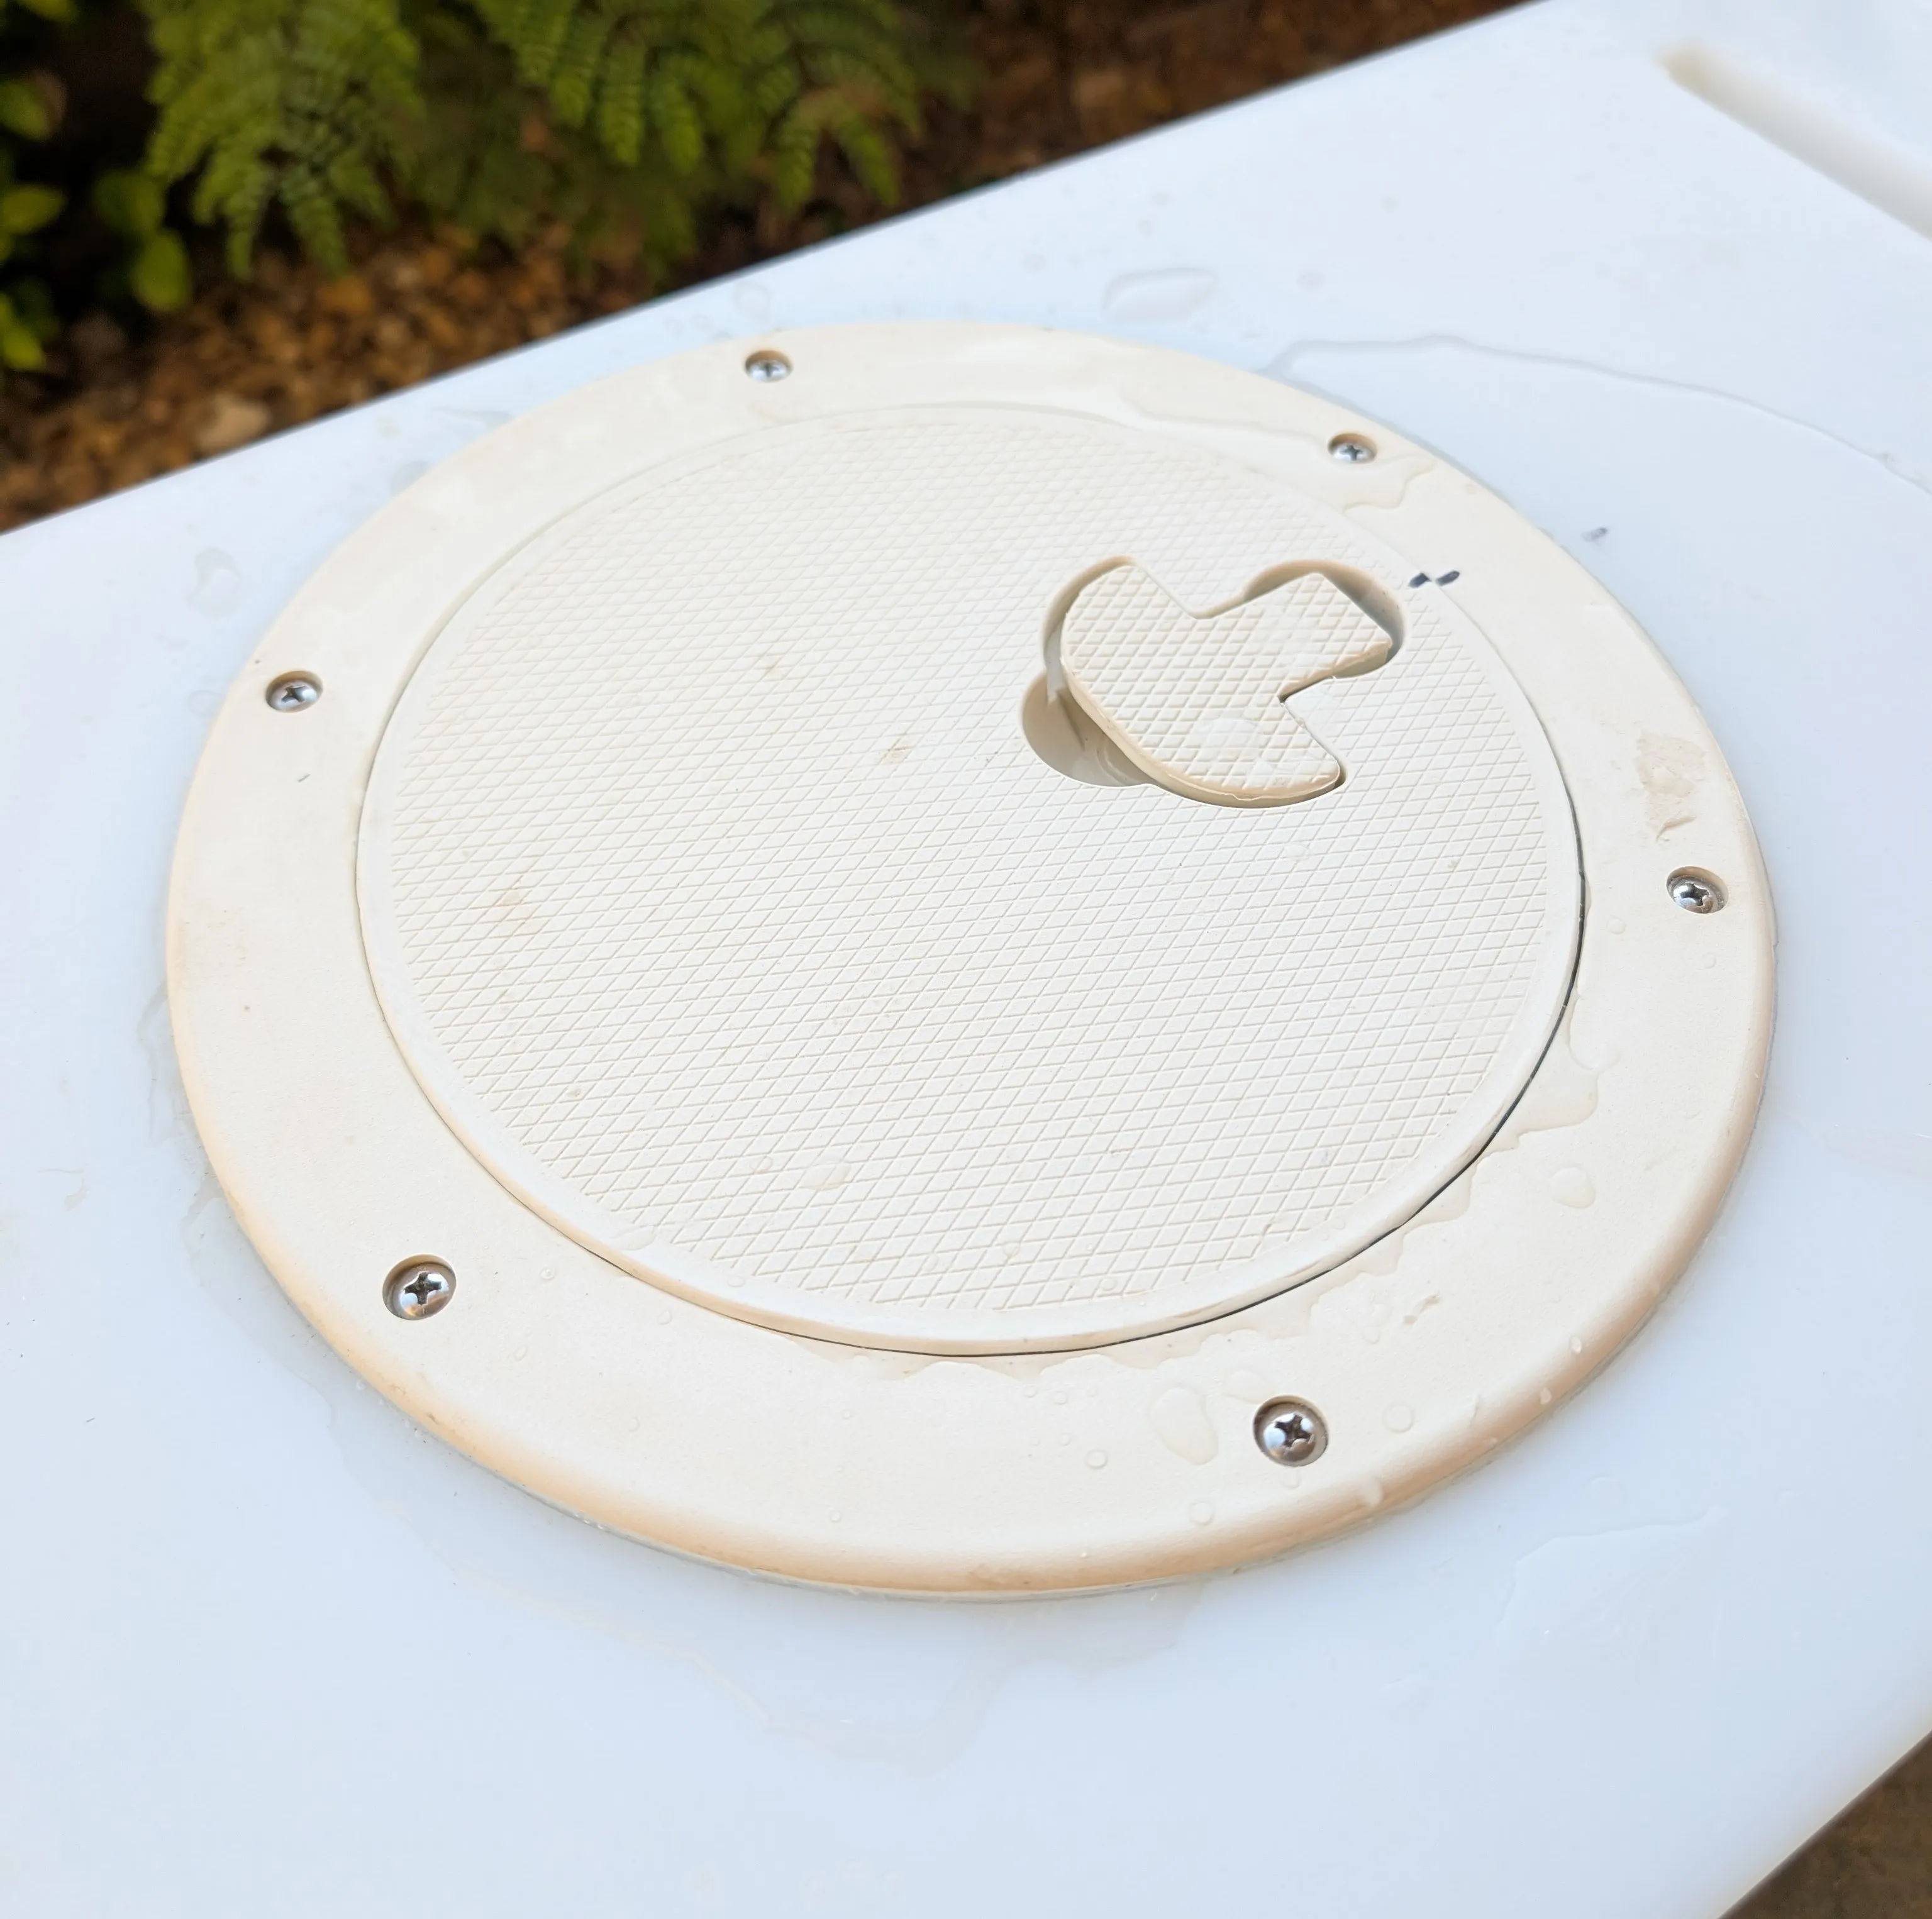
Unfortunately, after running the first leak test, I learned the hatch on the top is leaking. The gasket inside is broken and it’s been super hard to find a replacement gasket this large so I ended up just gluing it back together. I’ll have to run another test when the glue is fully cured.
May 15, 2025
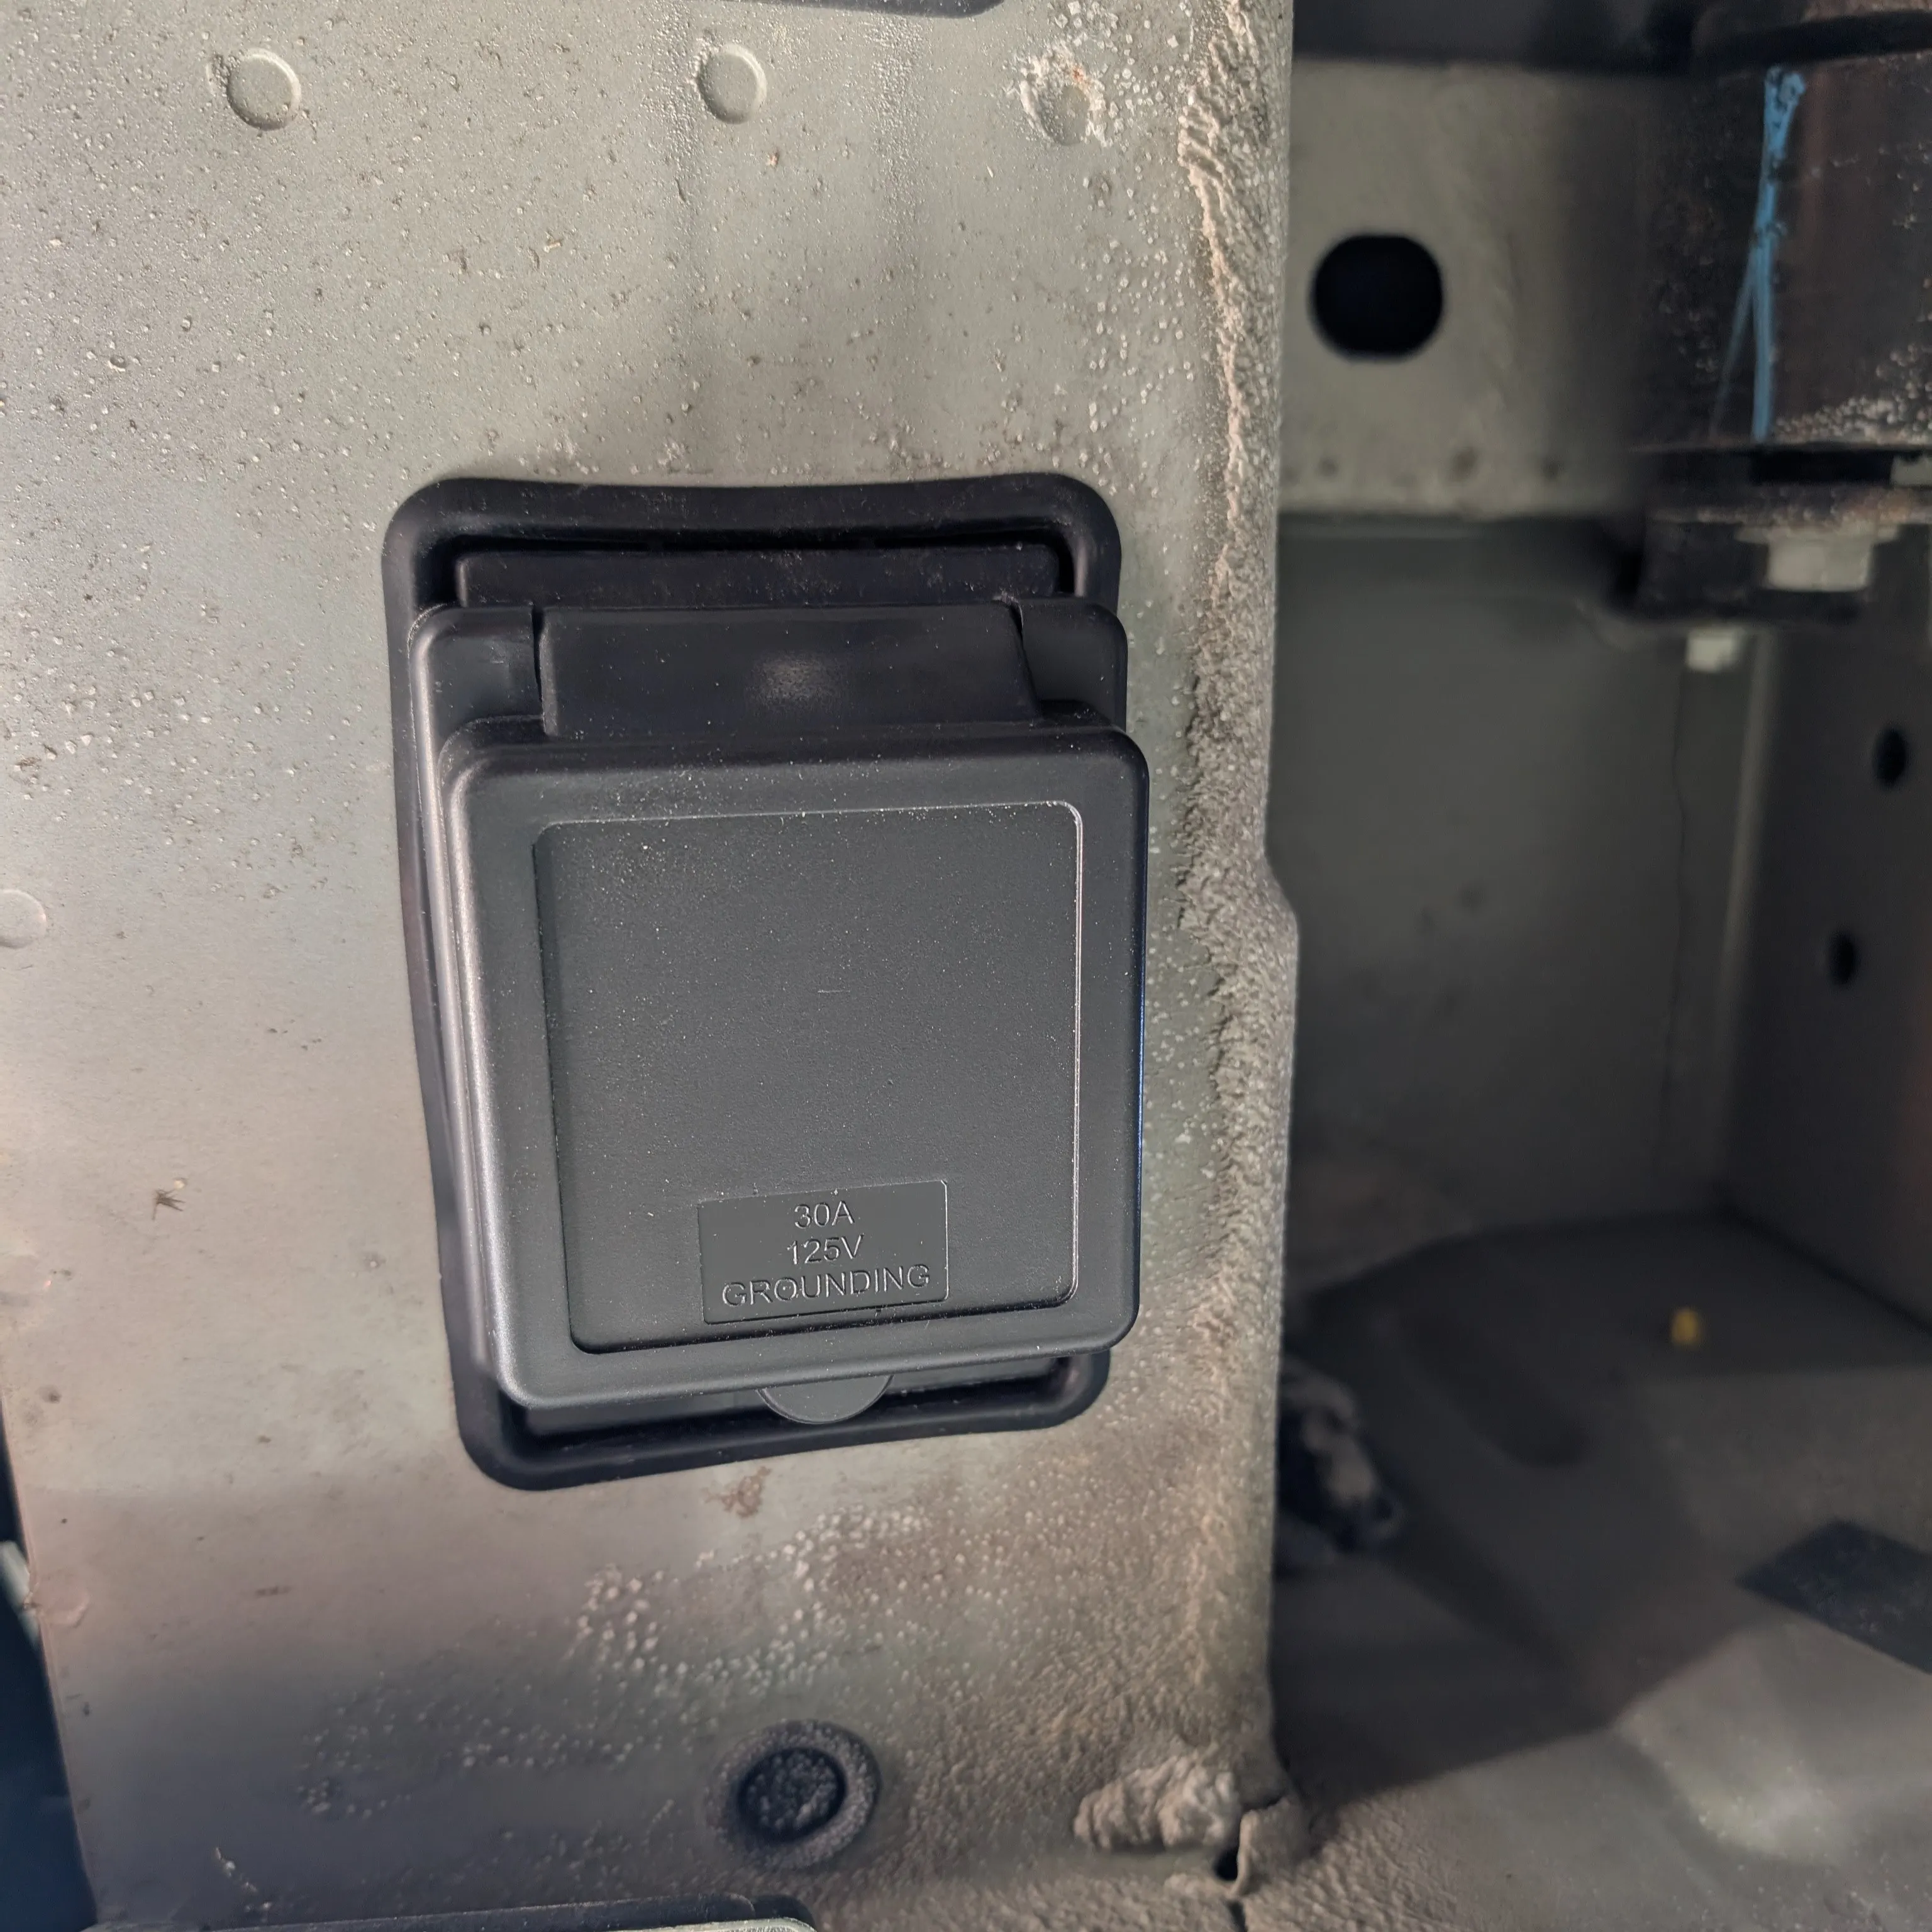
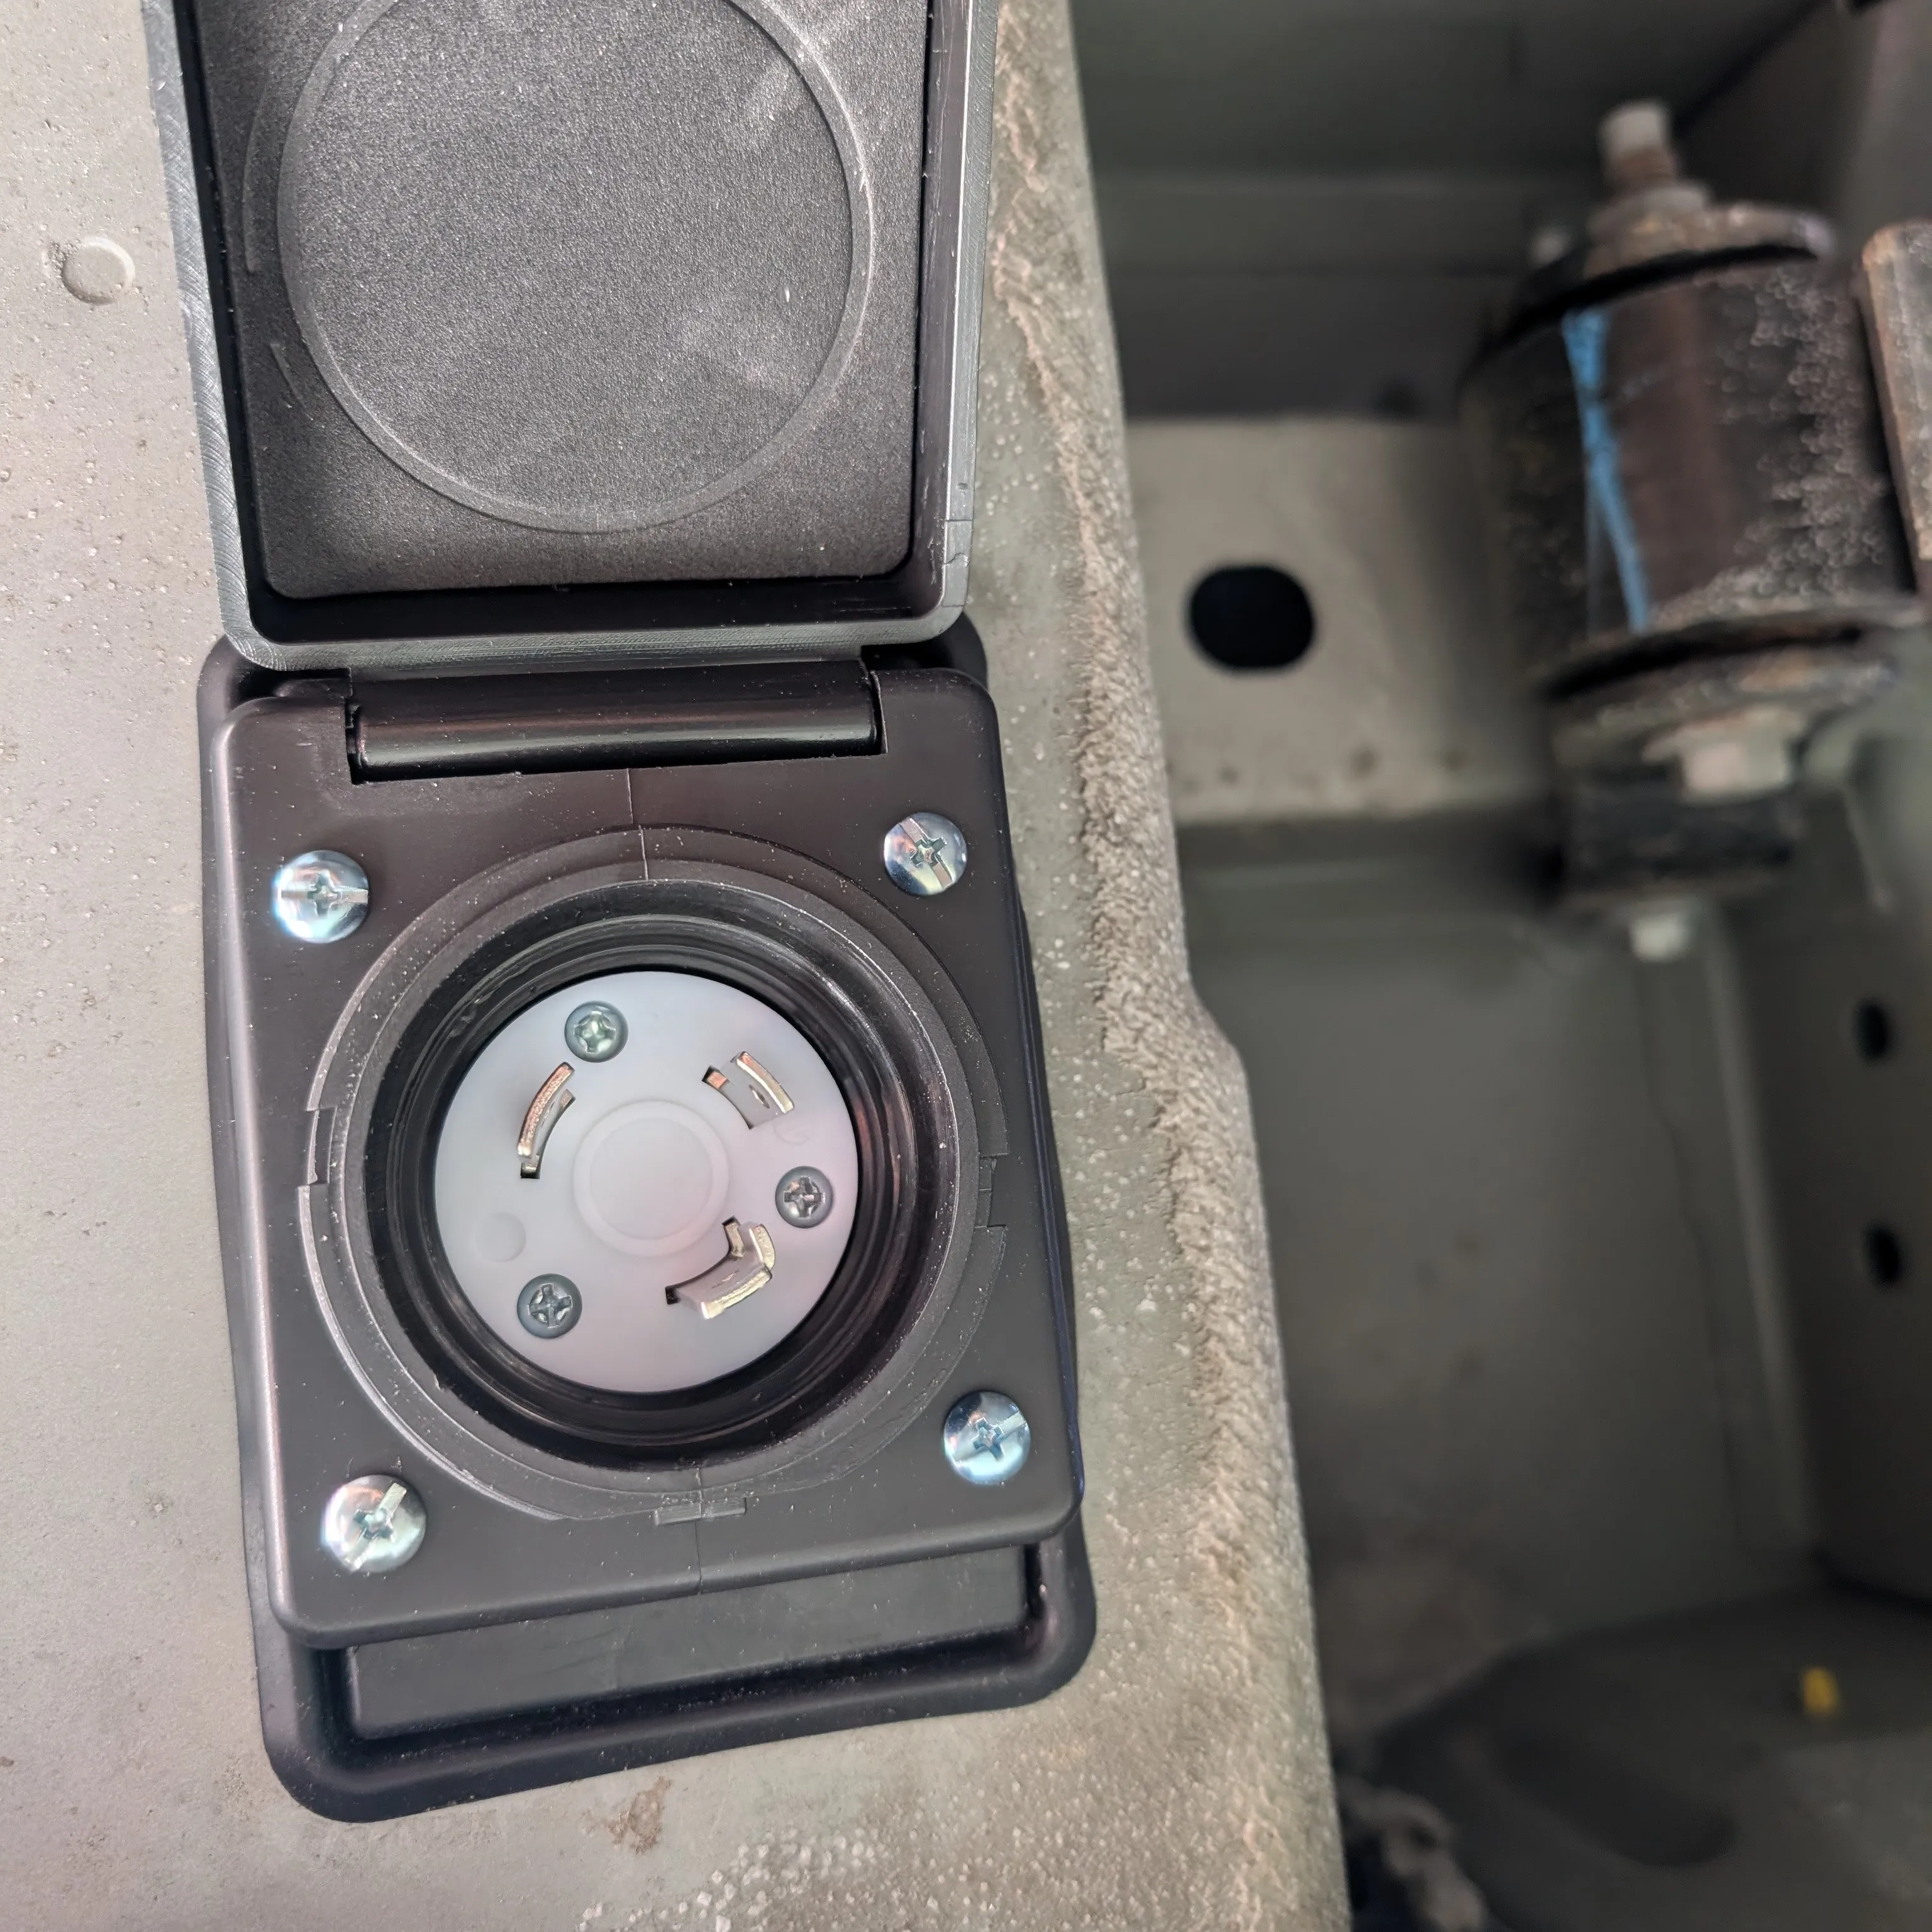
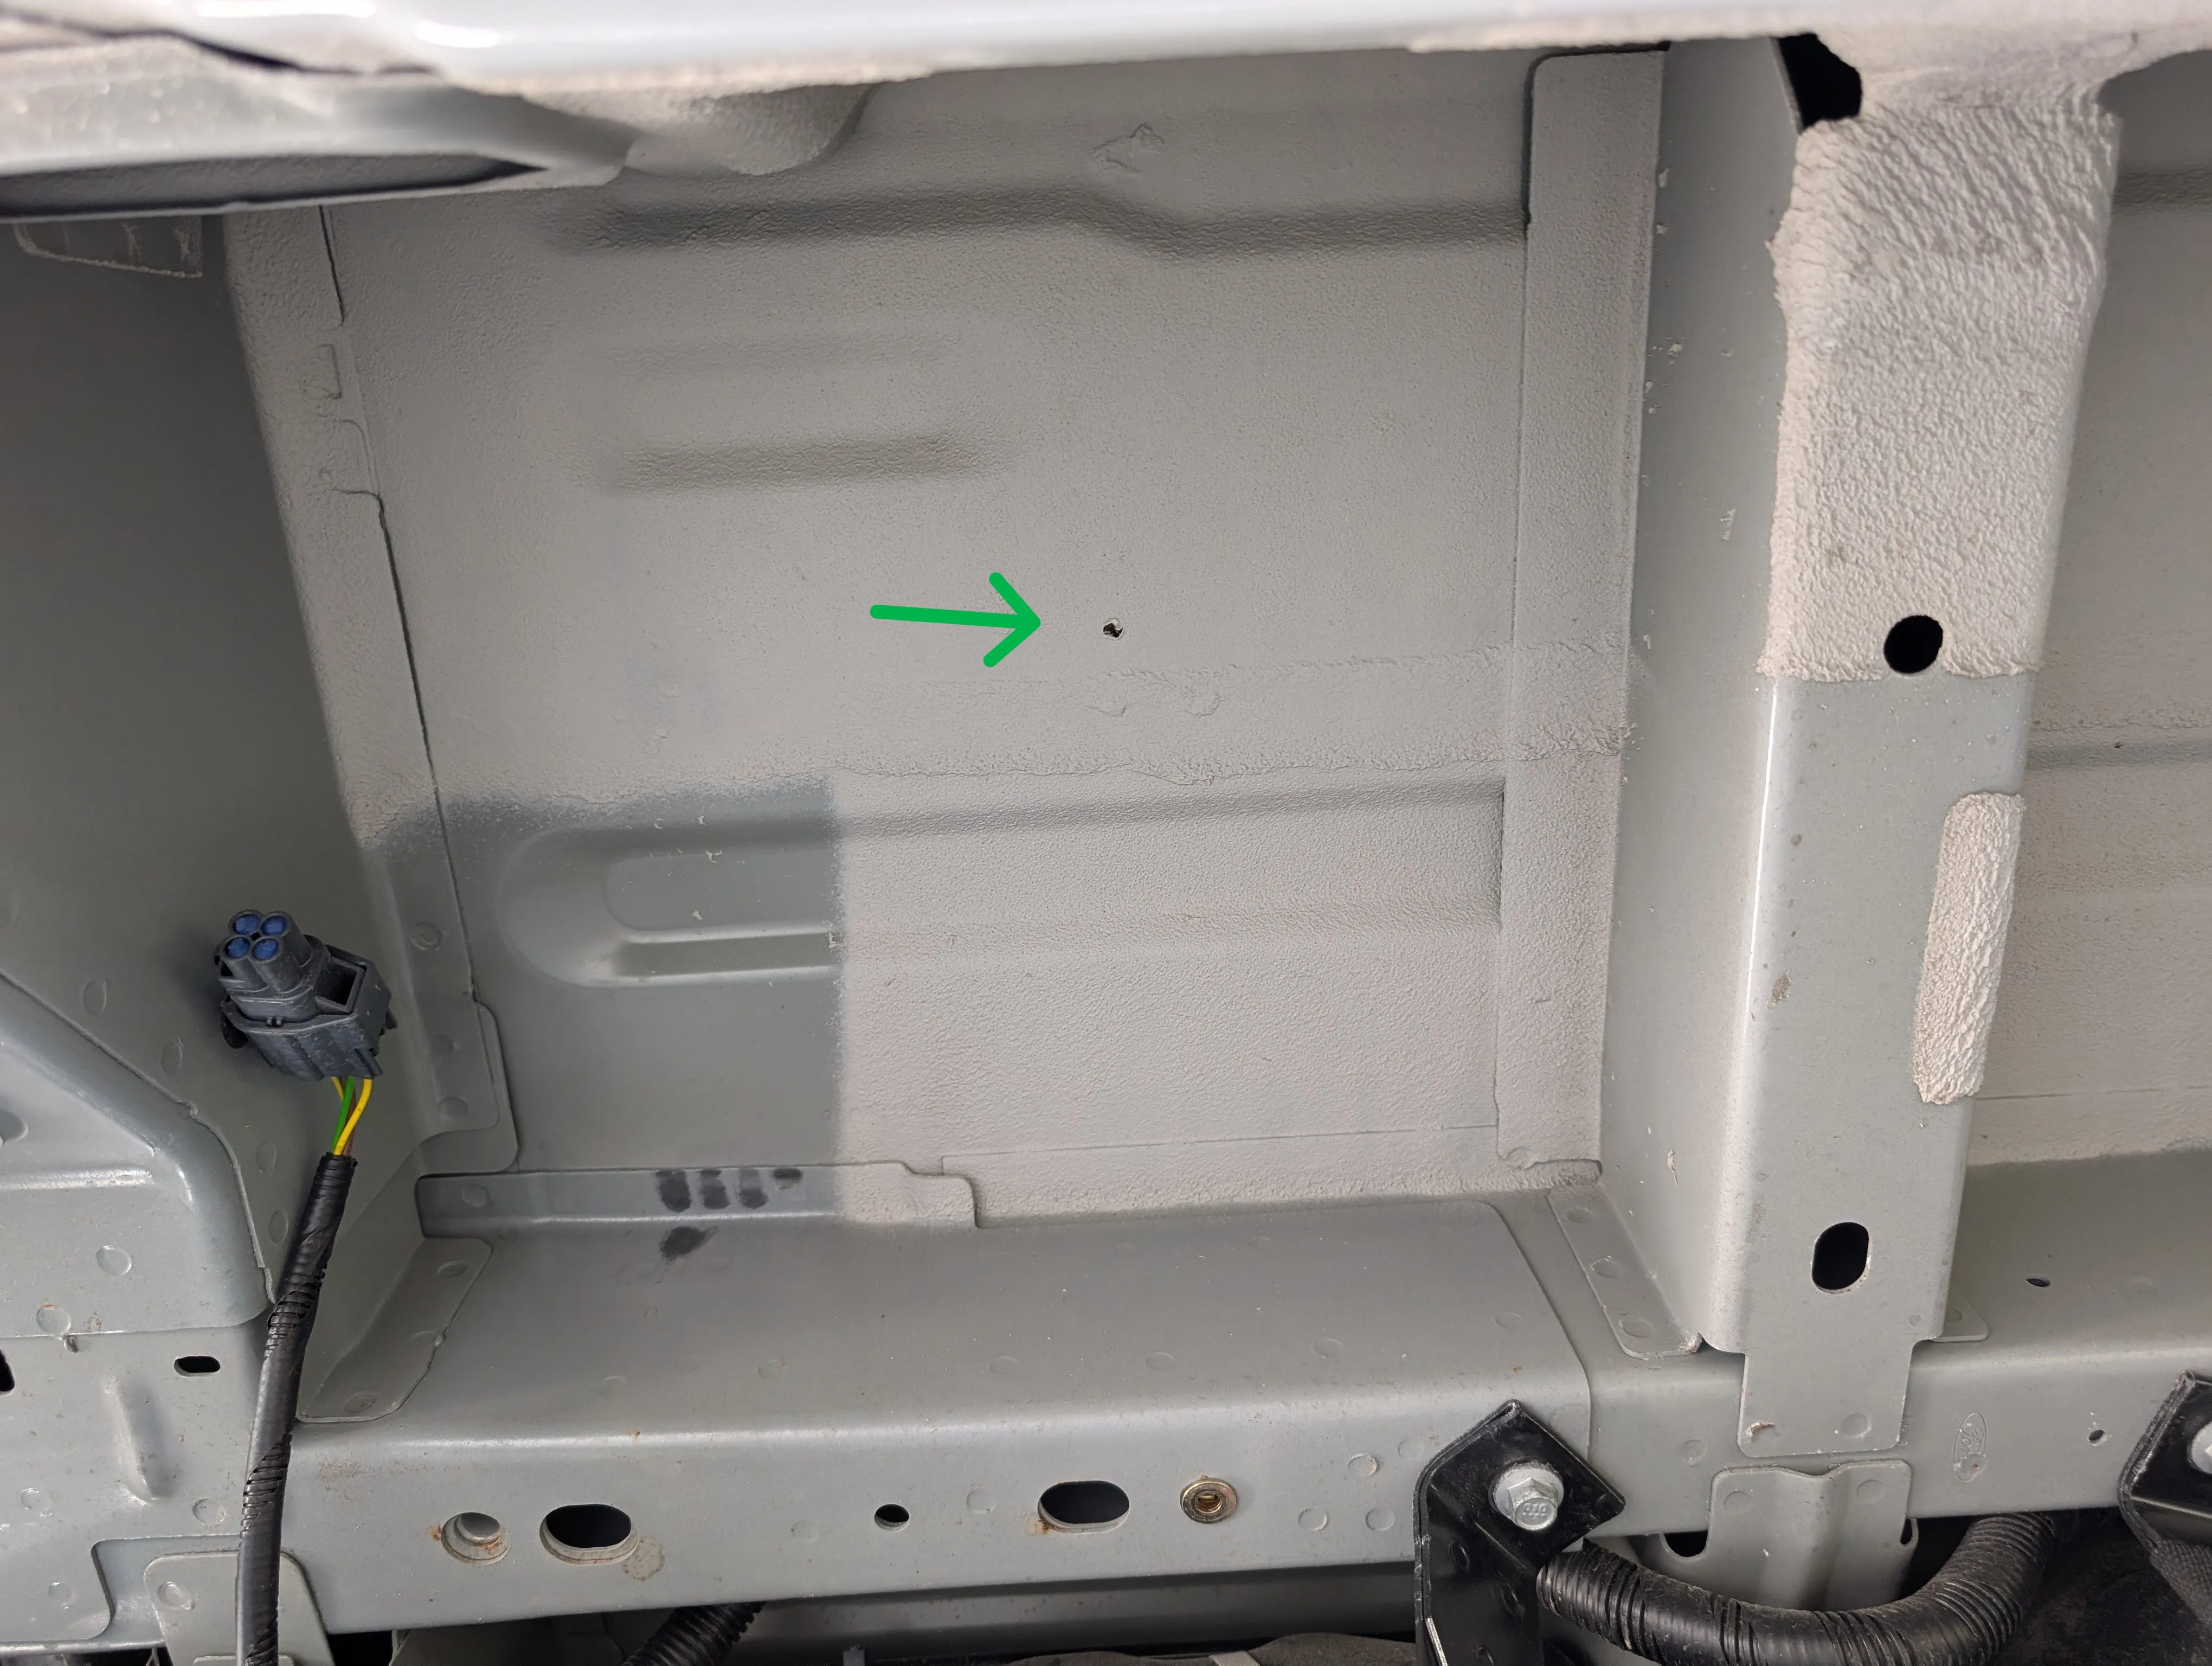
I was going to put off adding shore power until later but I found a really simple solution for it. There are conveniently located openings on the bottom of the van near the back with a rubber cover that pops into it. The location is perfect as it leads straight to the battery system. So, I just drilled a hole and mounted a 30A shore power inlet into the rubber and popped it back in. I didn’t want to drill any holes onto the side of Kep so this method worked really well.
Coming up: plumbing! Now that the electrical system is ready to go, I’ll be starting the build of the wetroom and planning the white and grey water system. The frame of the shower pan is complete but it still needs to be sloped and waterproofed. It will sit right behind the drivers seat and have 4 walls surrounding it with one of them being the door. The plan is to use 2x4 to frame the wall on the left and allow for some space for plumbing. The remaining walls will just be plywood sheets. I’ll then cover the walls on the inside with PVC panels to make the shower waterproof. I wasn’t able to find a shower pan with the dimensions I wanted and the drain hole in the right location so I opted to build my own. The shower pan is 27in x 24in and the resulting footprint of the wetroom will be about 32in x 26in.
May 13, 2025
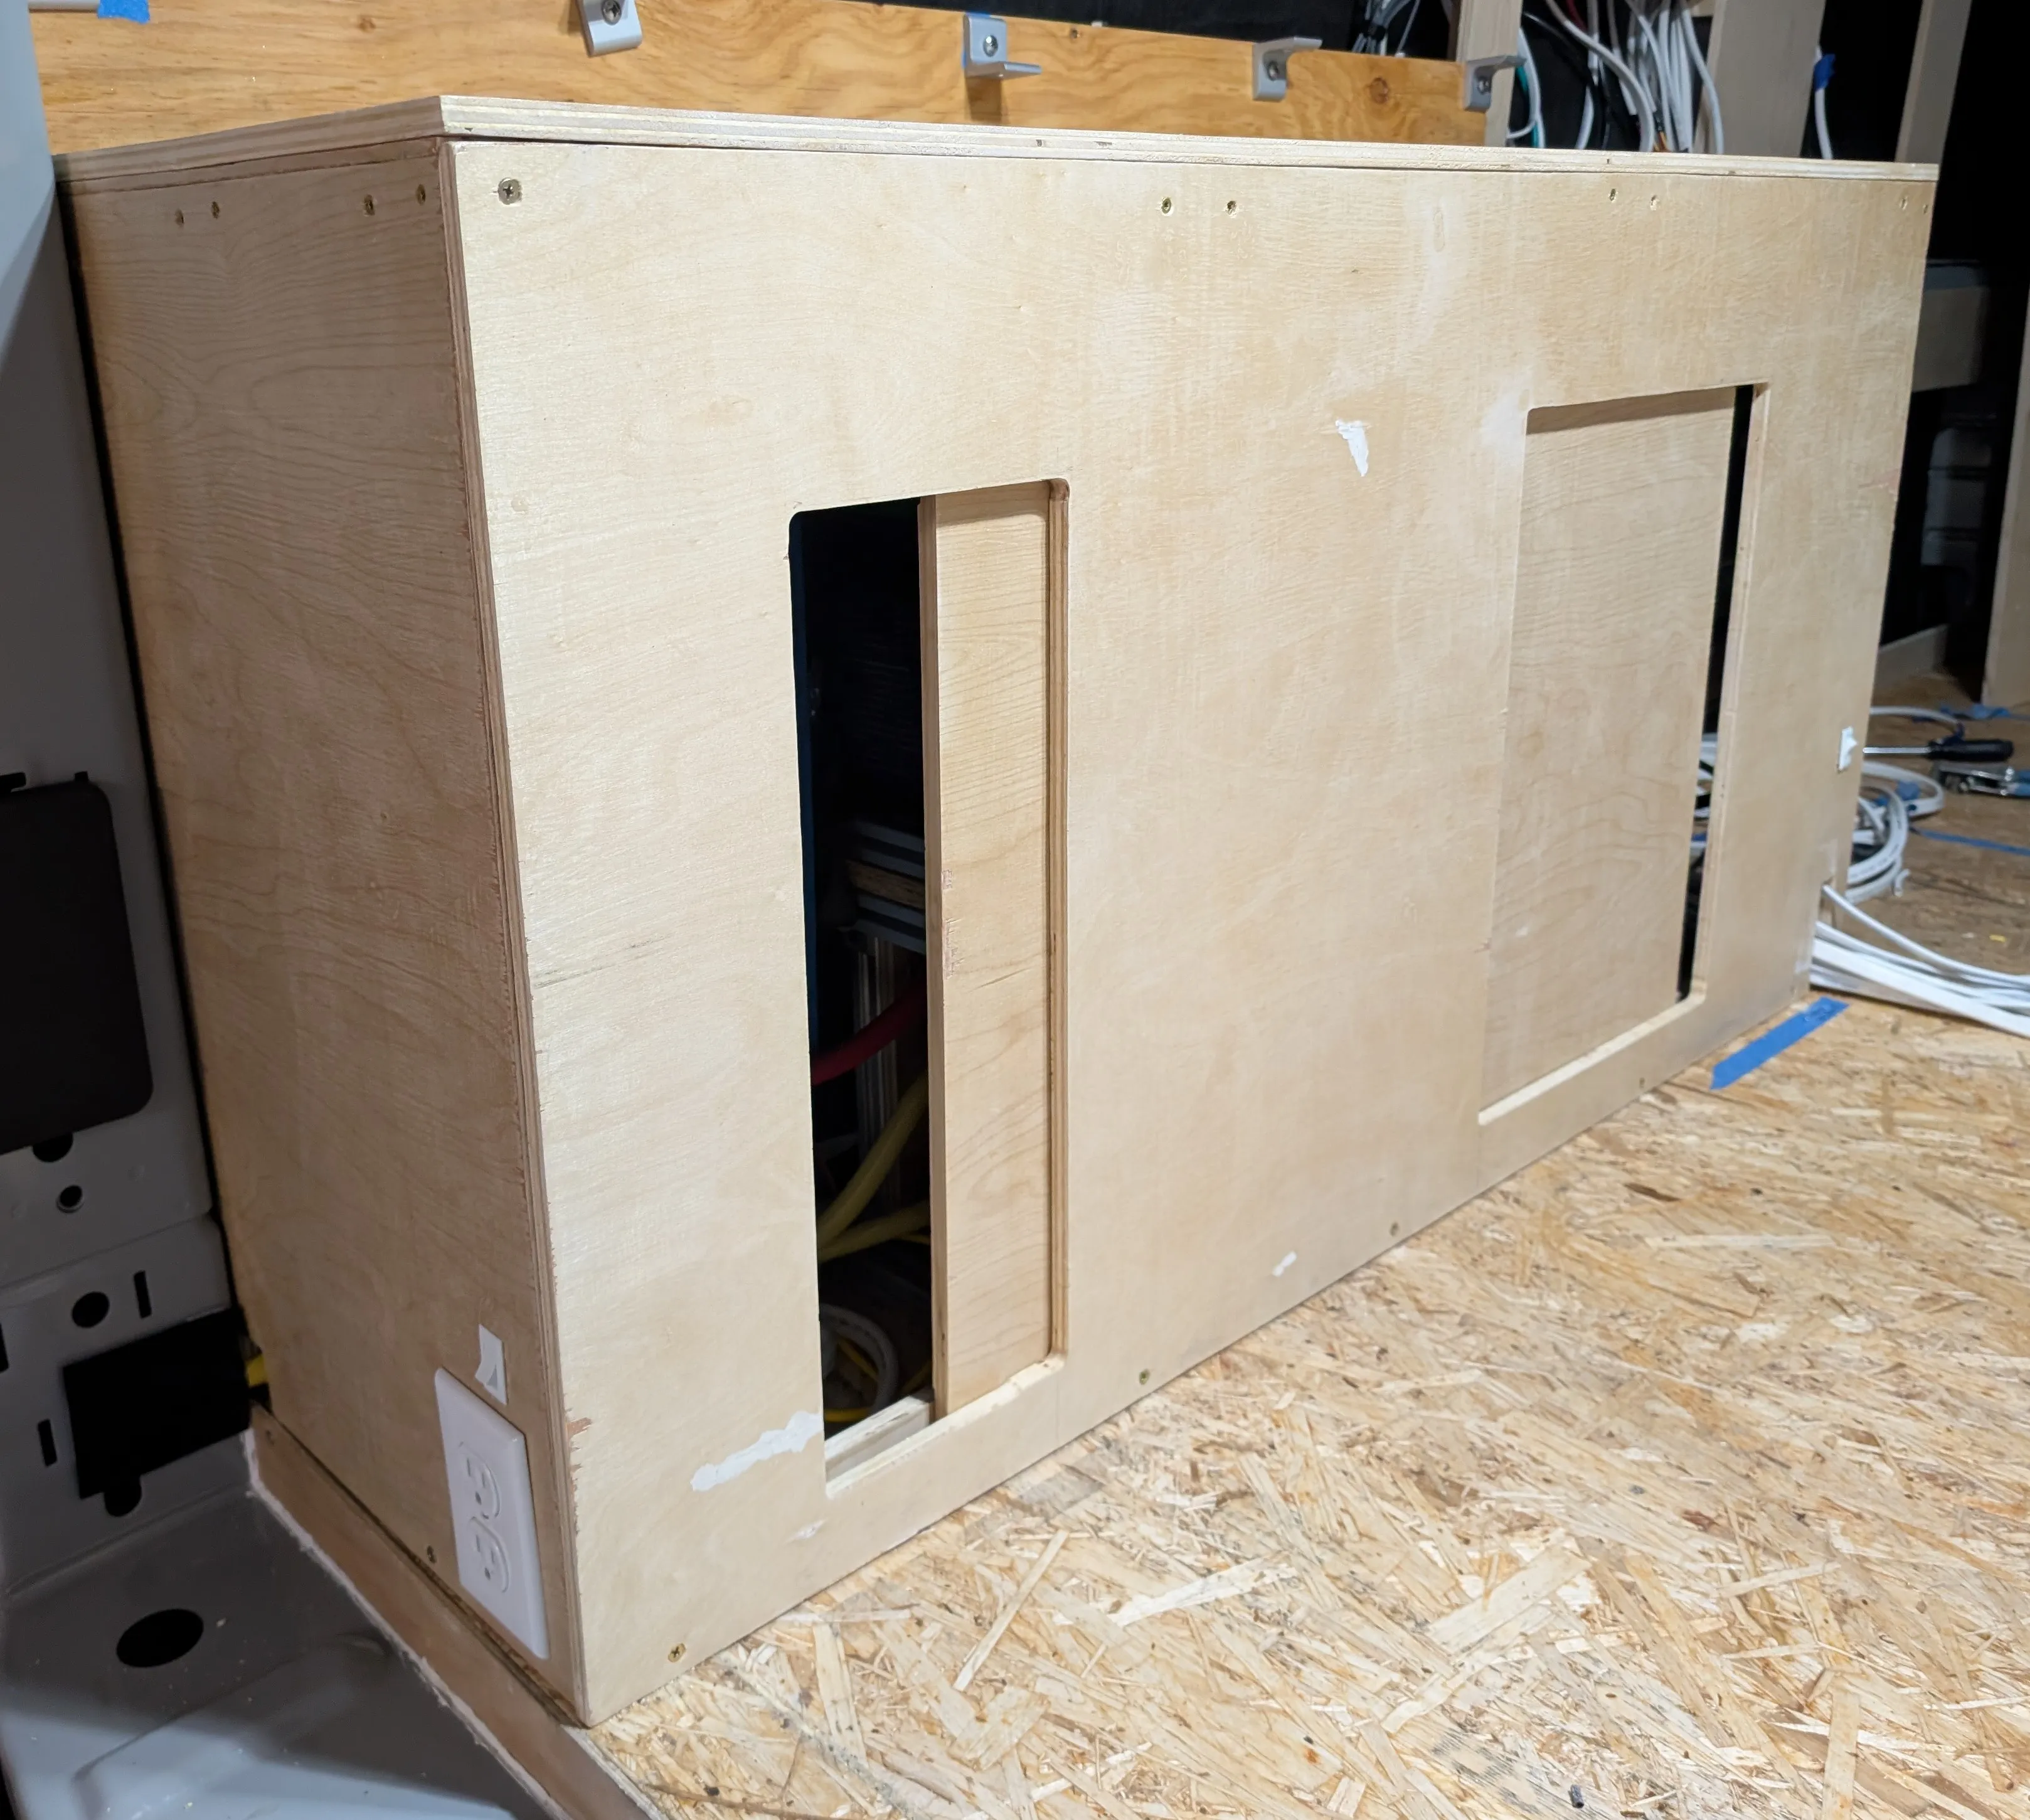
The battery housing is complete and installed. There are two really simple sliding doors to access the battery system, which still need handles and a locking mechanism. I added an outlet in the back and connected the light switches to control the garage lights. I should’ve thought more about the placement of these. I think it would have been better to have the outlet and switch in the back higher up.

For wiring the outlet, I used fork connectors, as the terminal screws don’t come out completely. These connectors are less preferred over ring connectors in vehicles as they run the risk of falling out. Apparently if you bend the ends of the fork, it provides a more secure connection.
May 11, 2025
Kep now has a hole in his underside. I’ve finally committed to a location for the shower drain with careful planning to avoid the gas tank and the ribs. I took some rough measurements from the driver side door and the side of the van and aligned it to where the shower was inside the van. It turned out to be quite accurate as this location for the drain is ideal. Another clever method I came across is sticking a strong magnet to the bottom and scattering metal shavings inside the van floor to see where they go. This didn’t work for me as I have some pretty thick flooring installed already.
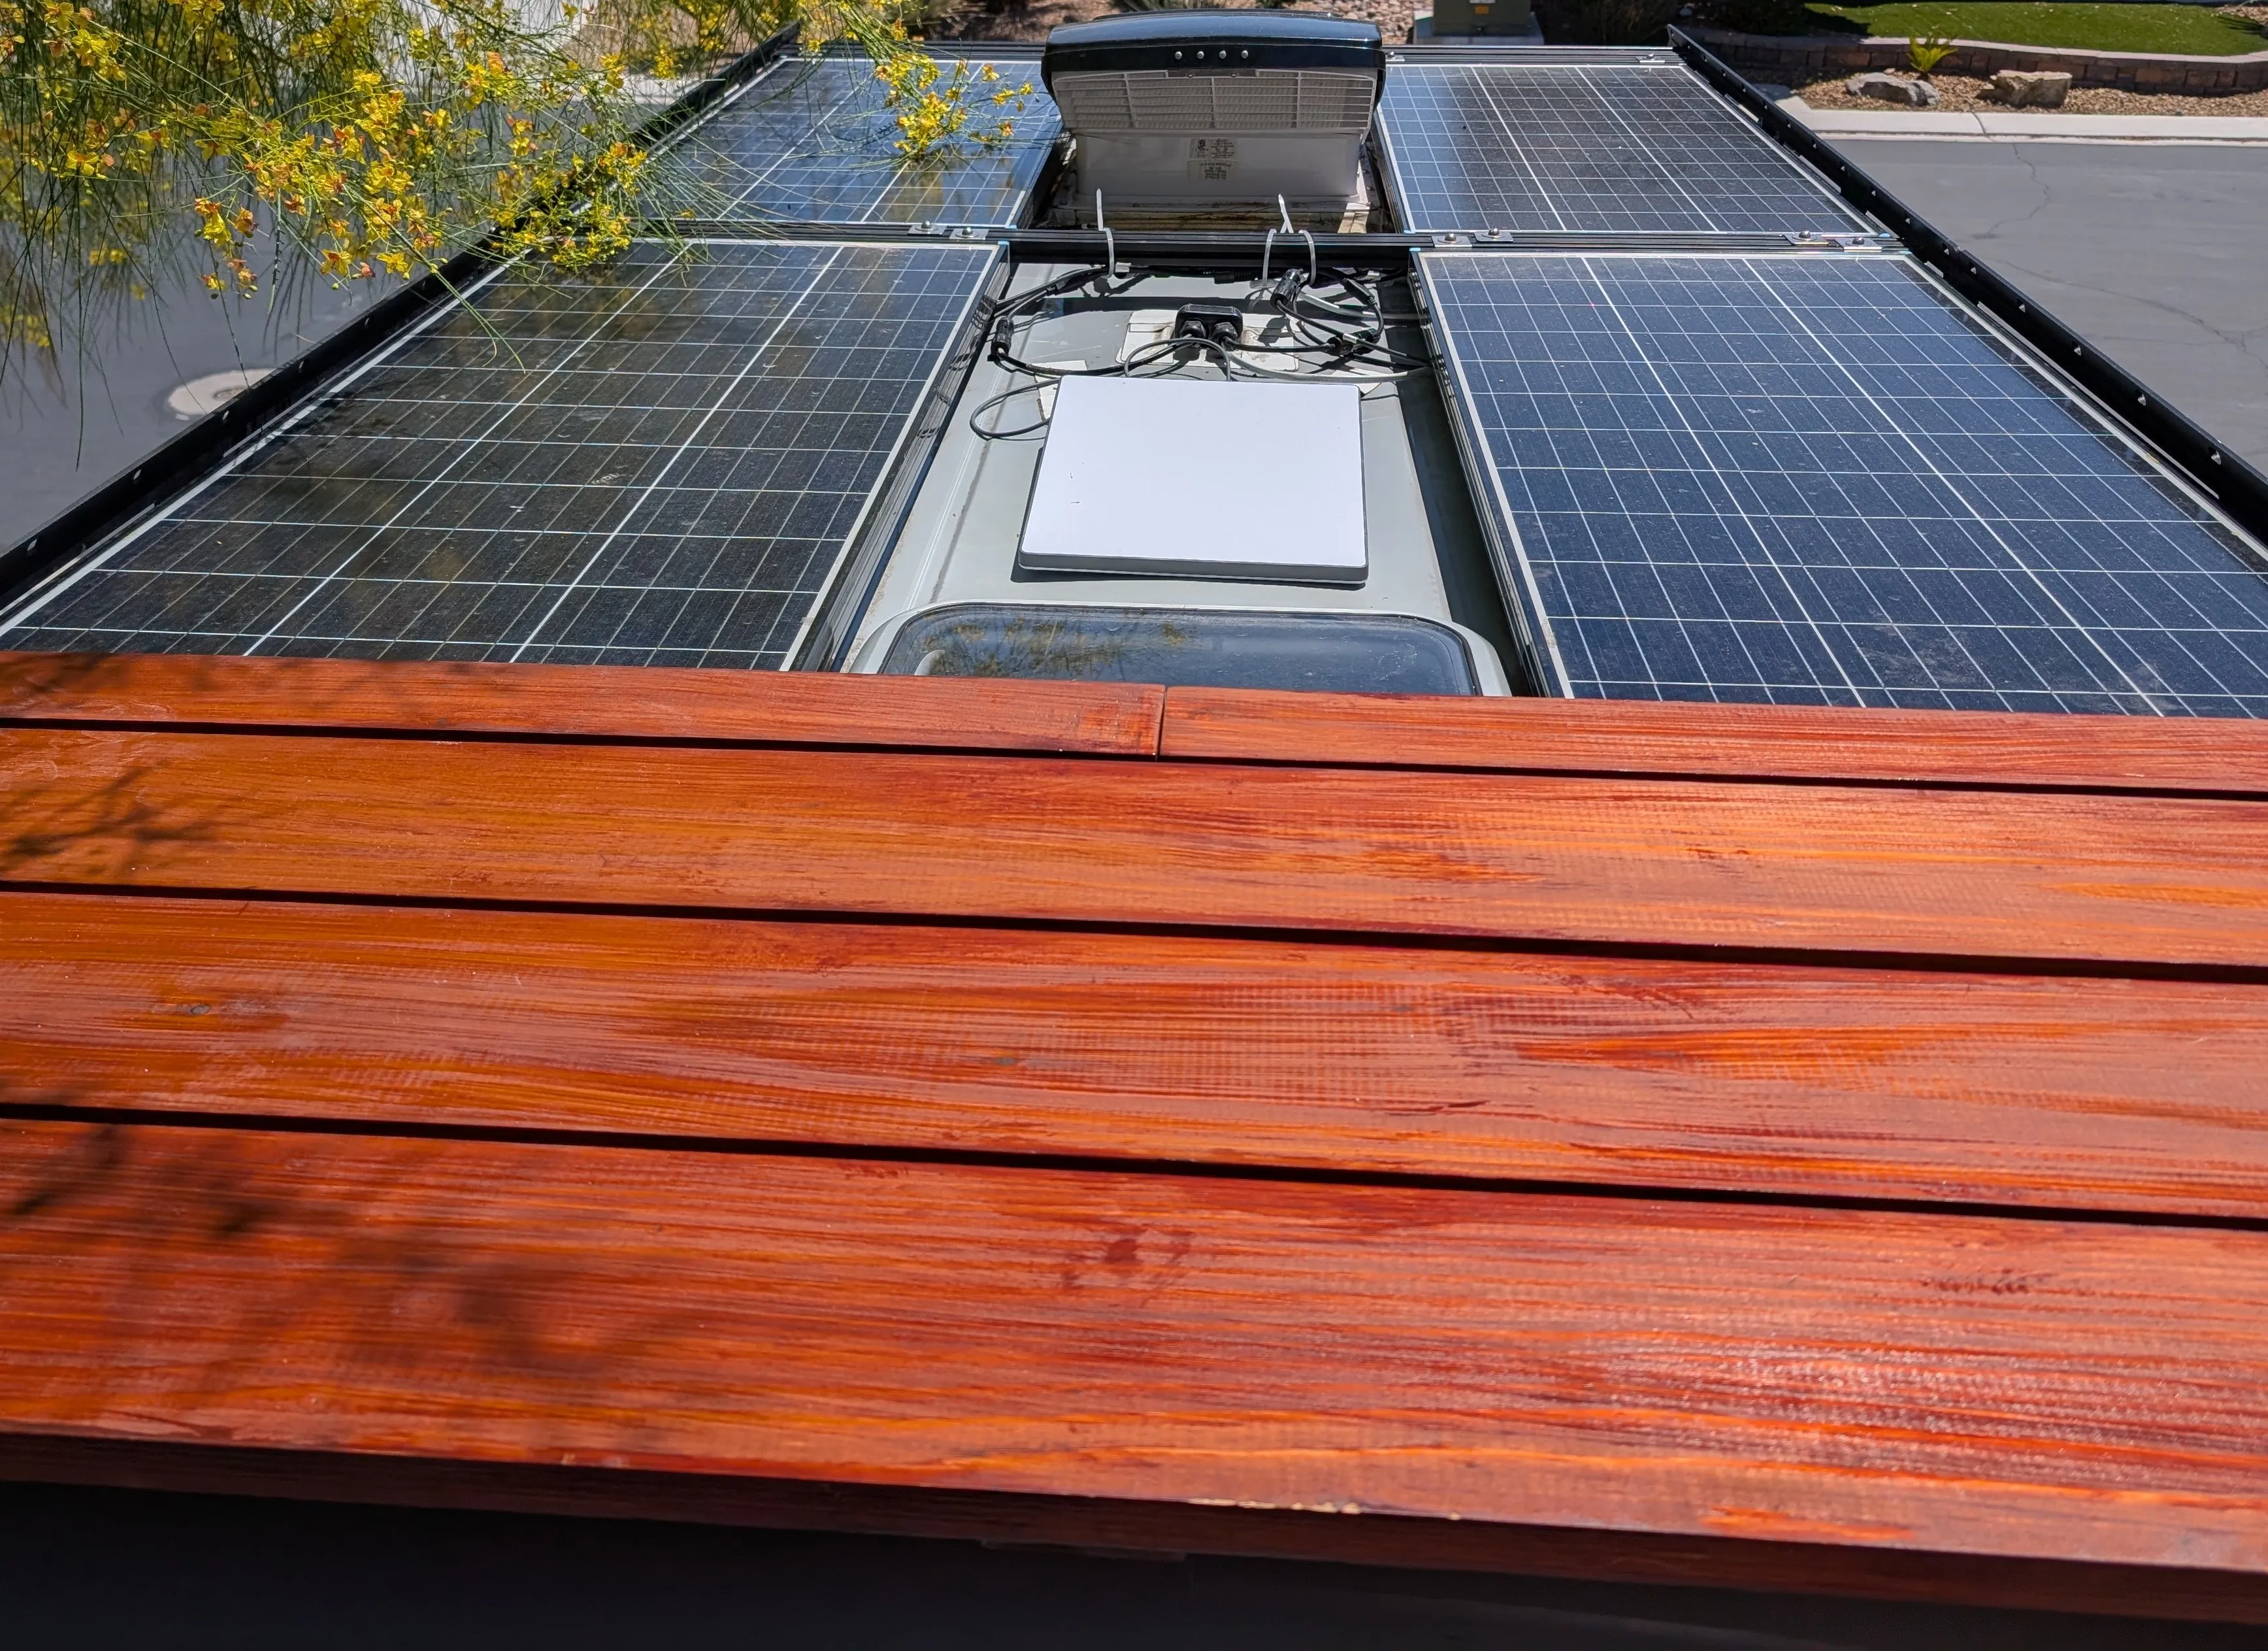
The deck is complete and mounted to the roof rack. It’s stained with an oil based stain in brown but it came out more orange looking probably due to the reddish undertones of cedar. I promise it’s not as bad in person. I also wired a mini Starlink to my 12V DC system and there’s a perfect spot for it in the center.
May 9, 2025

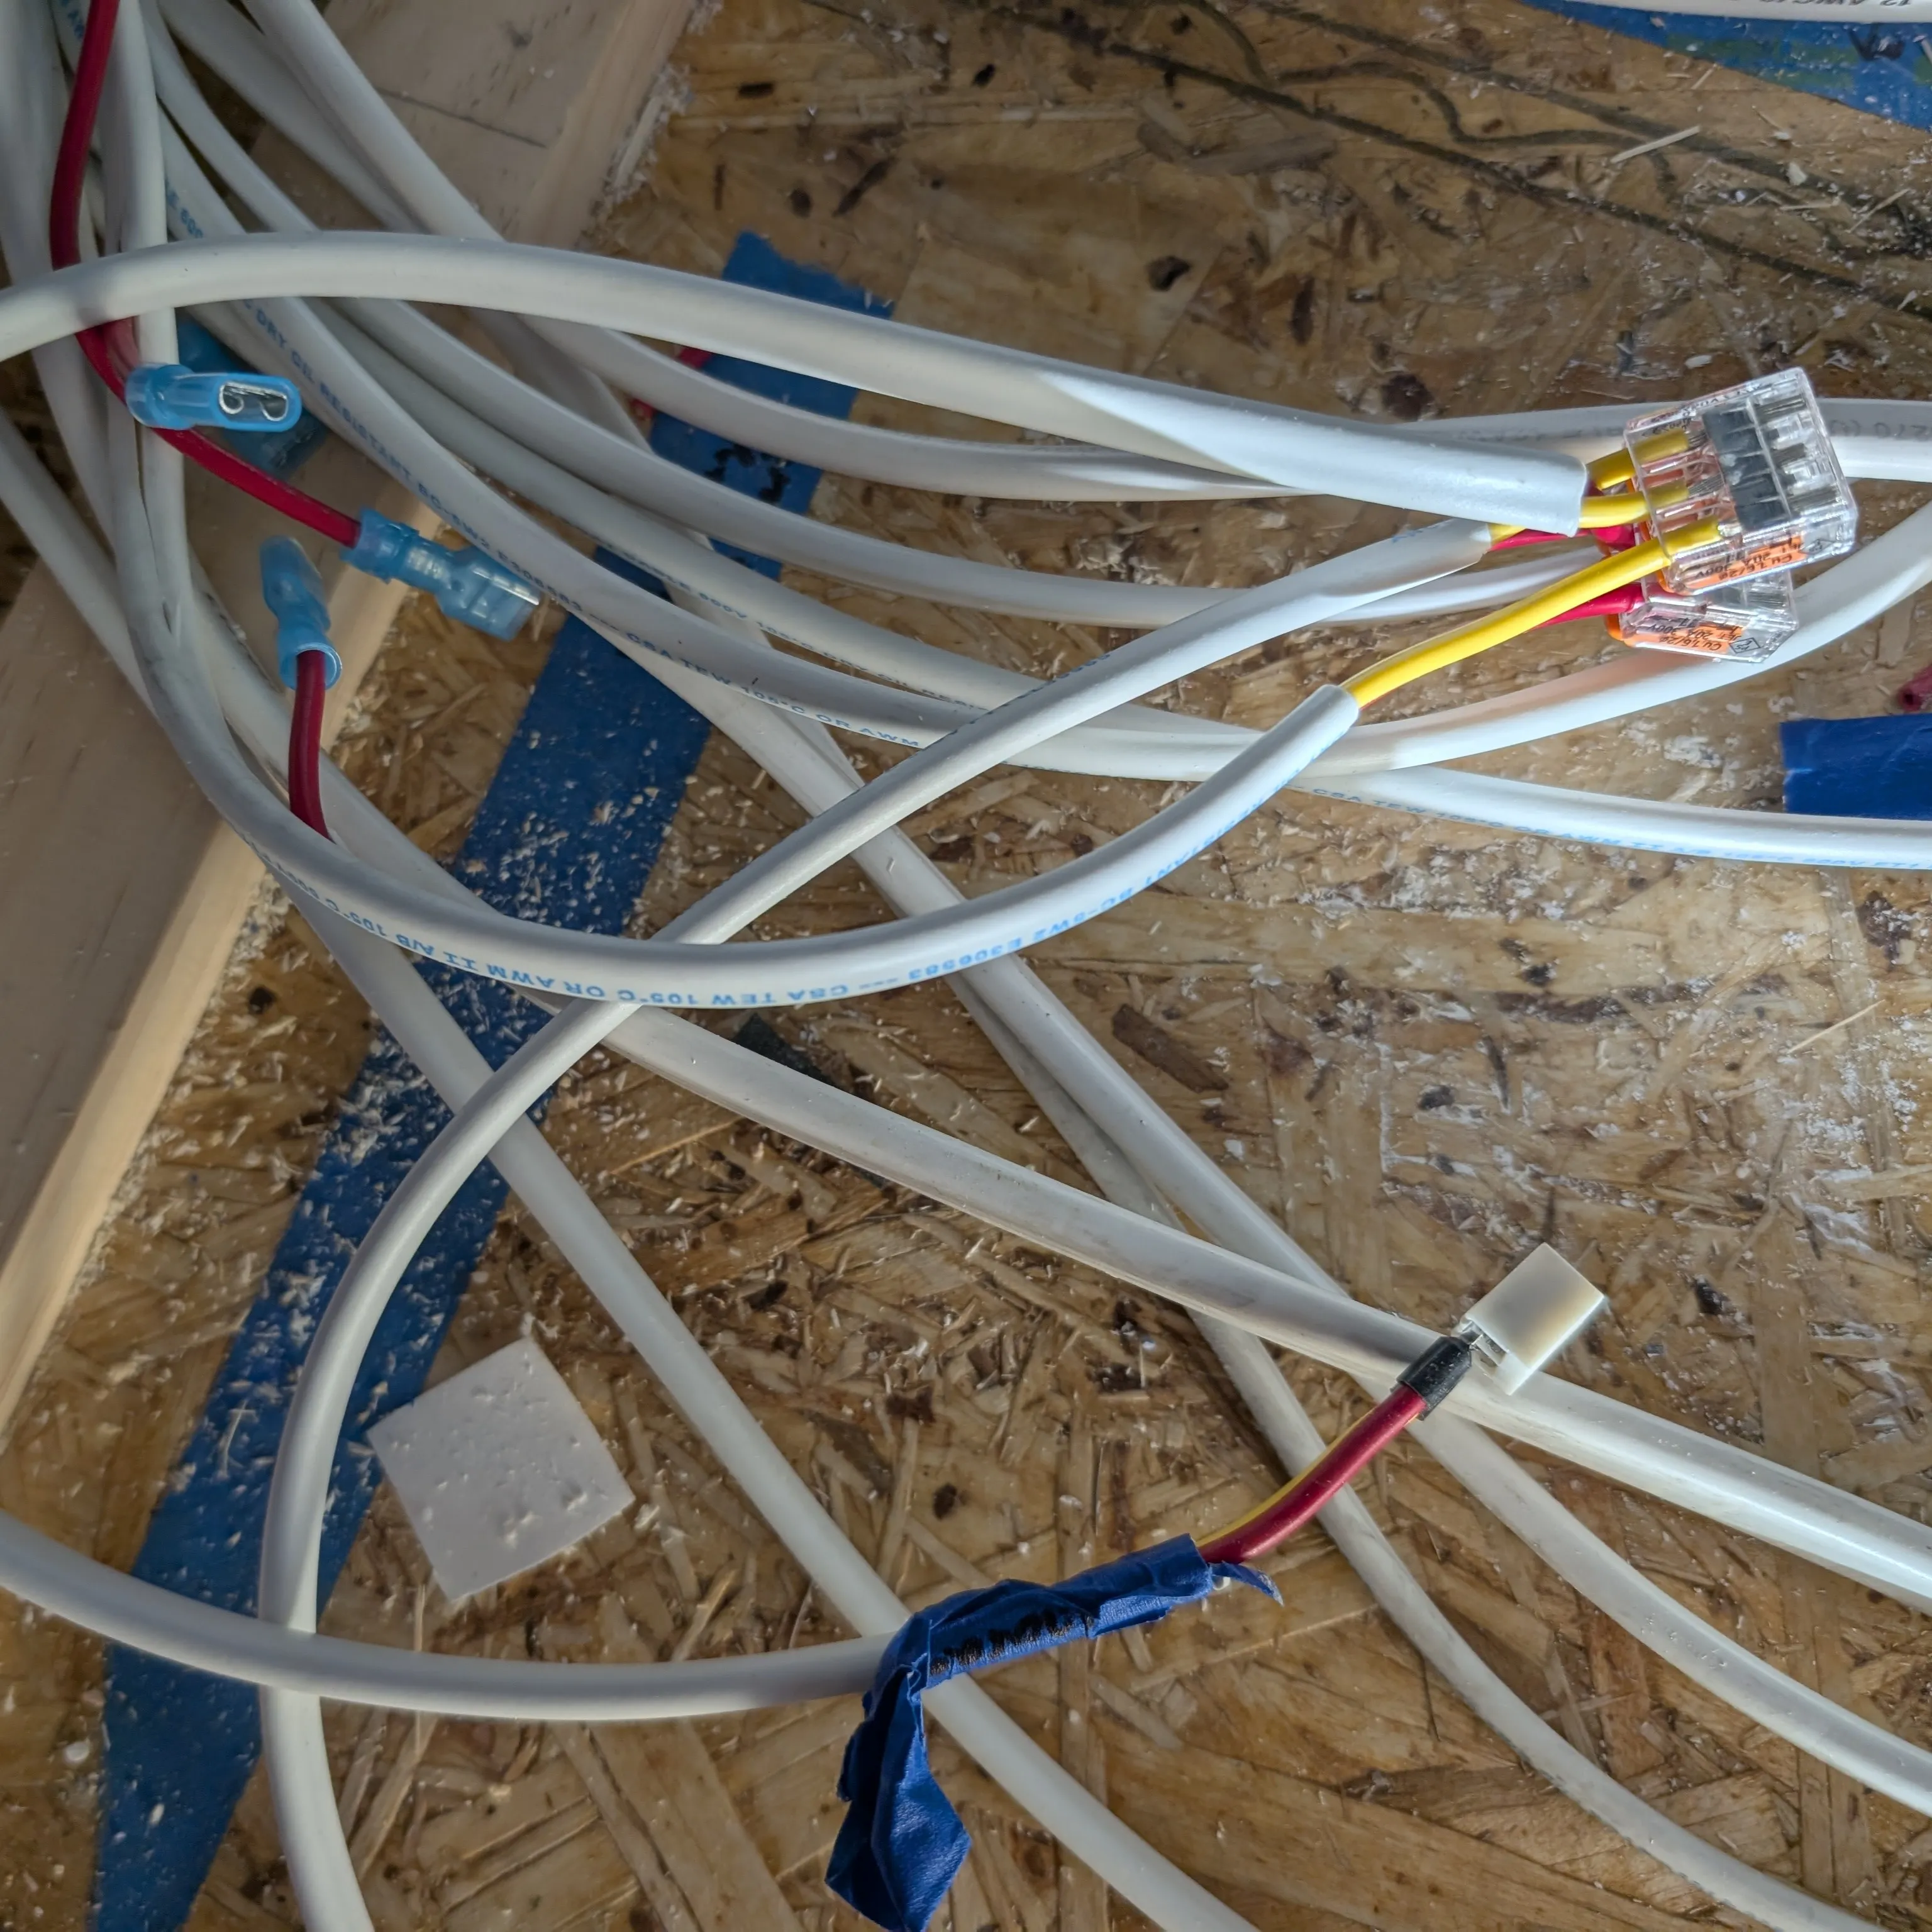
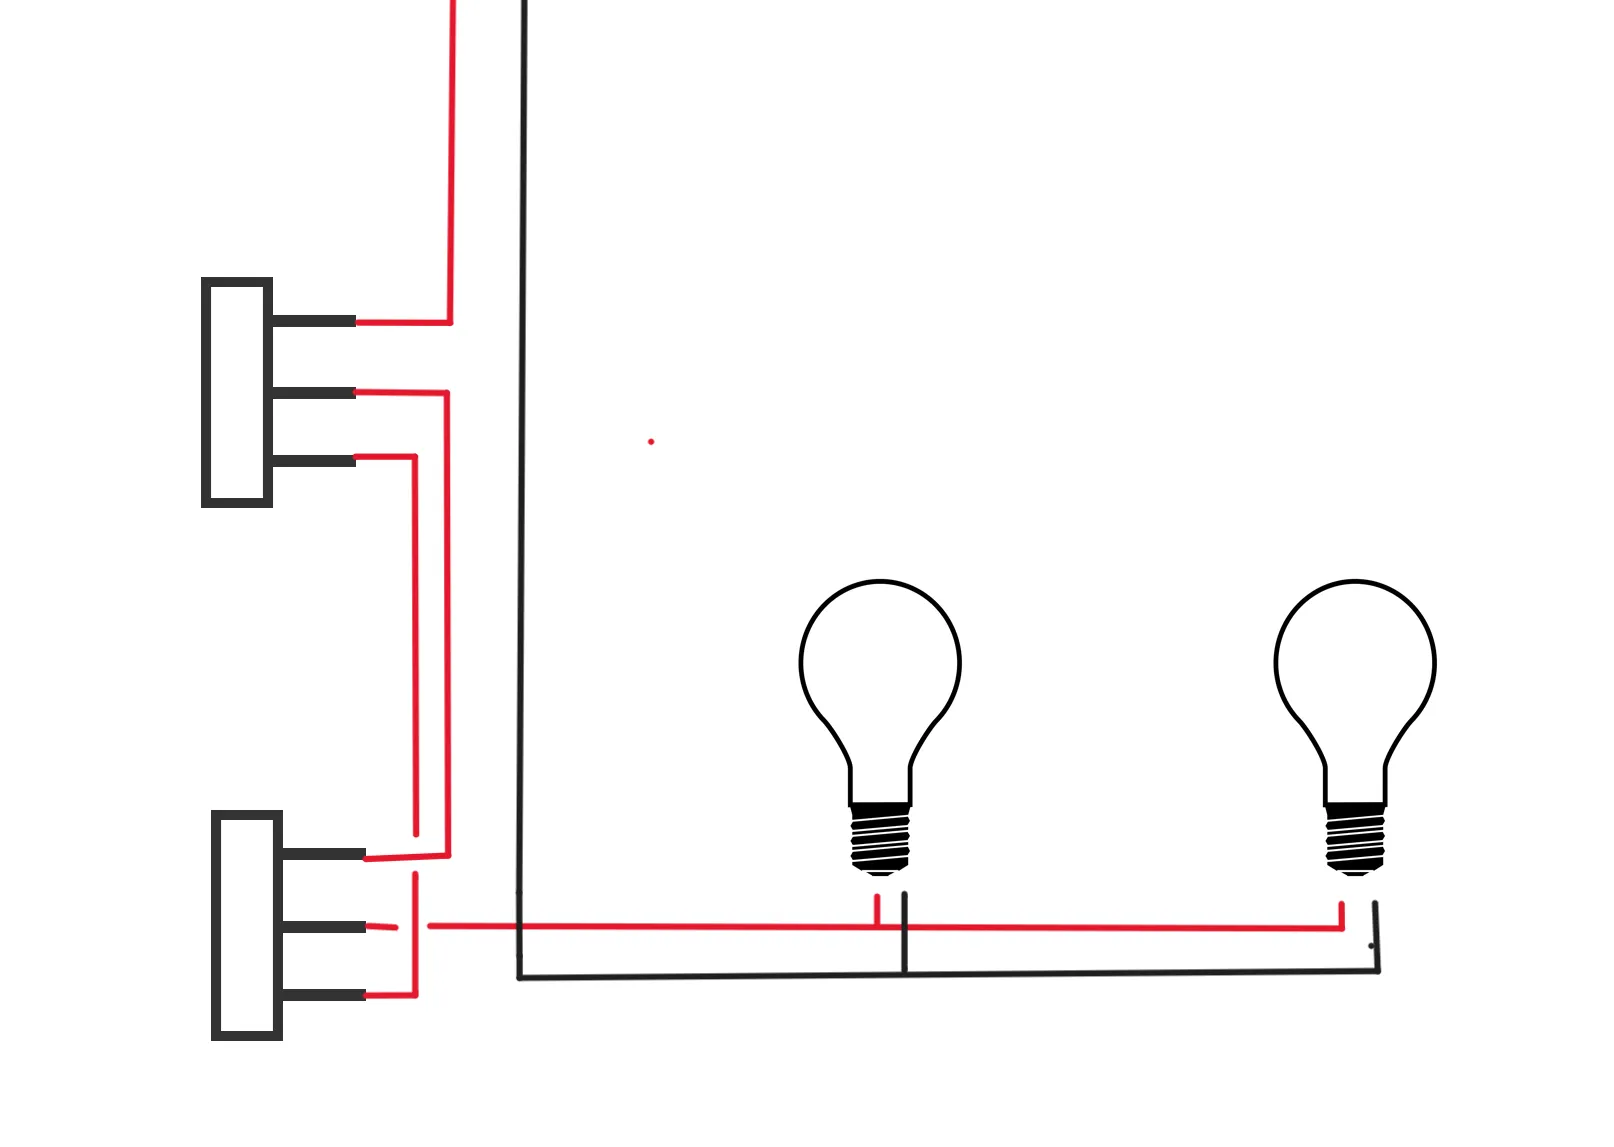
For the LED lights in the garage, there will be two switches on each end to control the light. This two way switch took me forever to figure out. There are basically three red wires running between the two switches, so for the third I separated out the red from the duplex wire and wrapped loom tubing around the whole bundle. I’m also using wago connectors when connecting three wires together.
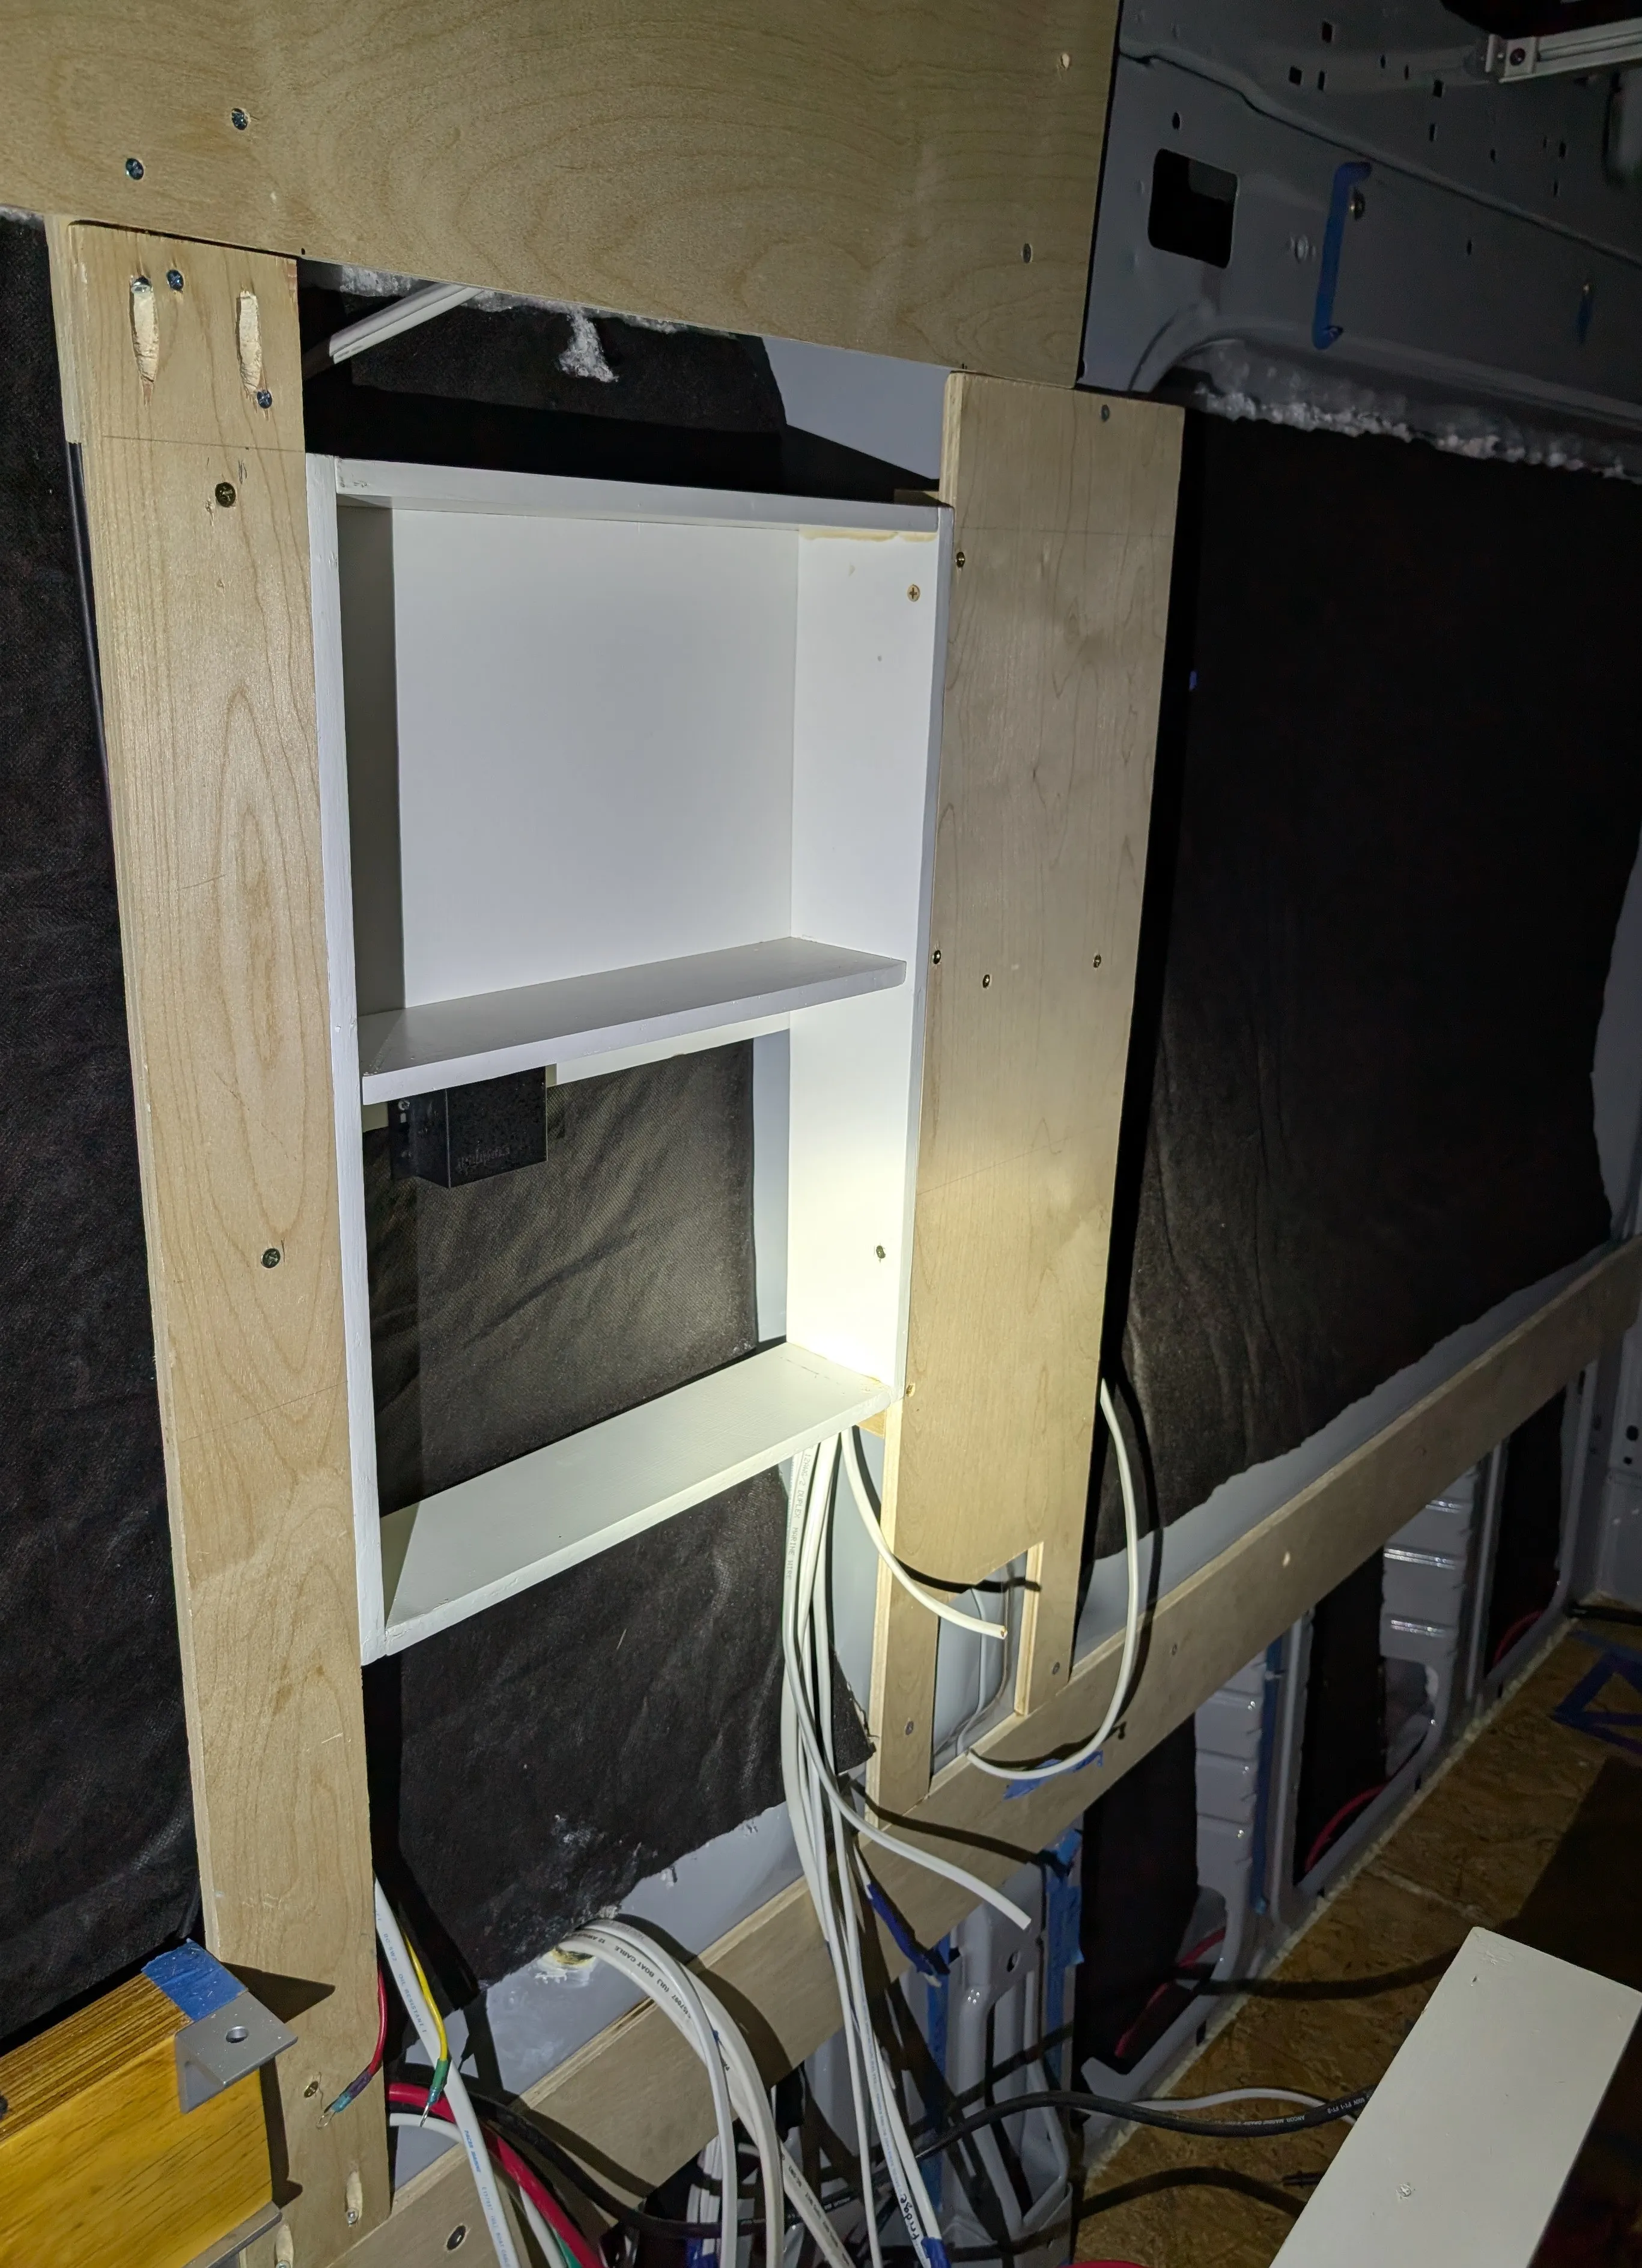
The furring around the recessed cabinet have been installed. I’m using a bit of marine sealant to glue the strip to the metal and then covering the screws with a bit of blue loctite. I added a couple of self drilling (tek) screws in the areas without rivnuts so these strips are permanently in, for the foreseeable future at least. Finally, the cabinet is supported by the two vertical strips.
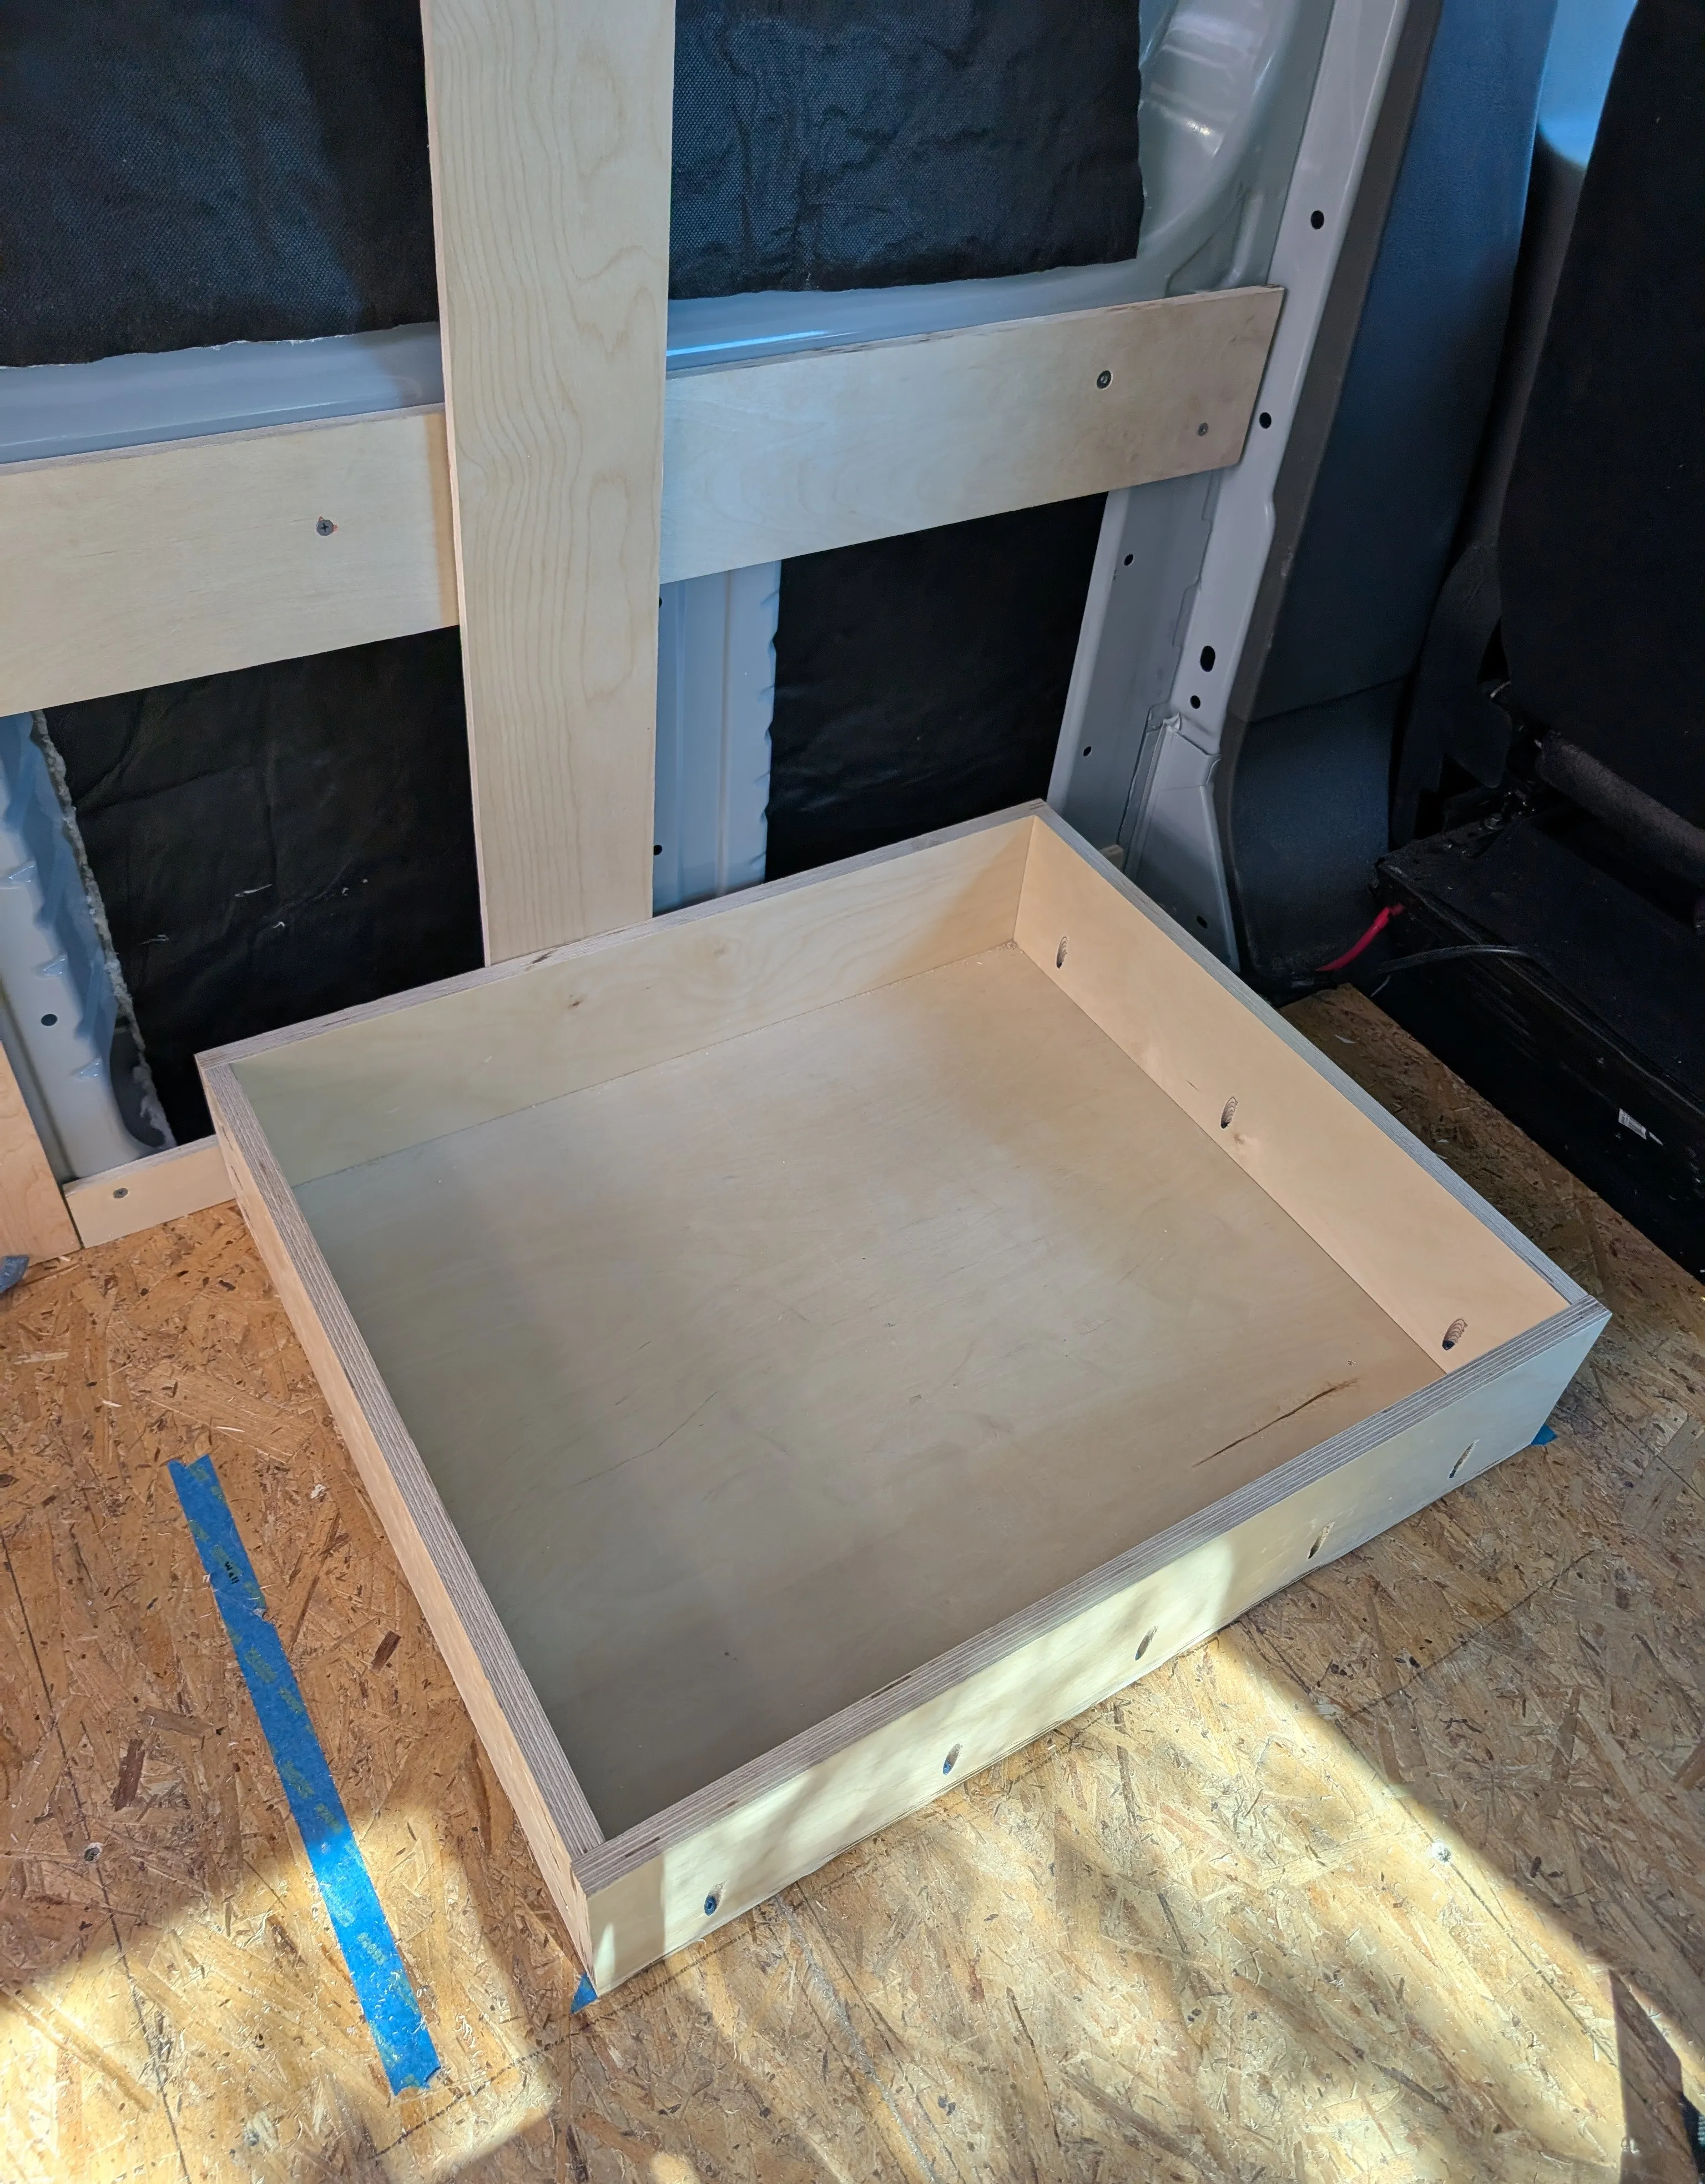
The housing for the batteries is almost done. This is long overdue but my electrical system will finally have some protection from falling wood and metal. I’m in the process of sealing the wood with polyurethane, which should help prevent it from molding. The garage will end up looking rather primitive as I’m not going to bother painting or staining the wood.
May 5, 2025

Today was an exciting day for Kep. I finally got the fan wired. It works just as expected, which means Kep can now stay cool through the summer. For connecting two wires of different (or same) gauges, I use butt connectors. They’re hard to hold together while crimping but it seems to make a very secure connection.

I also tested the outdoor light and wired a switch for it. It’s just a simple SPST switch and seems to work well. The light is actually super blinding and I’m not a big fan but it does the job. I used female spade connectors to connect to the terminals on the switch. These are pretty easy to install but a little wobbly. They should hold through vibrations though.
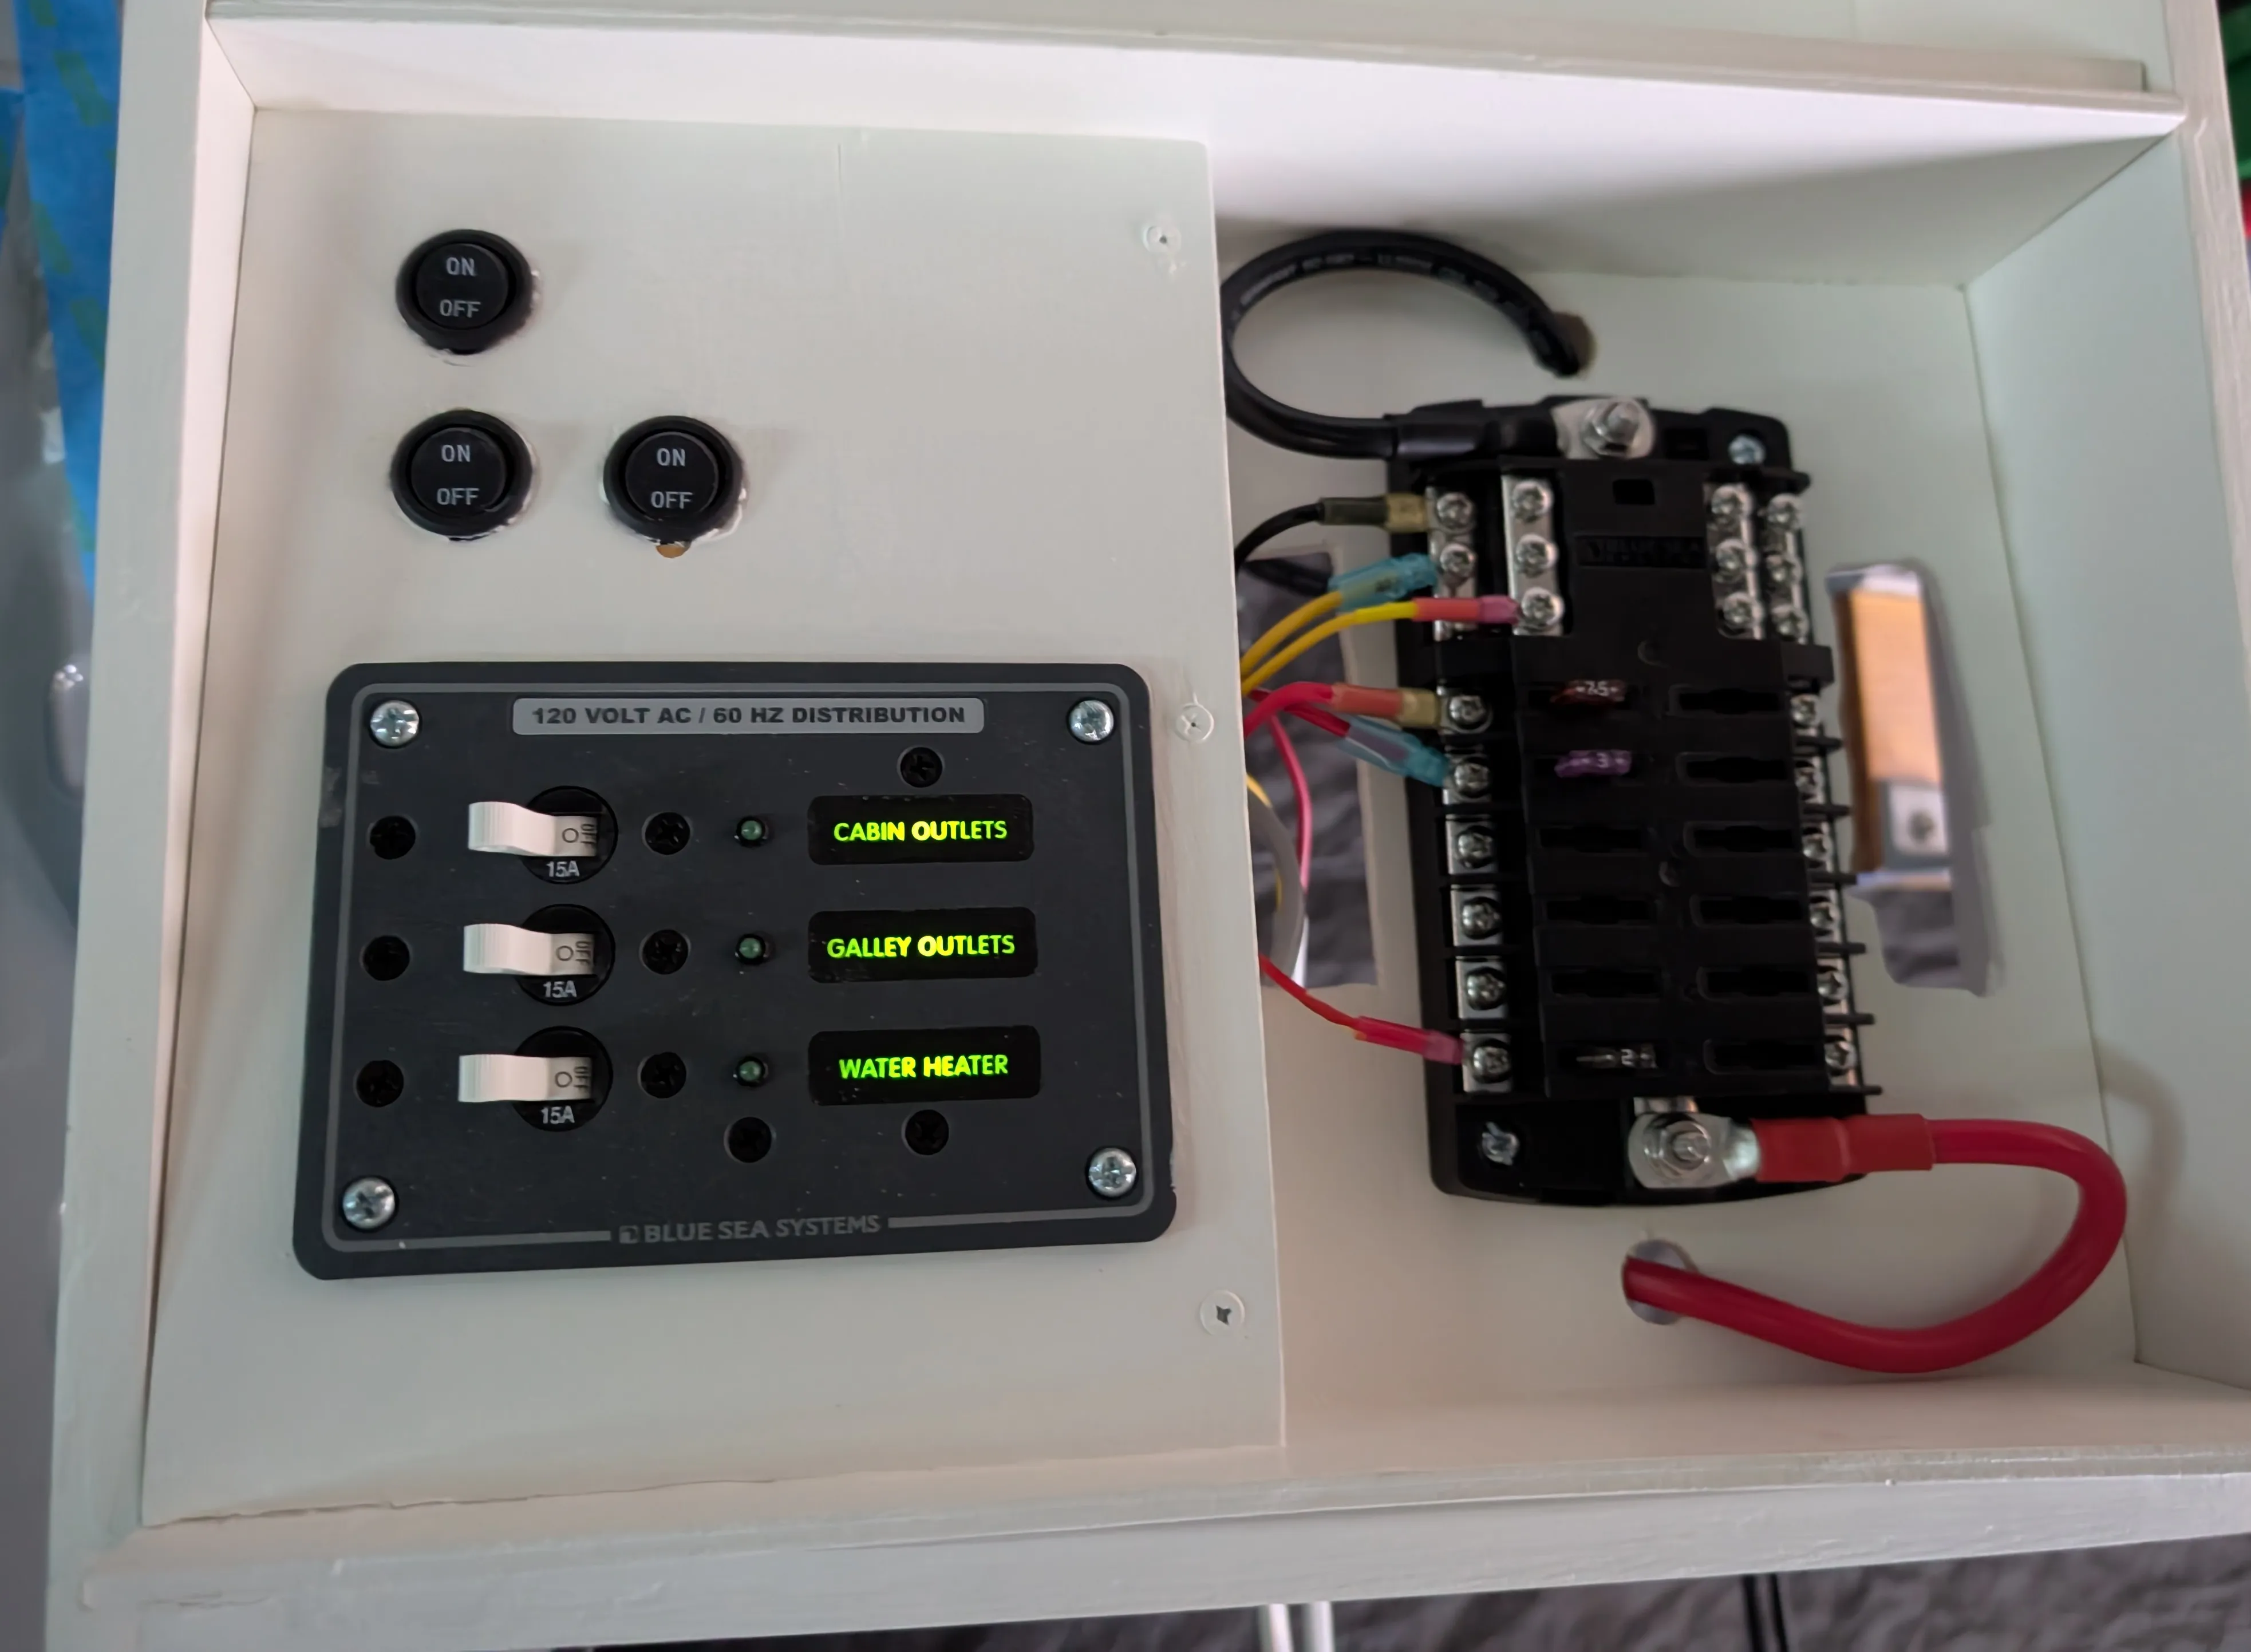
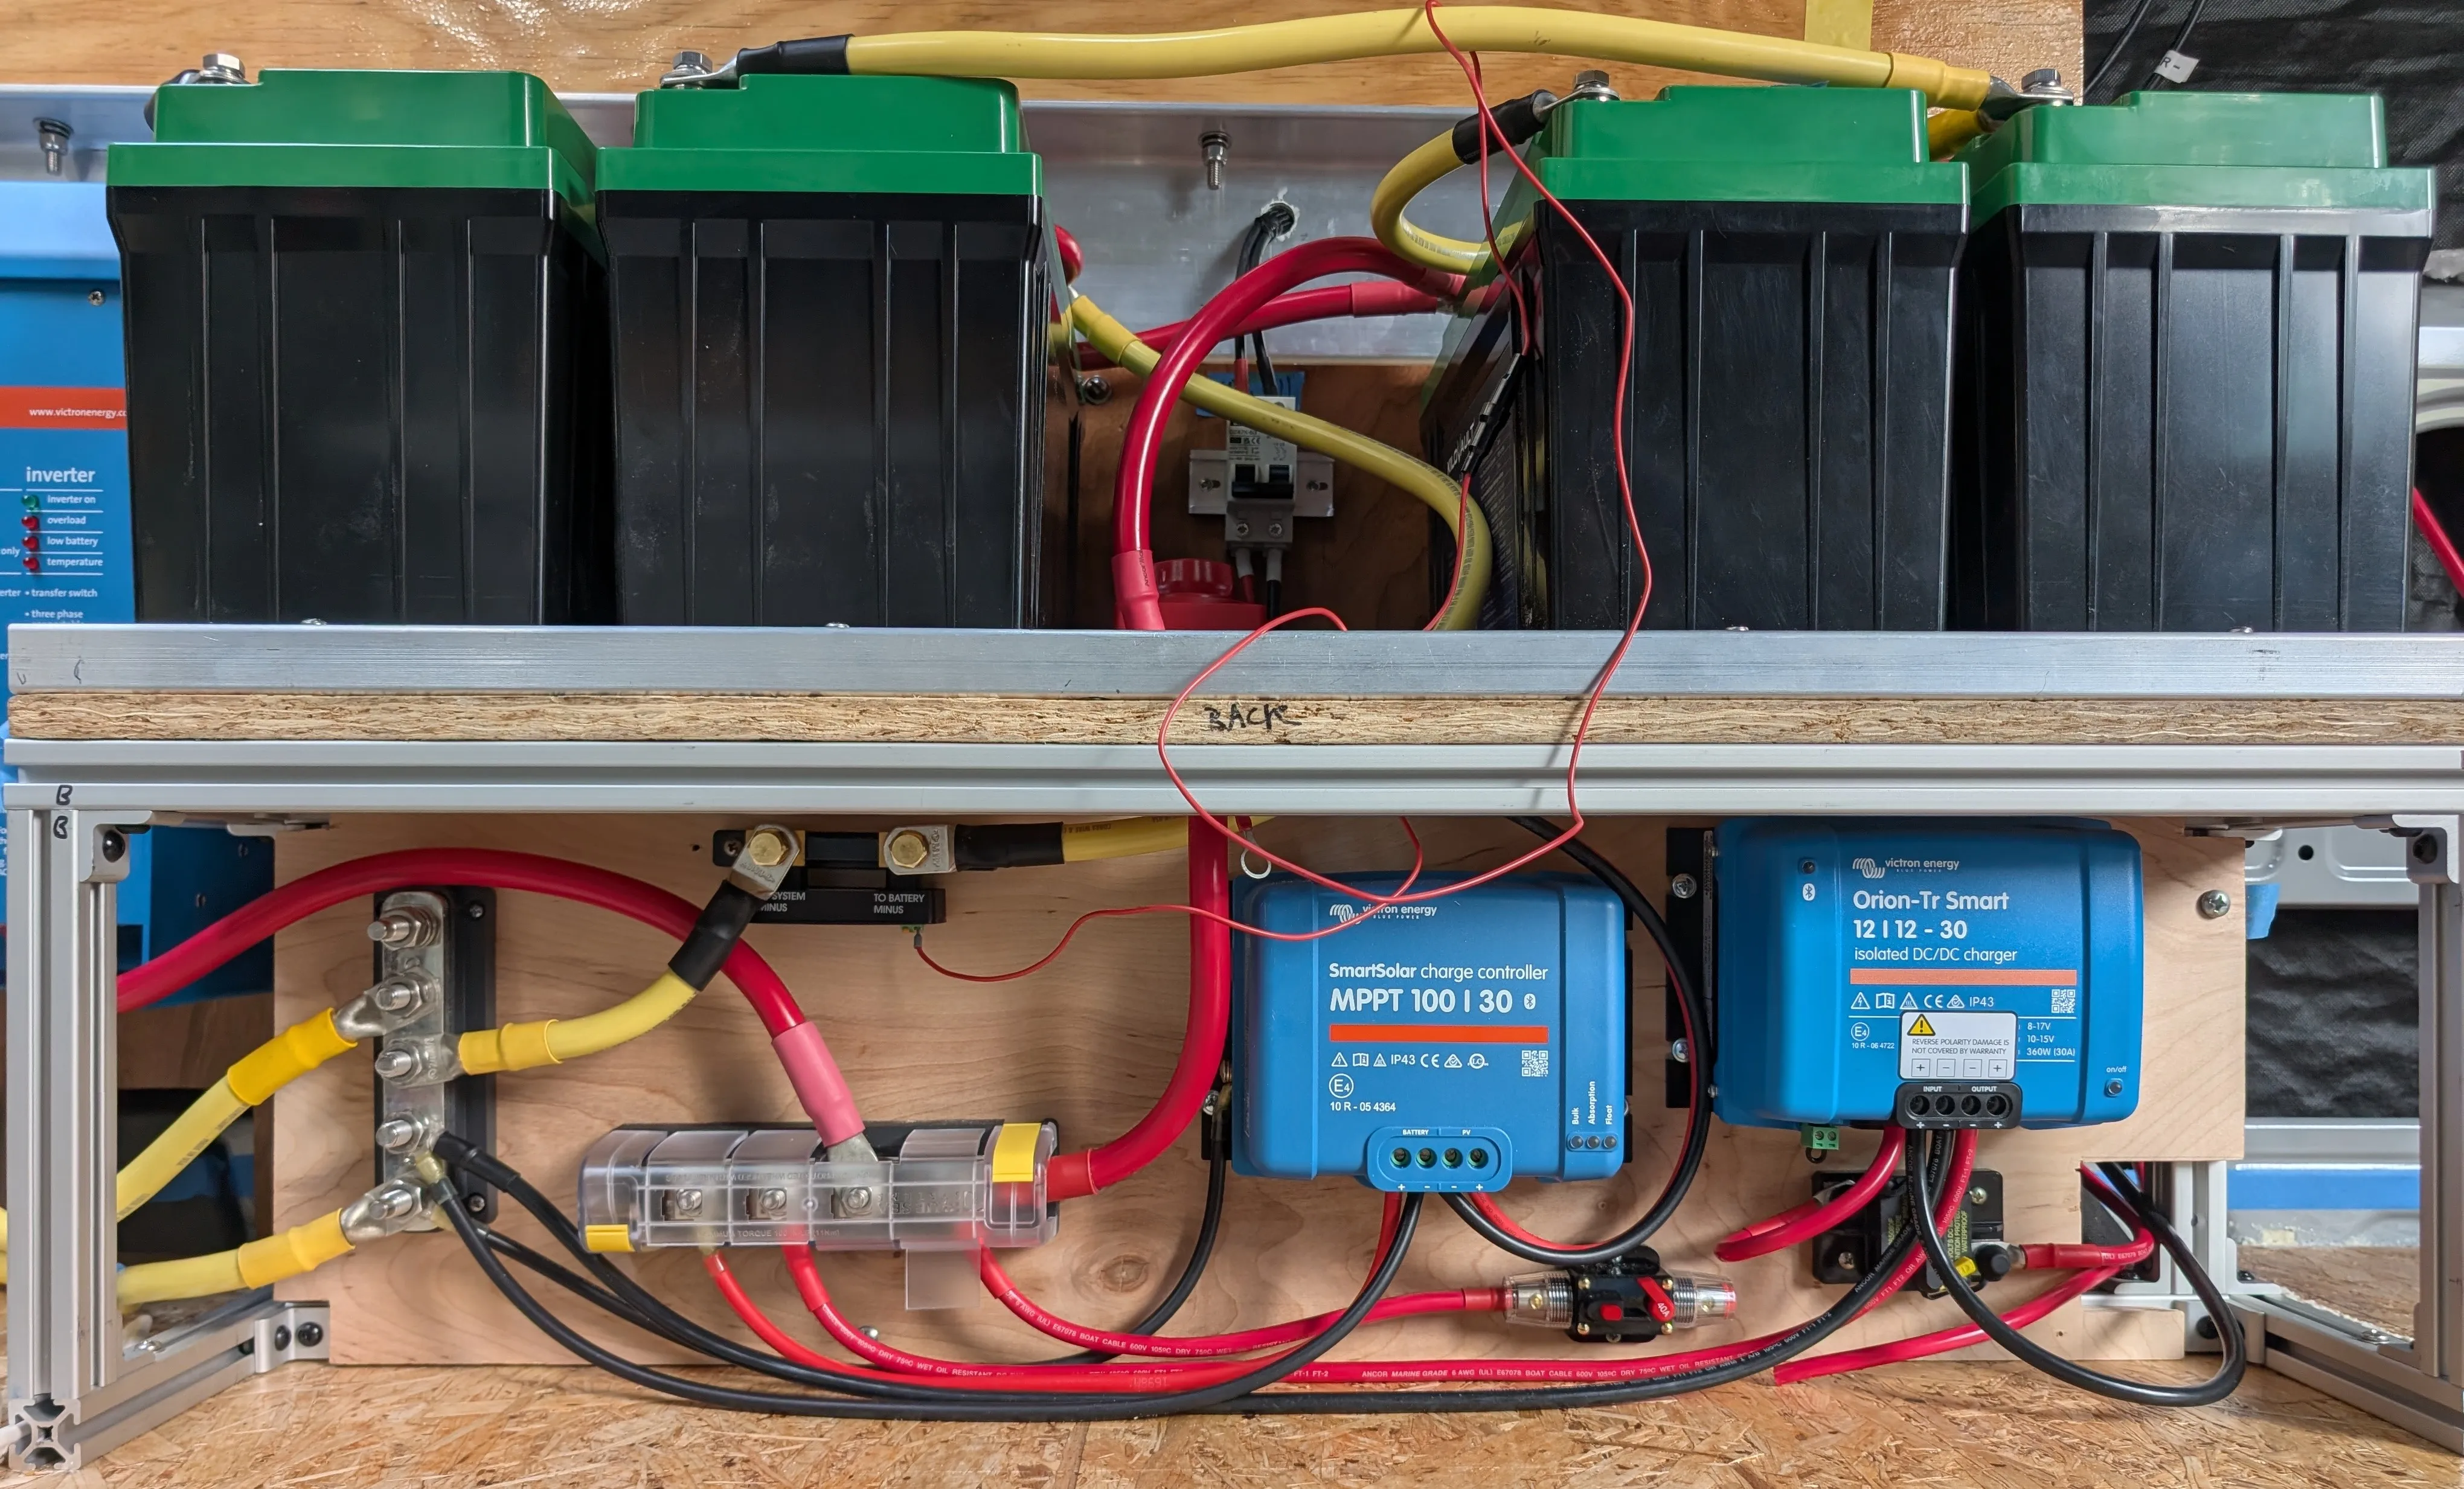
Some poor planning has led to the conclusion that I may need a larger breaker between the batteries and the DC fuse block. It’s currently 40A but I’ve been adding more and more circuits. For now, I’ll start making some of the connections. For the terminals on the fuse block (right), I used #8 ring connectors and the usual 5/16 inch lugs for the wires running to the battery. I don’t know why I thought 6AWG wire would be easier to bend, but it’s not so, now it has to snake around the sides. The AC panel does also light up. It seems unnecessary but it was easy to connect to the fuse block.
May 4, 2025
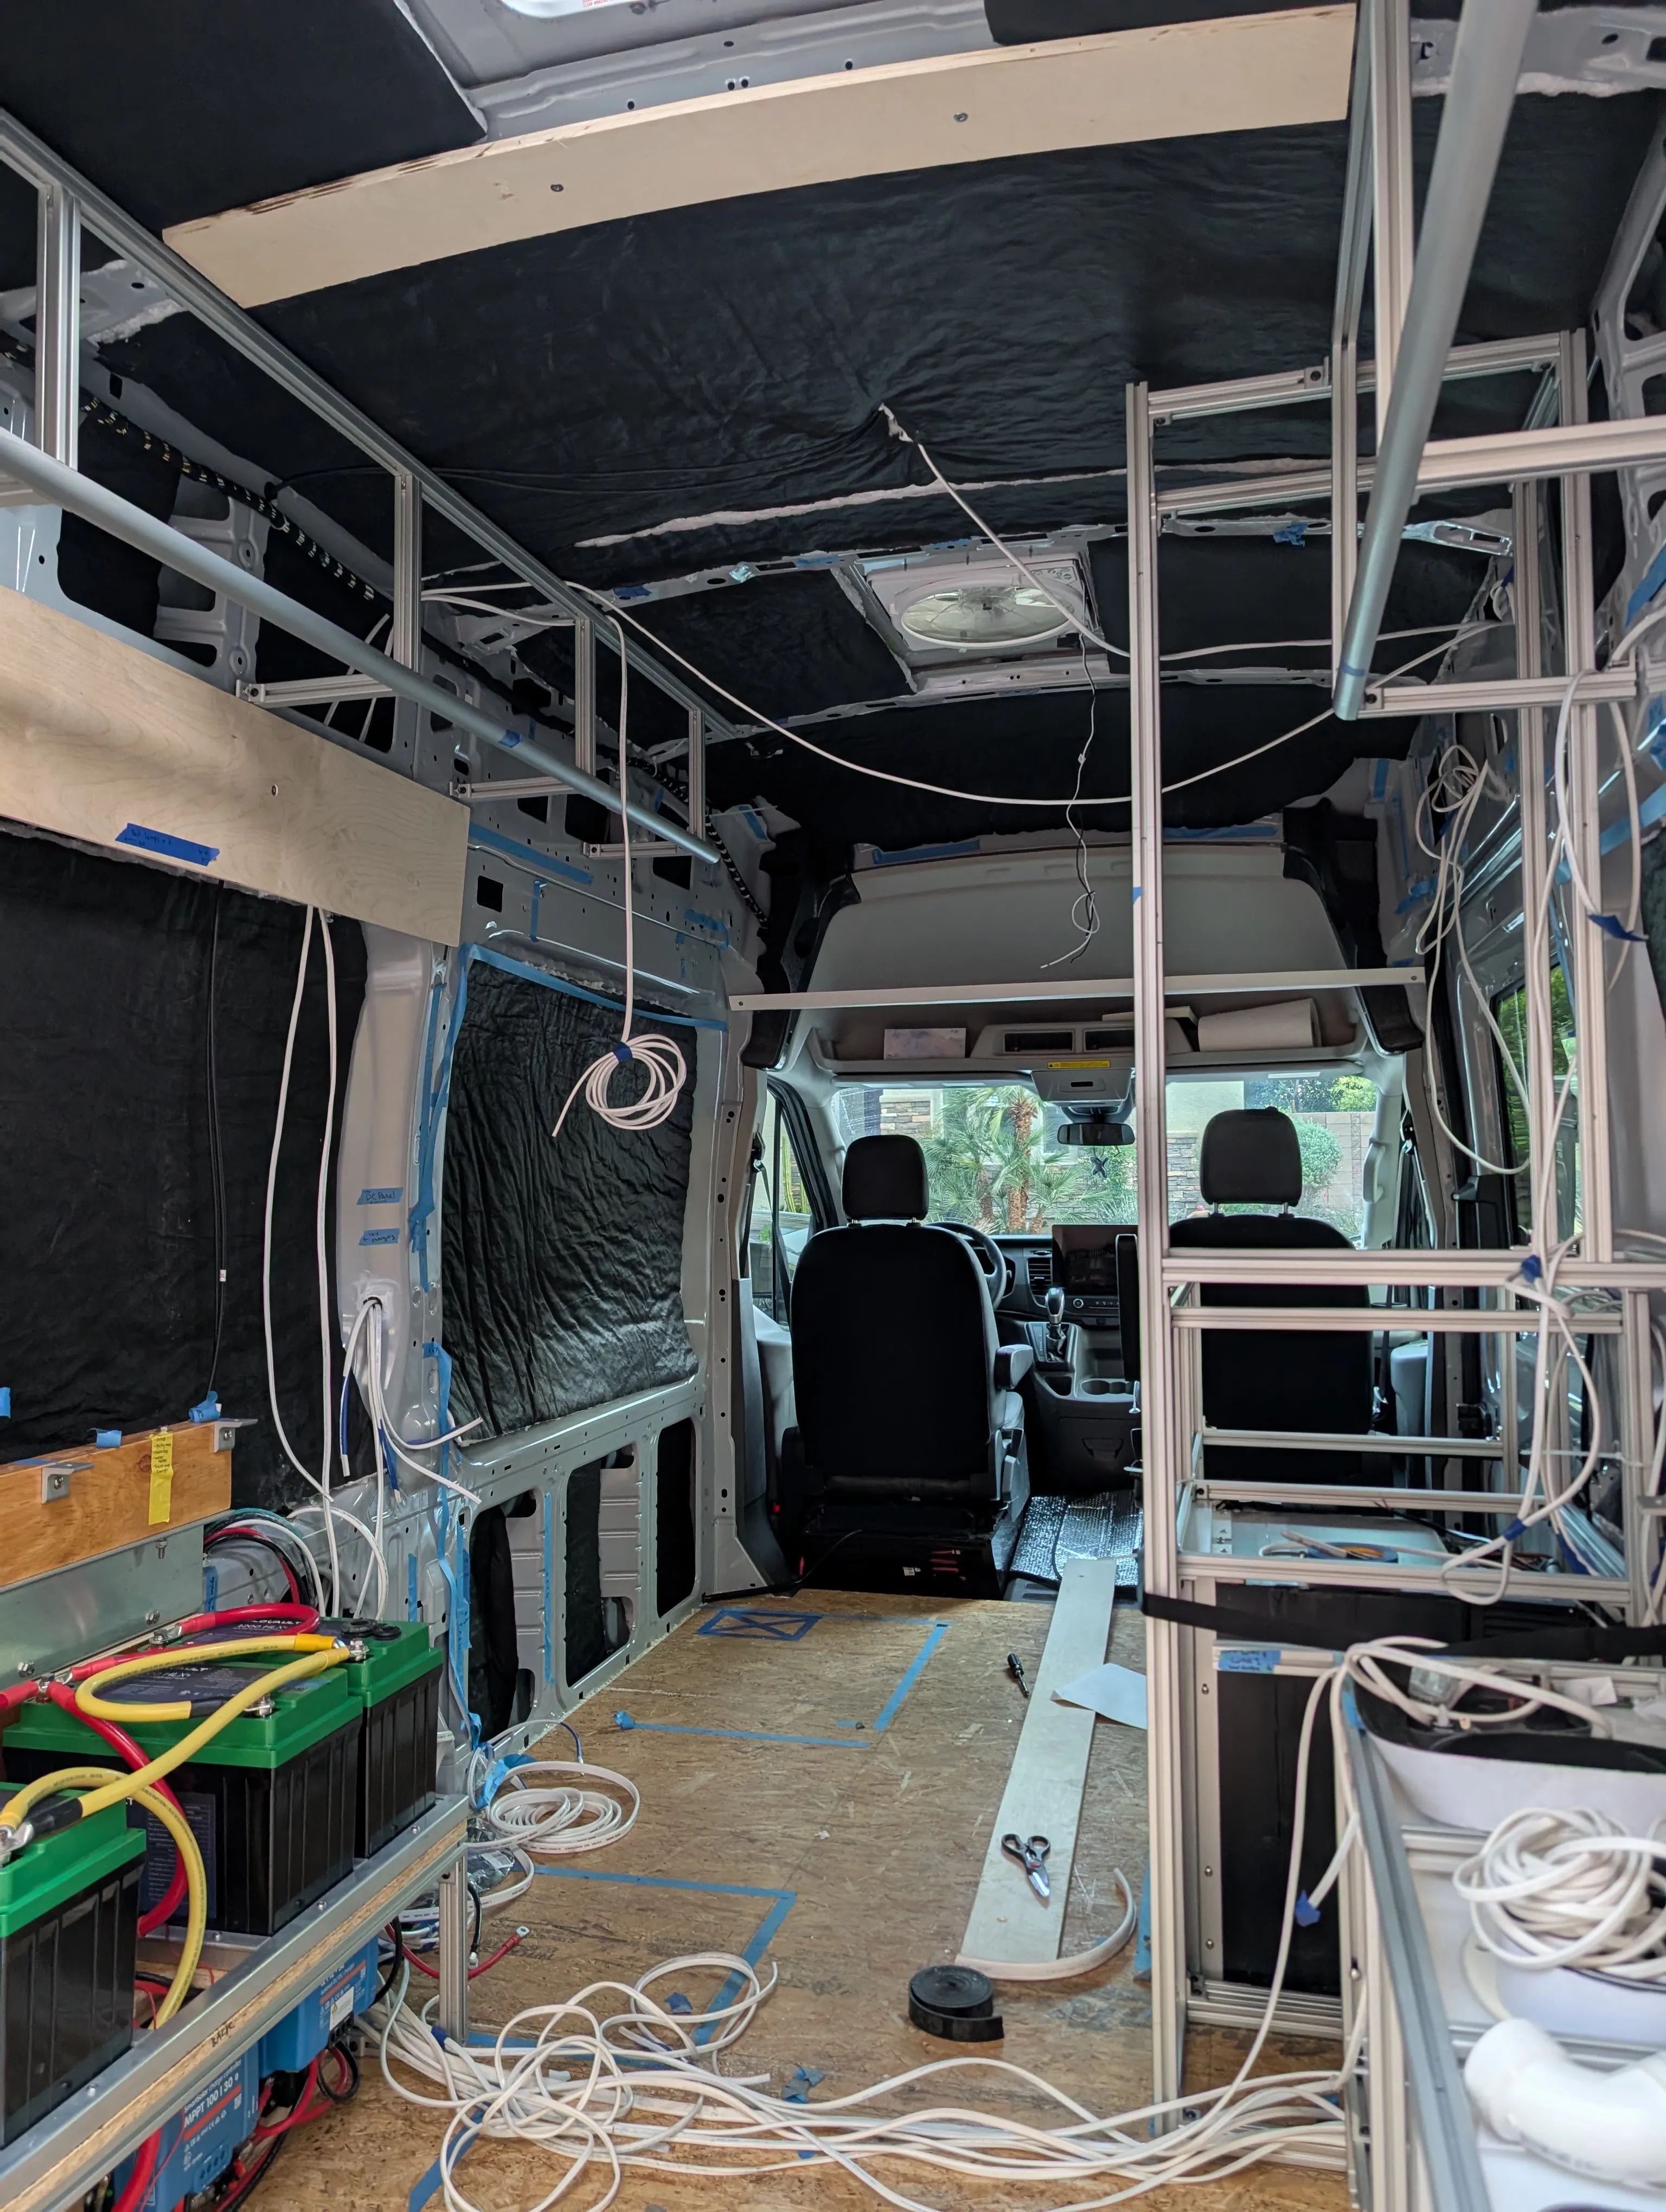
Excuse the mess. I have finally finished the pre-wiring and the AC/DC distribution panel, which I have also built a cabinet to place it in. I thought having easy access to this would be nice but it has actually made the wiring a lot harder due to the placement. I ended up drilling more holes through the sheet metal to better hide the wires, because it turns out I have a lot of things that need power in here. Keeping all electrical components in the garage might’ve been the way to go. Fun fact: there is over 150ft of wire in Kep (if you count the duplex/triplex as one). I think it’s also a good idea to keep as much of the wiring away from the ceiling as possible as it would be harder to remove ceiling planks to access the wires if ever needed.
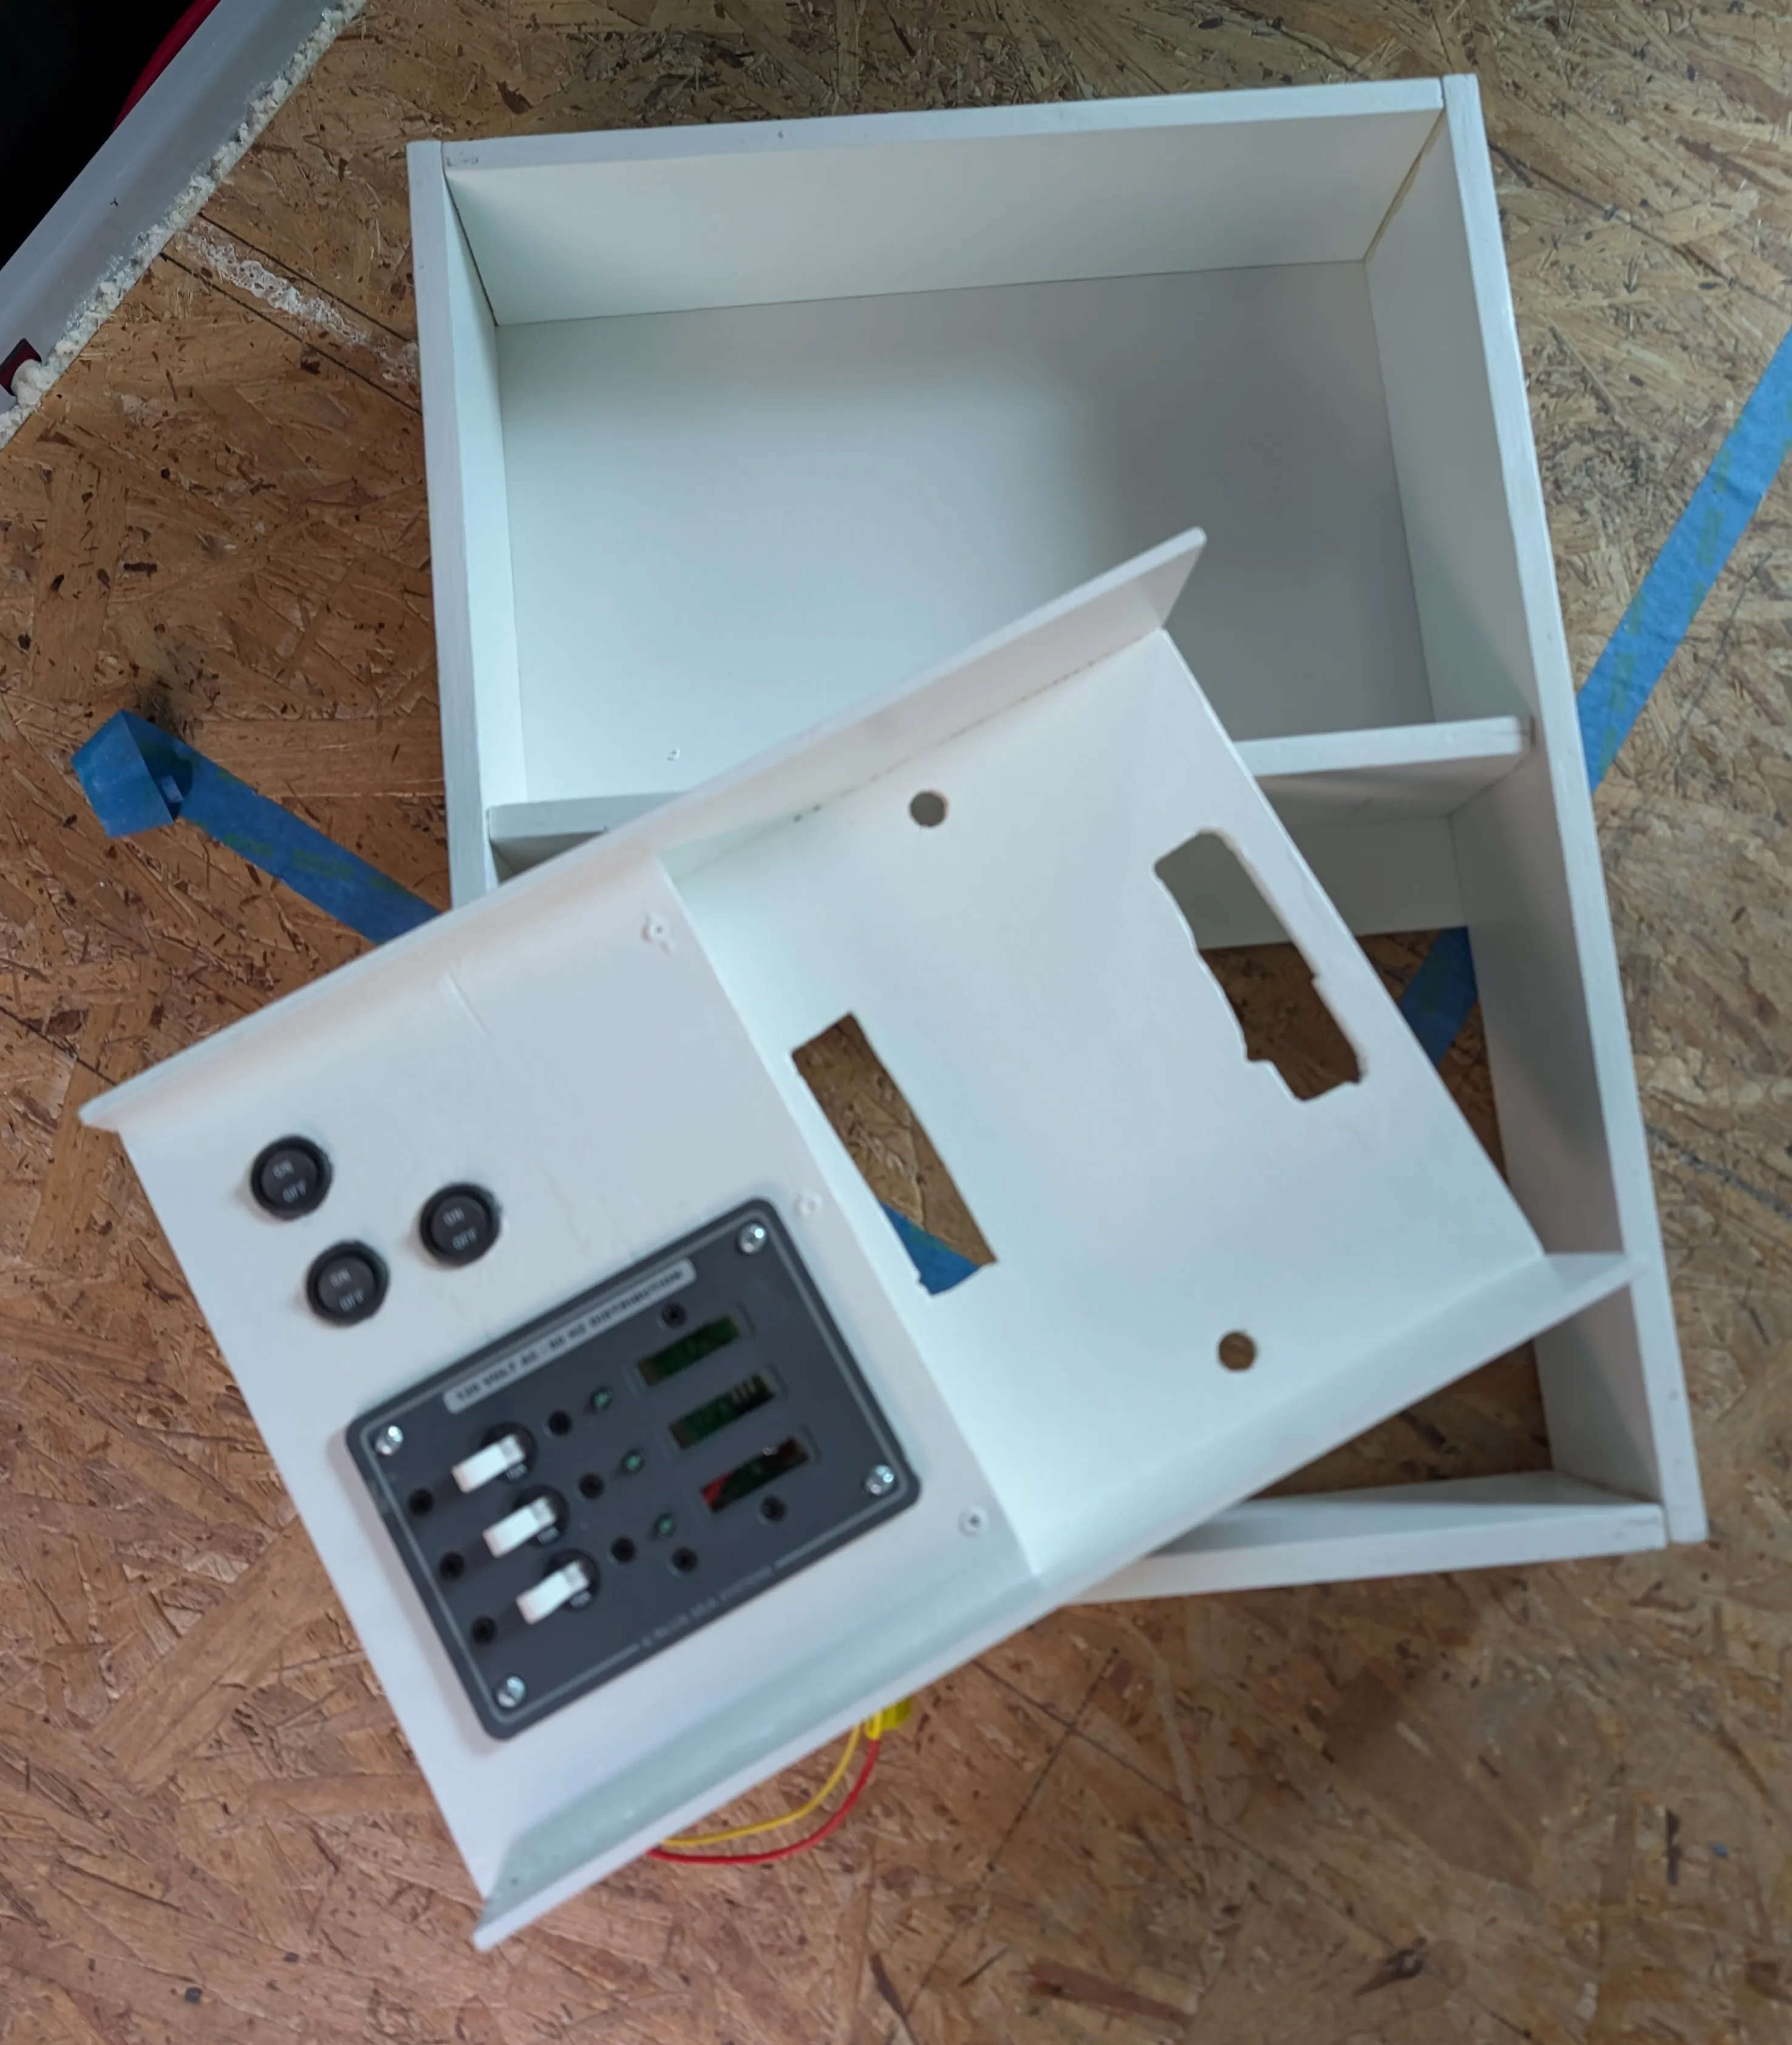
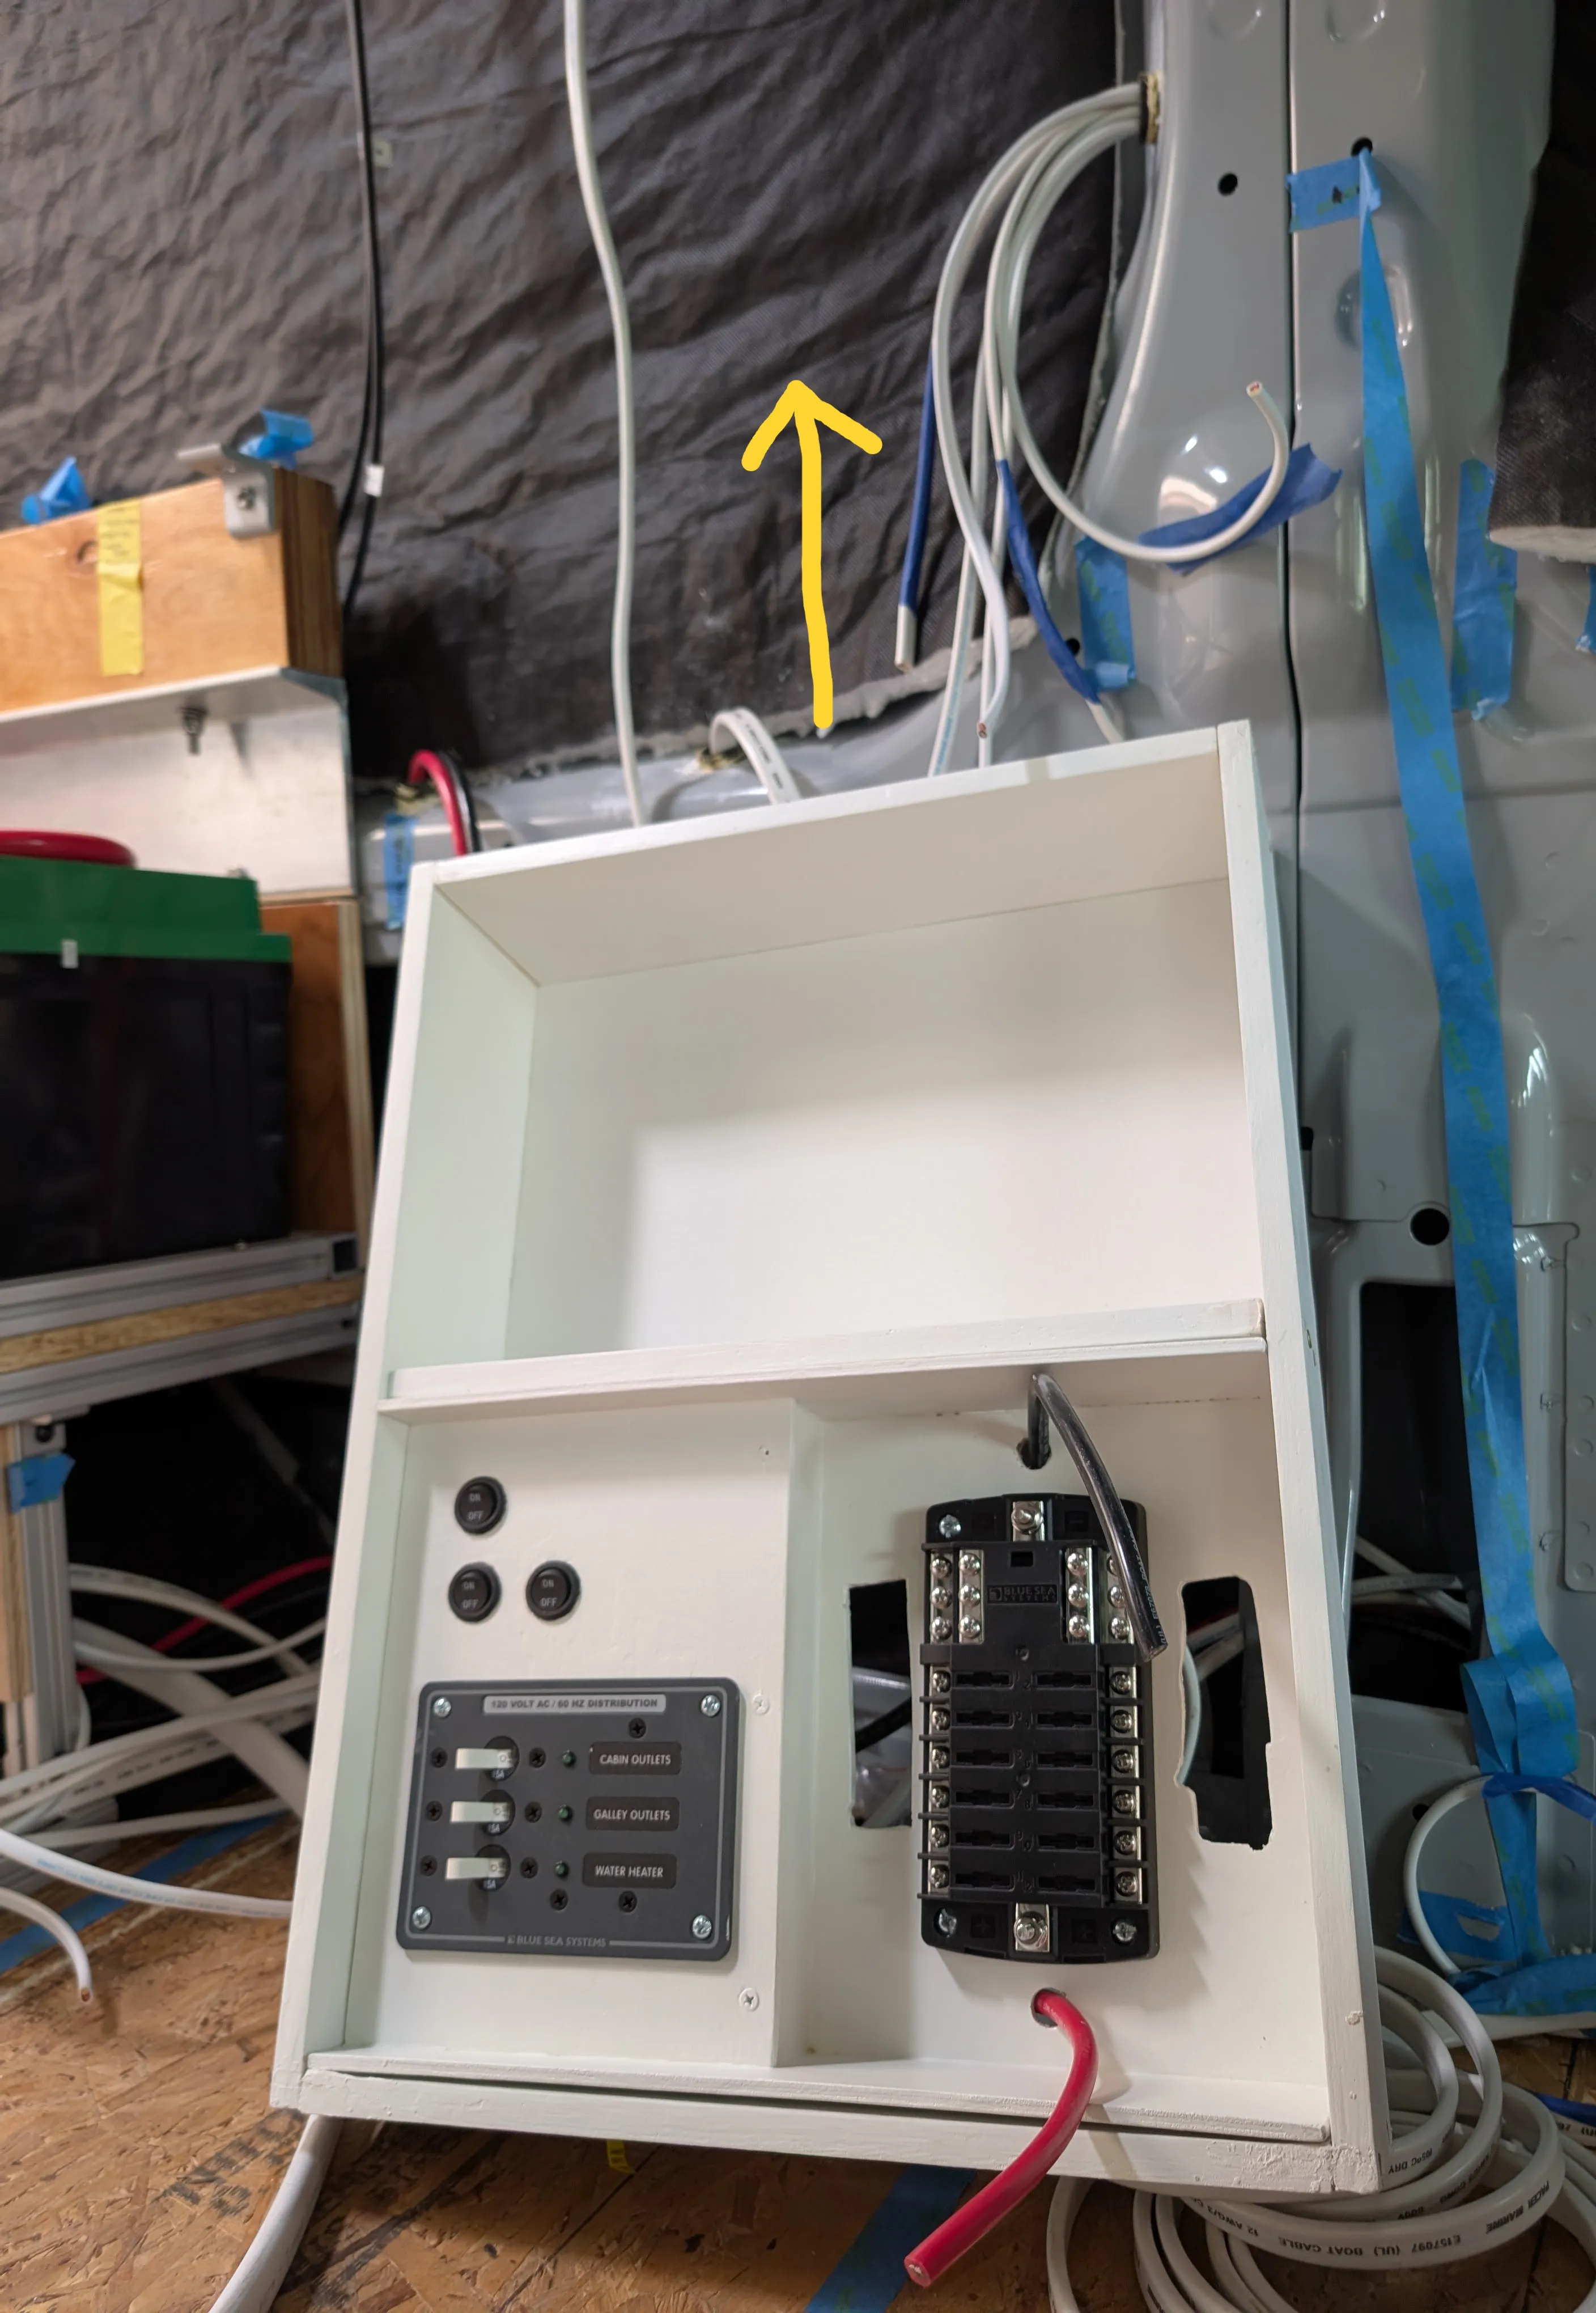
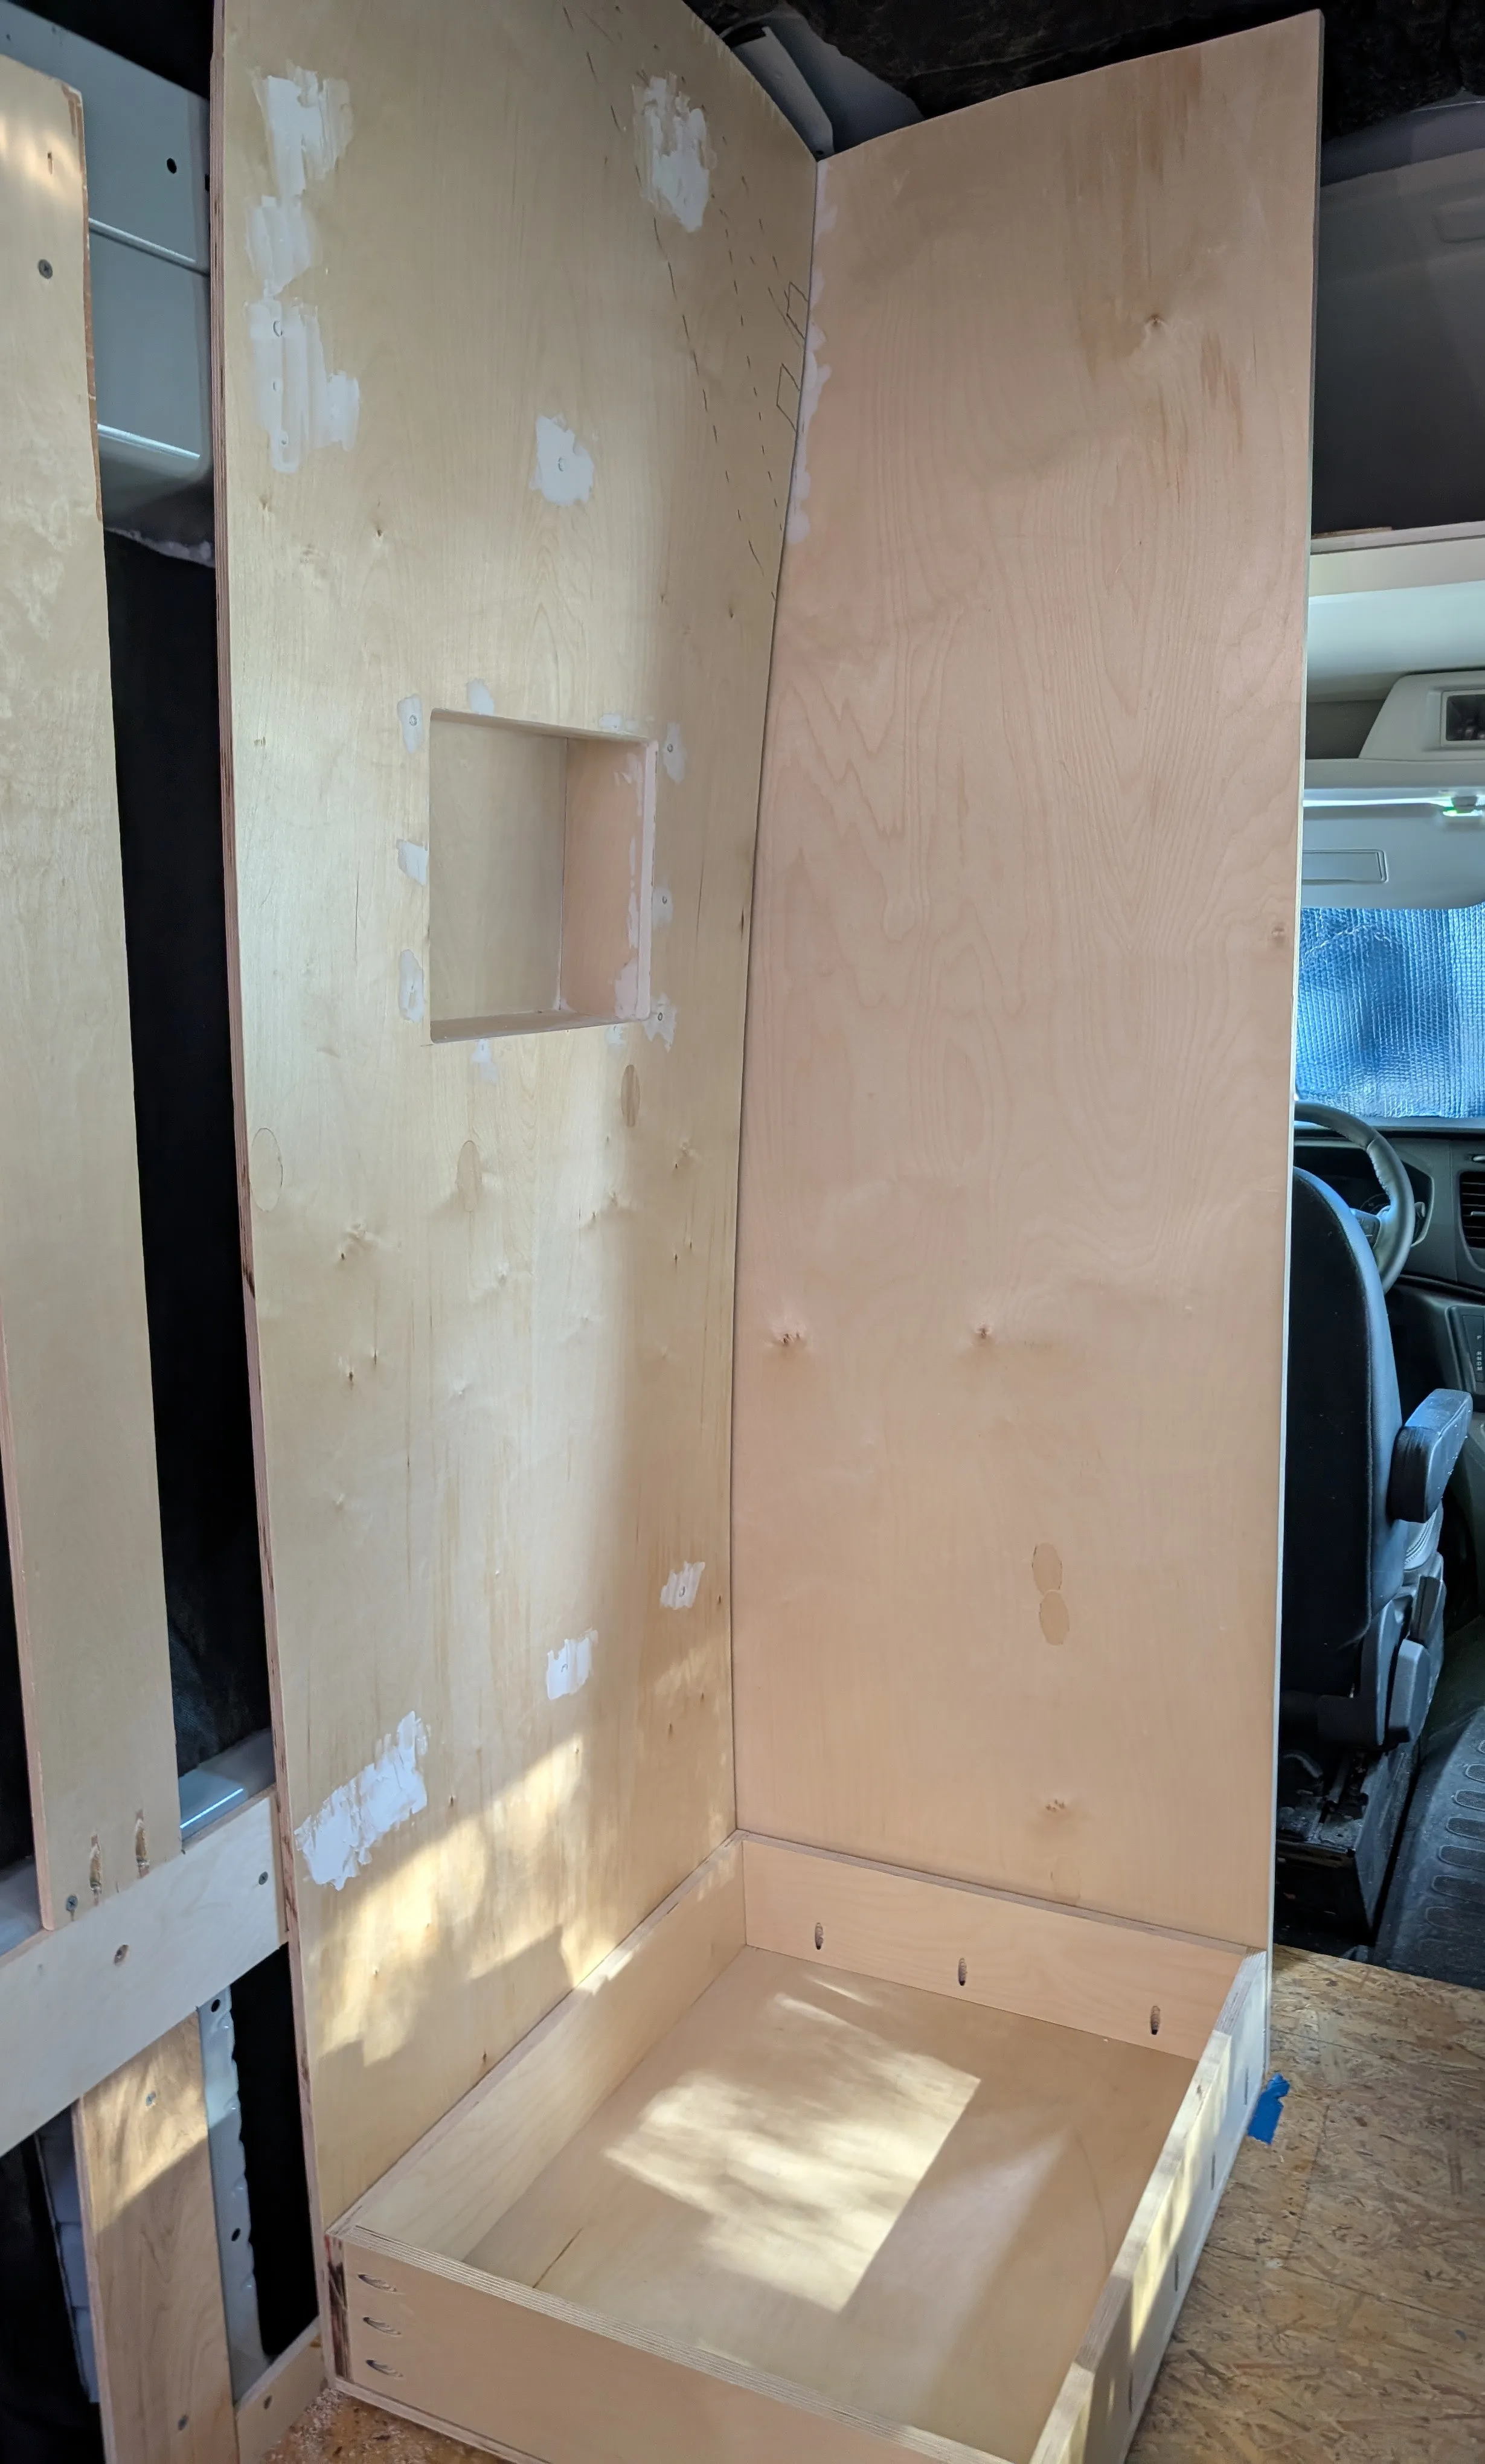
The distribution panel is removable and slides into the bottom half of the cabinet. The cabinet will be recessed into this wall on the right. I know what you’re thinking. Those are some real funky sized holes. But they work. The fit is also pretty tight and this box was probably poorly designed so we’ll see about replacing it later.
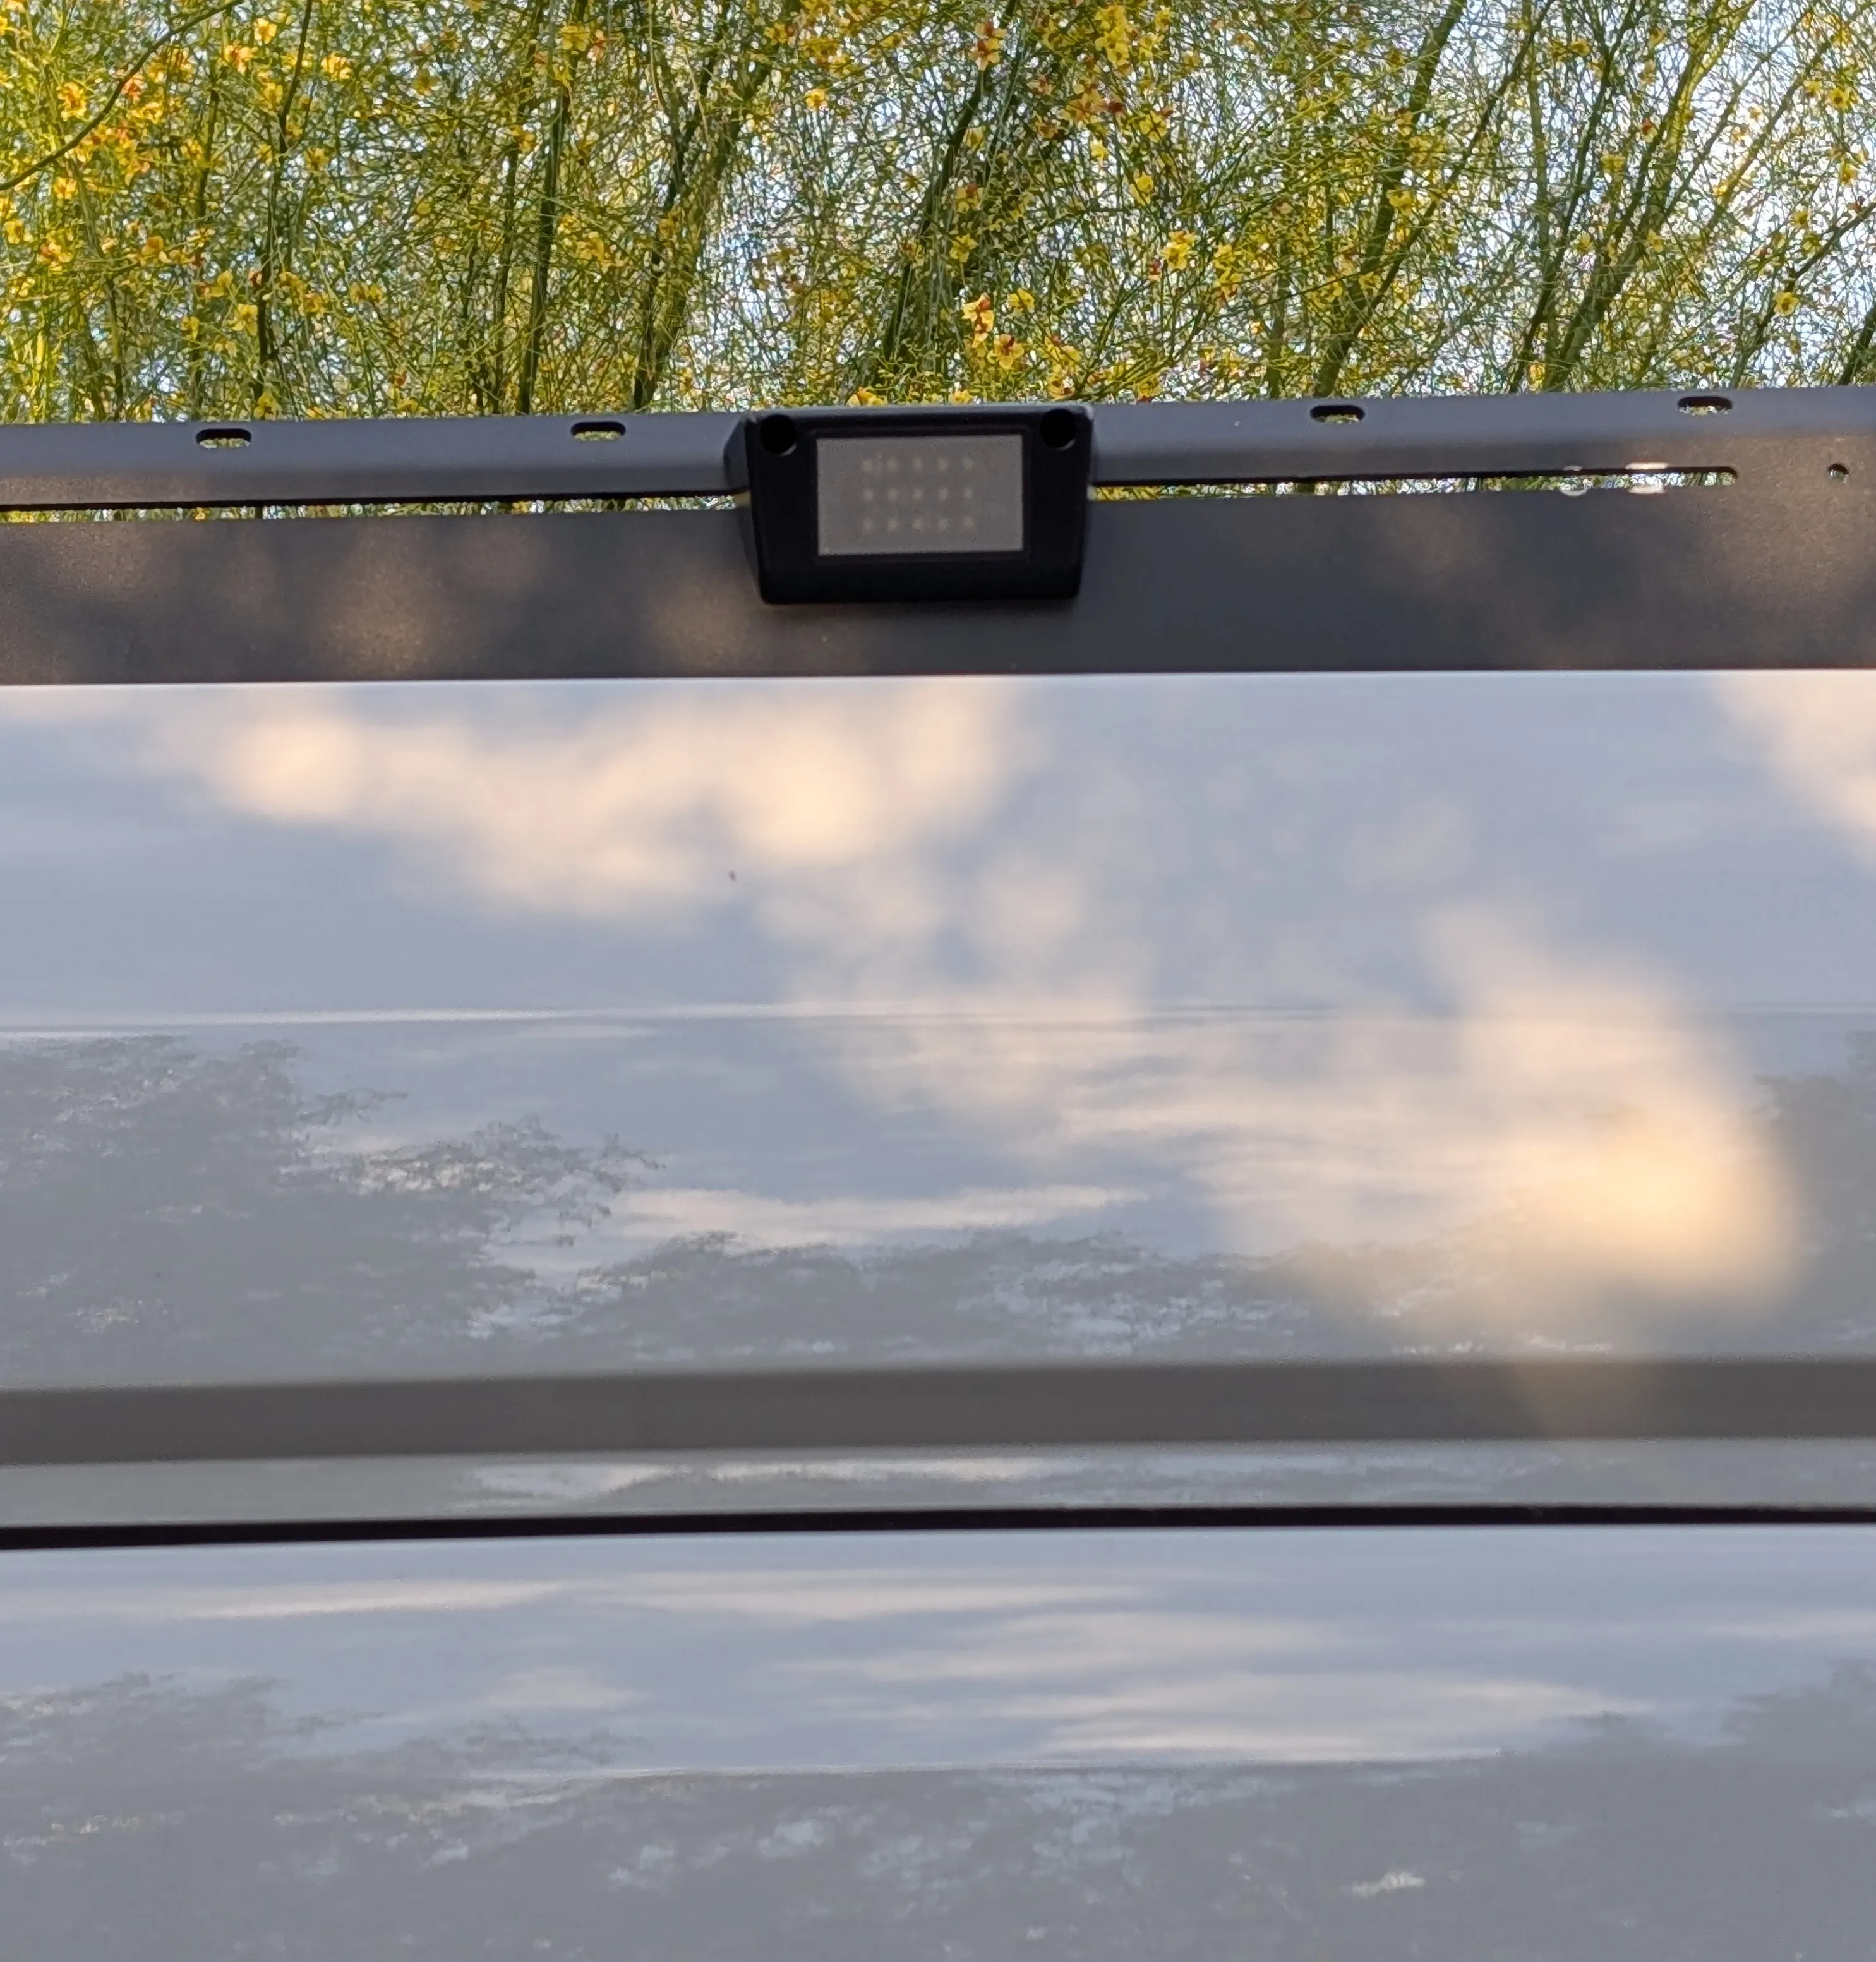
I’ve also made a couple of last minute changes. One being that I added this outdoor light and mounted it to the roof rack above the sliding door. I figured this will come in handy if I’m ever outside in the dark. The other is I’ve decided to go with a 4 gallon electric water heater. I had originally planned to keep a 20lb propane tank in here for heating but decided against it. I think I have enough power to at least use the water heater sparingly and that just means one less thing to build. Also, no need for sketchy gas lines.
April 27, 2025
There was a slight delay this morning in getting started with Kep as I was locked out of my home. But on the bright side I learned how to pick a sliding door lock. Well, sort of. So being extremely stubborn, I had to find a way in. Unfortunately, all the doors were locked so I started with picking the lock to the front door with a paperclip. Of course, to no avail. But obviously I should’ve tried the sliding glass door first as it had the simplest lock out of all the doors! So, I did some browsing on YouTube and saw someone use a screwdriver to lift up the door while pulling it open at the same time. I conveniently had a screwdriver in my car so I tried this, aggressively jiggling the door while trying to lift it. After a couple of attempts, thinking I had failed, I was surprised to find that the door had become unlocked. I was curious about why this actually worked, so I then spent a few more minutes puzzled.
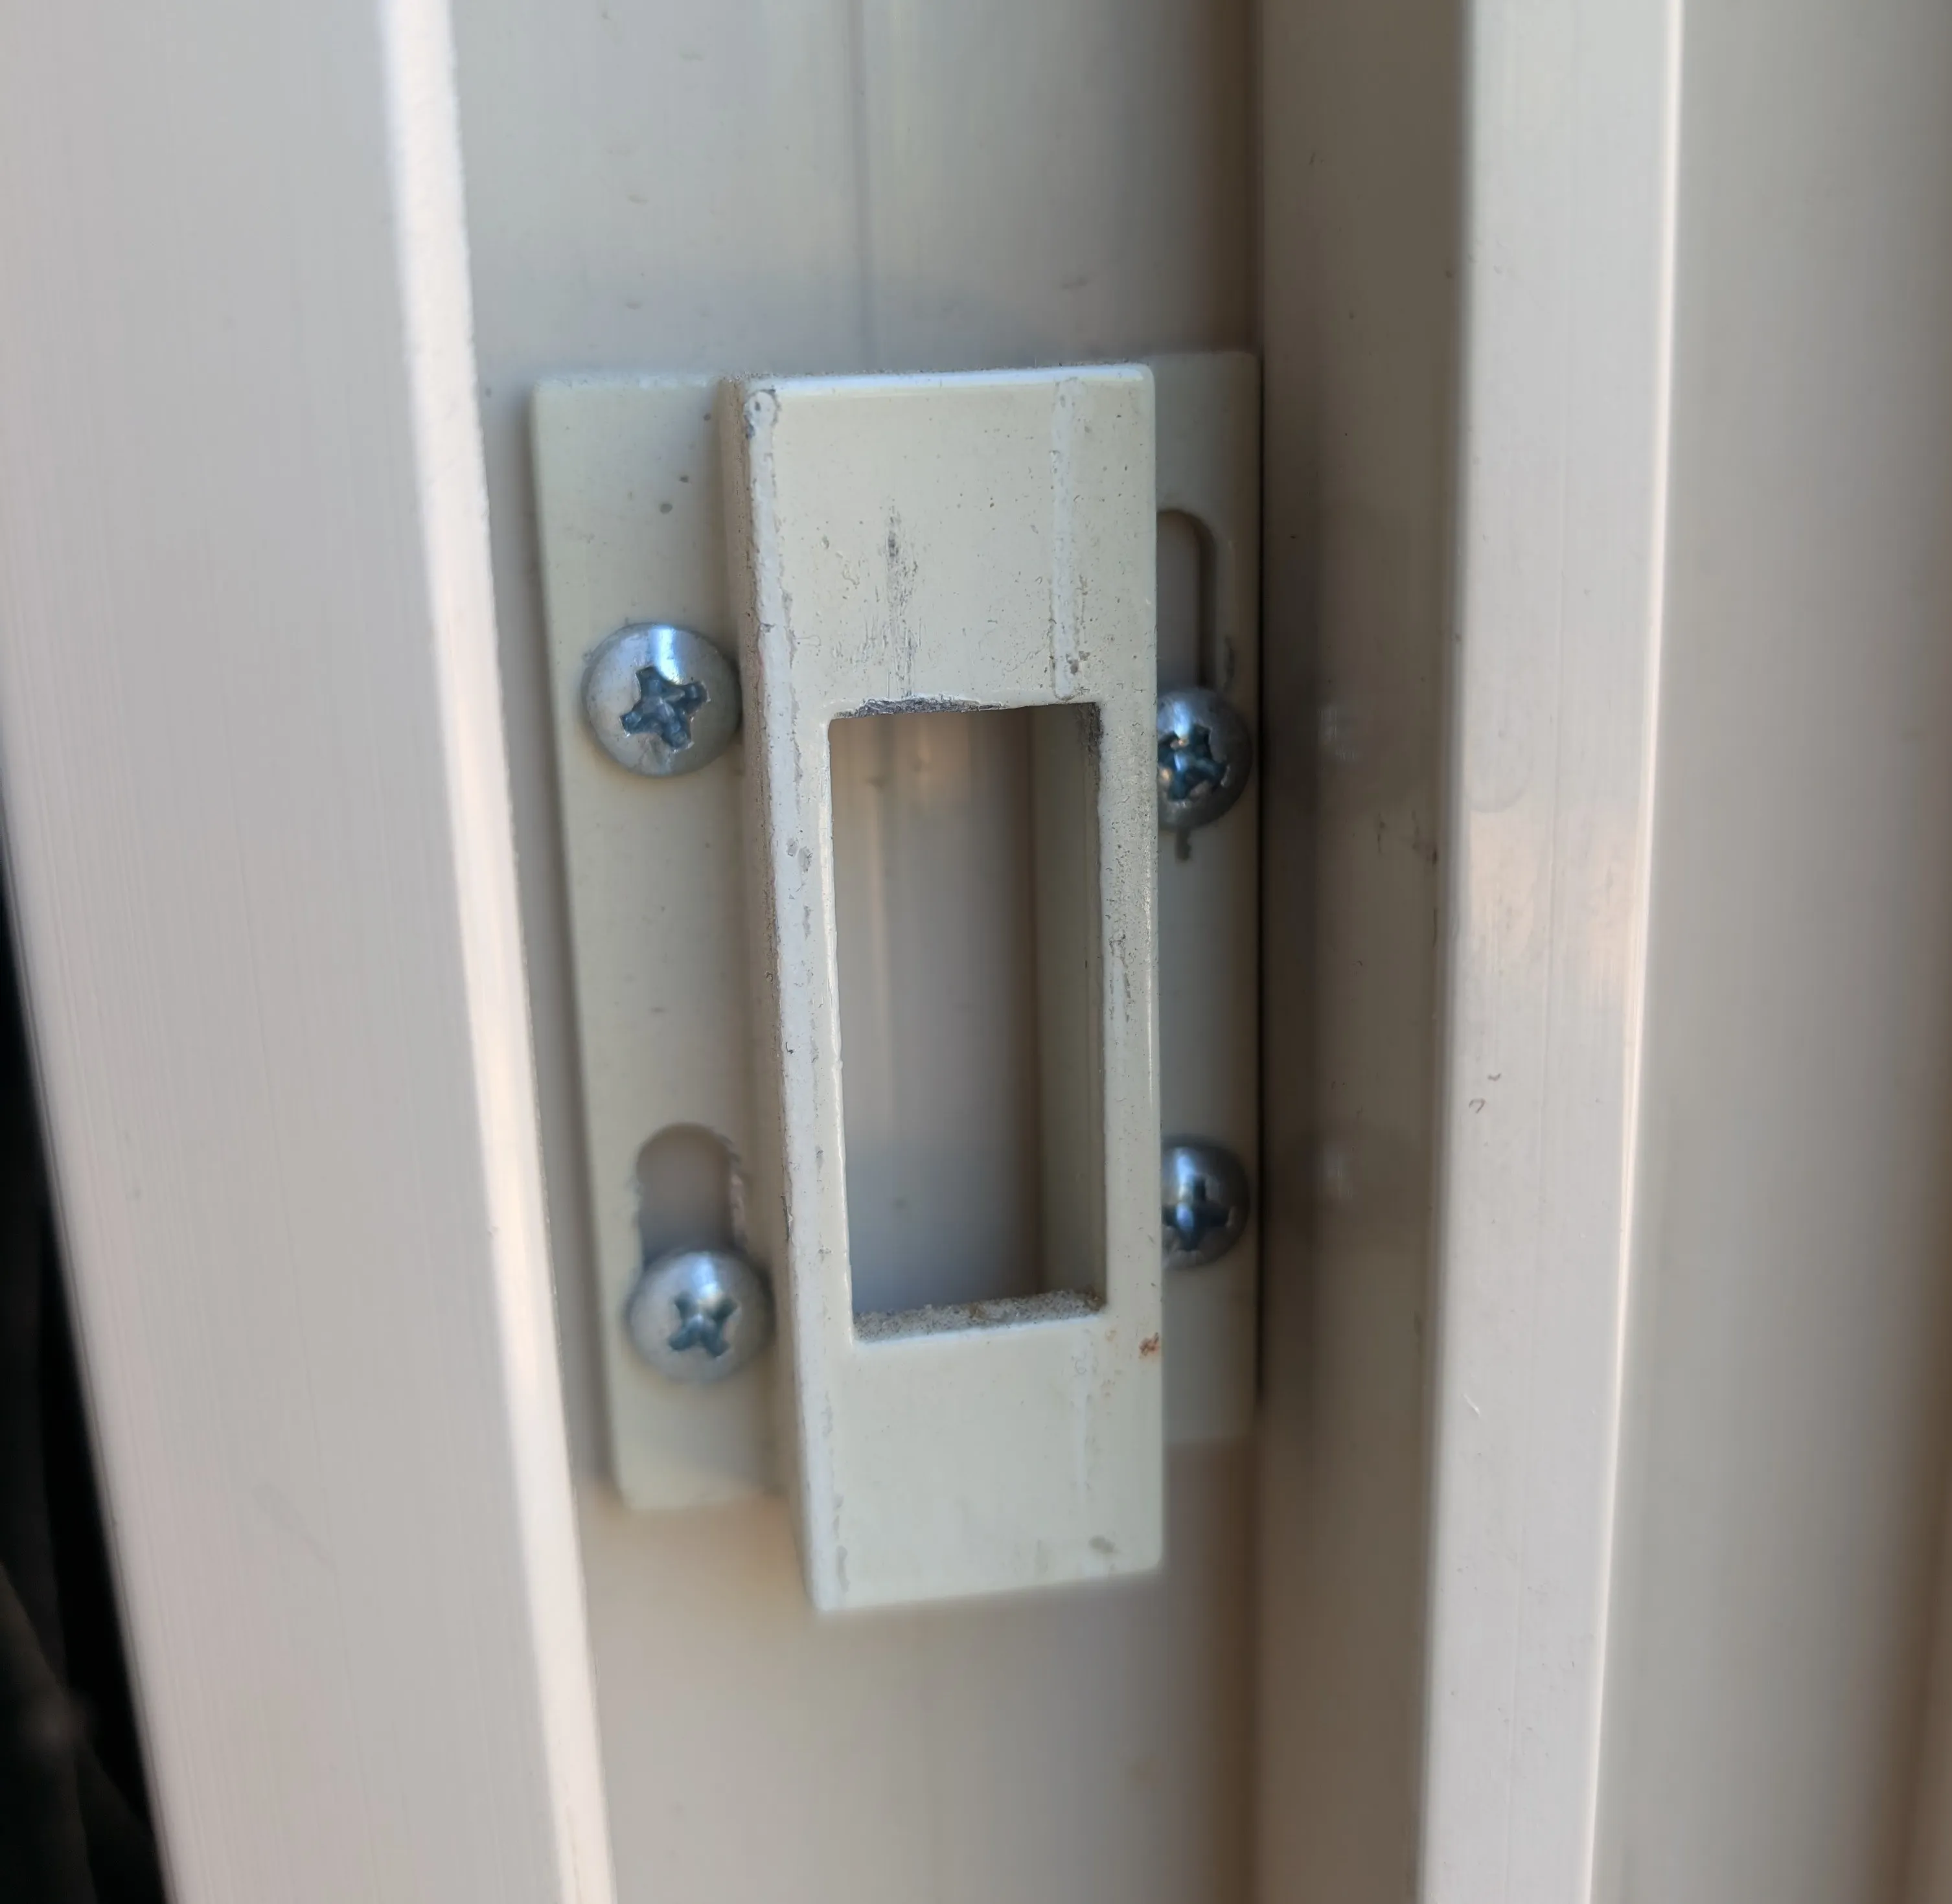

So here’s what the lock looks like, on the right. It flips up and hooks onto the latch through the center opening, on the left. I thought that I could just push it down and that’s why it was necessary to lift up the door. But actually, an upwards force is required for it to fold back in. Can you visualize that? So now I’m utterly confused.
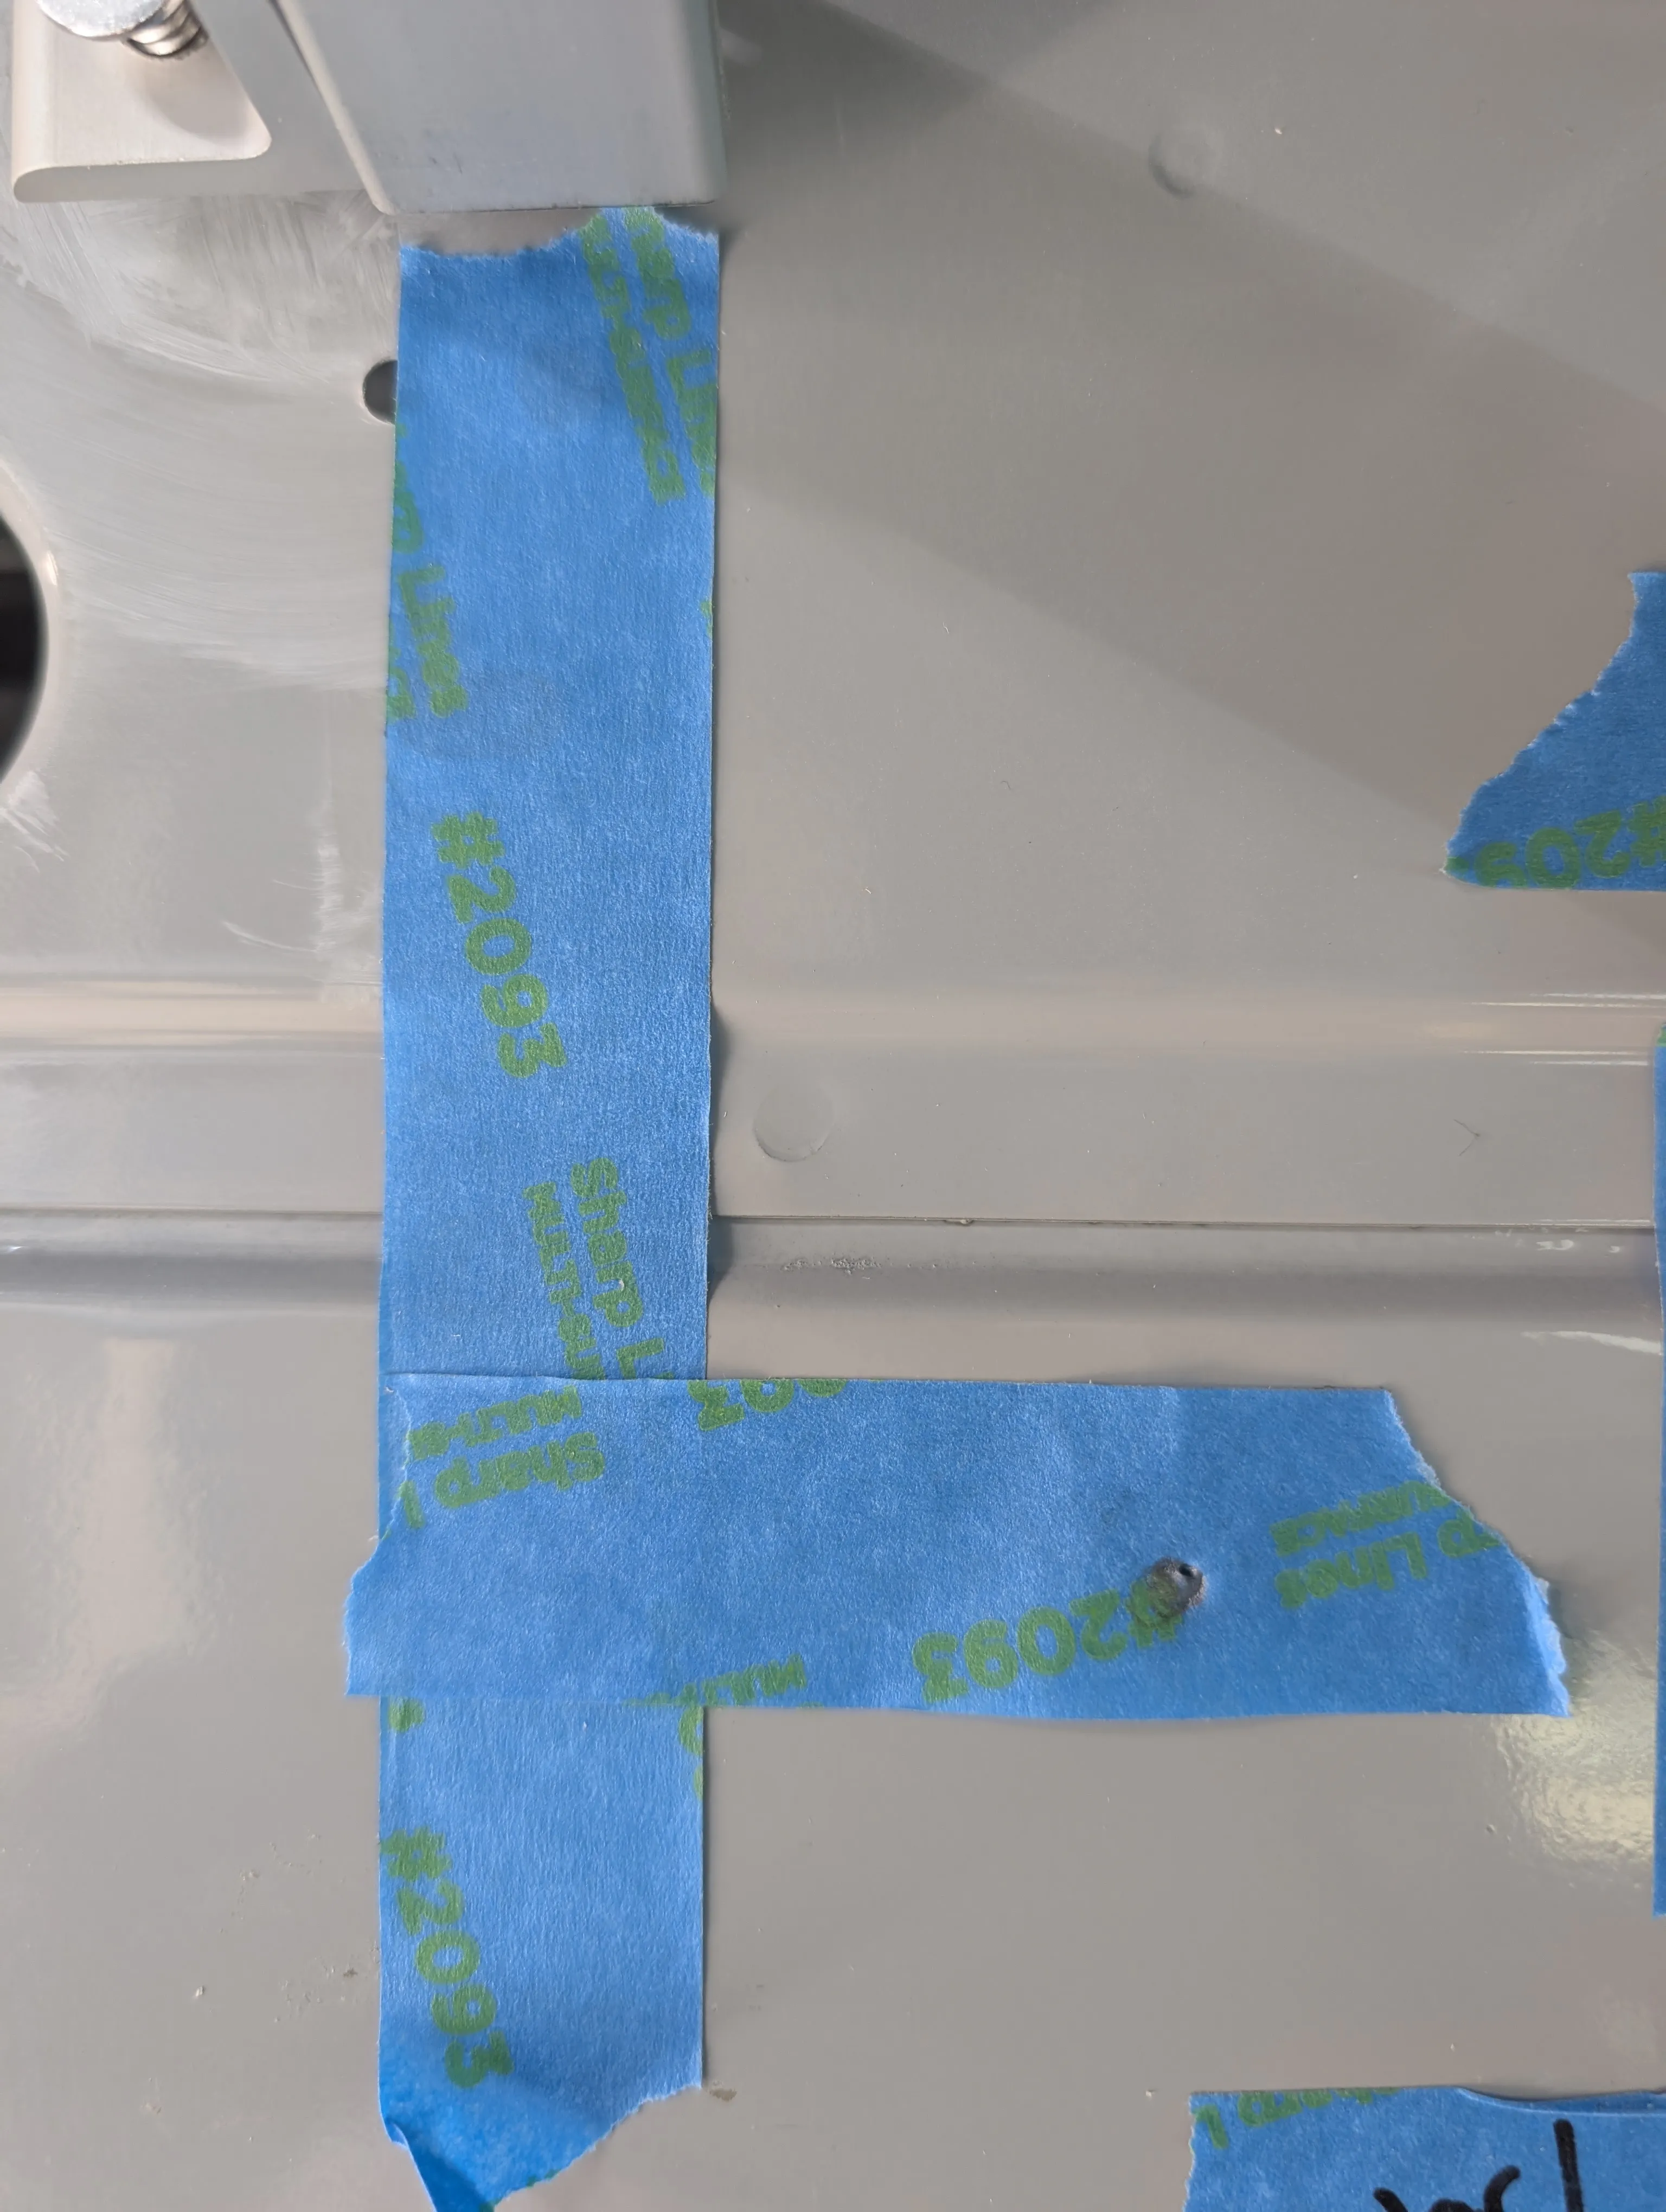
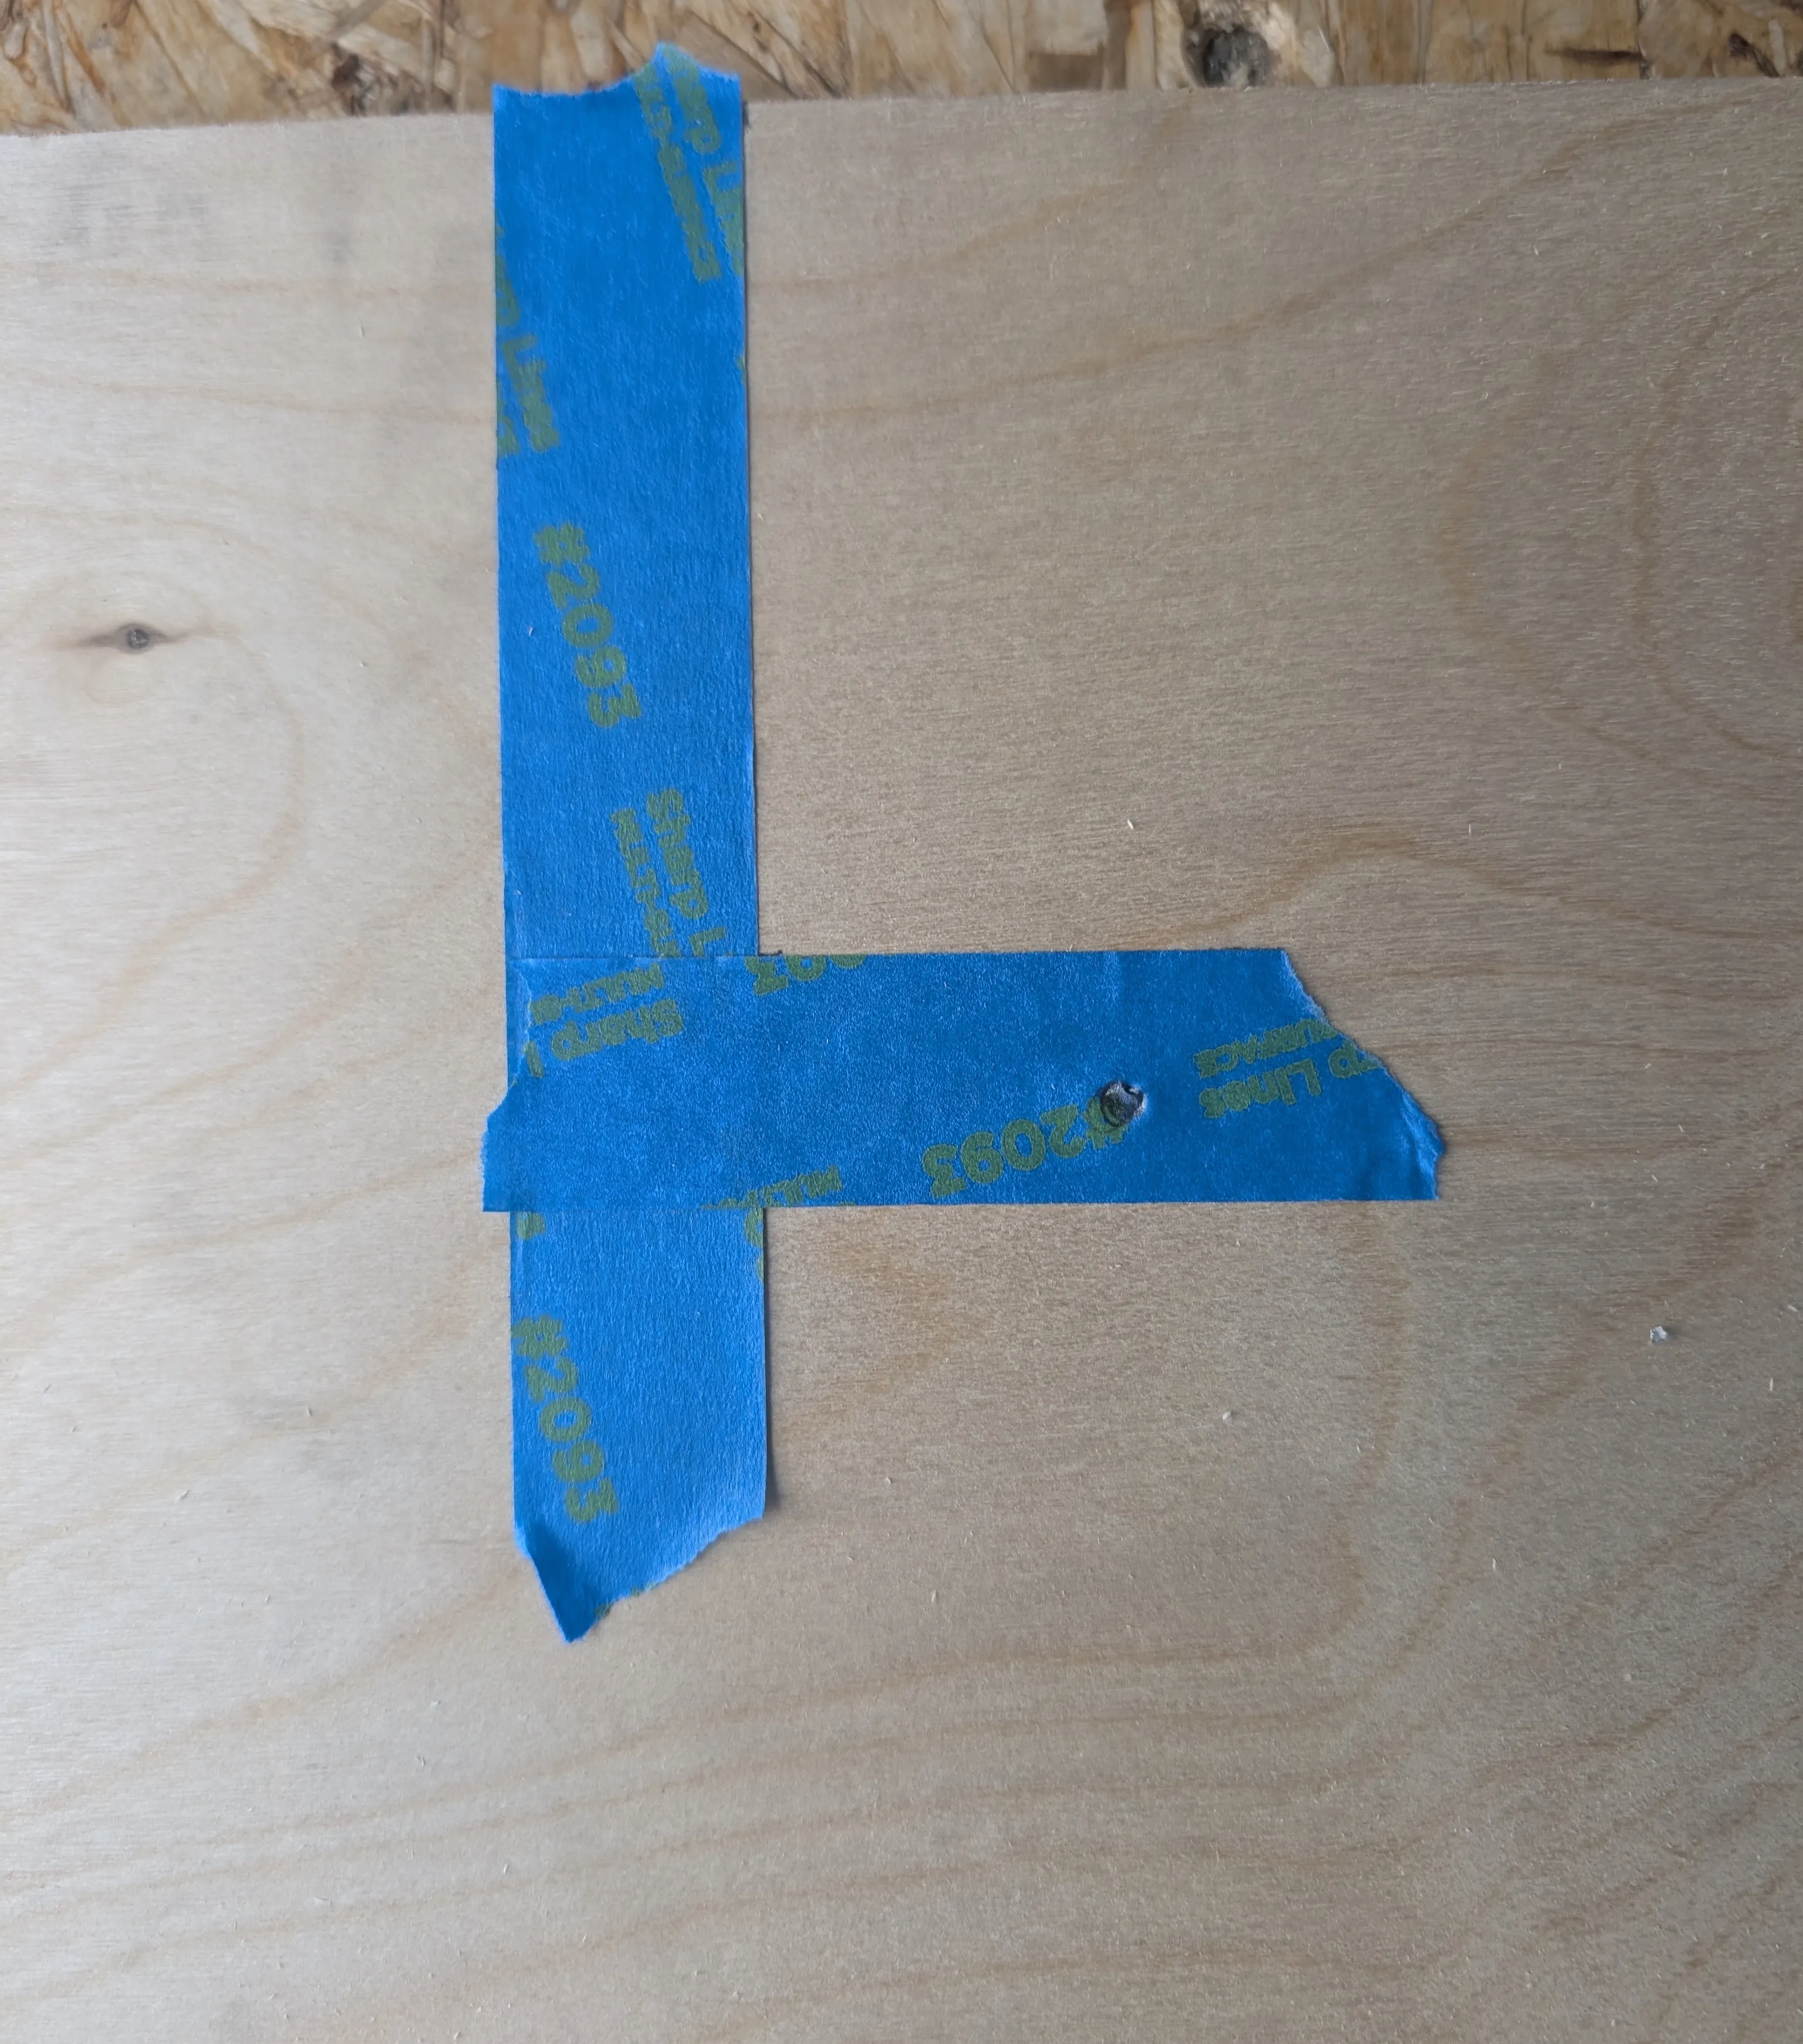
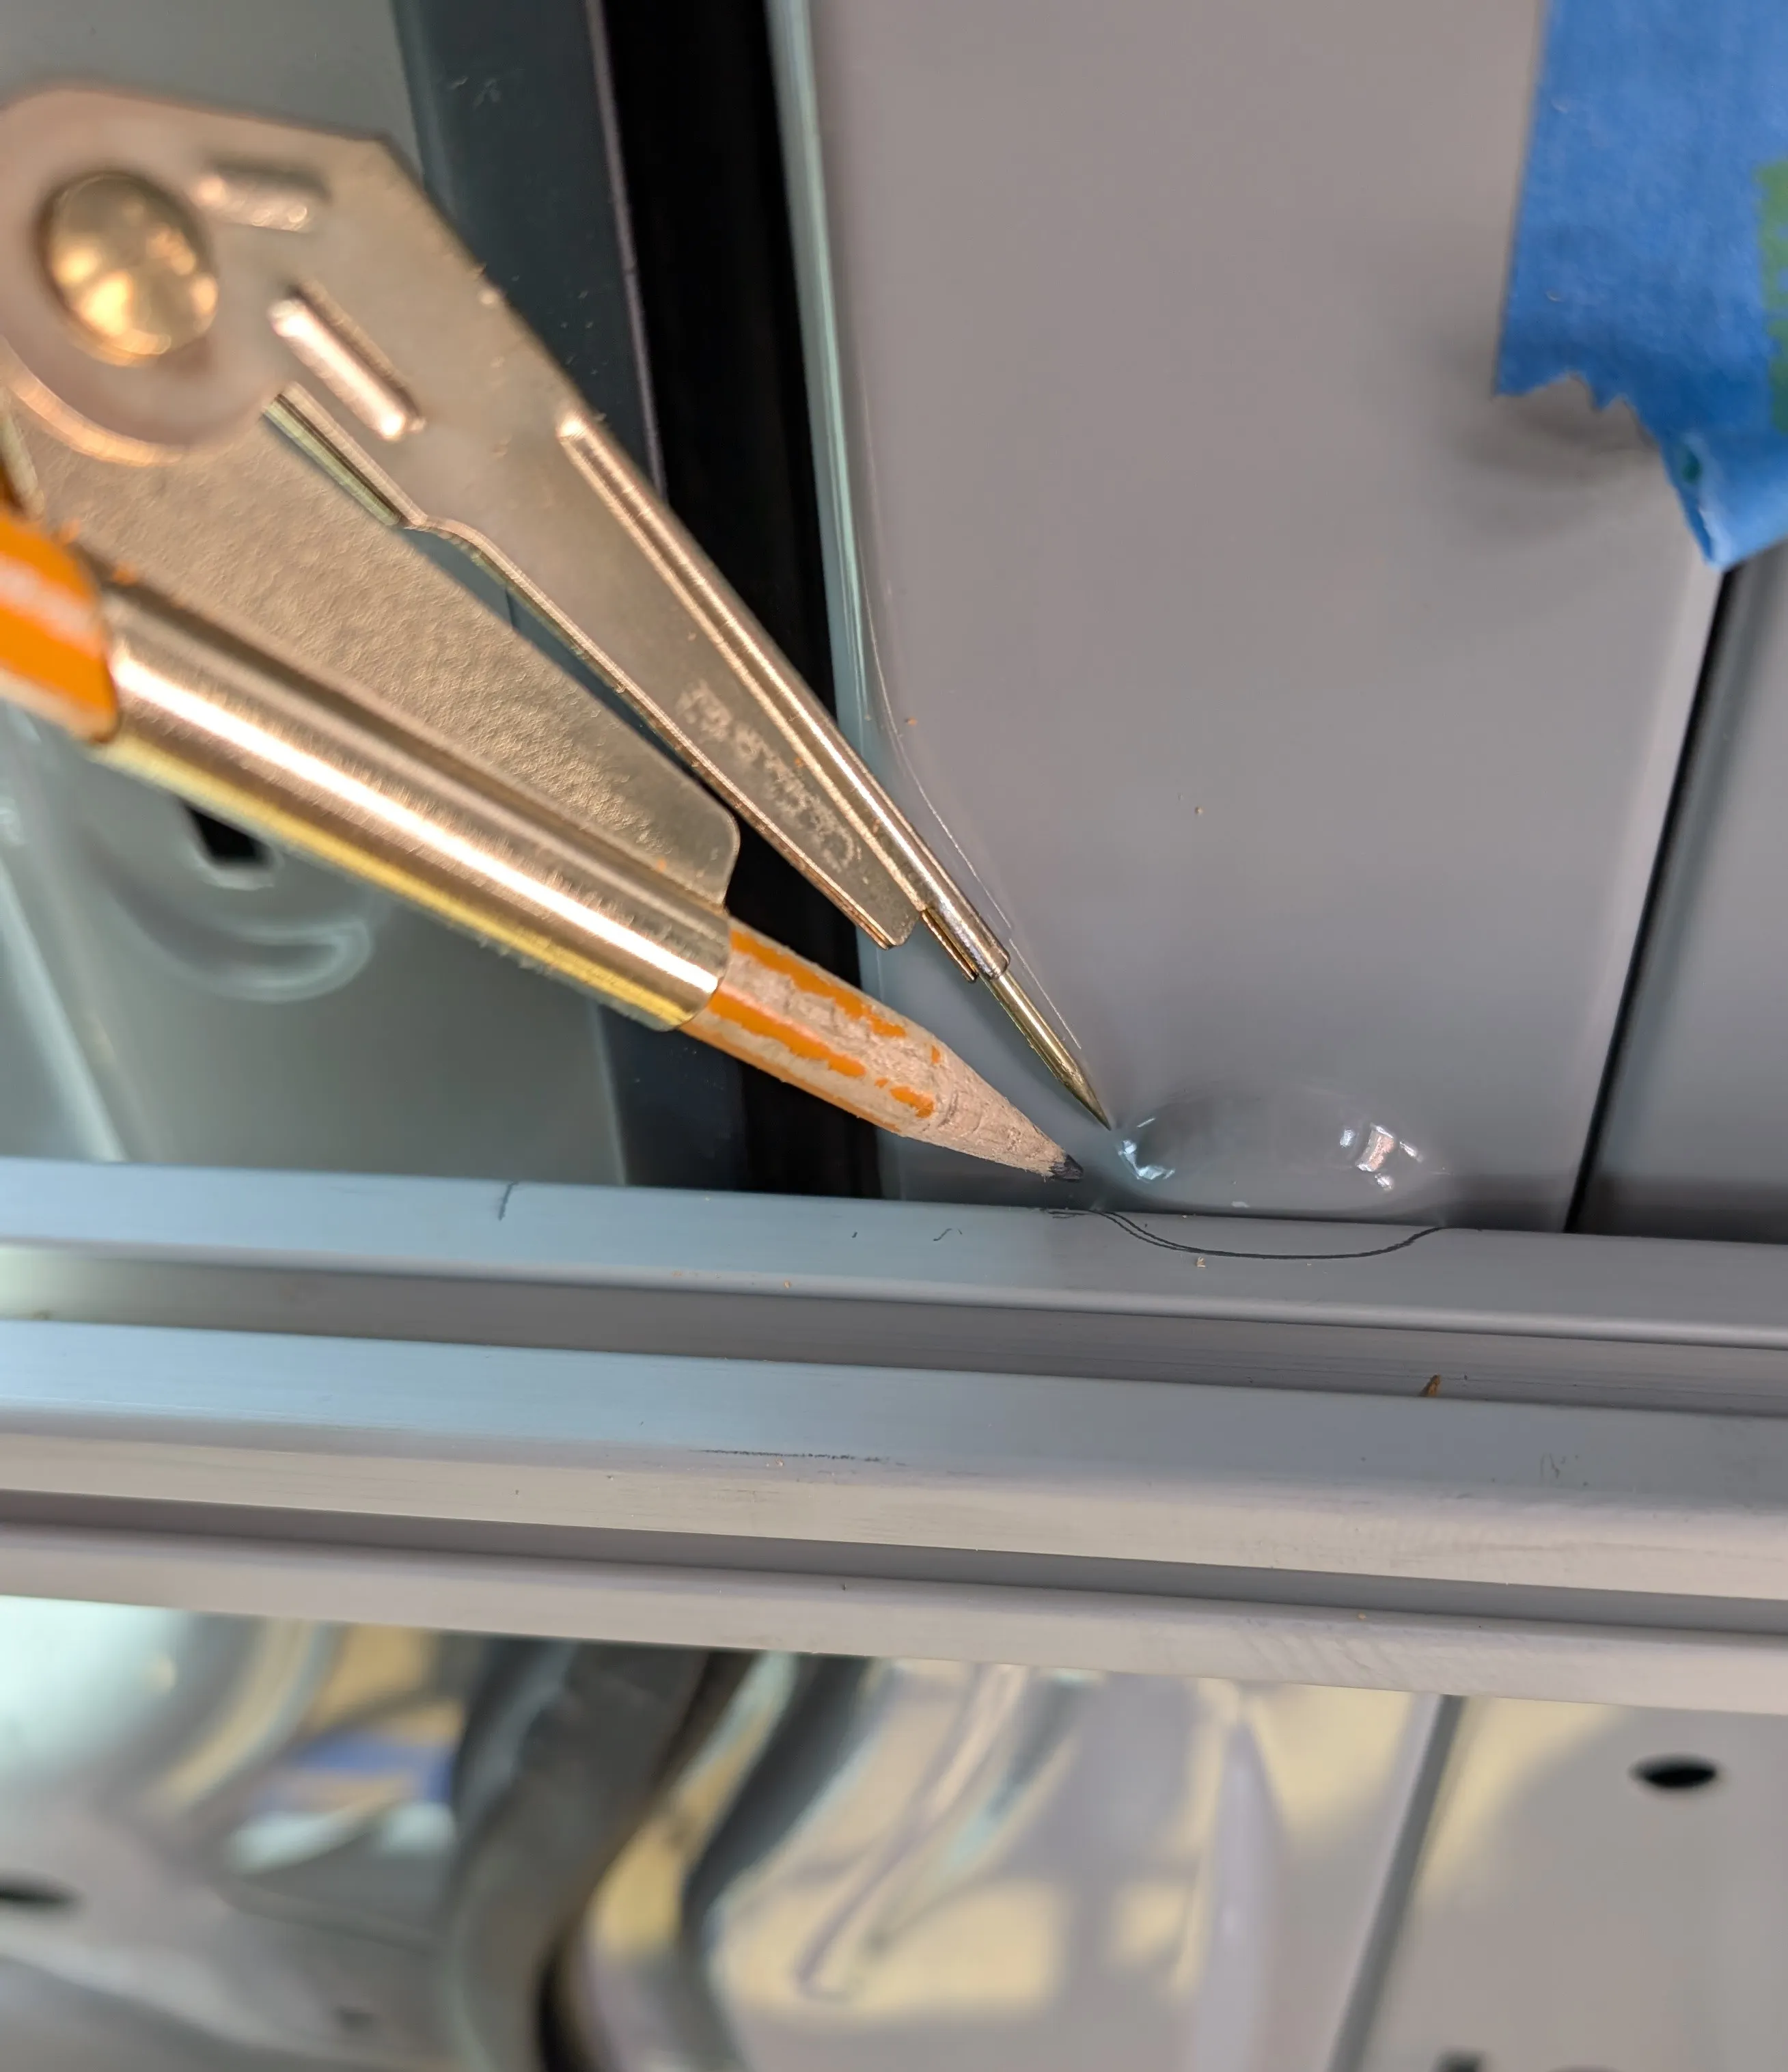
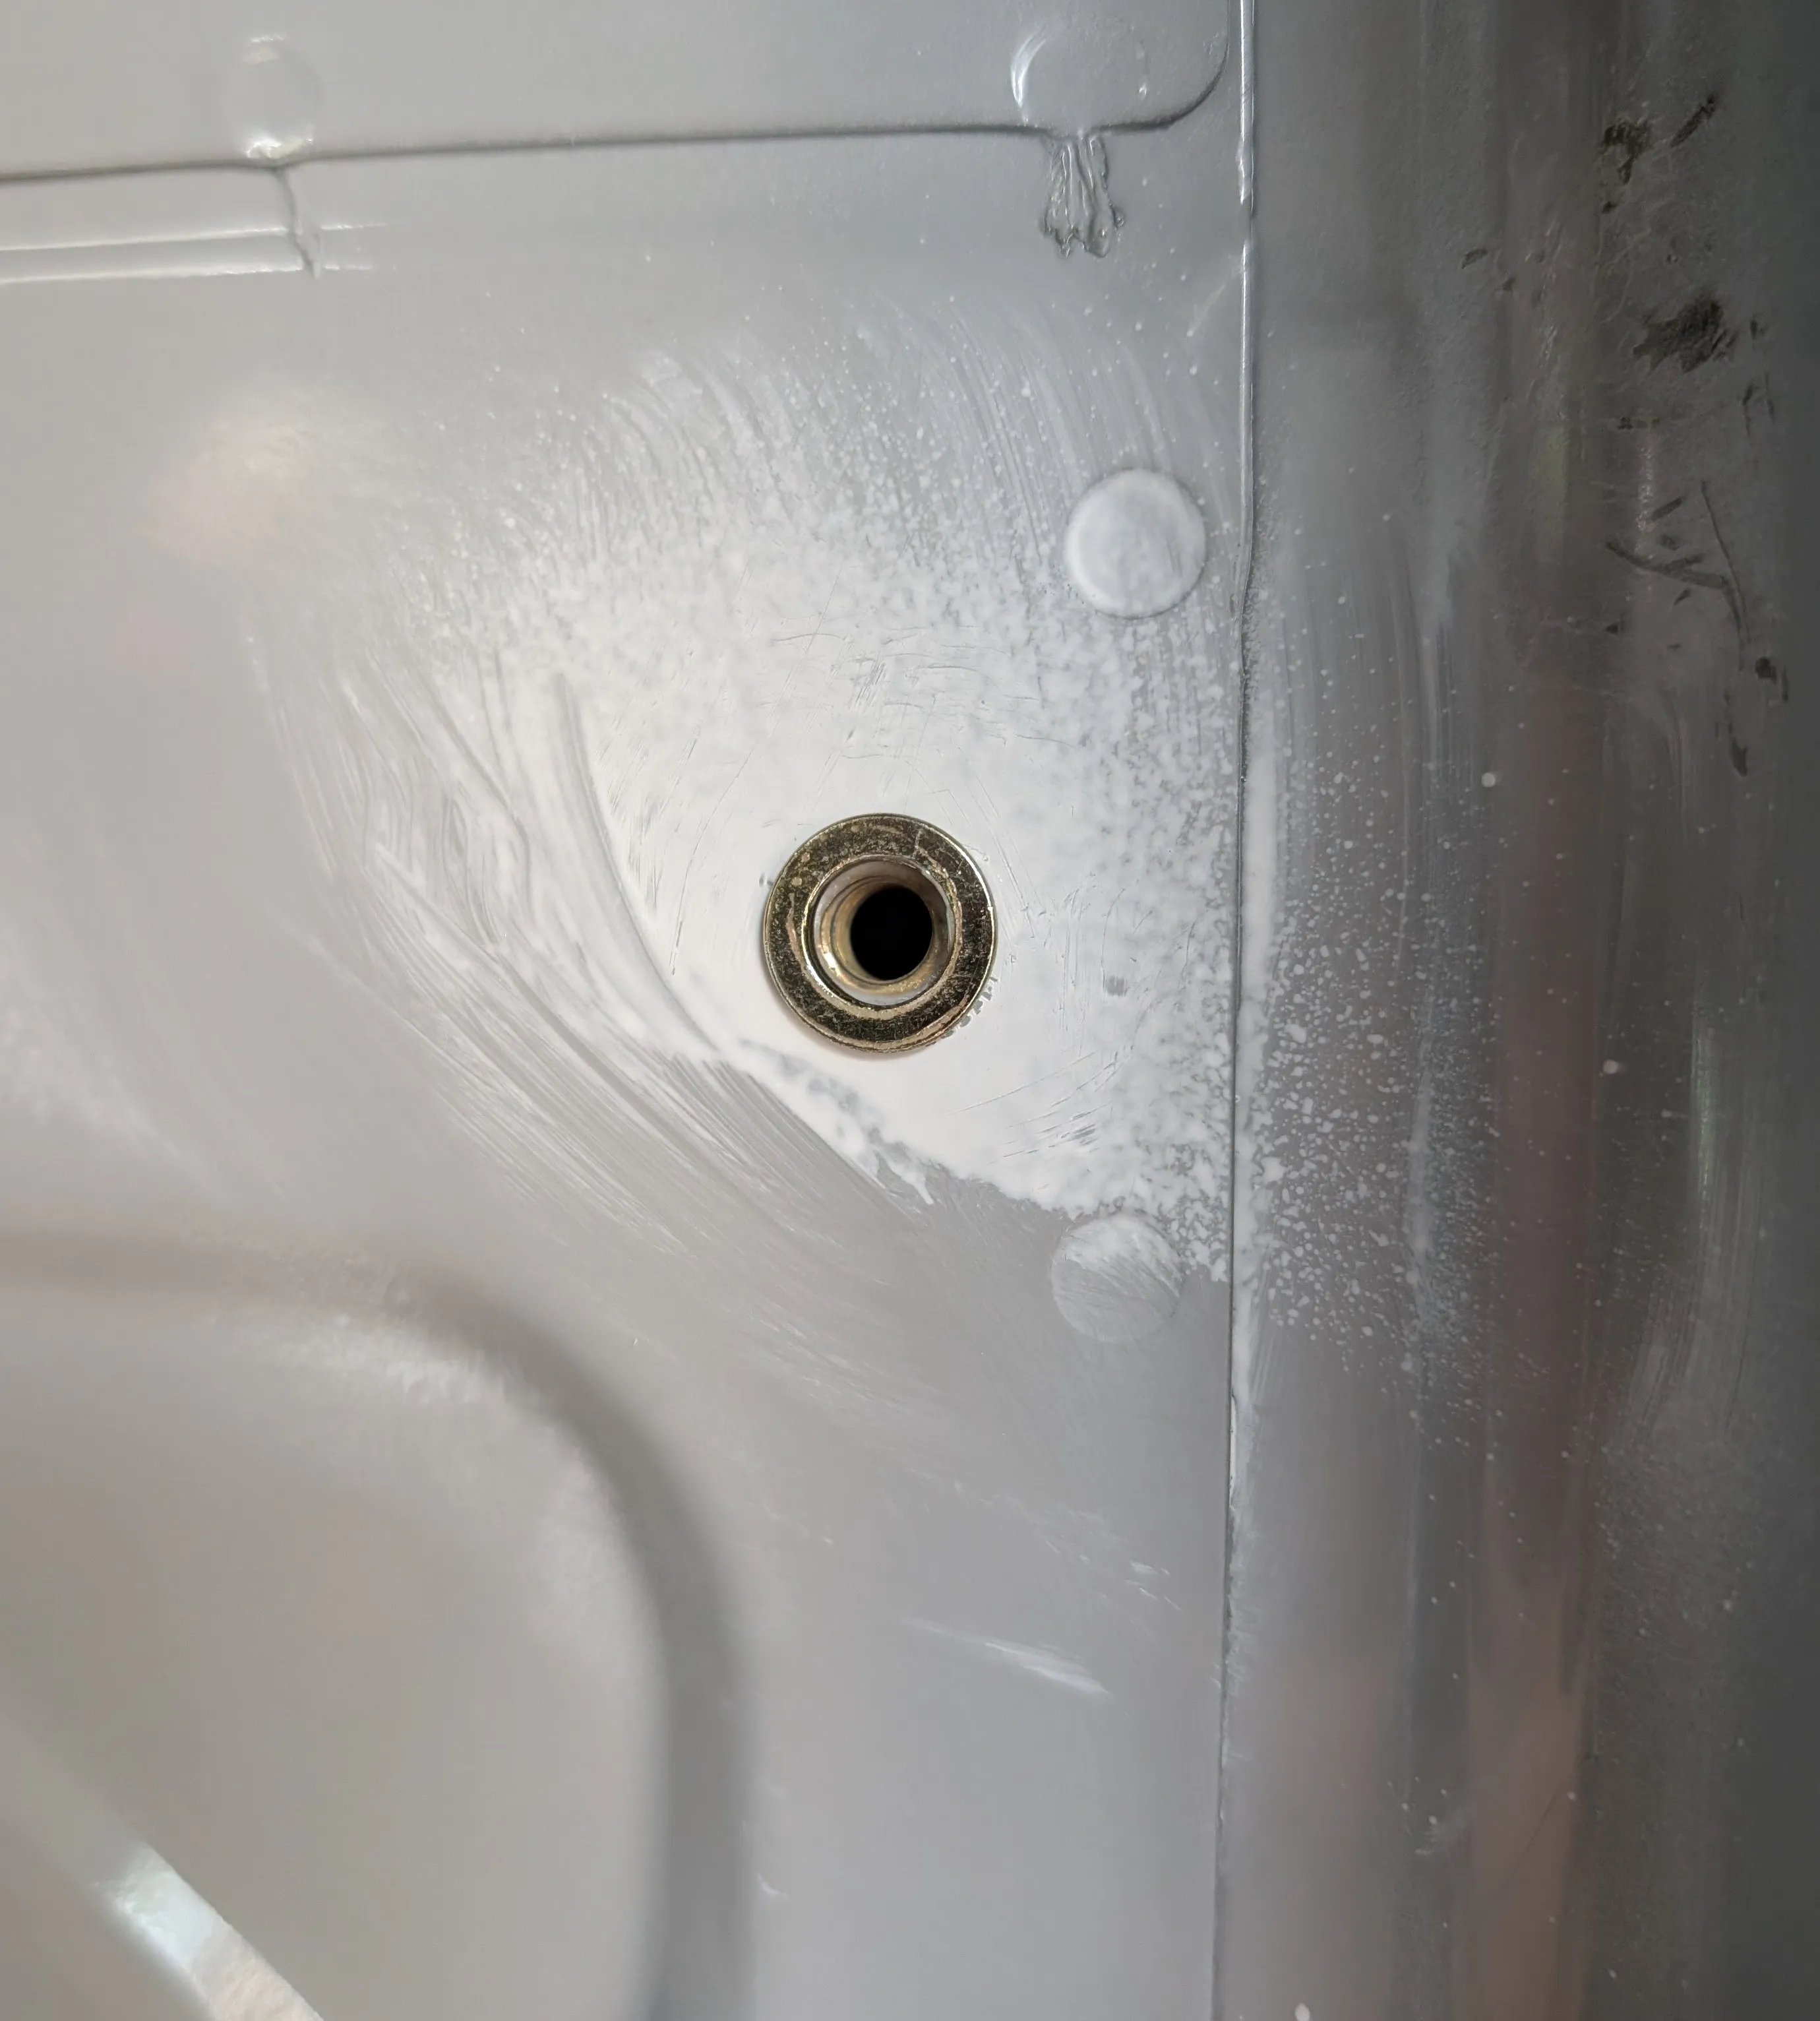
Anyways, I began working on the furring strips today. I cut up some 1/2 inch plywood to create the strips. I used this neat method to determine where to drill holes. Here’s how it goes. First, put up some tape around known markers and use this tape as a guide to determine where the rivnut was. After marking the rivnut with a pen/pencil, transfer the tape to the plywood and drill a hole where the marking is. This worked for the most part.
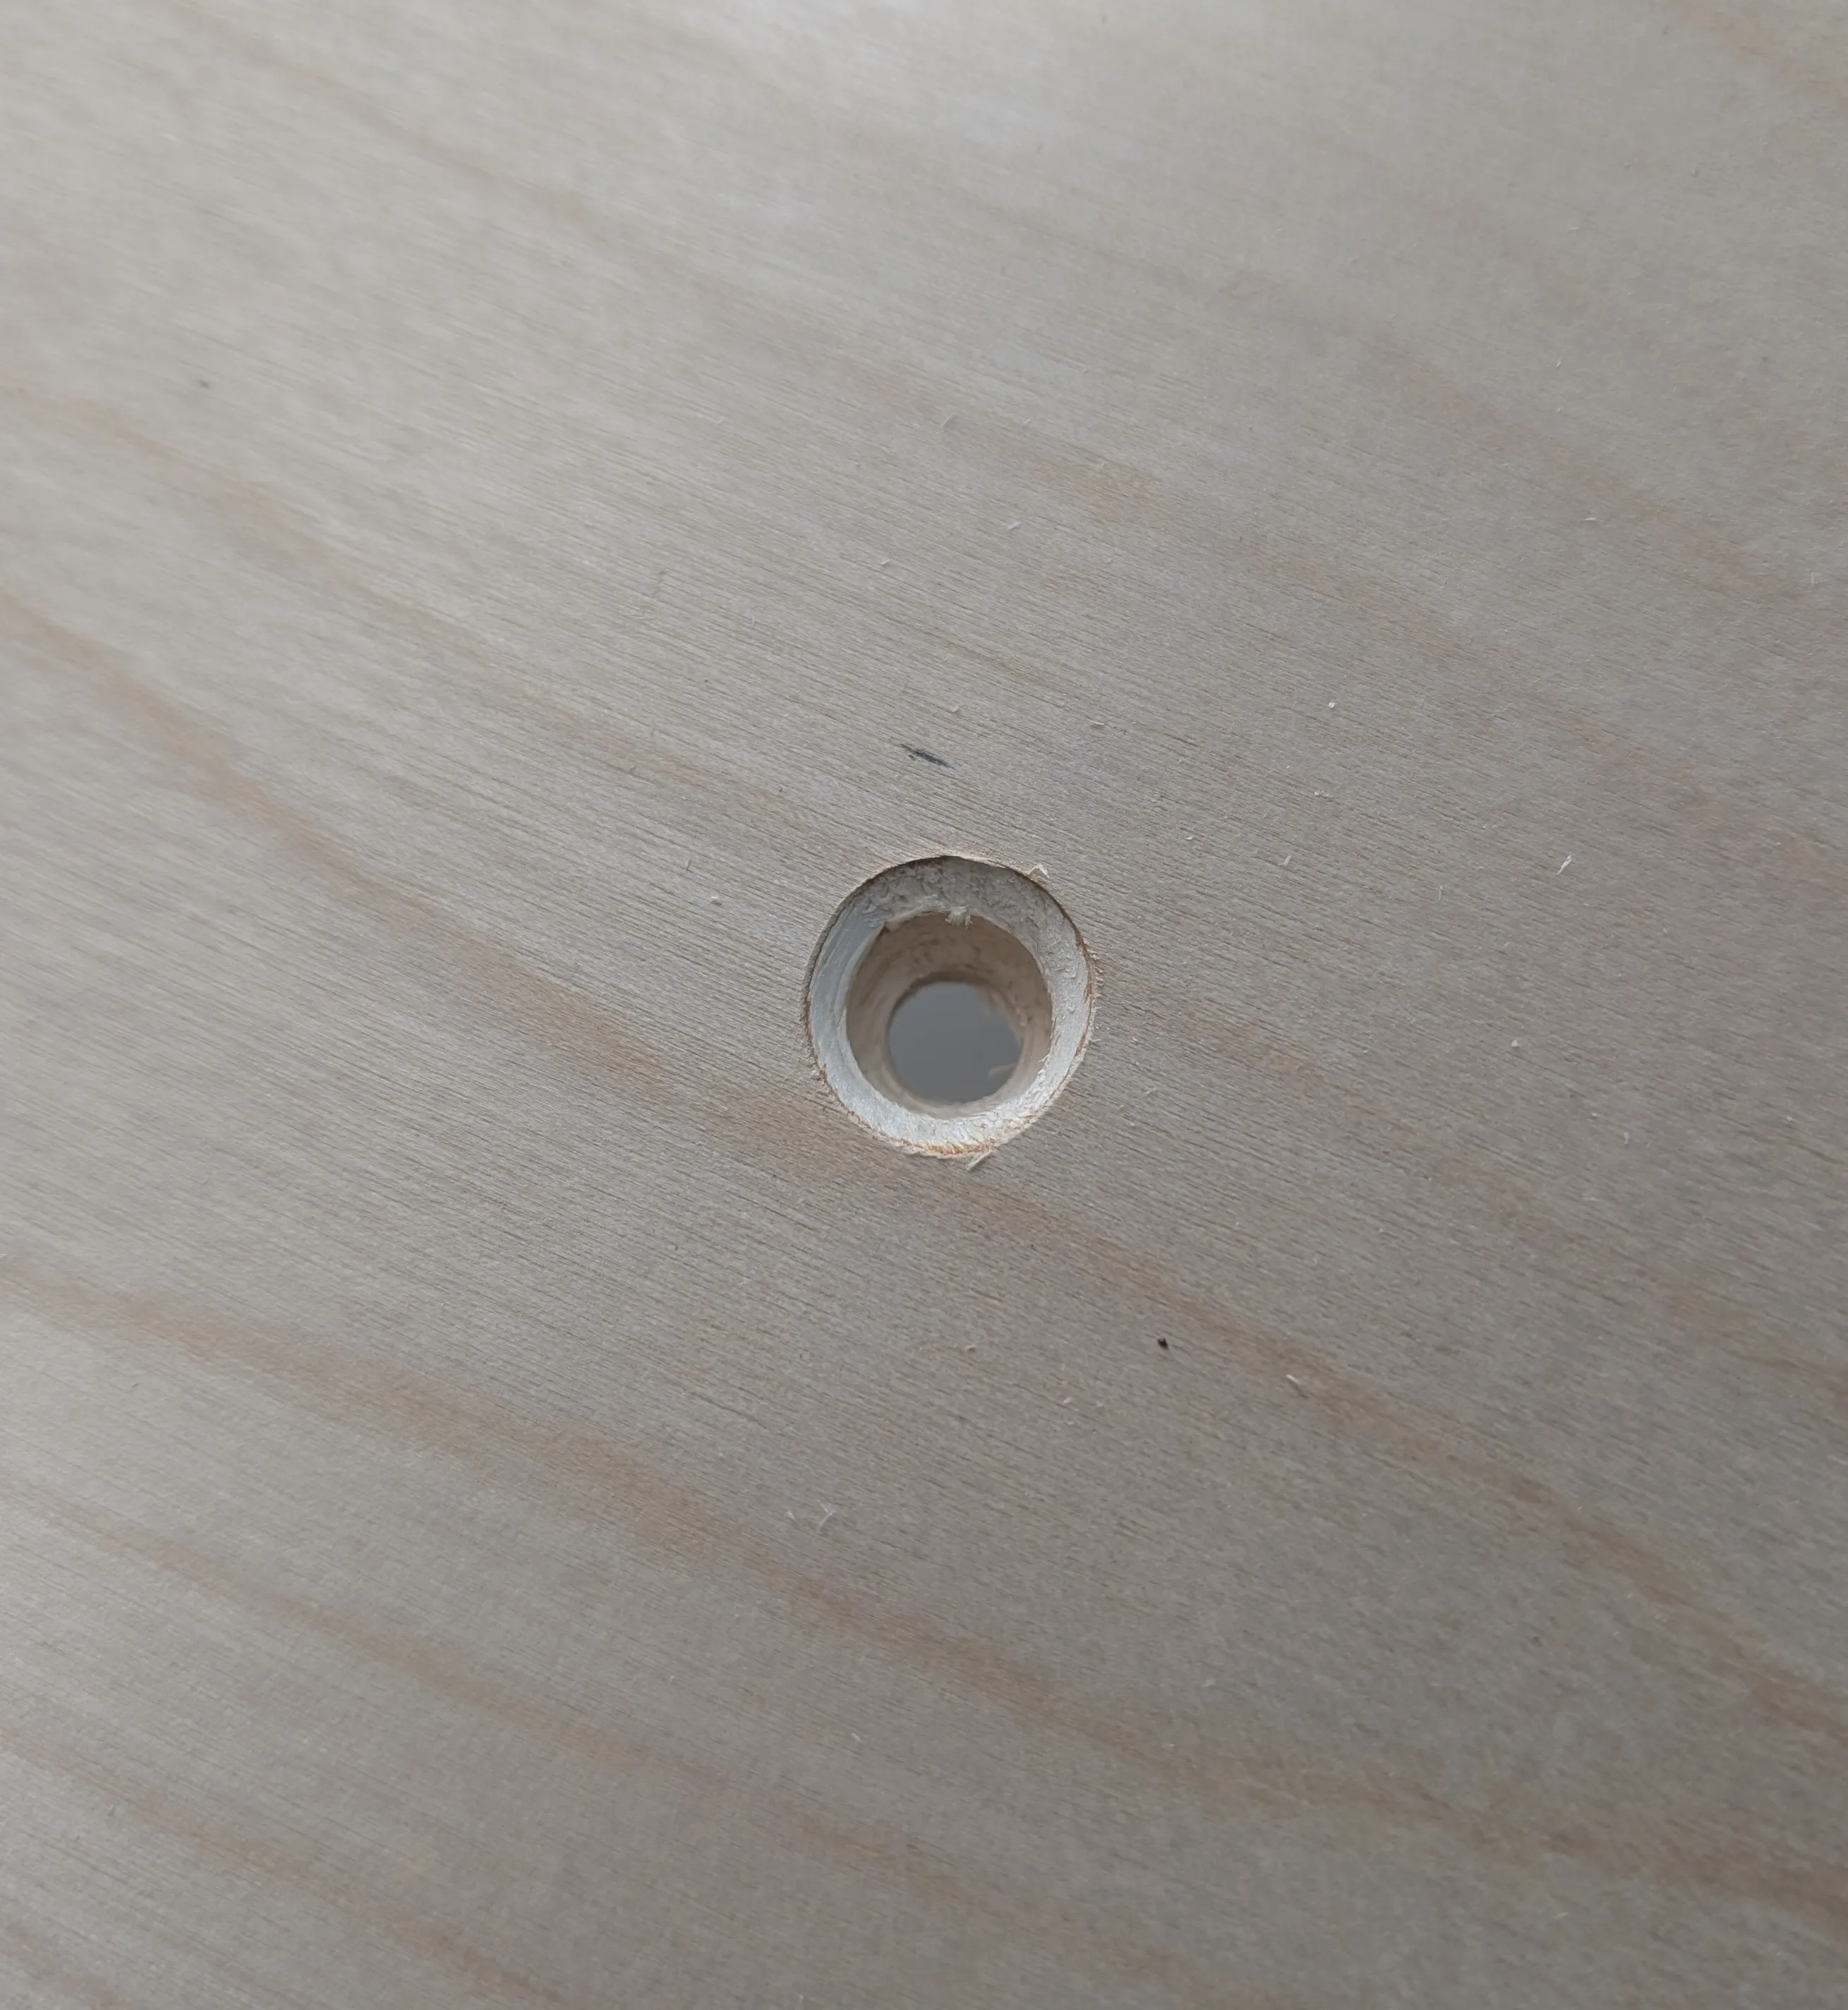
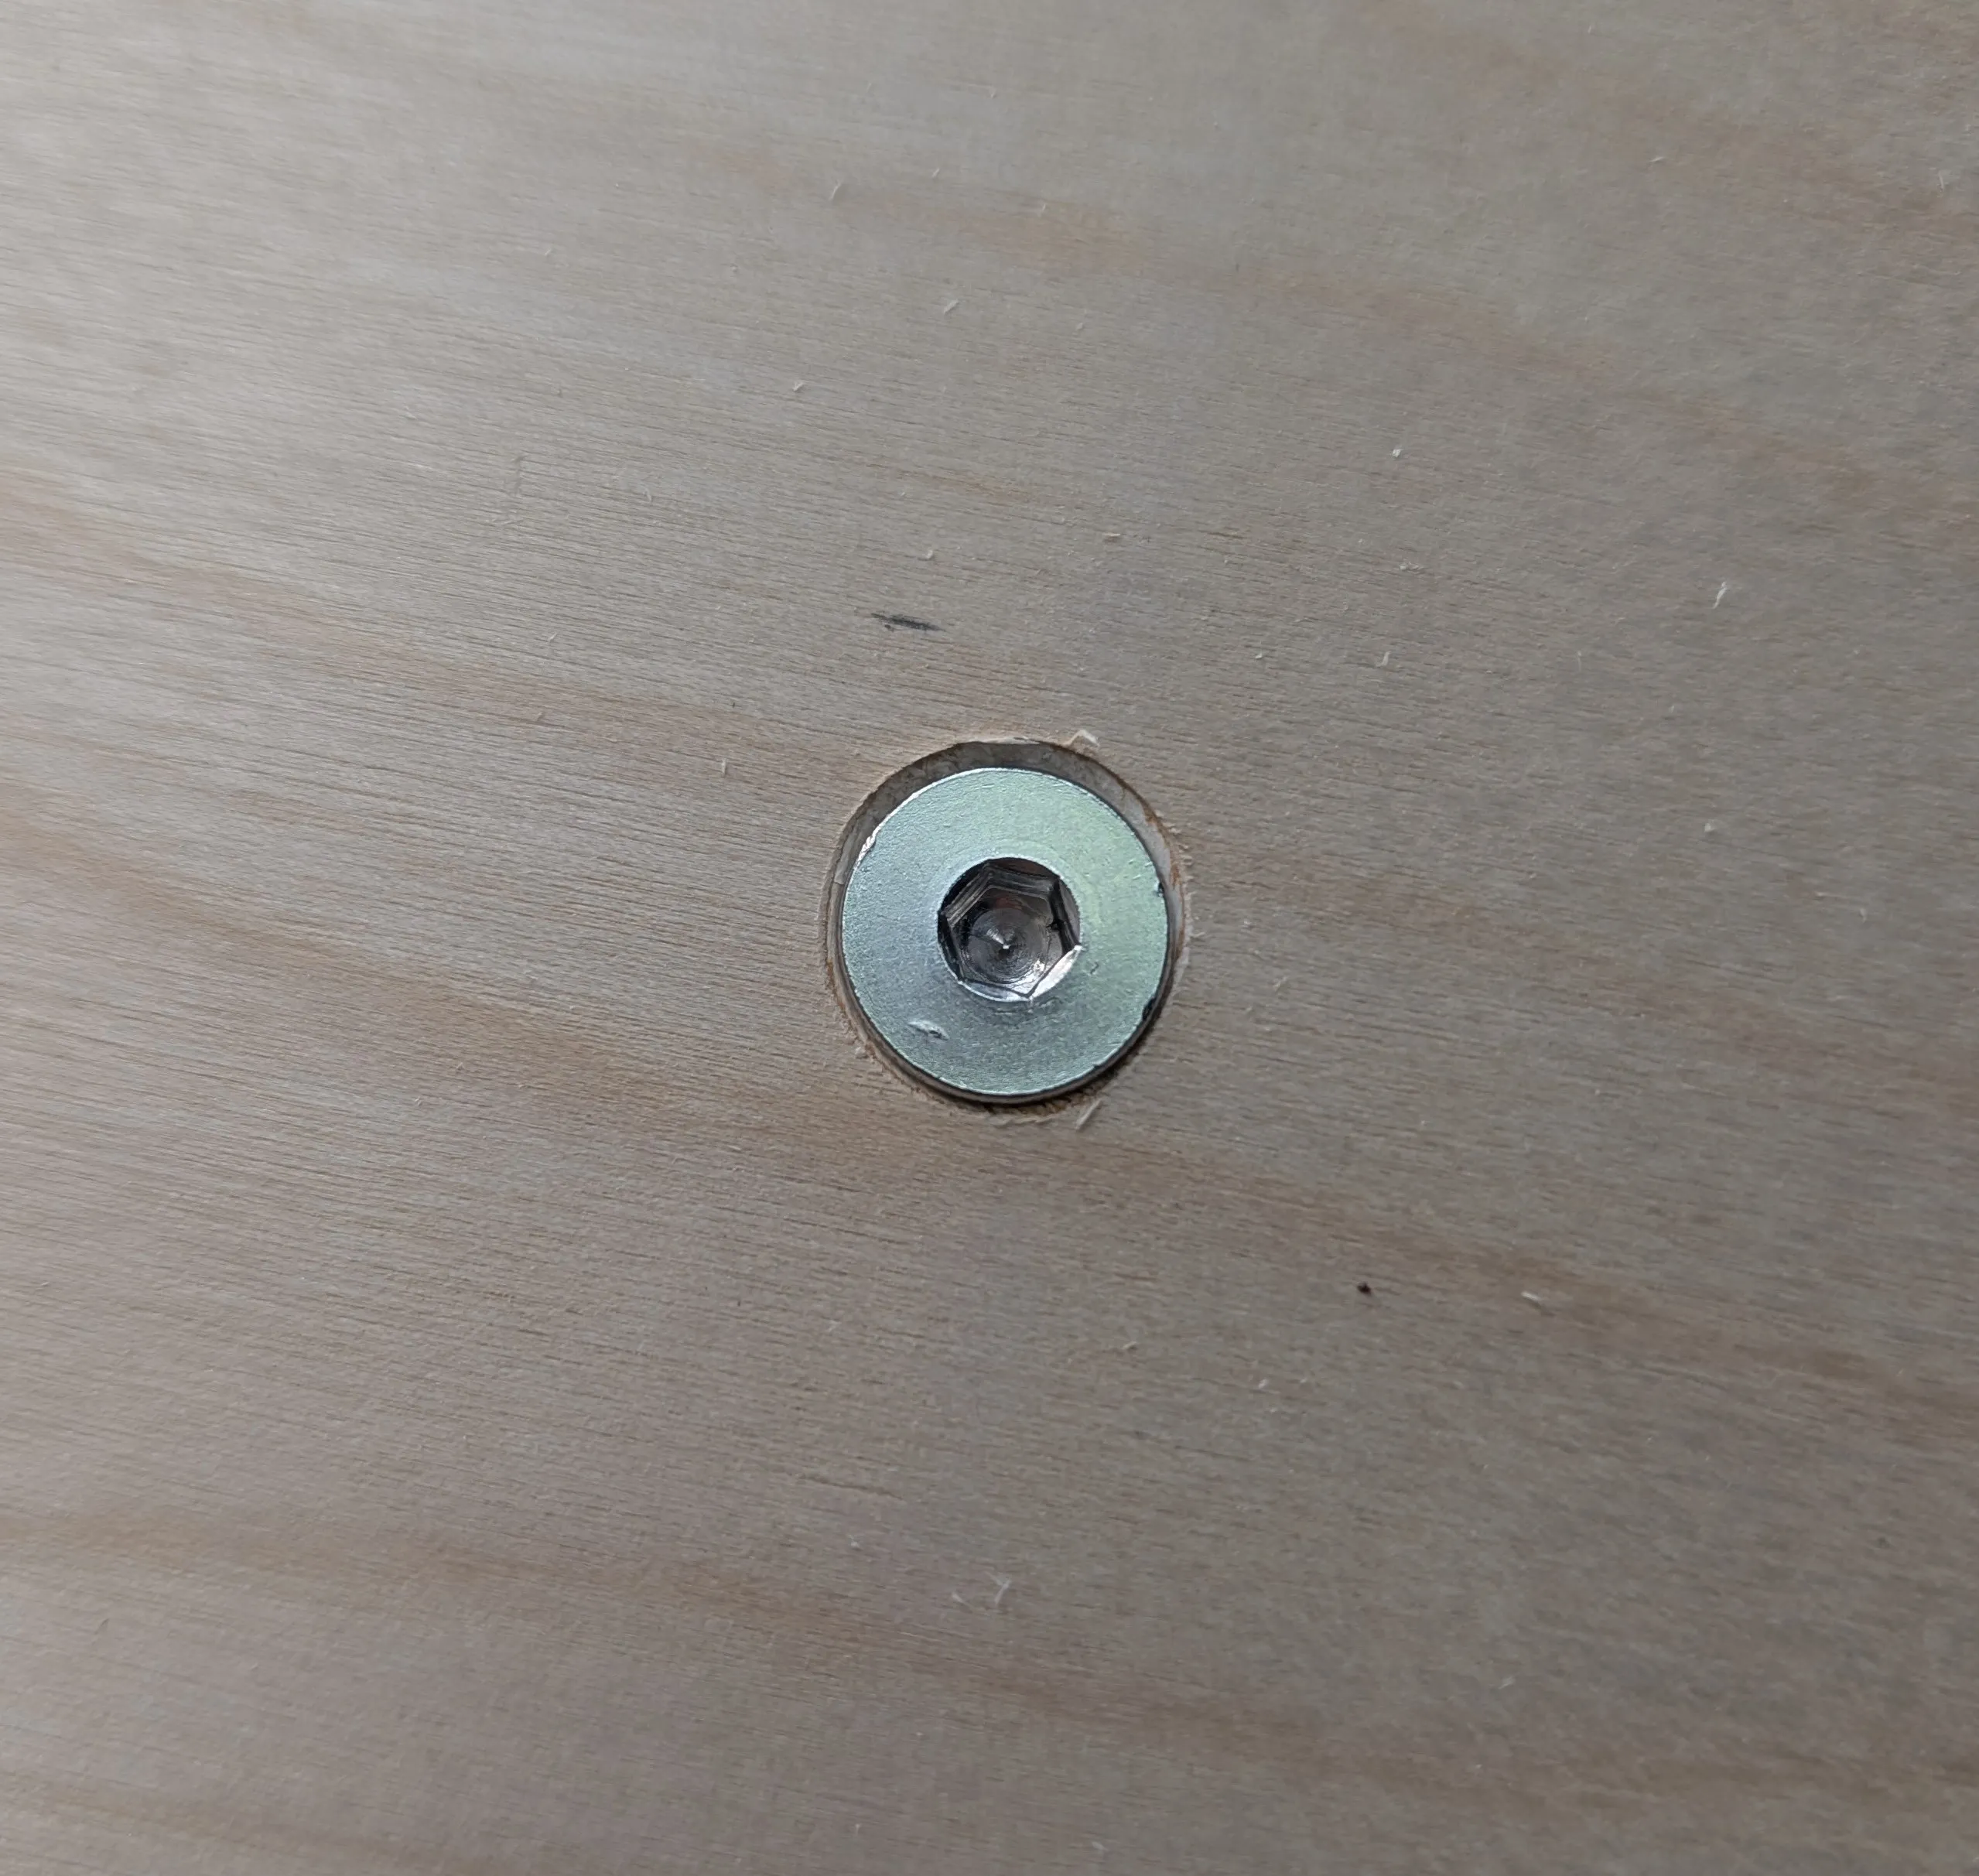
Then I had to countersink the holes so that the screws can sit flat in the plywood.
This is what Kep looks like now with only a couple of strips. I also mounted one more overhead cabinet.
April 26, 2025
After finishing framing the galley, there were a couple more imperfections in the van’s chassis that I had to account for. This one cool tool, a scribe, that I tried for the first time was quite useful for this. It allowed me to trace the exact size and location of the notch I needed to cut so I could get the frame flush against the chassis.
This is the final layout. I added a quarter inch thermal insulation (just a foam strip) on the areas that will have contact with the chassis. This creates a barrier from the outside temperature and should help regulate the temperature of the aluminum. I still have to mount everything so the overhead cabinets are just sitting on top of the counter. I also got my third injury today. Metal is dangerous.
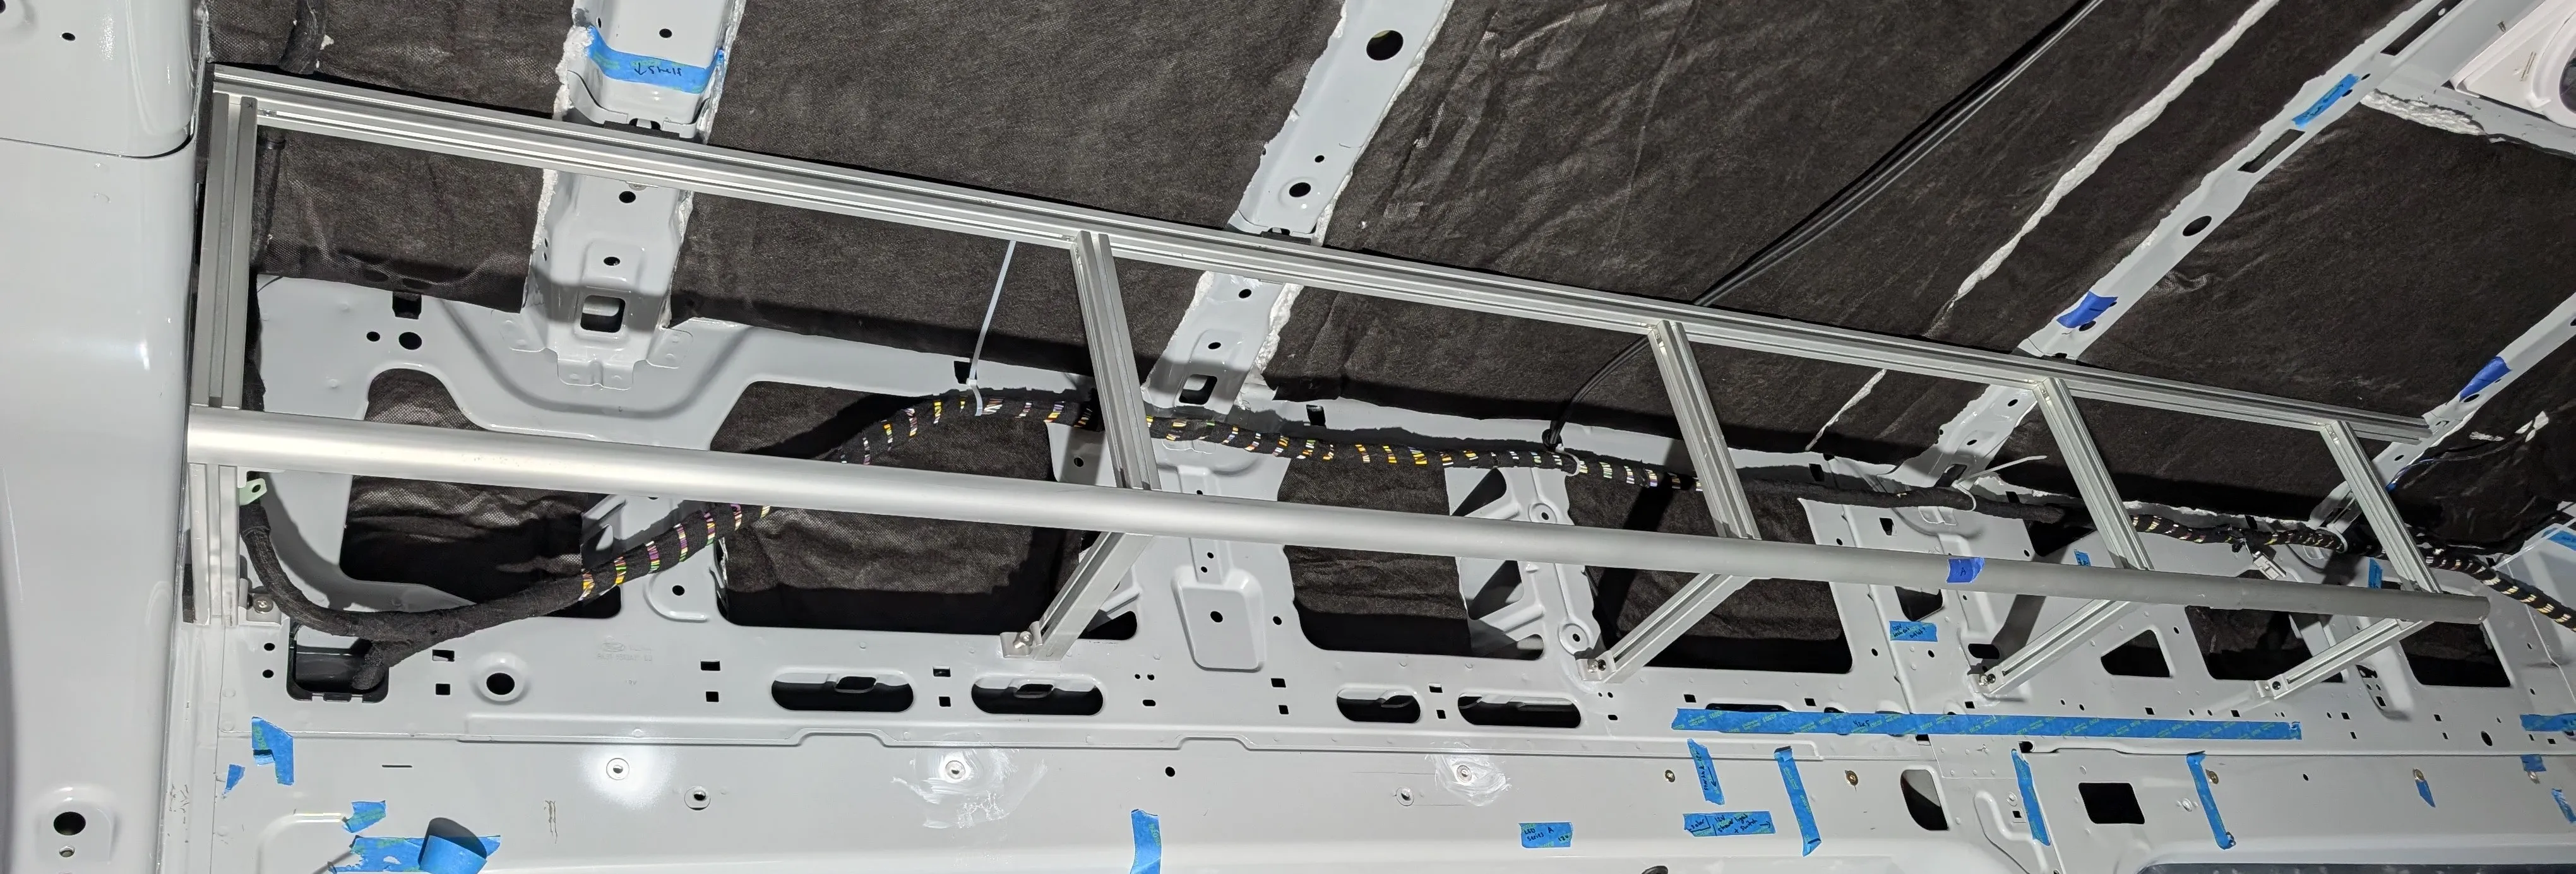
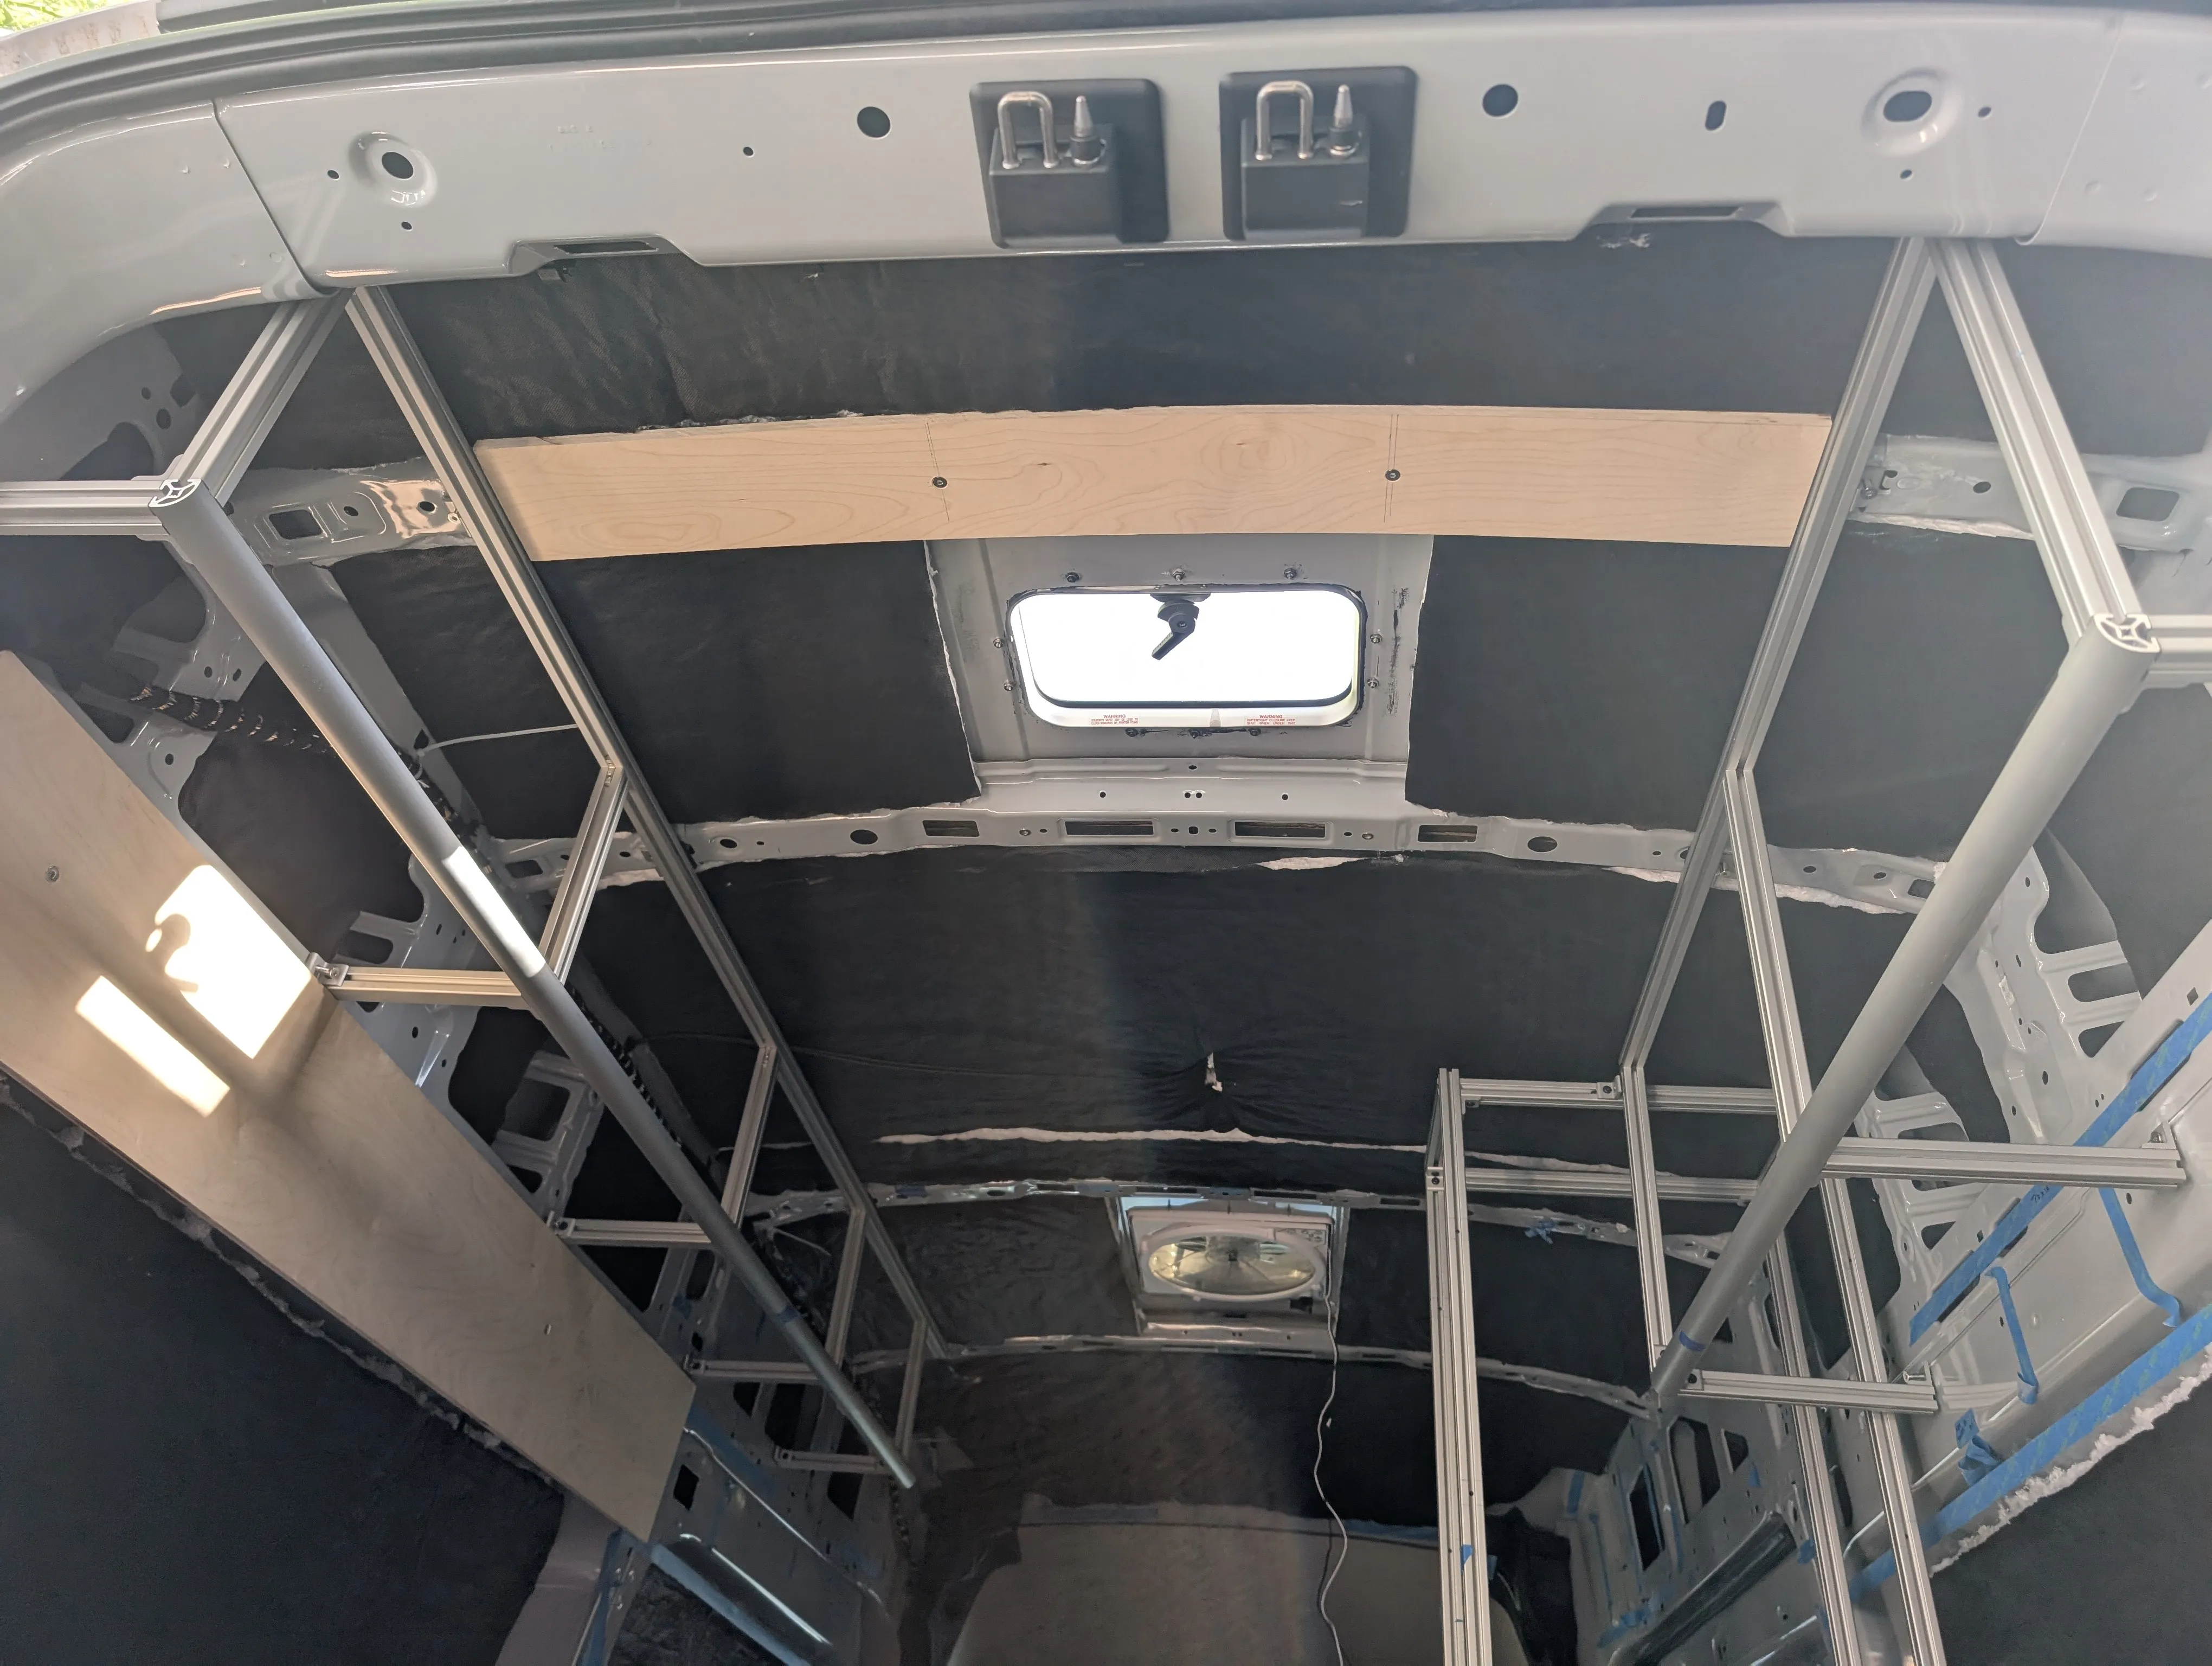
I finally got the long overhead cabinets mounted, which will span the entire drivers side wall up to the shower. It also hides the factory cables nicely. I left the end a bit longer as I don’t know exactly where the shower will start. Getting every section squared and level took the longest and still it is definitely not perfect. The mounting points do not match up with any existing holes so I had to mark, drill, and prep my own holes. Afterwards, I tried deburring the holes to smooth them out but not sure if that really made a difference. Then I sprayed the bare metal with Rust-Oleum to prevent rust/corrosion.
And finally, I installed 1/4-20 rivnuts, which is actually a very hard process with a manual rivet tool. All but one of the holes matched up but I will revisit that one later.
April 25, 2025
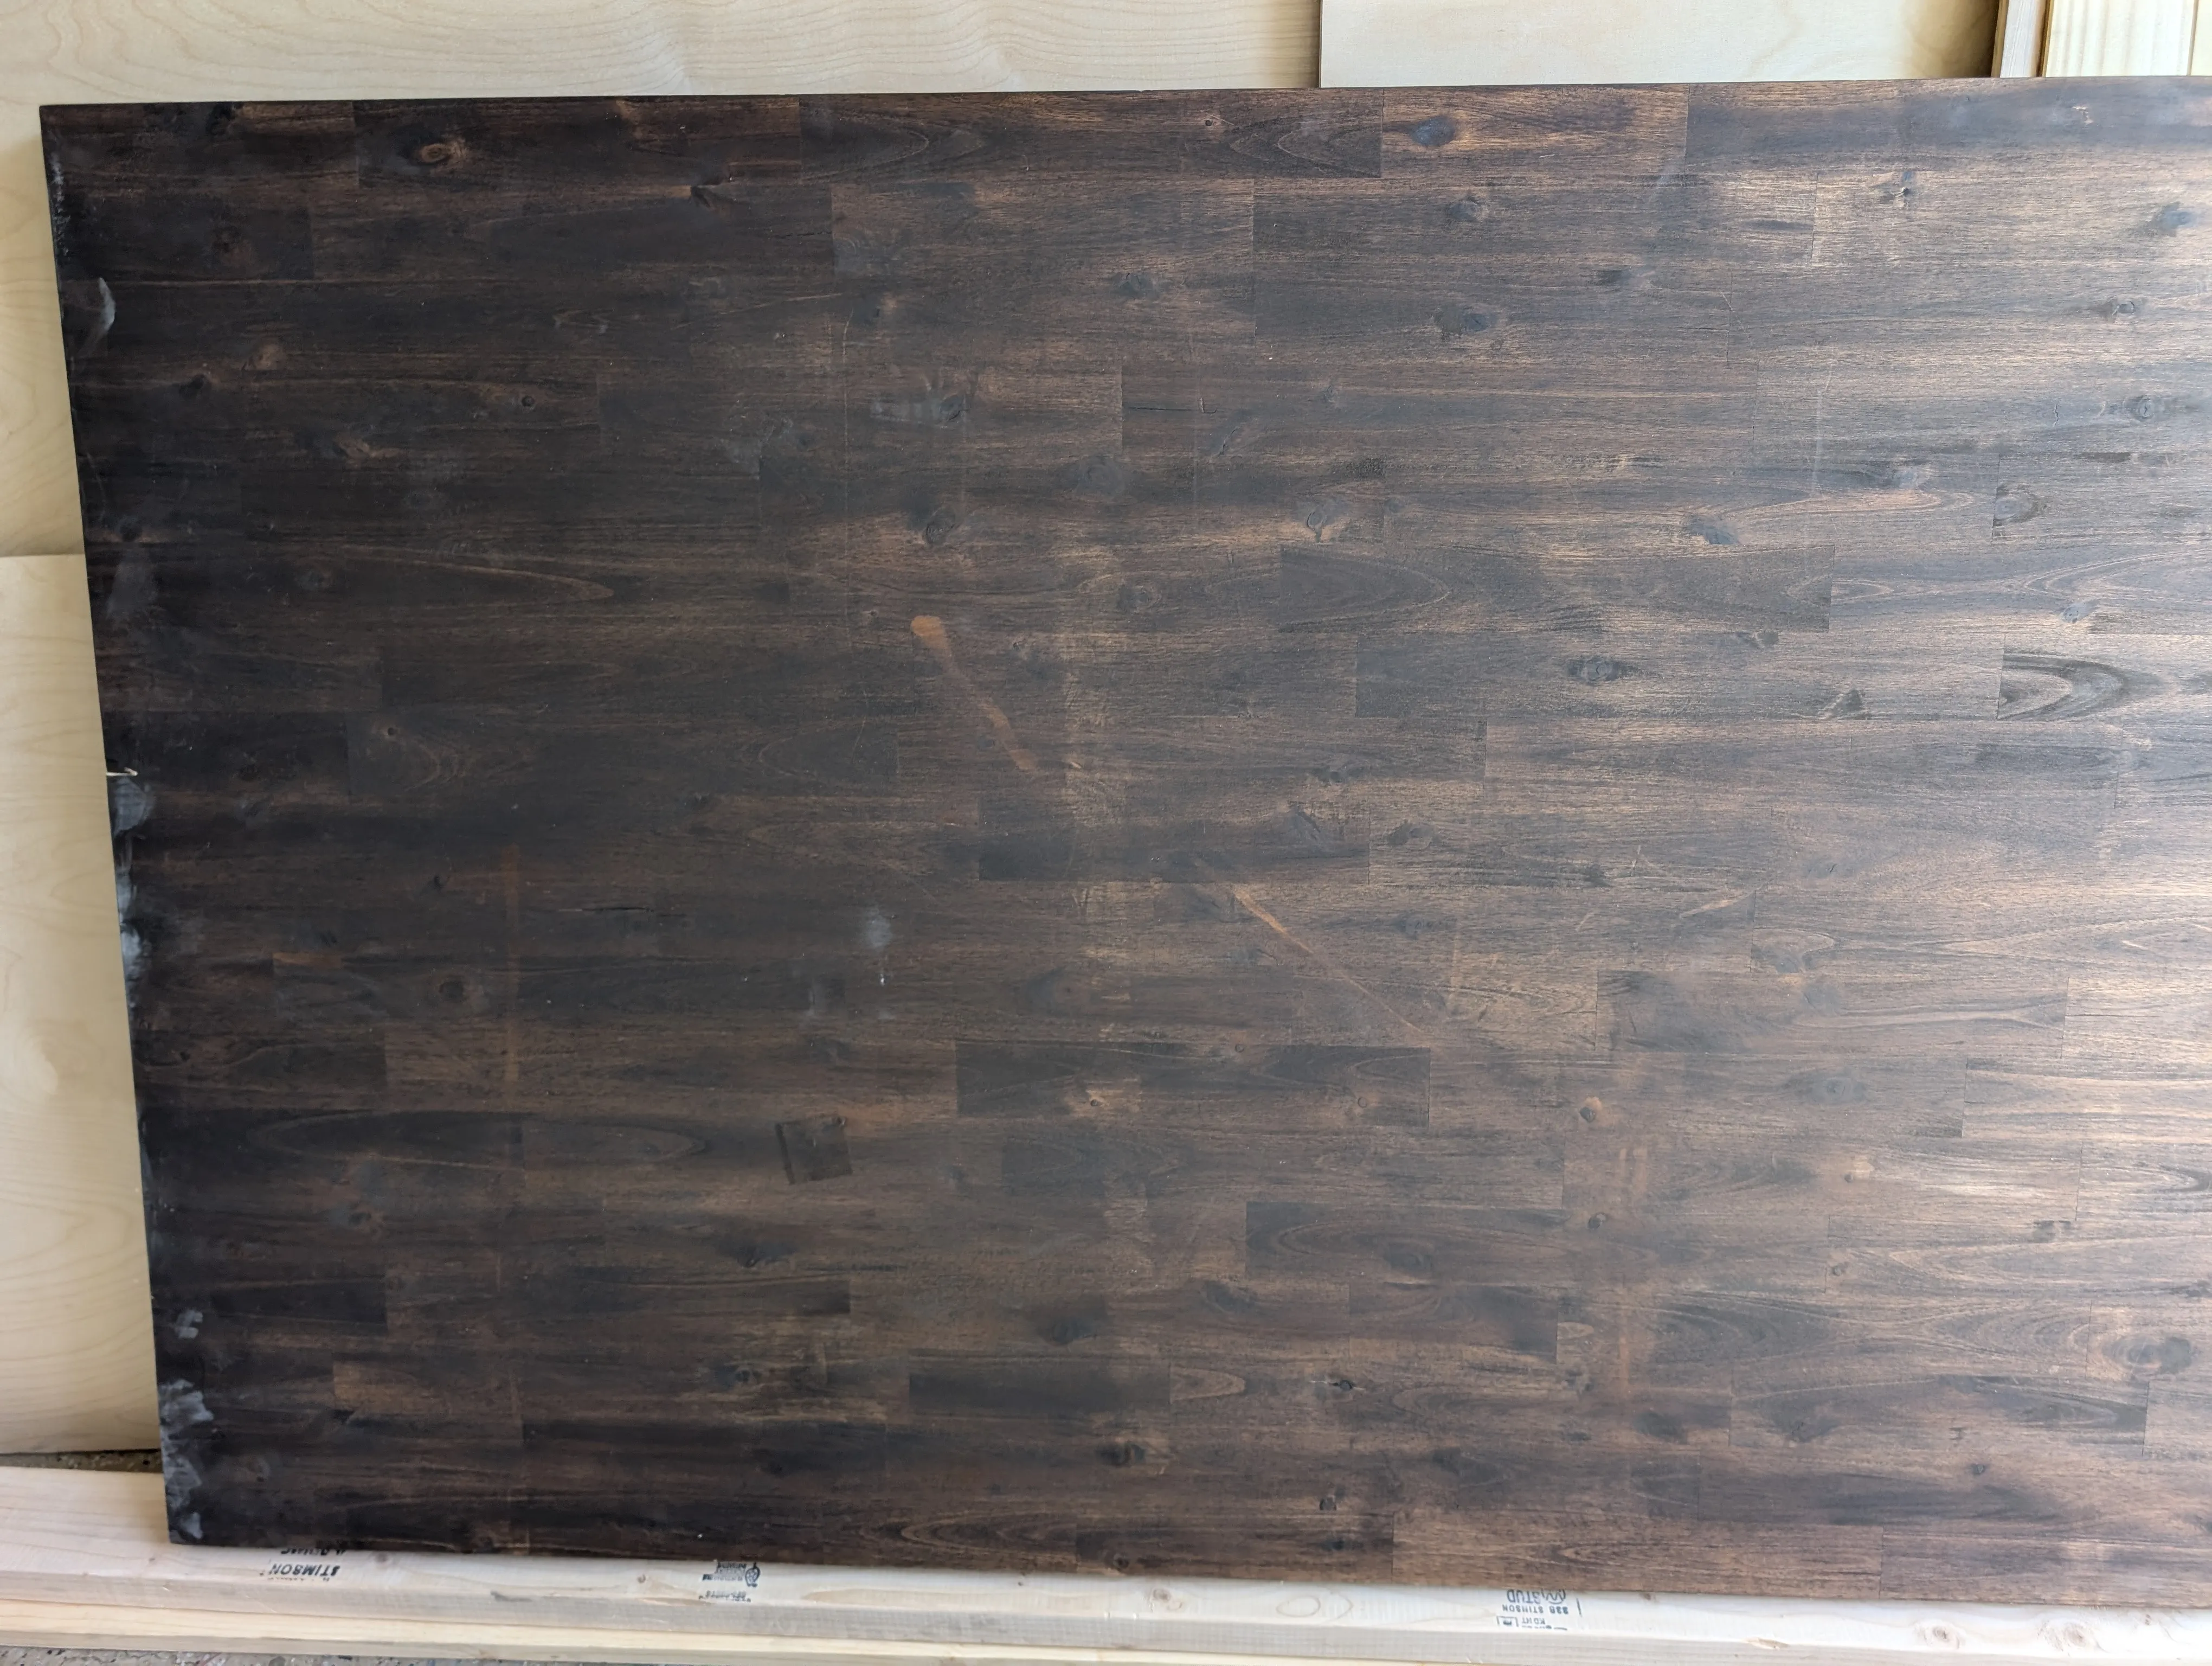
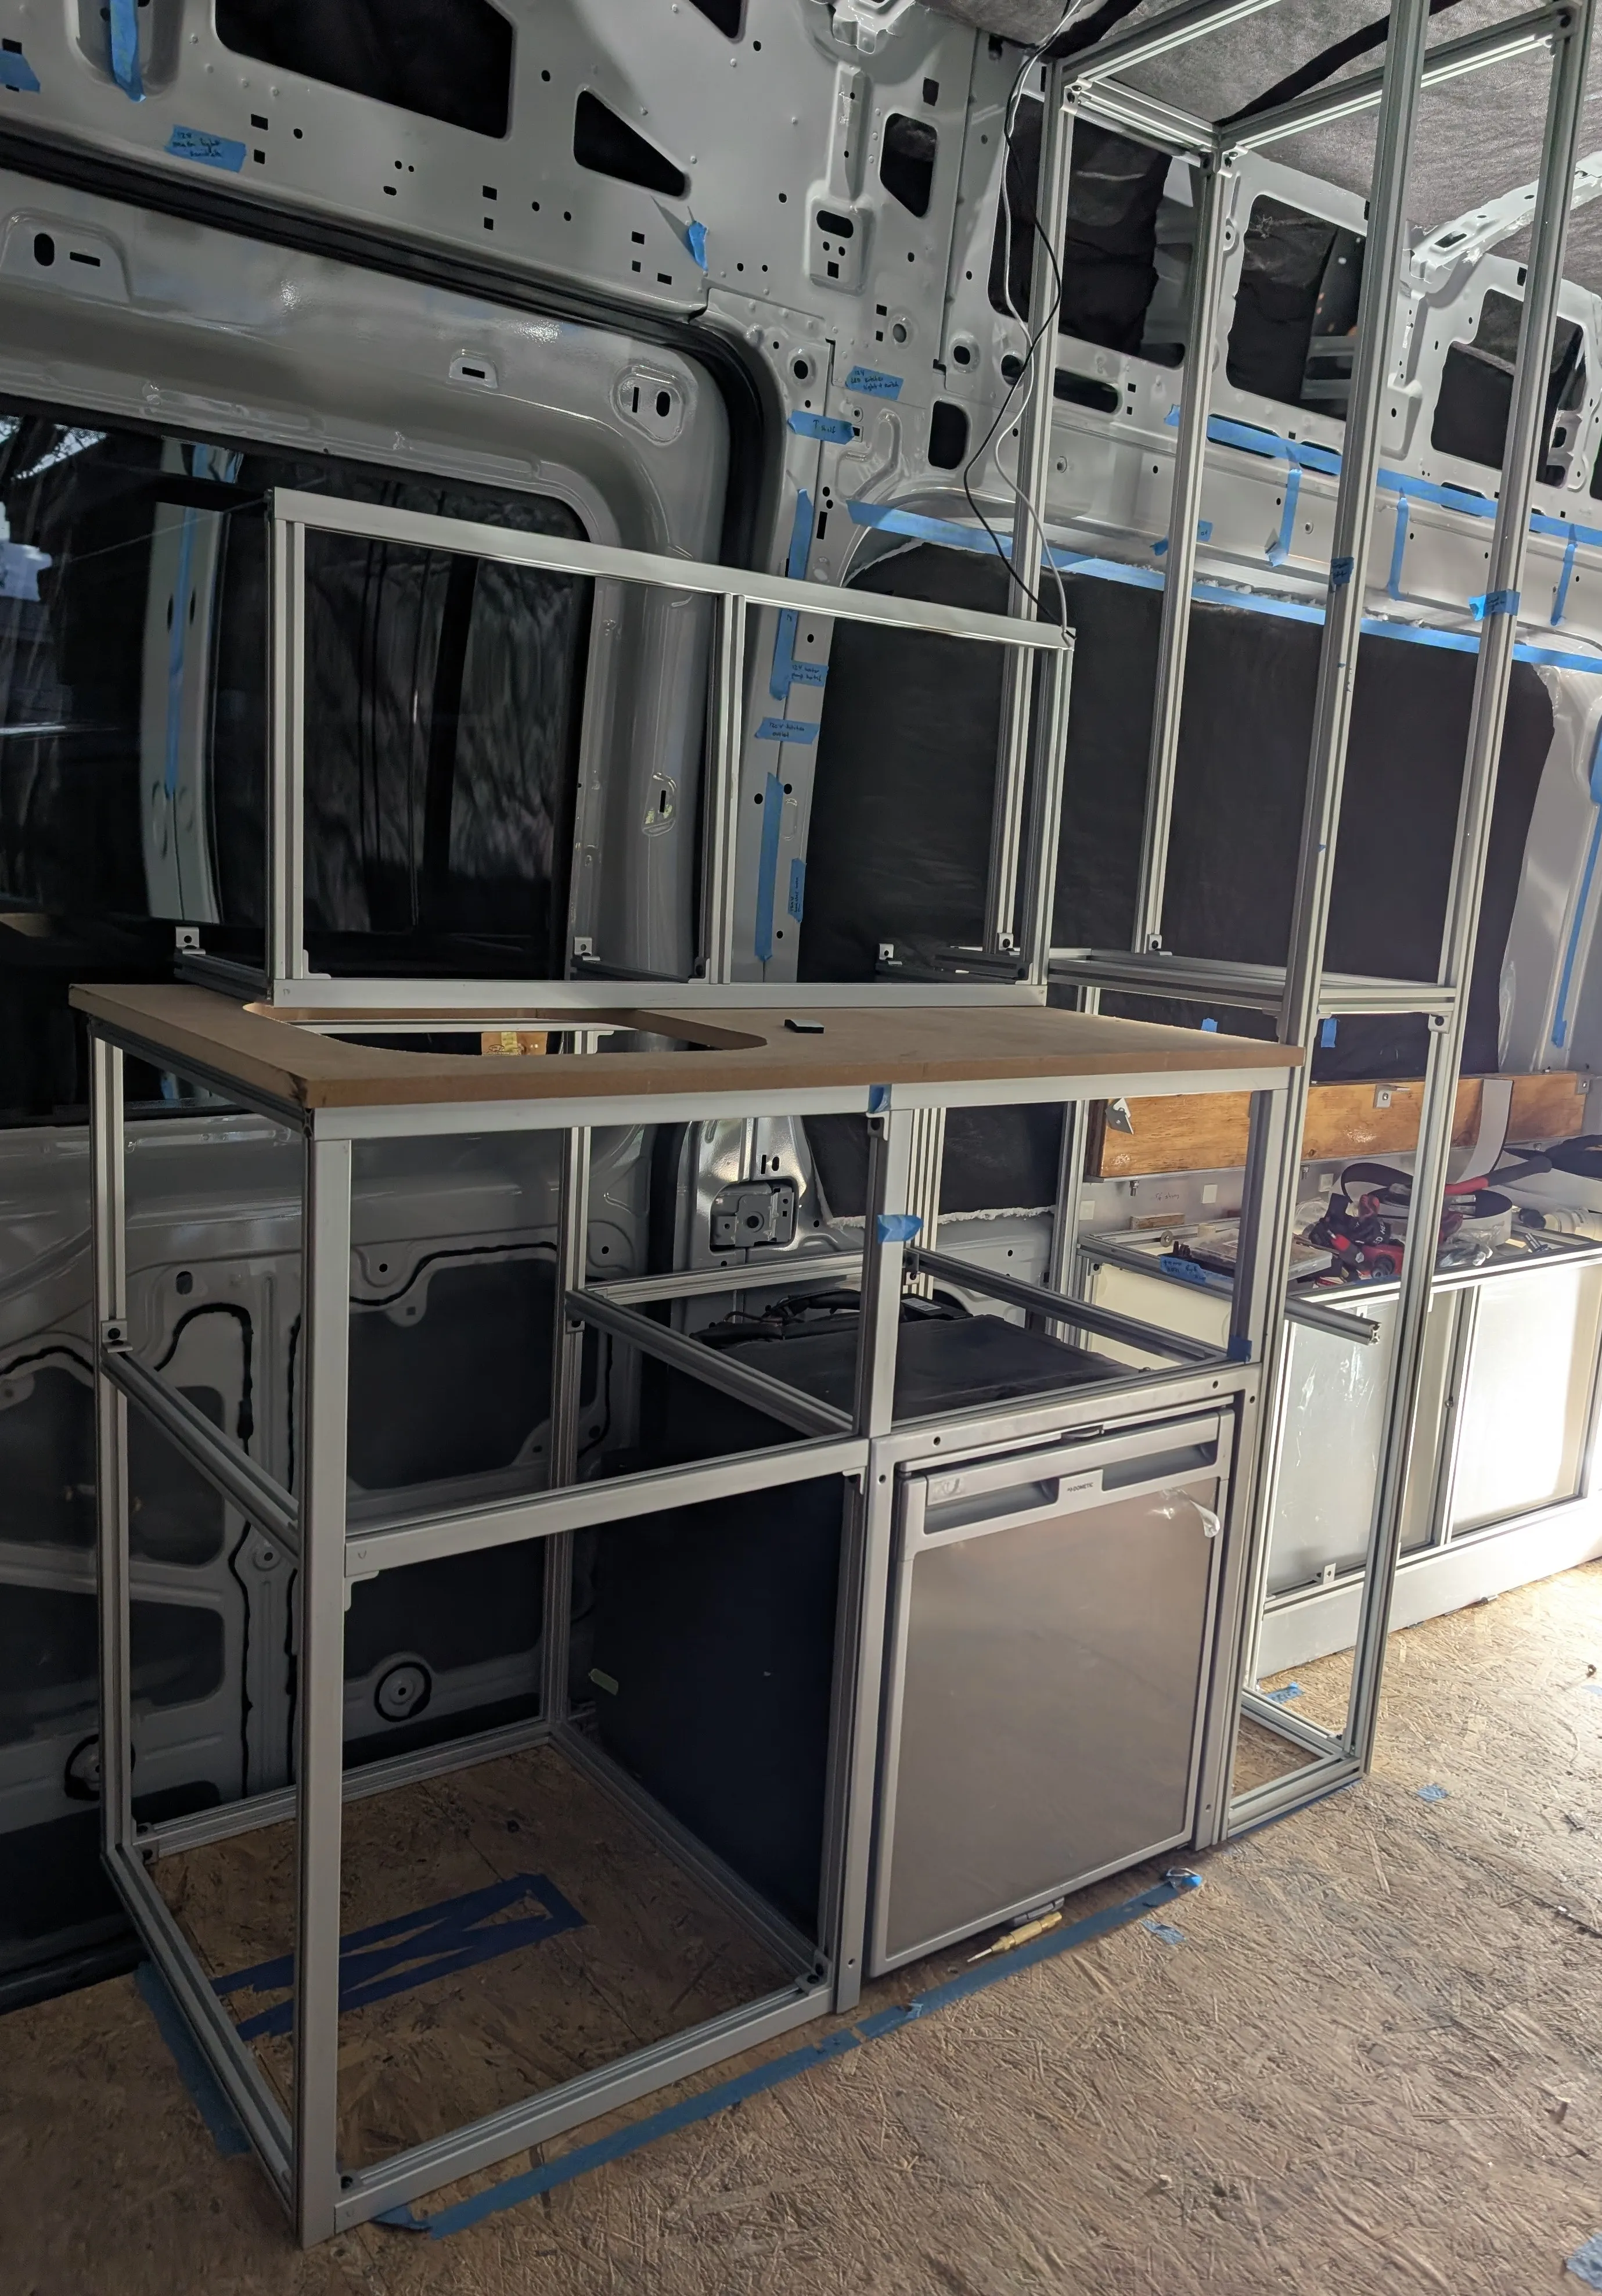
Today I bought a block of wood from a random stranger. It’s stained acacia butcher block that was used as a computer desk. There are some blemishes and dents but most of it should be either cut out or fixed with a good sanding. I plan to restain and refinish it after so hopefully this wasn’t a complete waste. The aluminum framing is almost done, just some final touches to the kitchen countertop. Apparently the order in which to attach everything really matters, but unfortunately I’ll have to redo everything again later to add loctite to each of the screws.
April 24, 2025
Here’s a sneak peak of the overall layout. The overhead cabinets are complete and so is part of the kitchen galley. This took quite a bit of time to get everything squared and making sure I cut each aluminum piece to the right size without having too many leftover small pieces. So far Kep’s looking good.
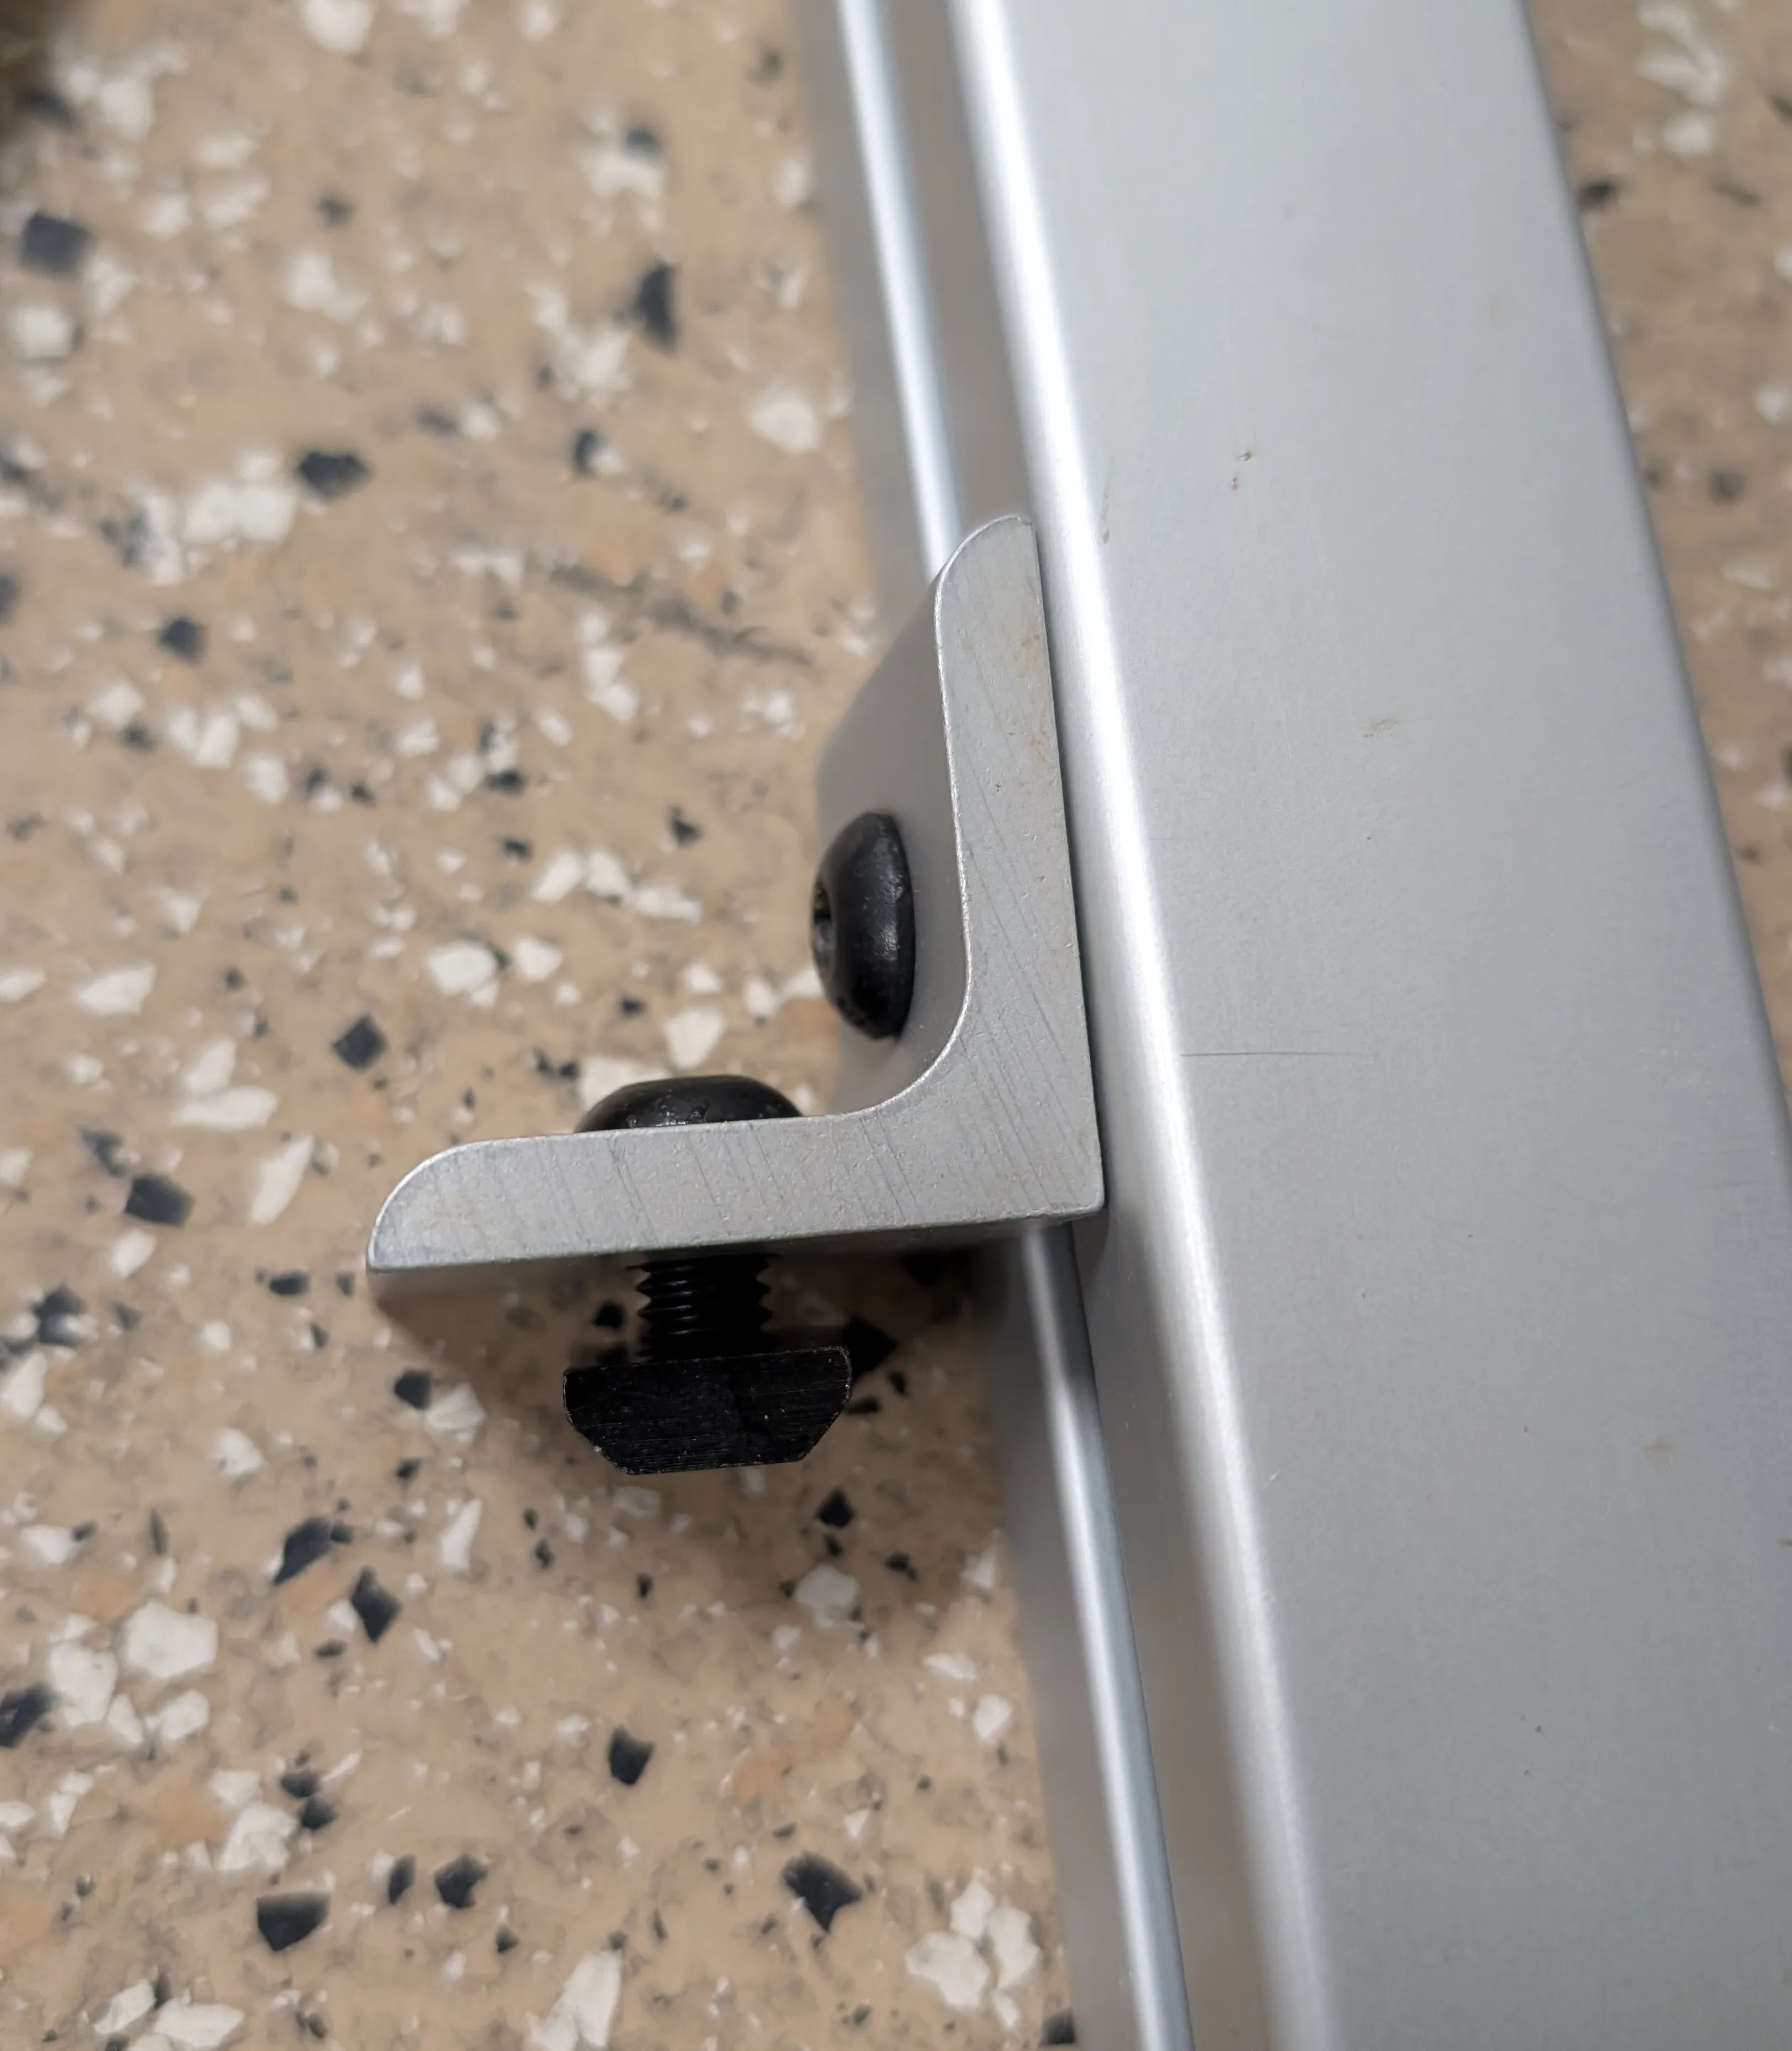
The extruded aluminum is quite easy to work with, especially with the proper tools to cut the pieces and fasten the screws. I mostly used corner brackets with screws and slide in T-nuts. I’ve found it easier to connect the pieces together first and then slide them in to the slot.
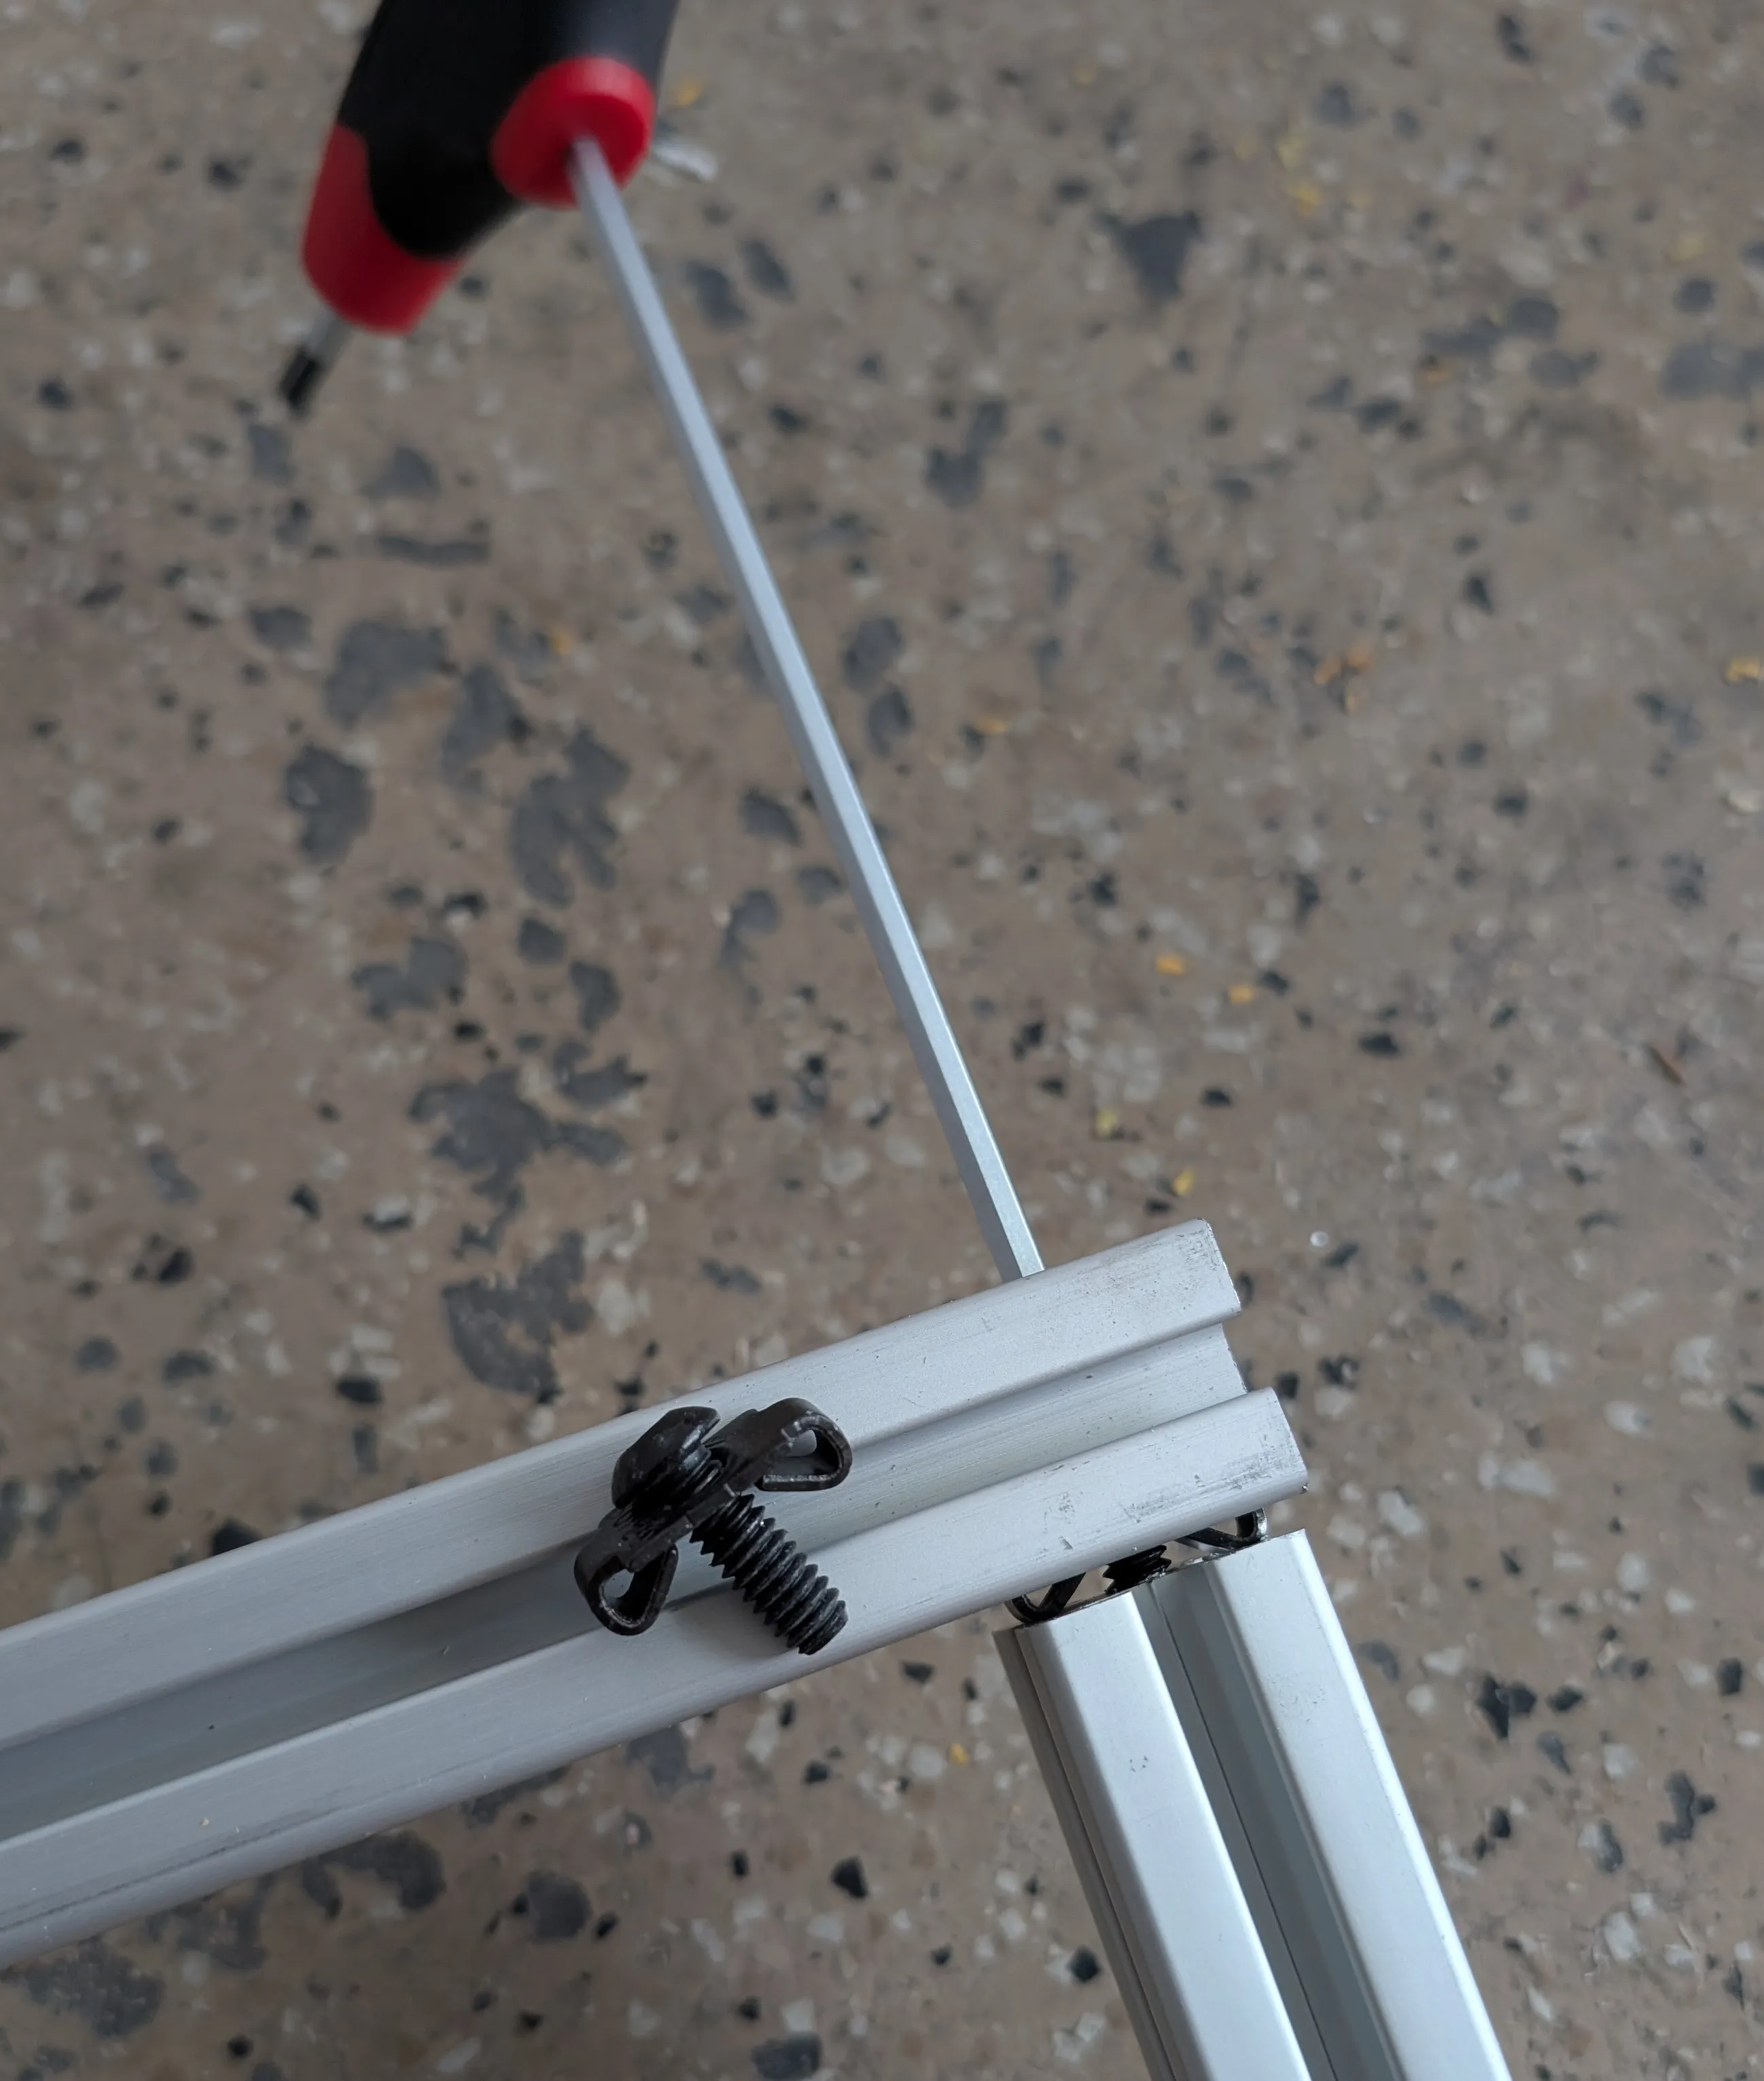
These end fasteners are the bane of my existence. They require a drill press to drill a hole through one piece and the screw goes into the center of the other piece. You then use the hole that you drilled to tighten the screw, like so. It’s nice when you don’t want the brackets showing but can be difficult to get lined up or remove. It also requires a permanent hole so best to use in a location that will be covered up.
April 14, 2025
Lately I’ve been trying to figure out the framing, how to work with extruded aluminum, and taking measurements for the overall layout. Adding the furring strips should allow me to also build the wall space cabinets and decide where to install the AC/DC panels. Then I can finish wiring all the energy consuming components. Hopefully I’ll be done just in time to power on the fan for the summer. Also, the alternator charging does work, I just had the settings wrong.
April 12, 2025
Kep has power! All the parts (mostly) have been tested and the batteries are able to charge via the sun. It took two hours to charge 10% with full afternoon sun. It doesn’t seem like the alternator will charge the batteries when idle so I’ll need to take Kep for a ride some other day.
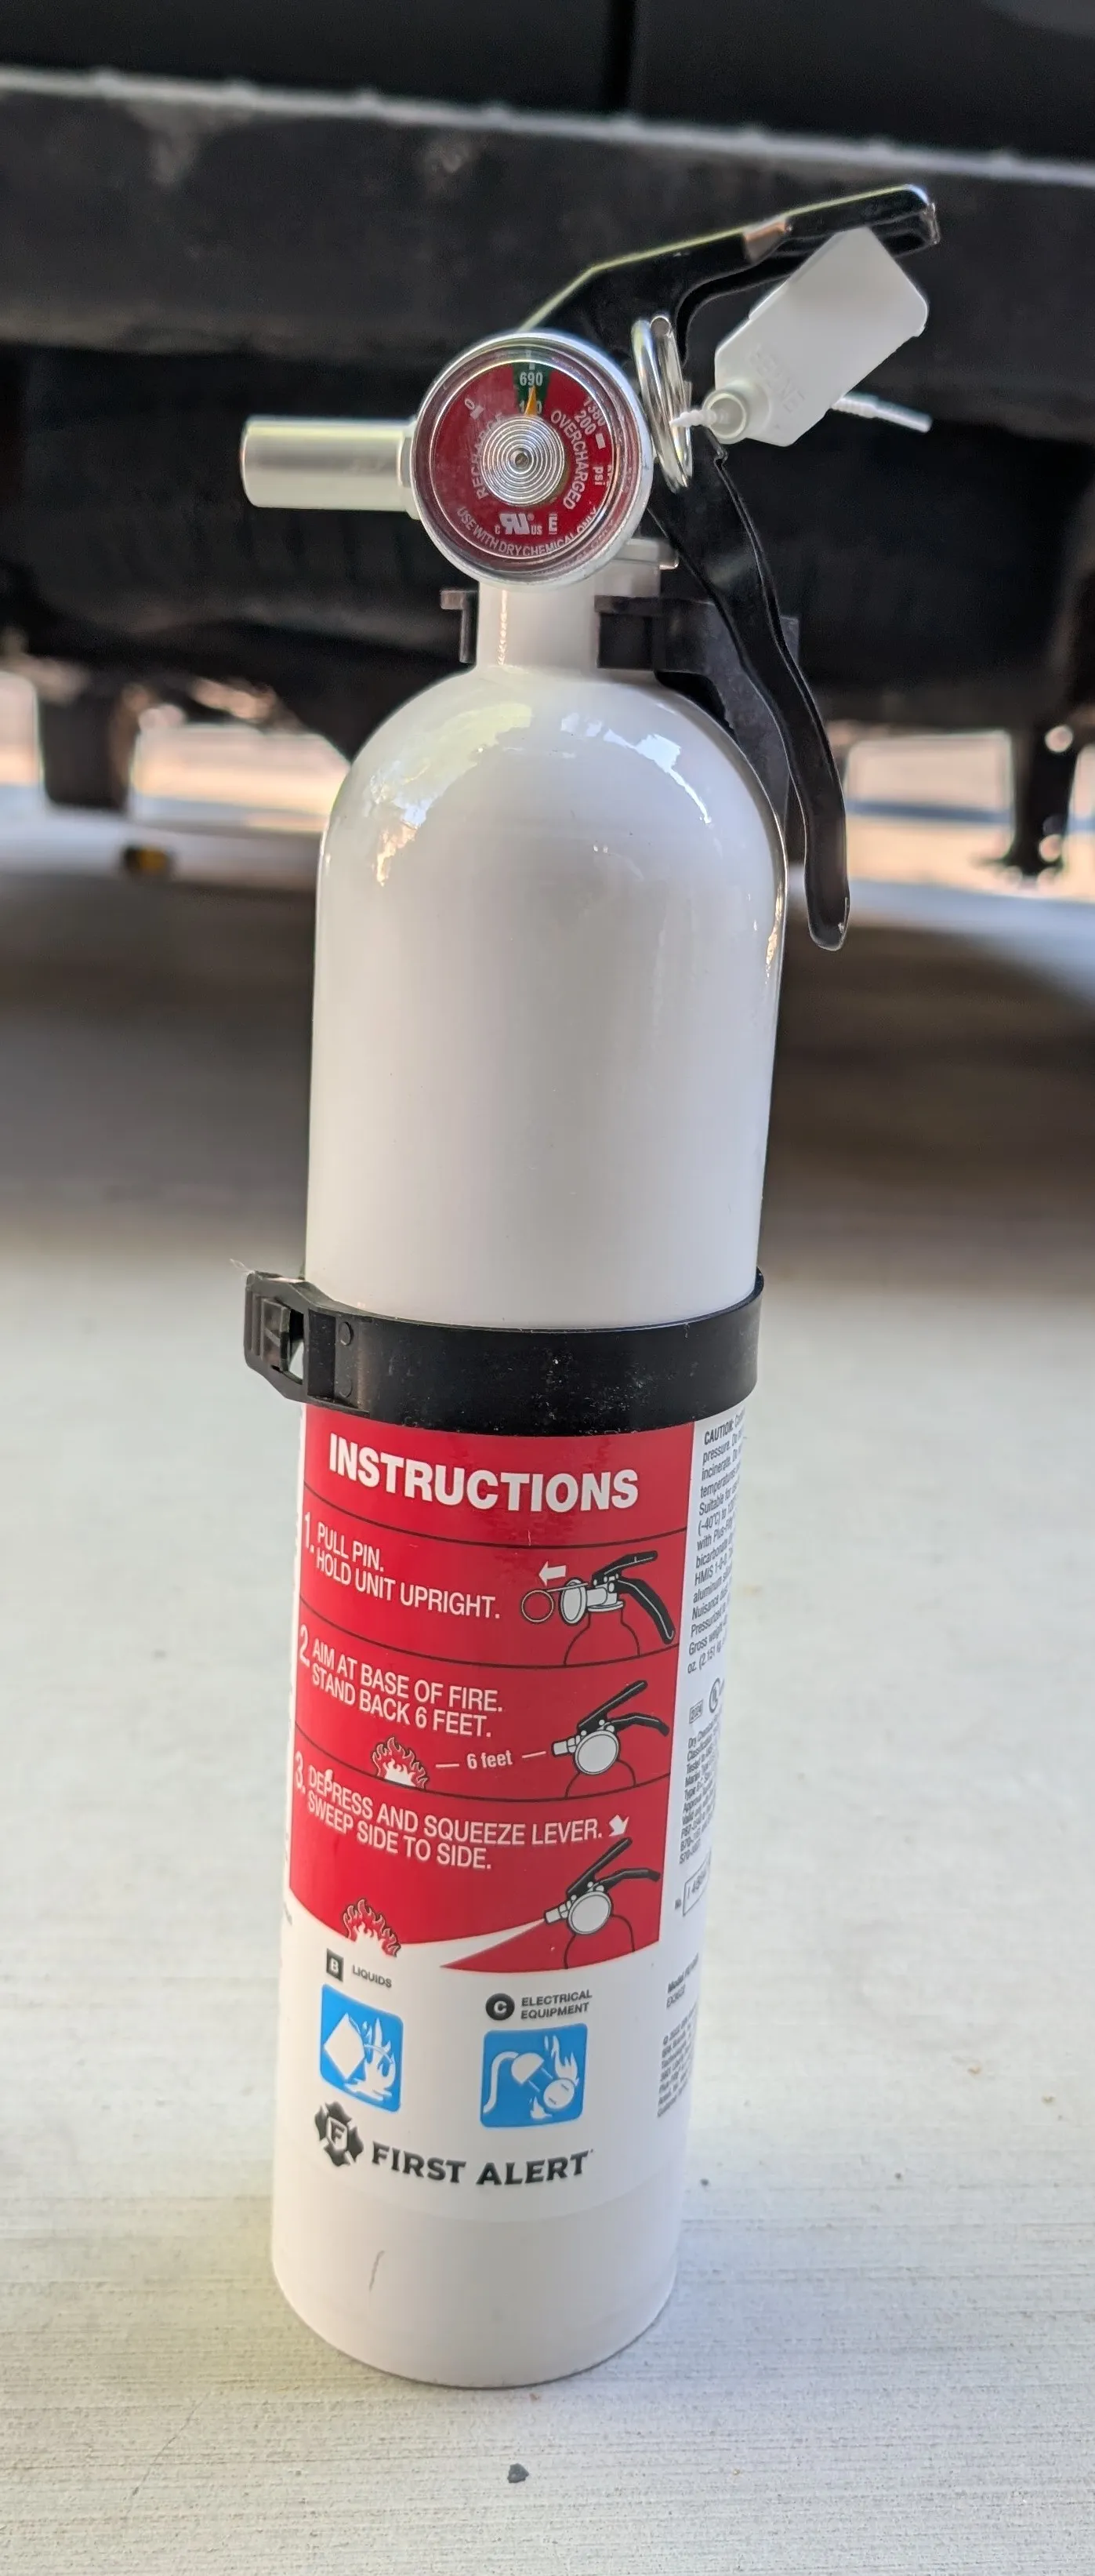
April 11, 2025
Kep is fully wired. Fire extinguisher has been acquired. A potential fire may occur tomorrow. This will eventually be property of Kep. Everything has been torqued to the recommended torque setting and I used a combination of 3/8 inch and 5/16 inch lugs. The 3/8 was mostly for the bus bars. I tried to use ferrules on all screw terminals but some did not fit (like in the solar charge controller) so I had to omit them for those connections.
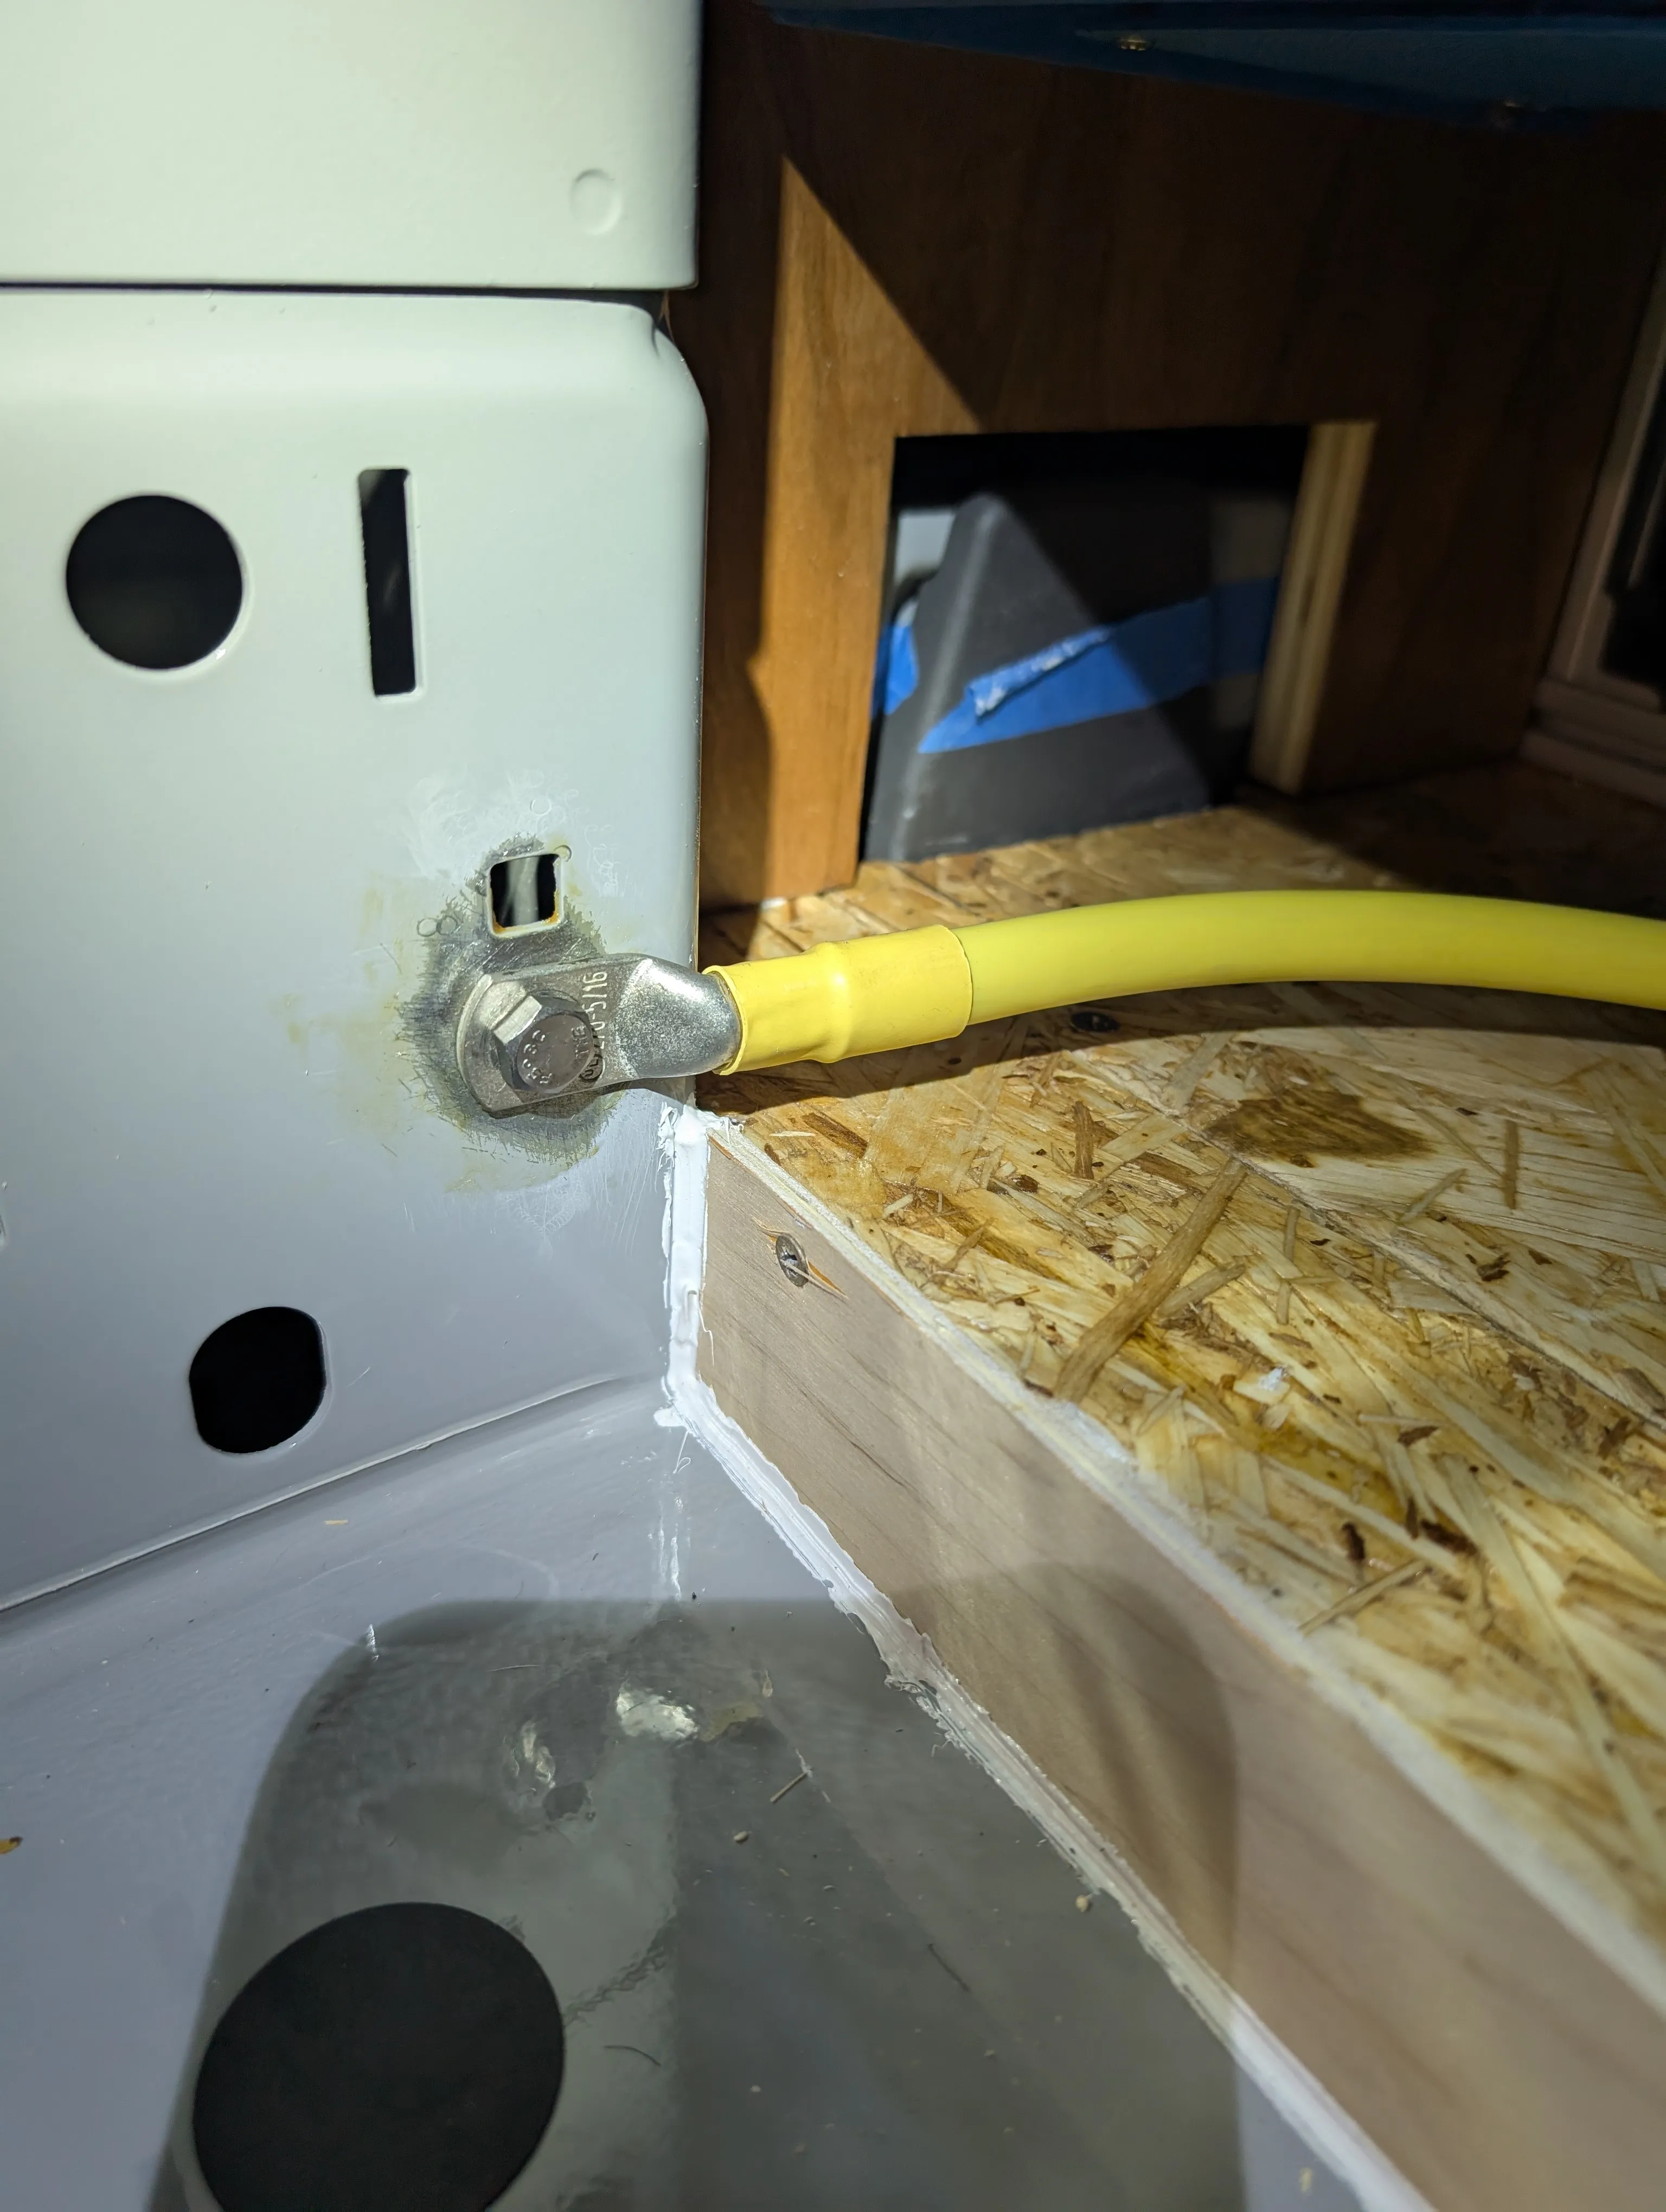

You may notice the end result looks very different from the plan and that is because I did not anticipate how difficult it is to bend wires. I had to make some adjustments but it all worked out. I also found a (hopefully) good spot to ground the whole system. Honestly, this was the hardest part.
April 8, 2025
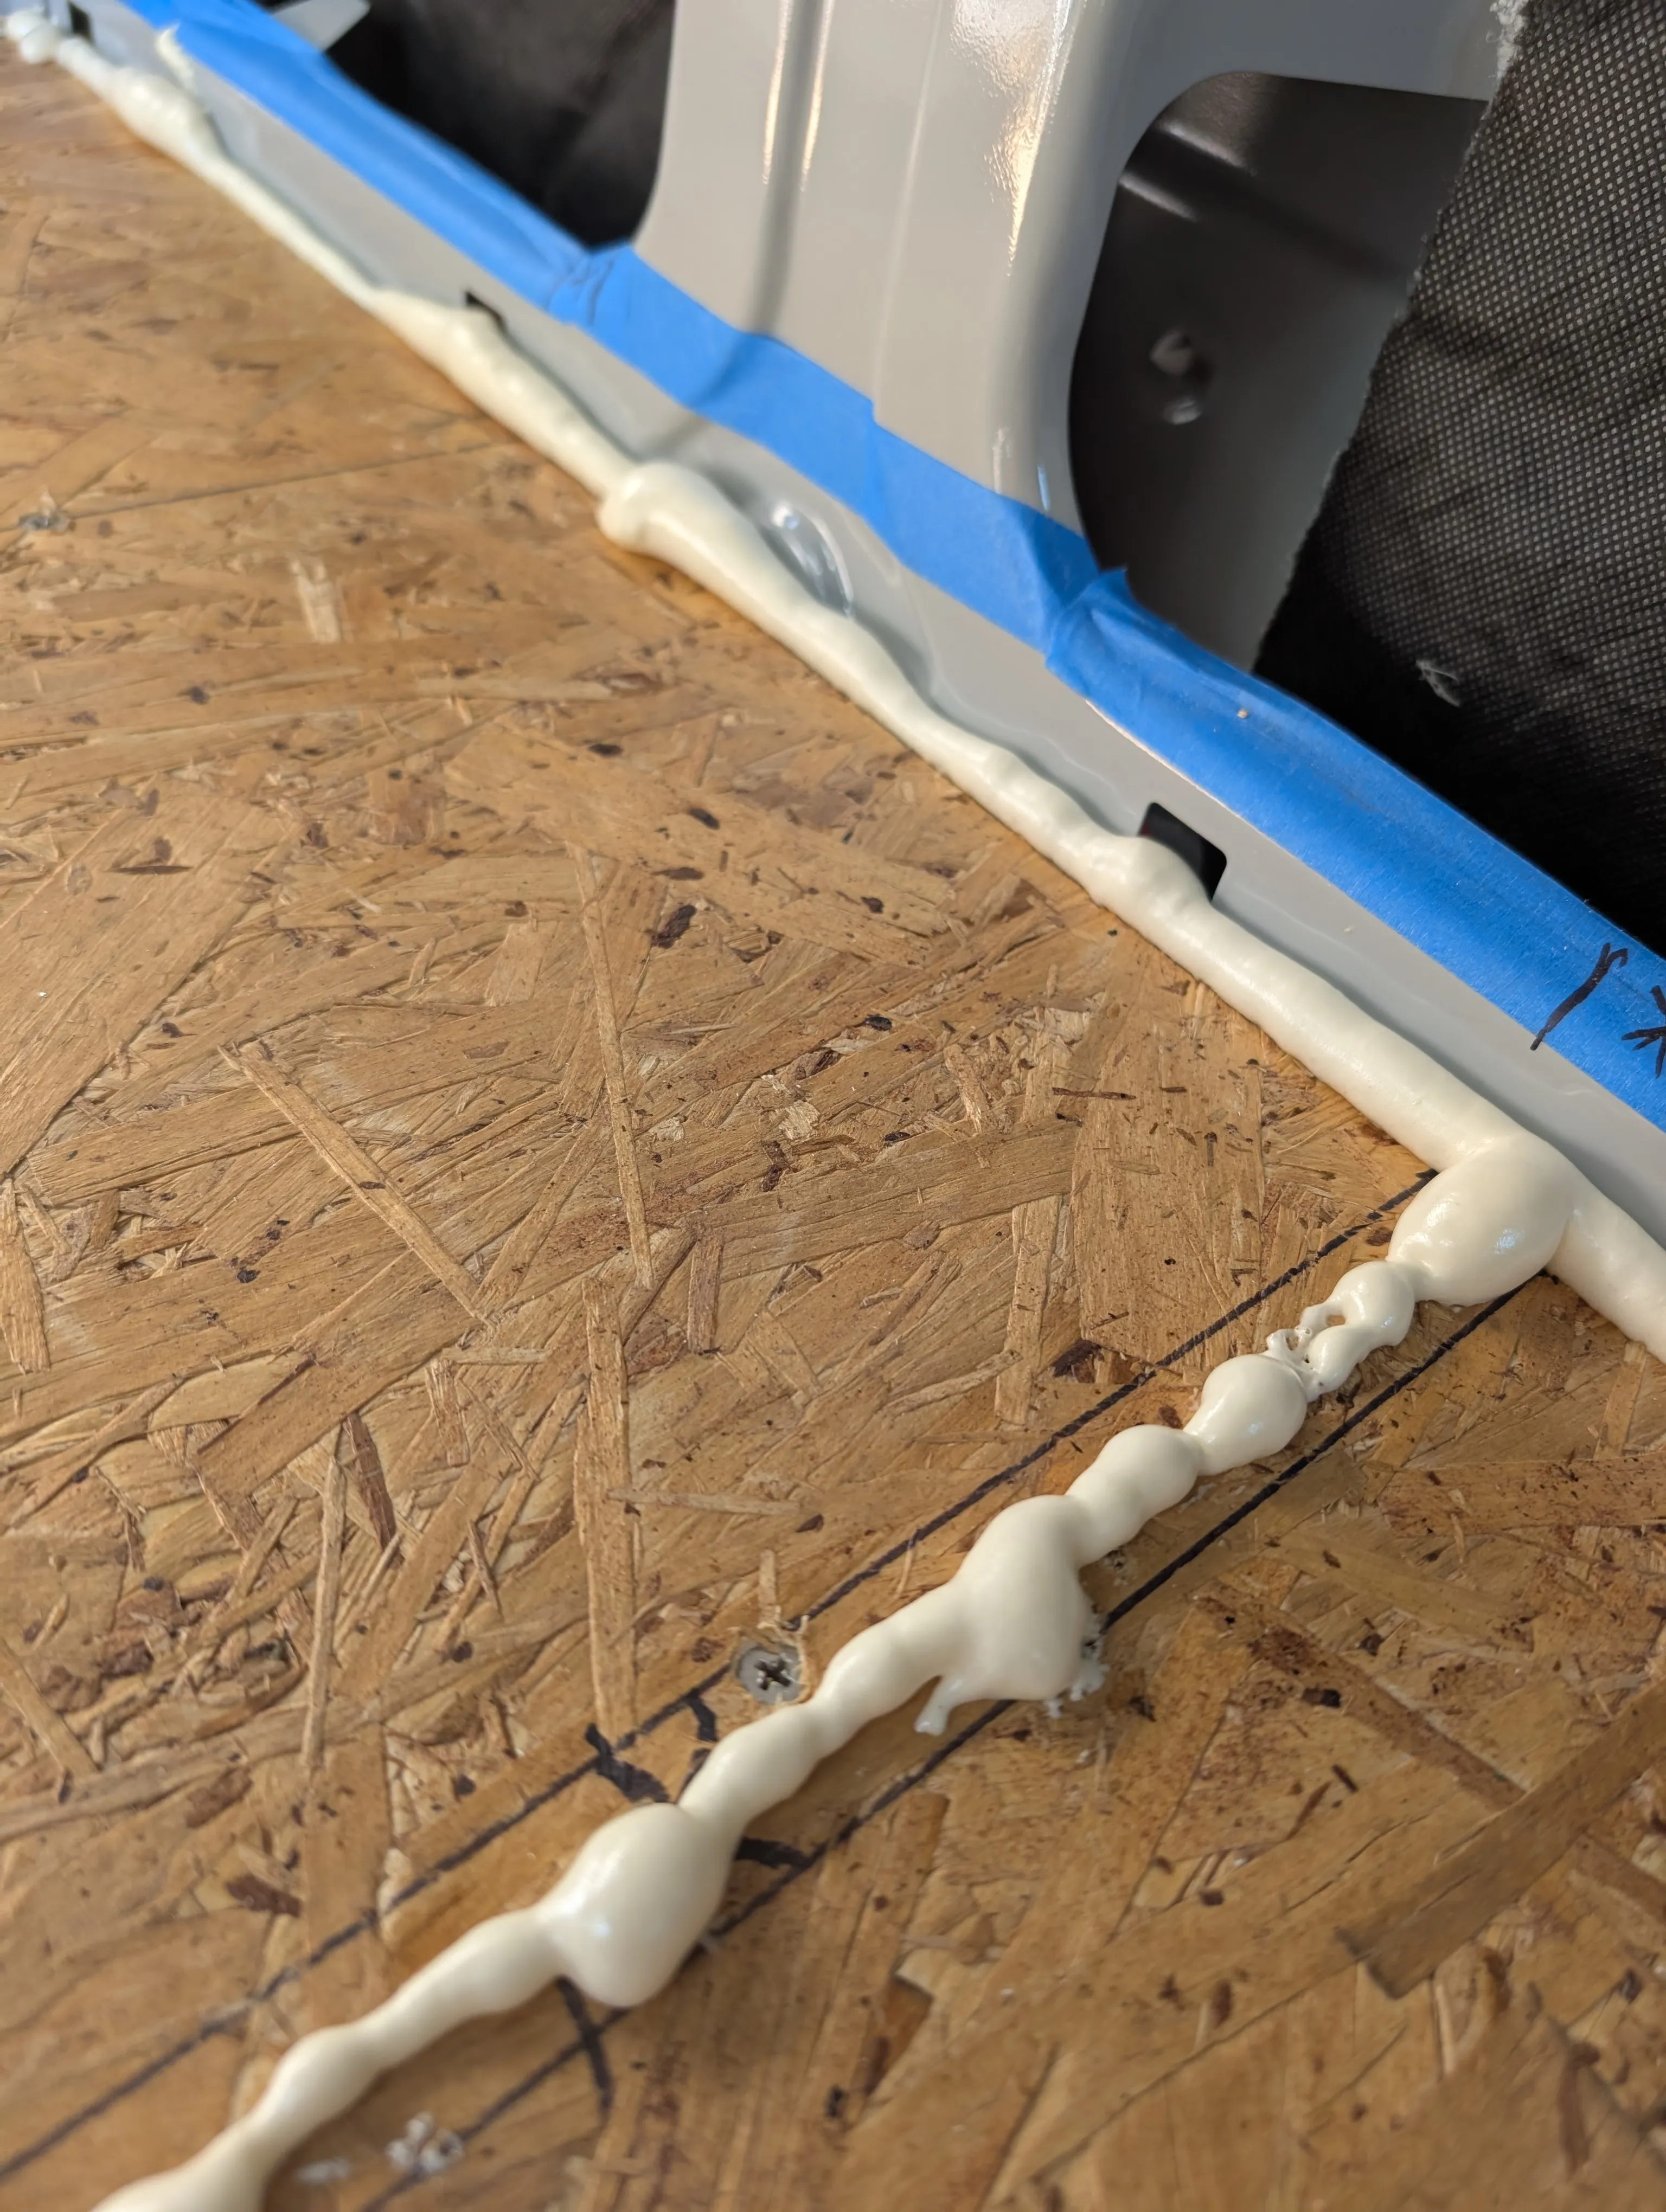
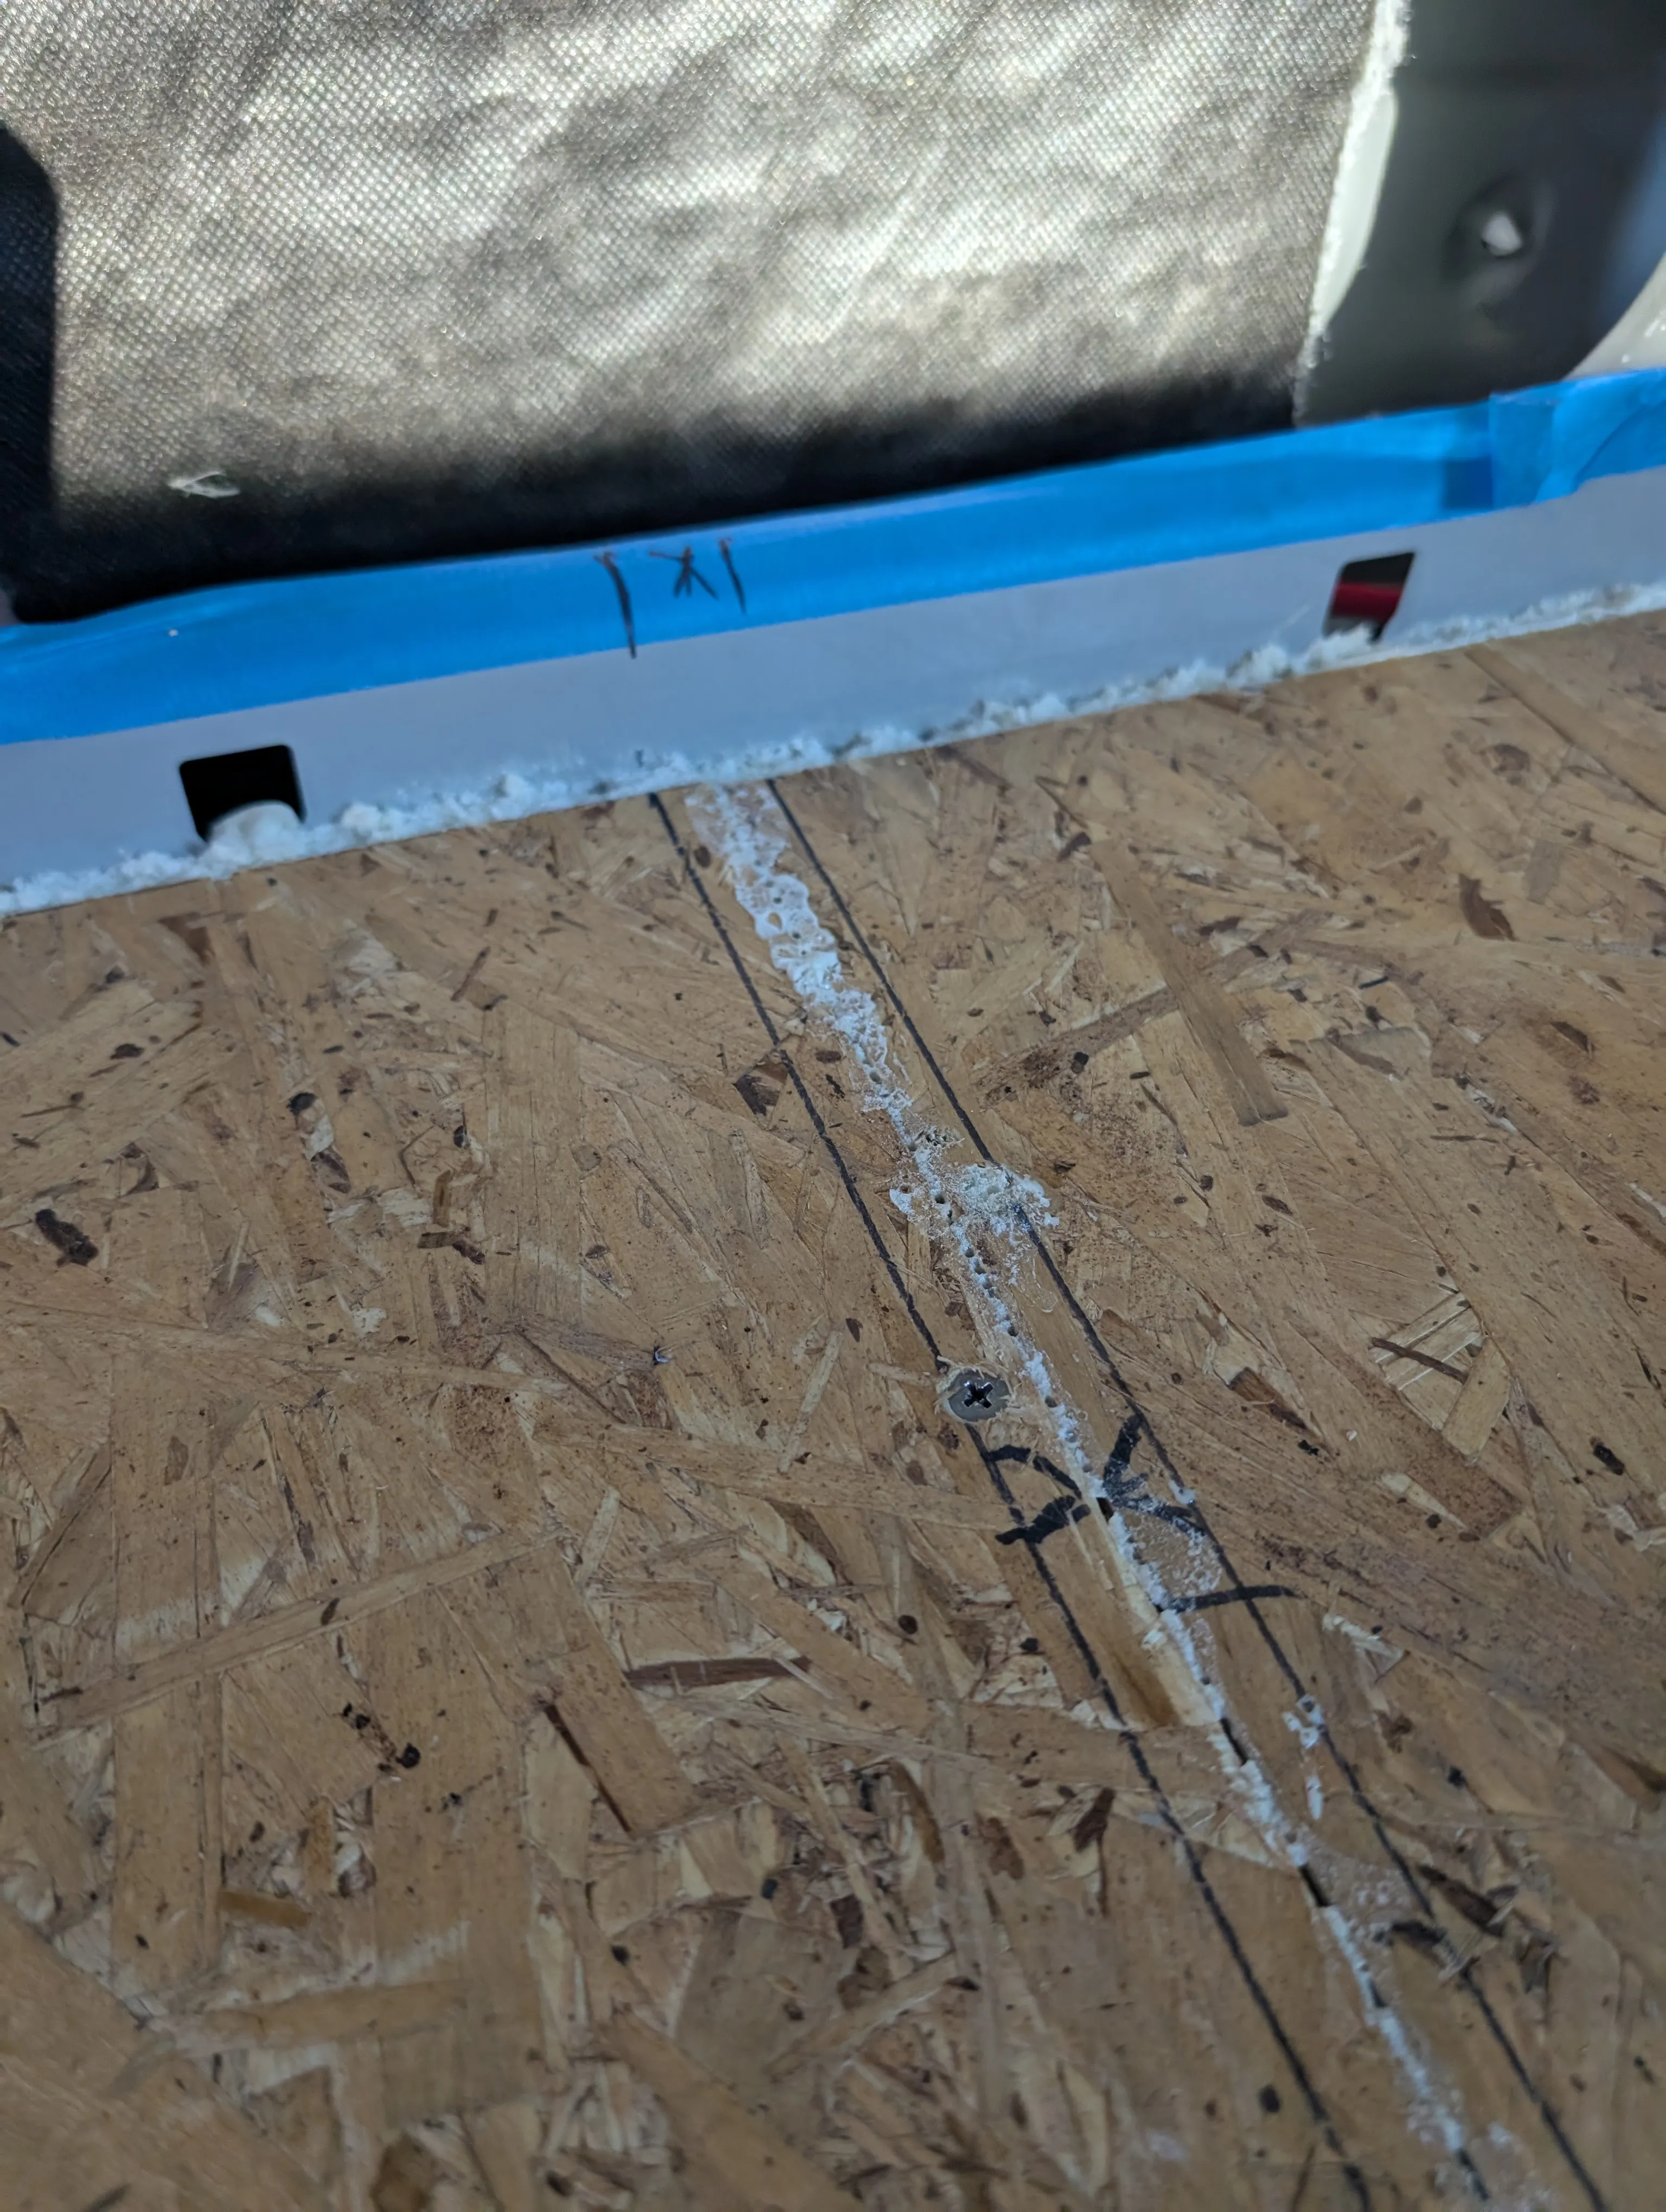
I decided to try out this foam filler to cover up the gaps between the subfloors and the walls. It puffs up and you trim it afterwards and it looks like it helps.
April 6, 2025
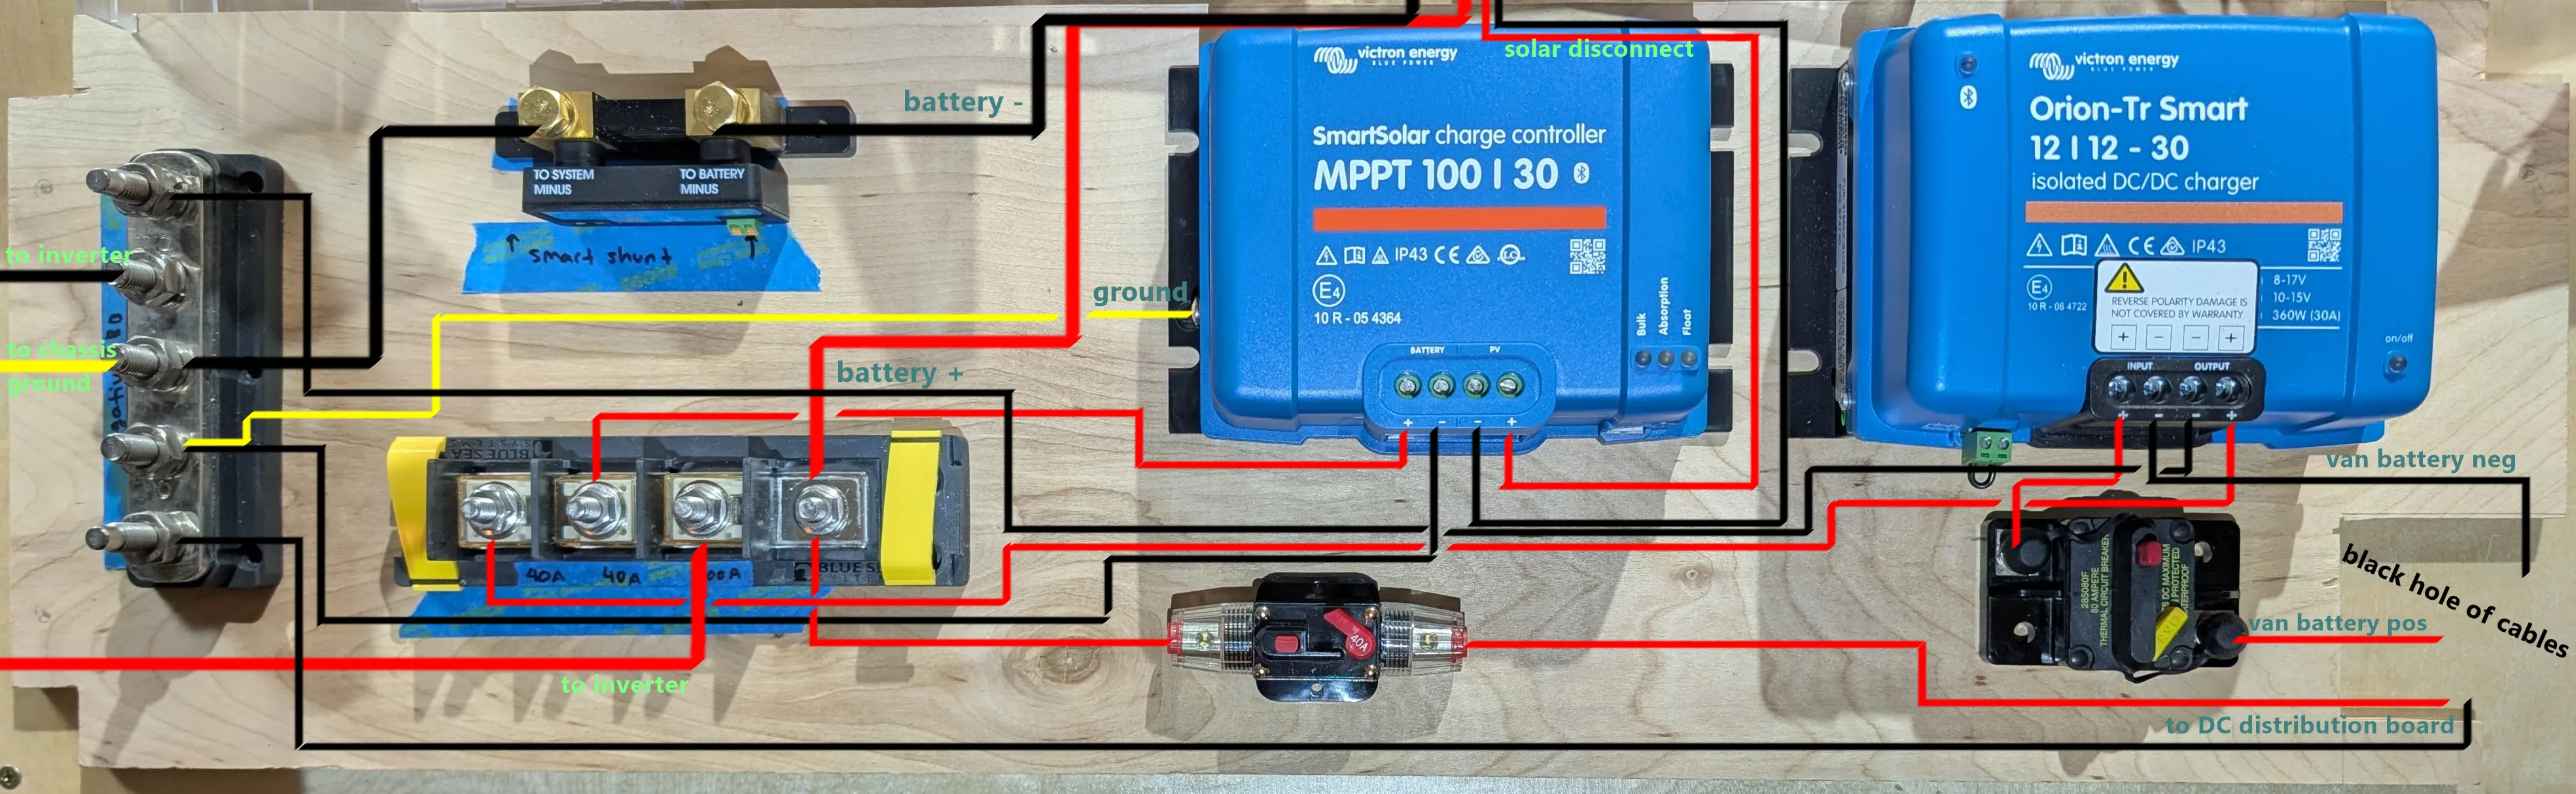
Here’s an idea for the planned out wiring. I also decided to cut a [black] hole (bottom right) for feeding the wires to the designated locations. This way everything will be hidden on the garage side.

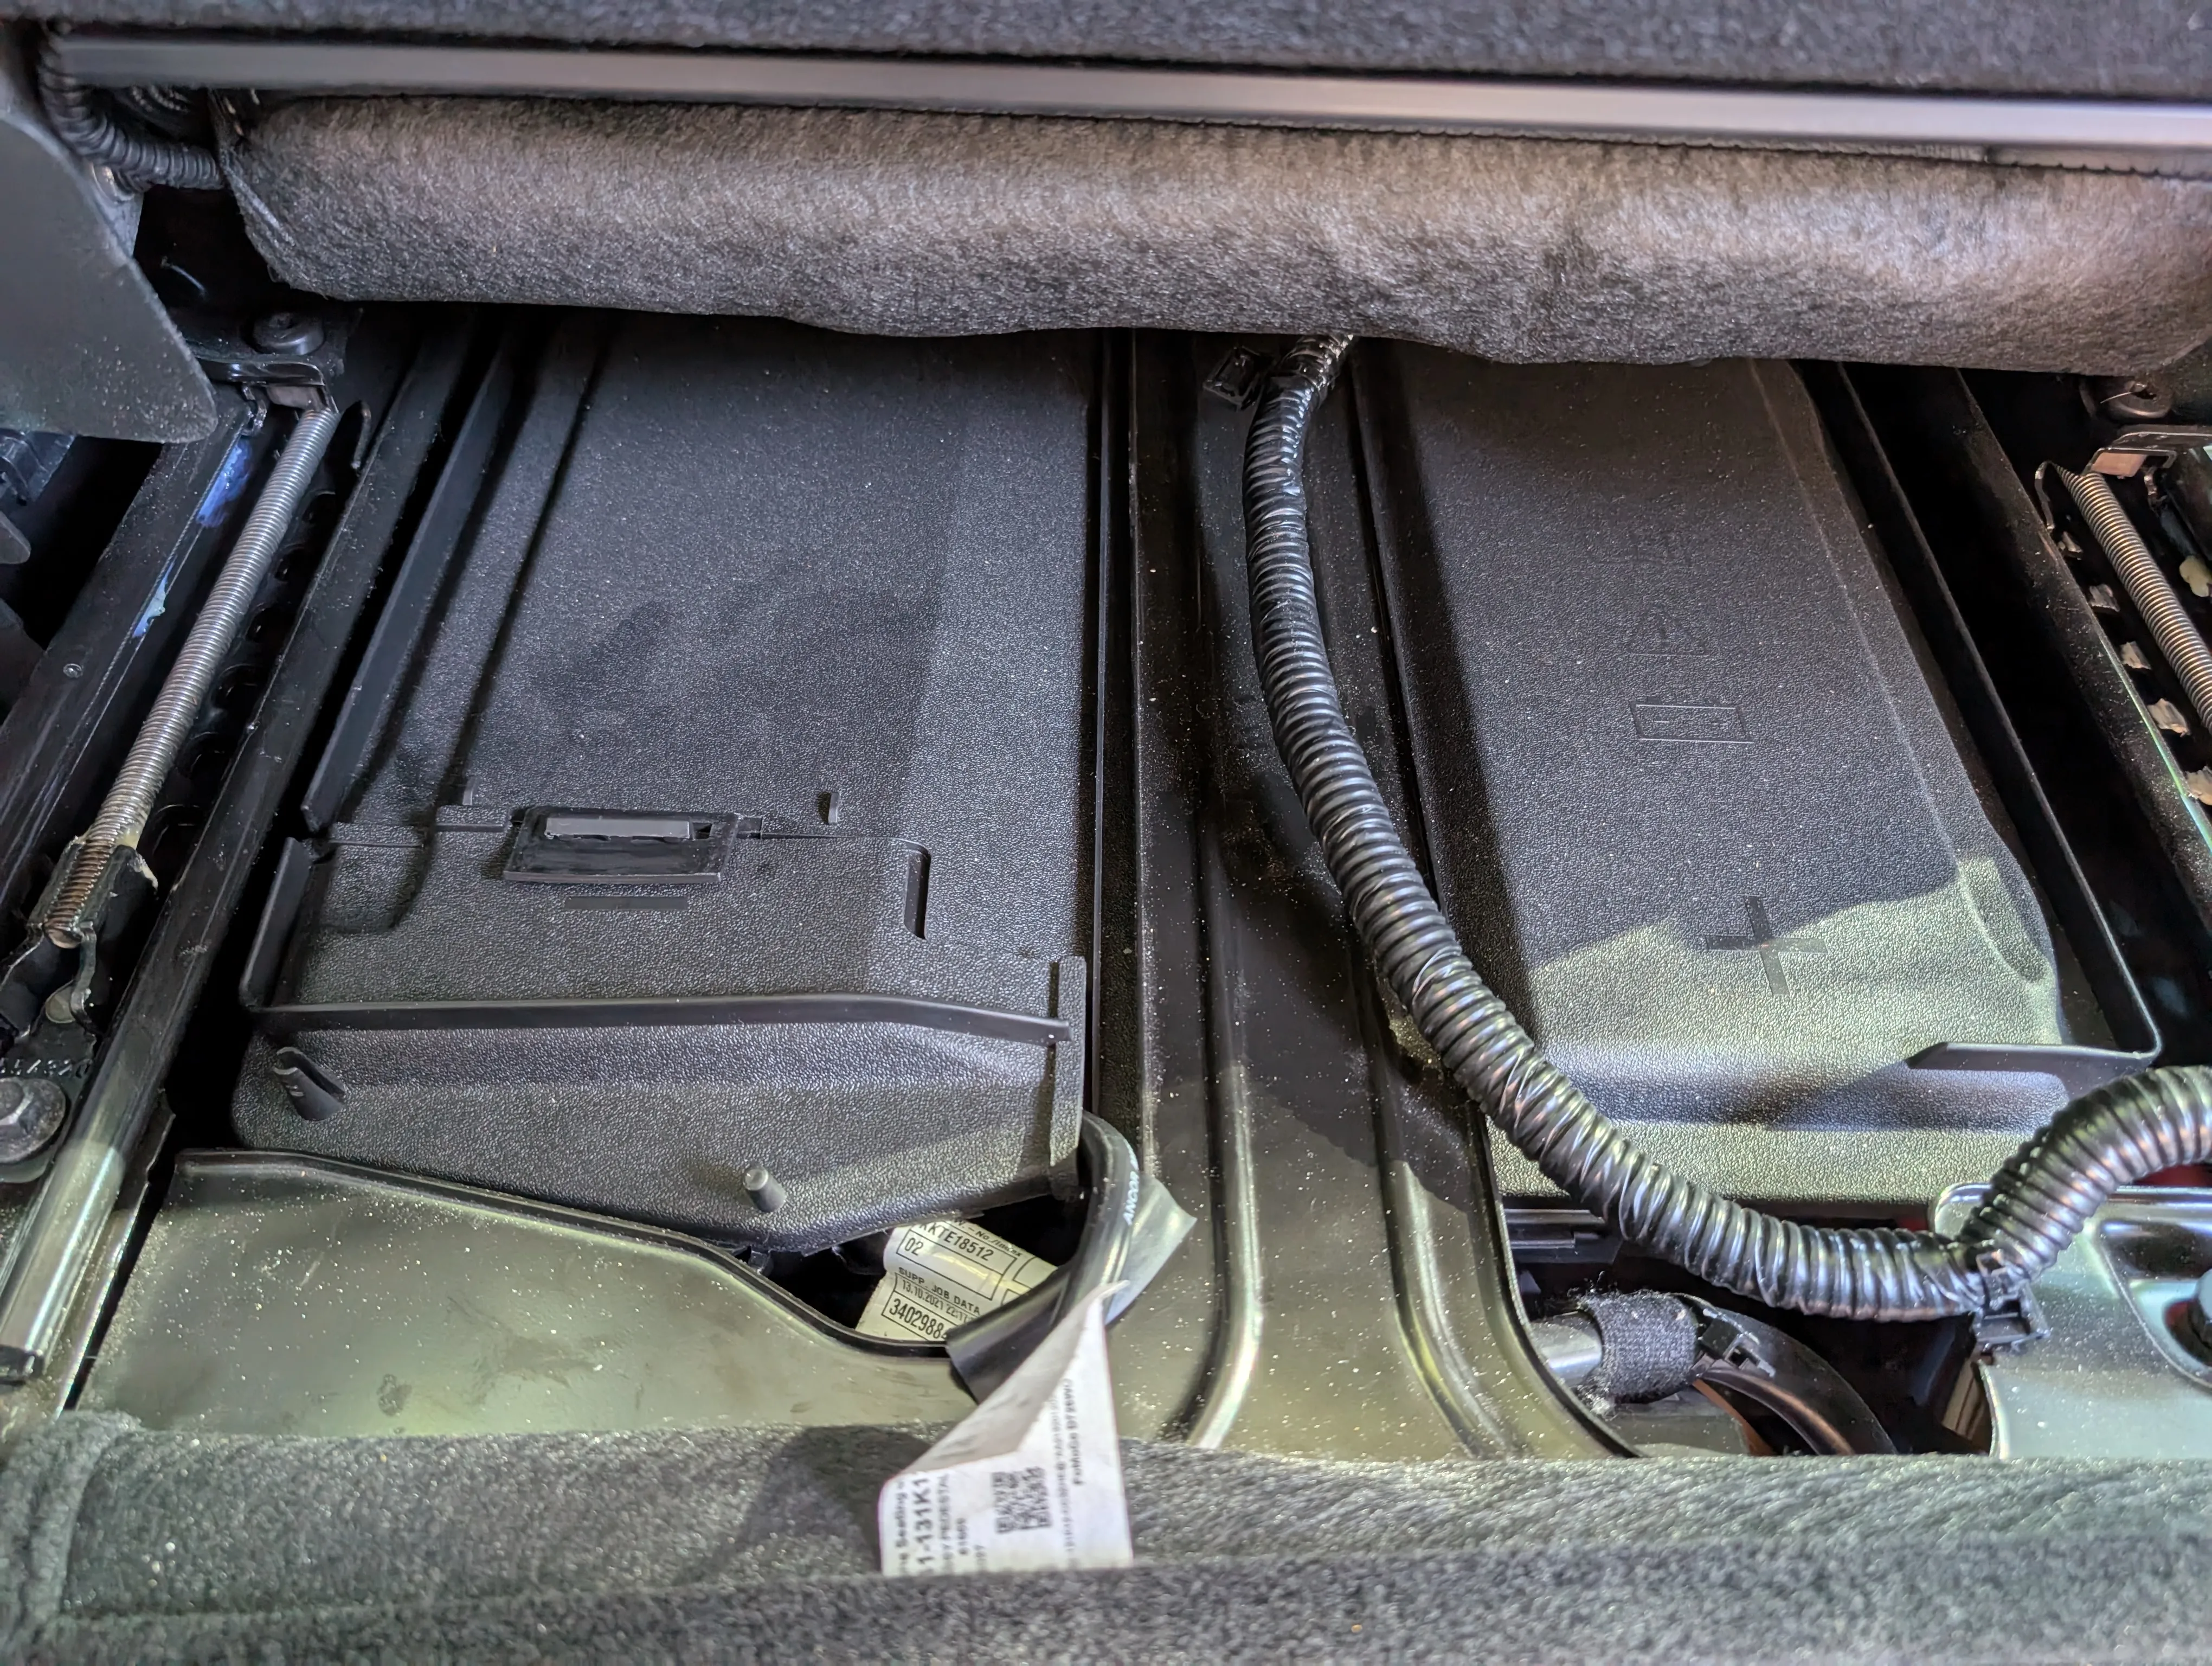
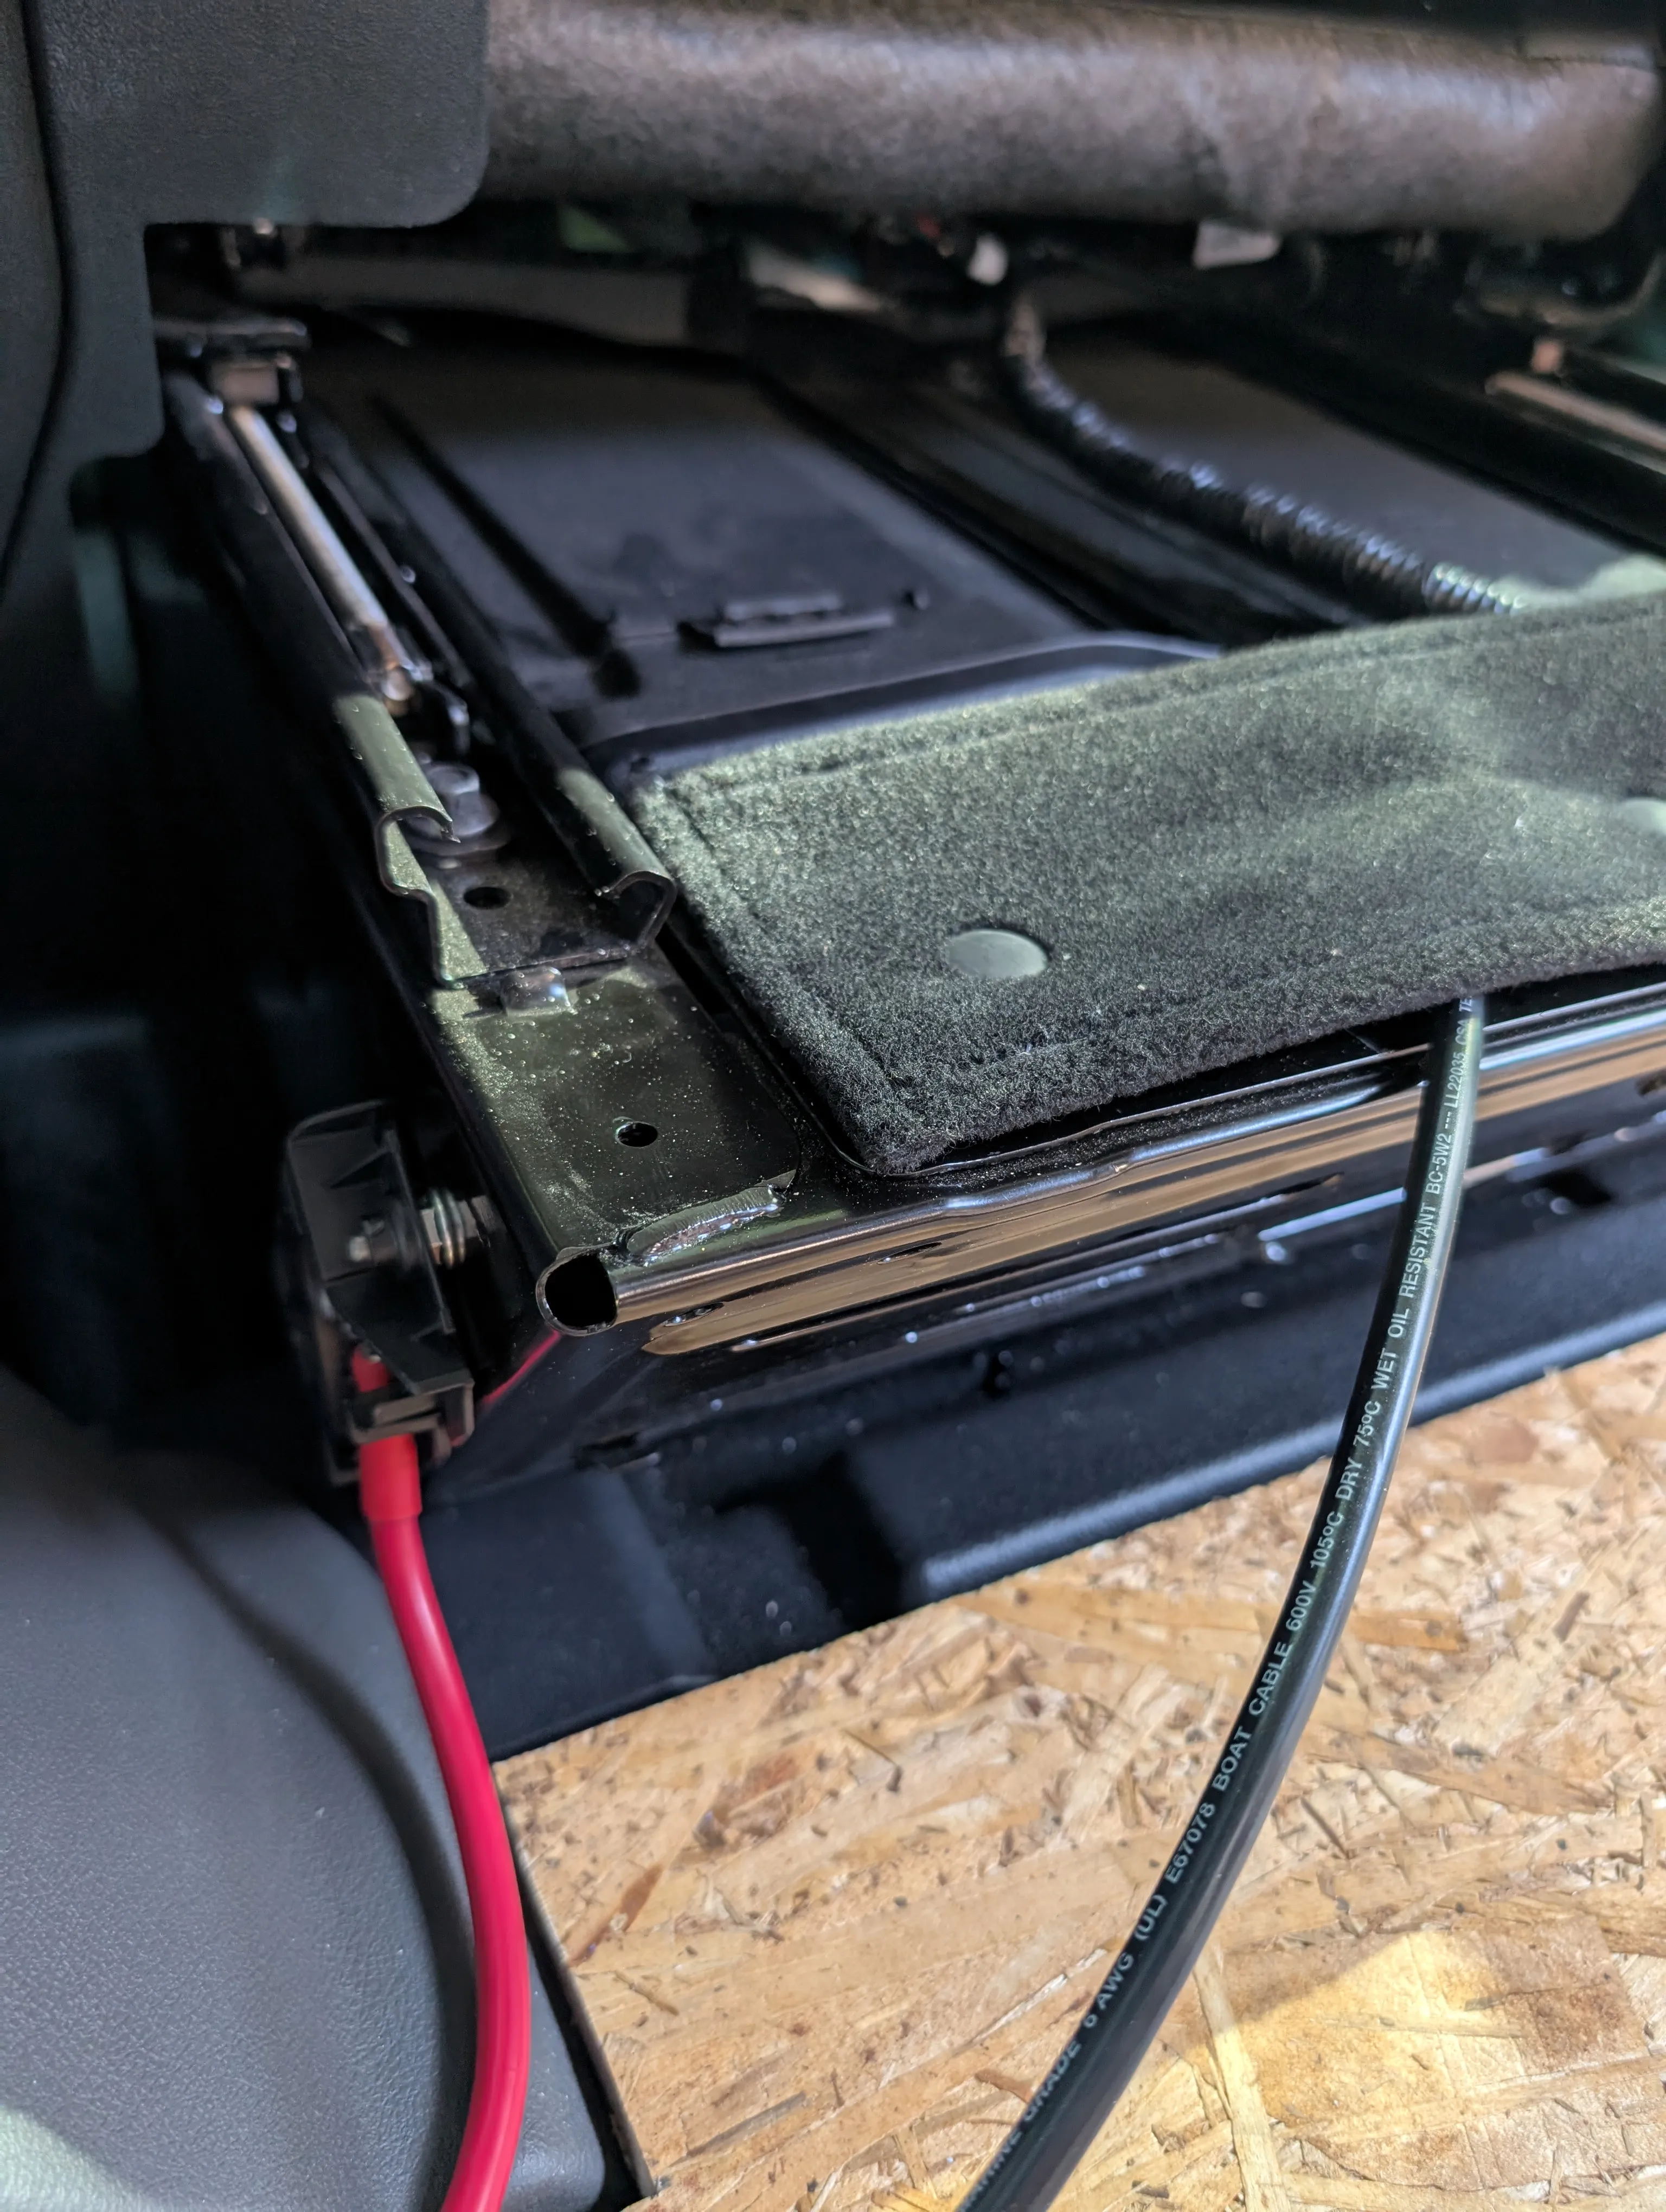
So Kep’s got a dual alternator, which comes with a second consumer connection point (CCP). These wires have been connected to the van’s 175A CCP and the negative terminal of the battery that is under the driver’s seat. The most time consuming part was figuring out how to put back the plastic trims…
April 2, 2025
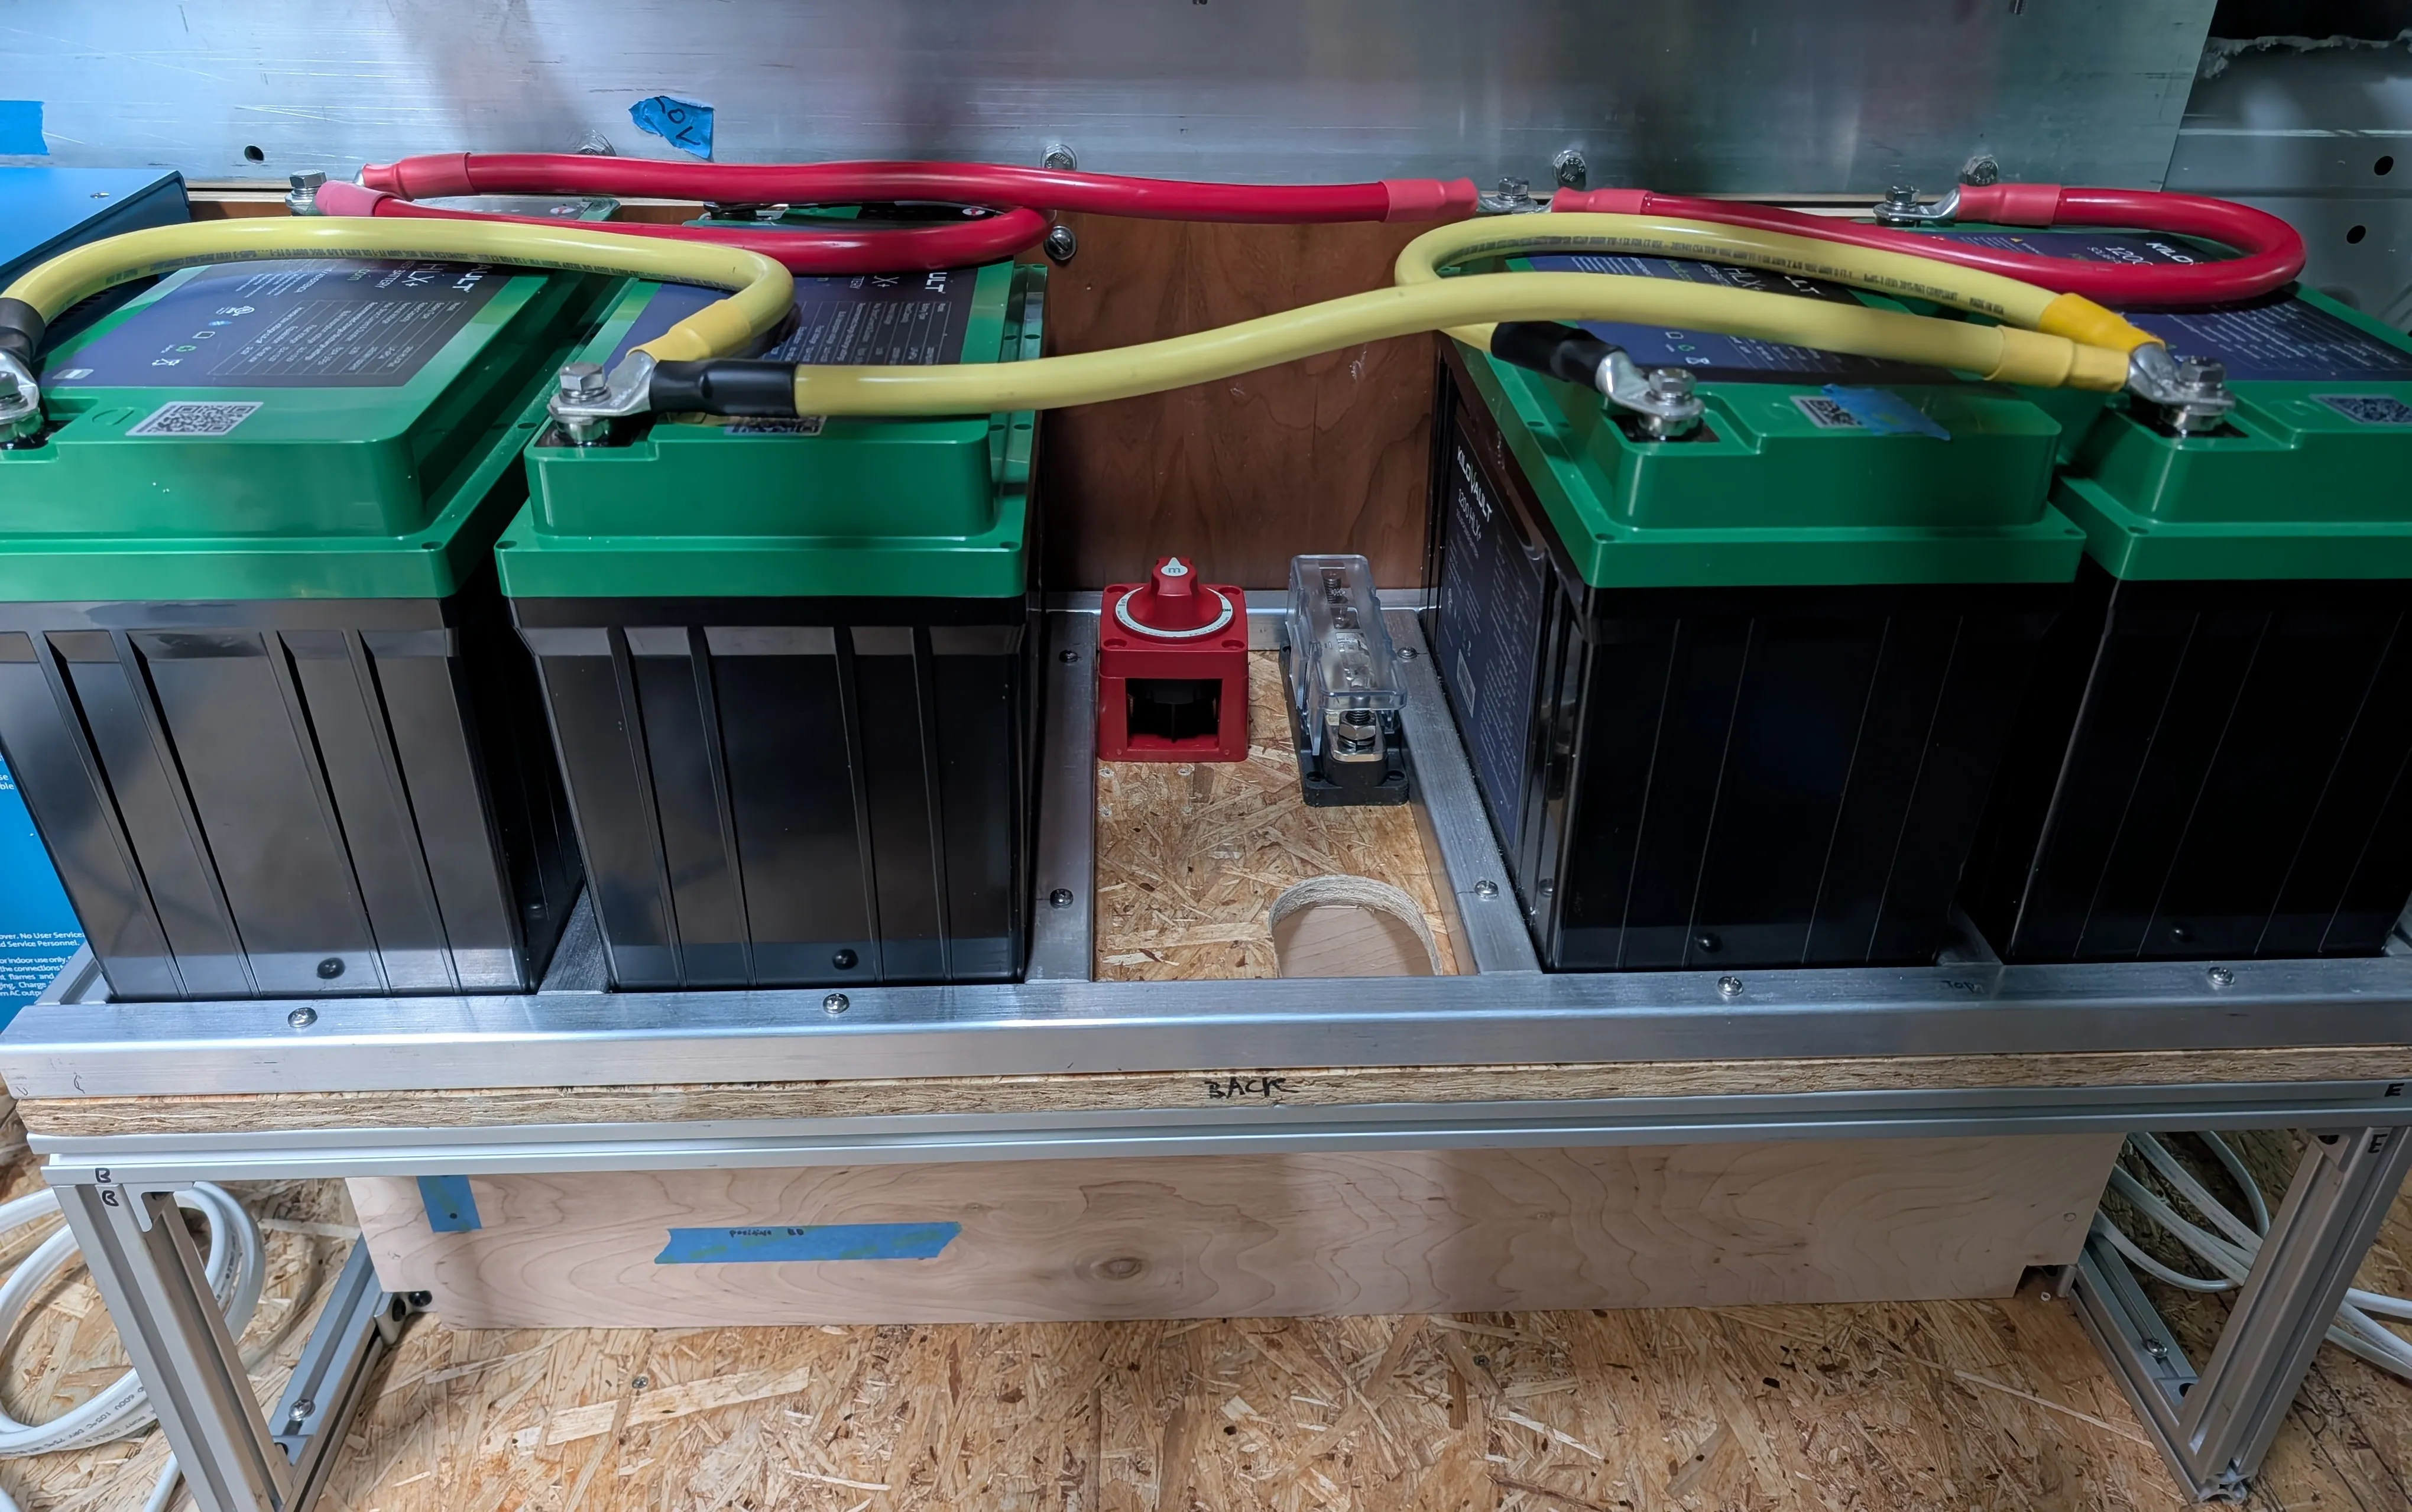
Newly wired batteries! Originally all the positives and negatives were wired to their own terminal on the bus bar but I think this saves space and weight. To wire them in parallel, you can connect all of the positive terminals and all of the negative terminals to each other. I cut the existing 2/0 AWG cables to the same length and wired them in this pattern. This is apparently a method to balance the current draw through all of the batteries.
March 31, 2025
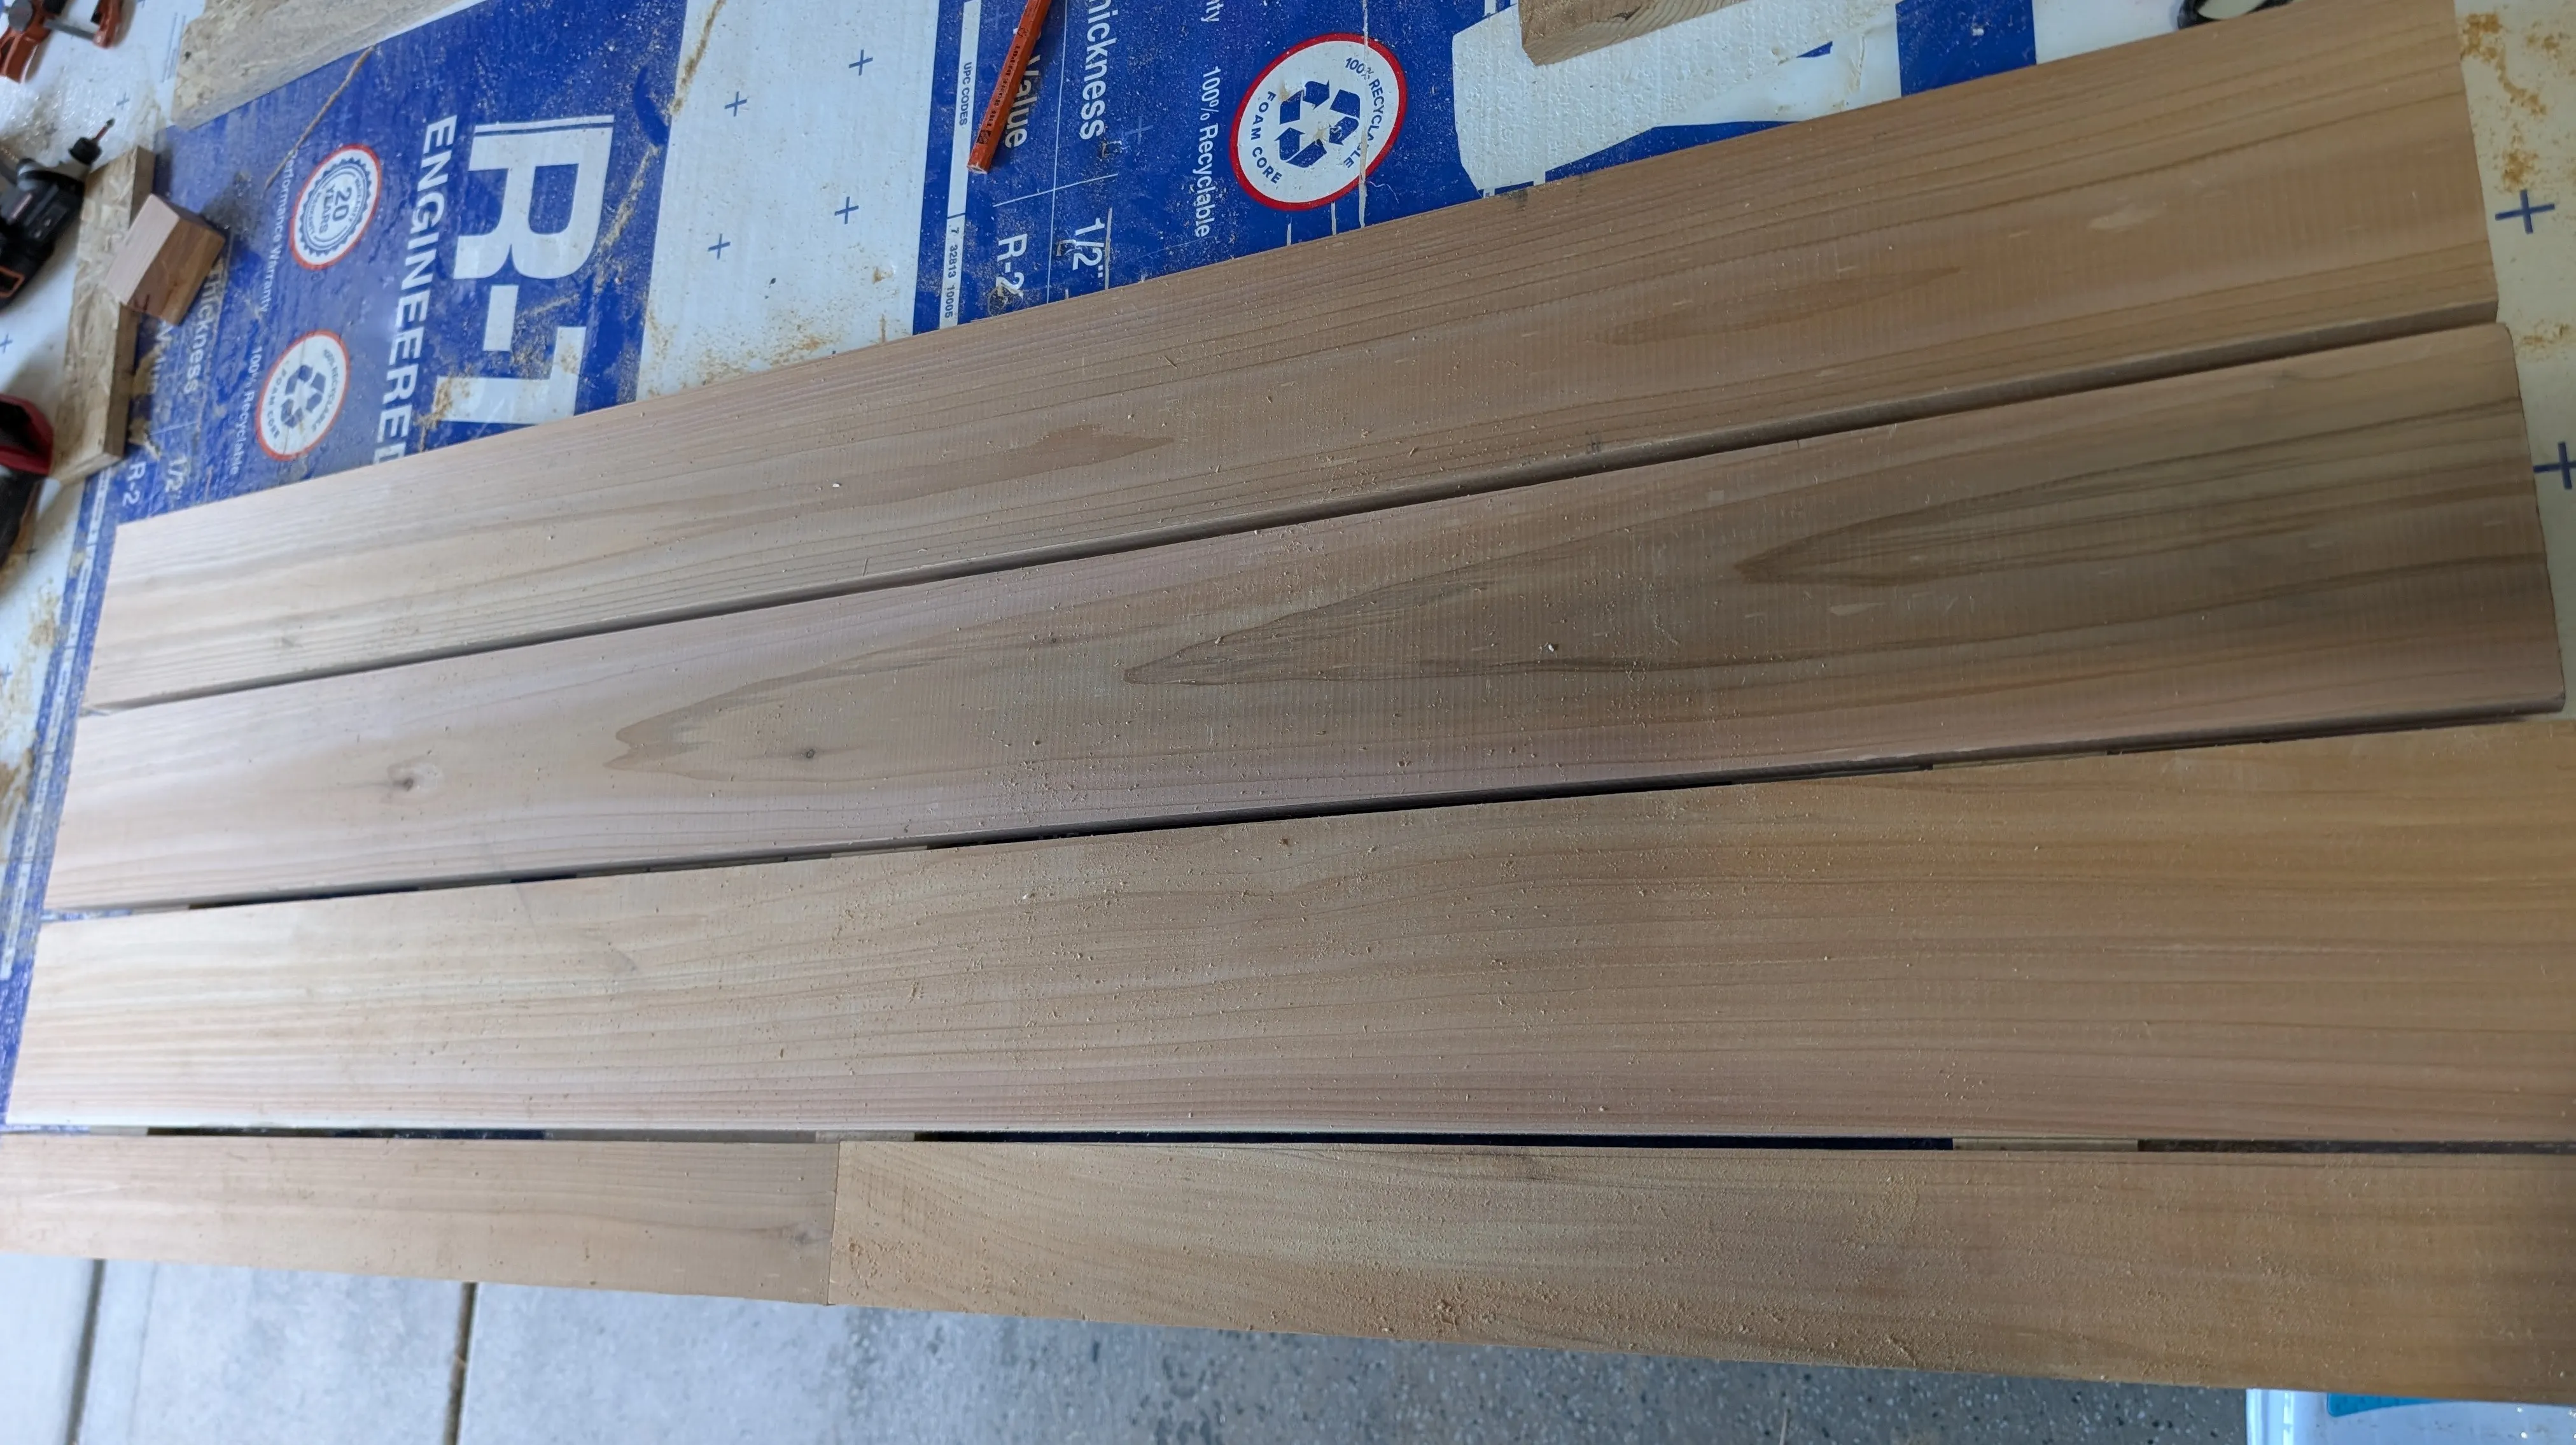
Waiting on some parts and doing some more pondering… Meanwhile, I’ve honed my straight line wood cutting skills with this deck that will go on top of Kep. I was able to make it larger than I expected, hence the half cut pieces on the side. I used cedar wood but it also seems to be a softer wood so maybe it won’t last very long, but that’s honstly okay.
March 30, 2025
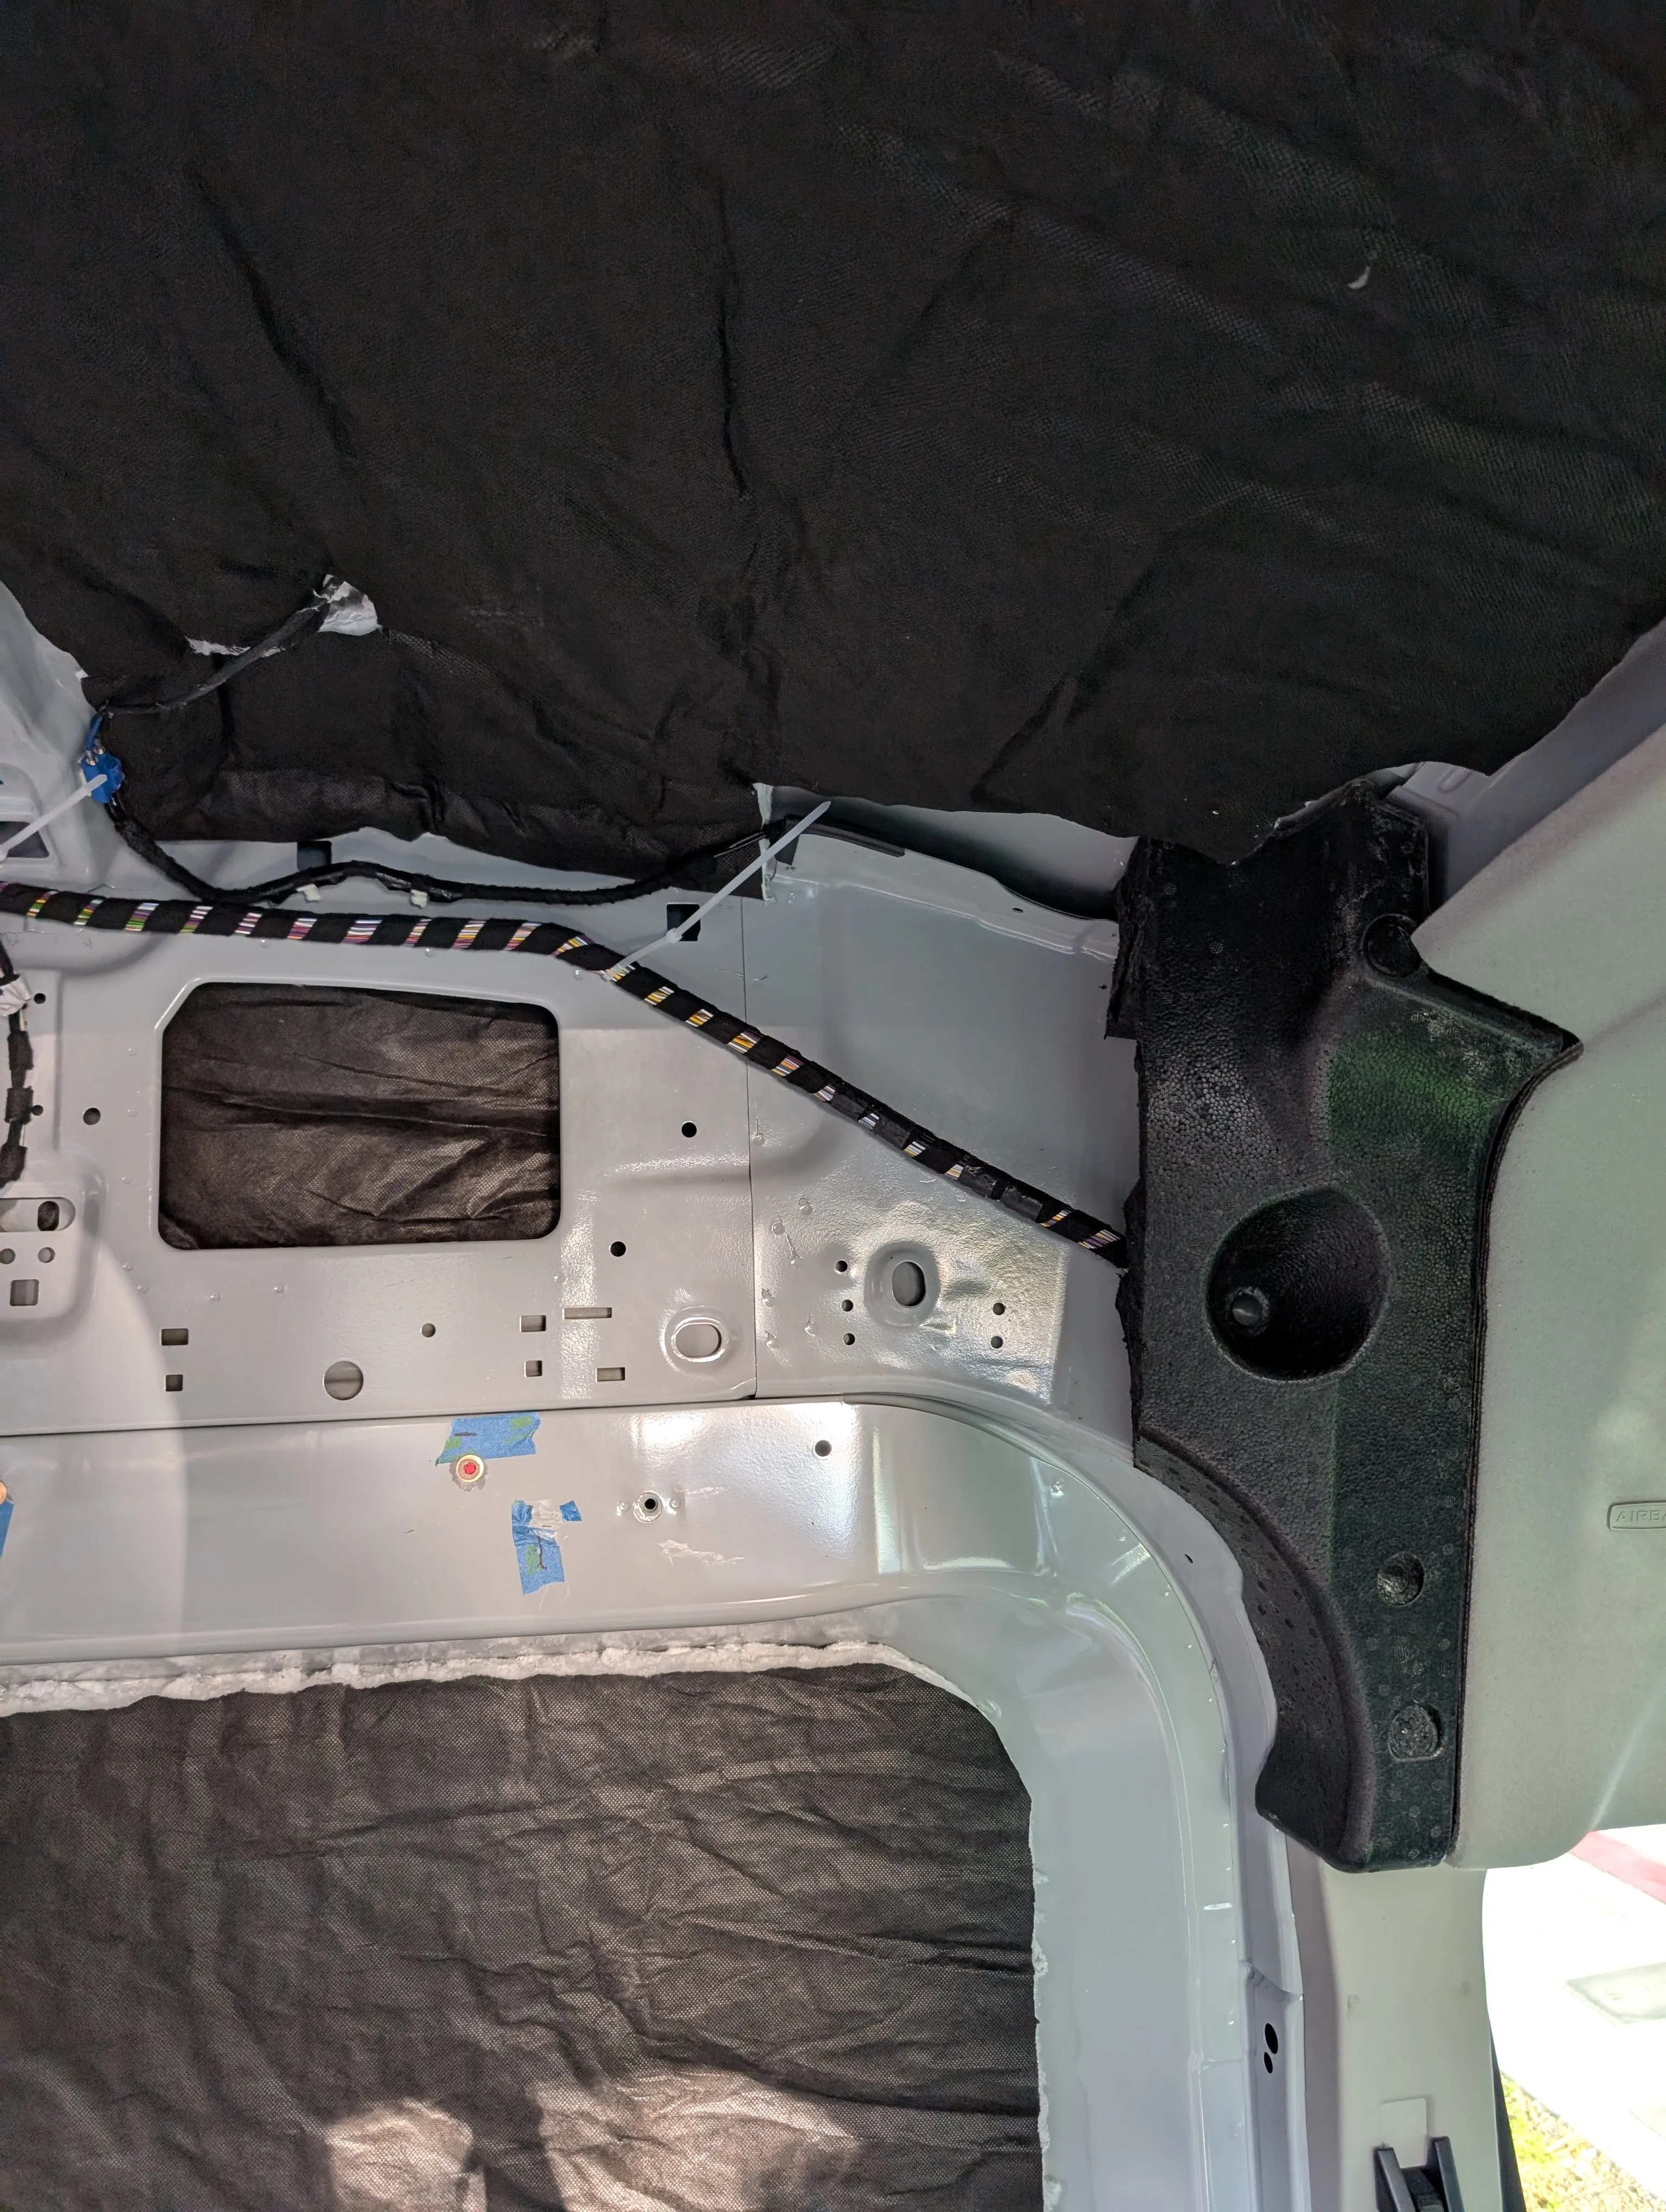
So there are these annoying foam trims that have wires coming from them and hide the side airbag. Some people remove these completely and some people just cover it with cloth. So again, here’s me doing something in between. I ended up cutting the block so I have room to build the shower without the useless foam taking up space.
I also ended up removing the wires from the batteries (because I wanted to wire them differently) and planned out some of the electrical.
March 28, 2025
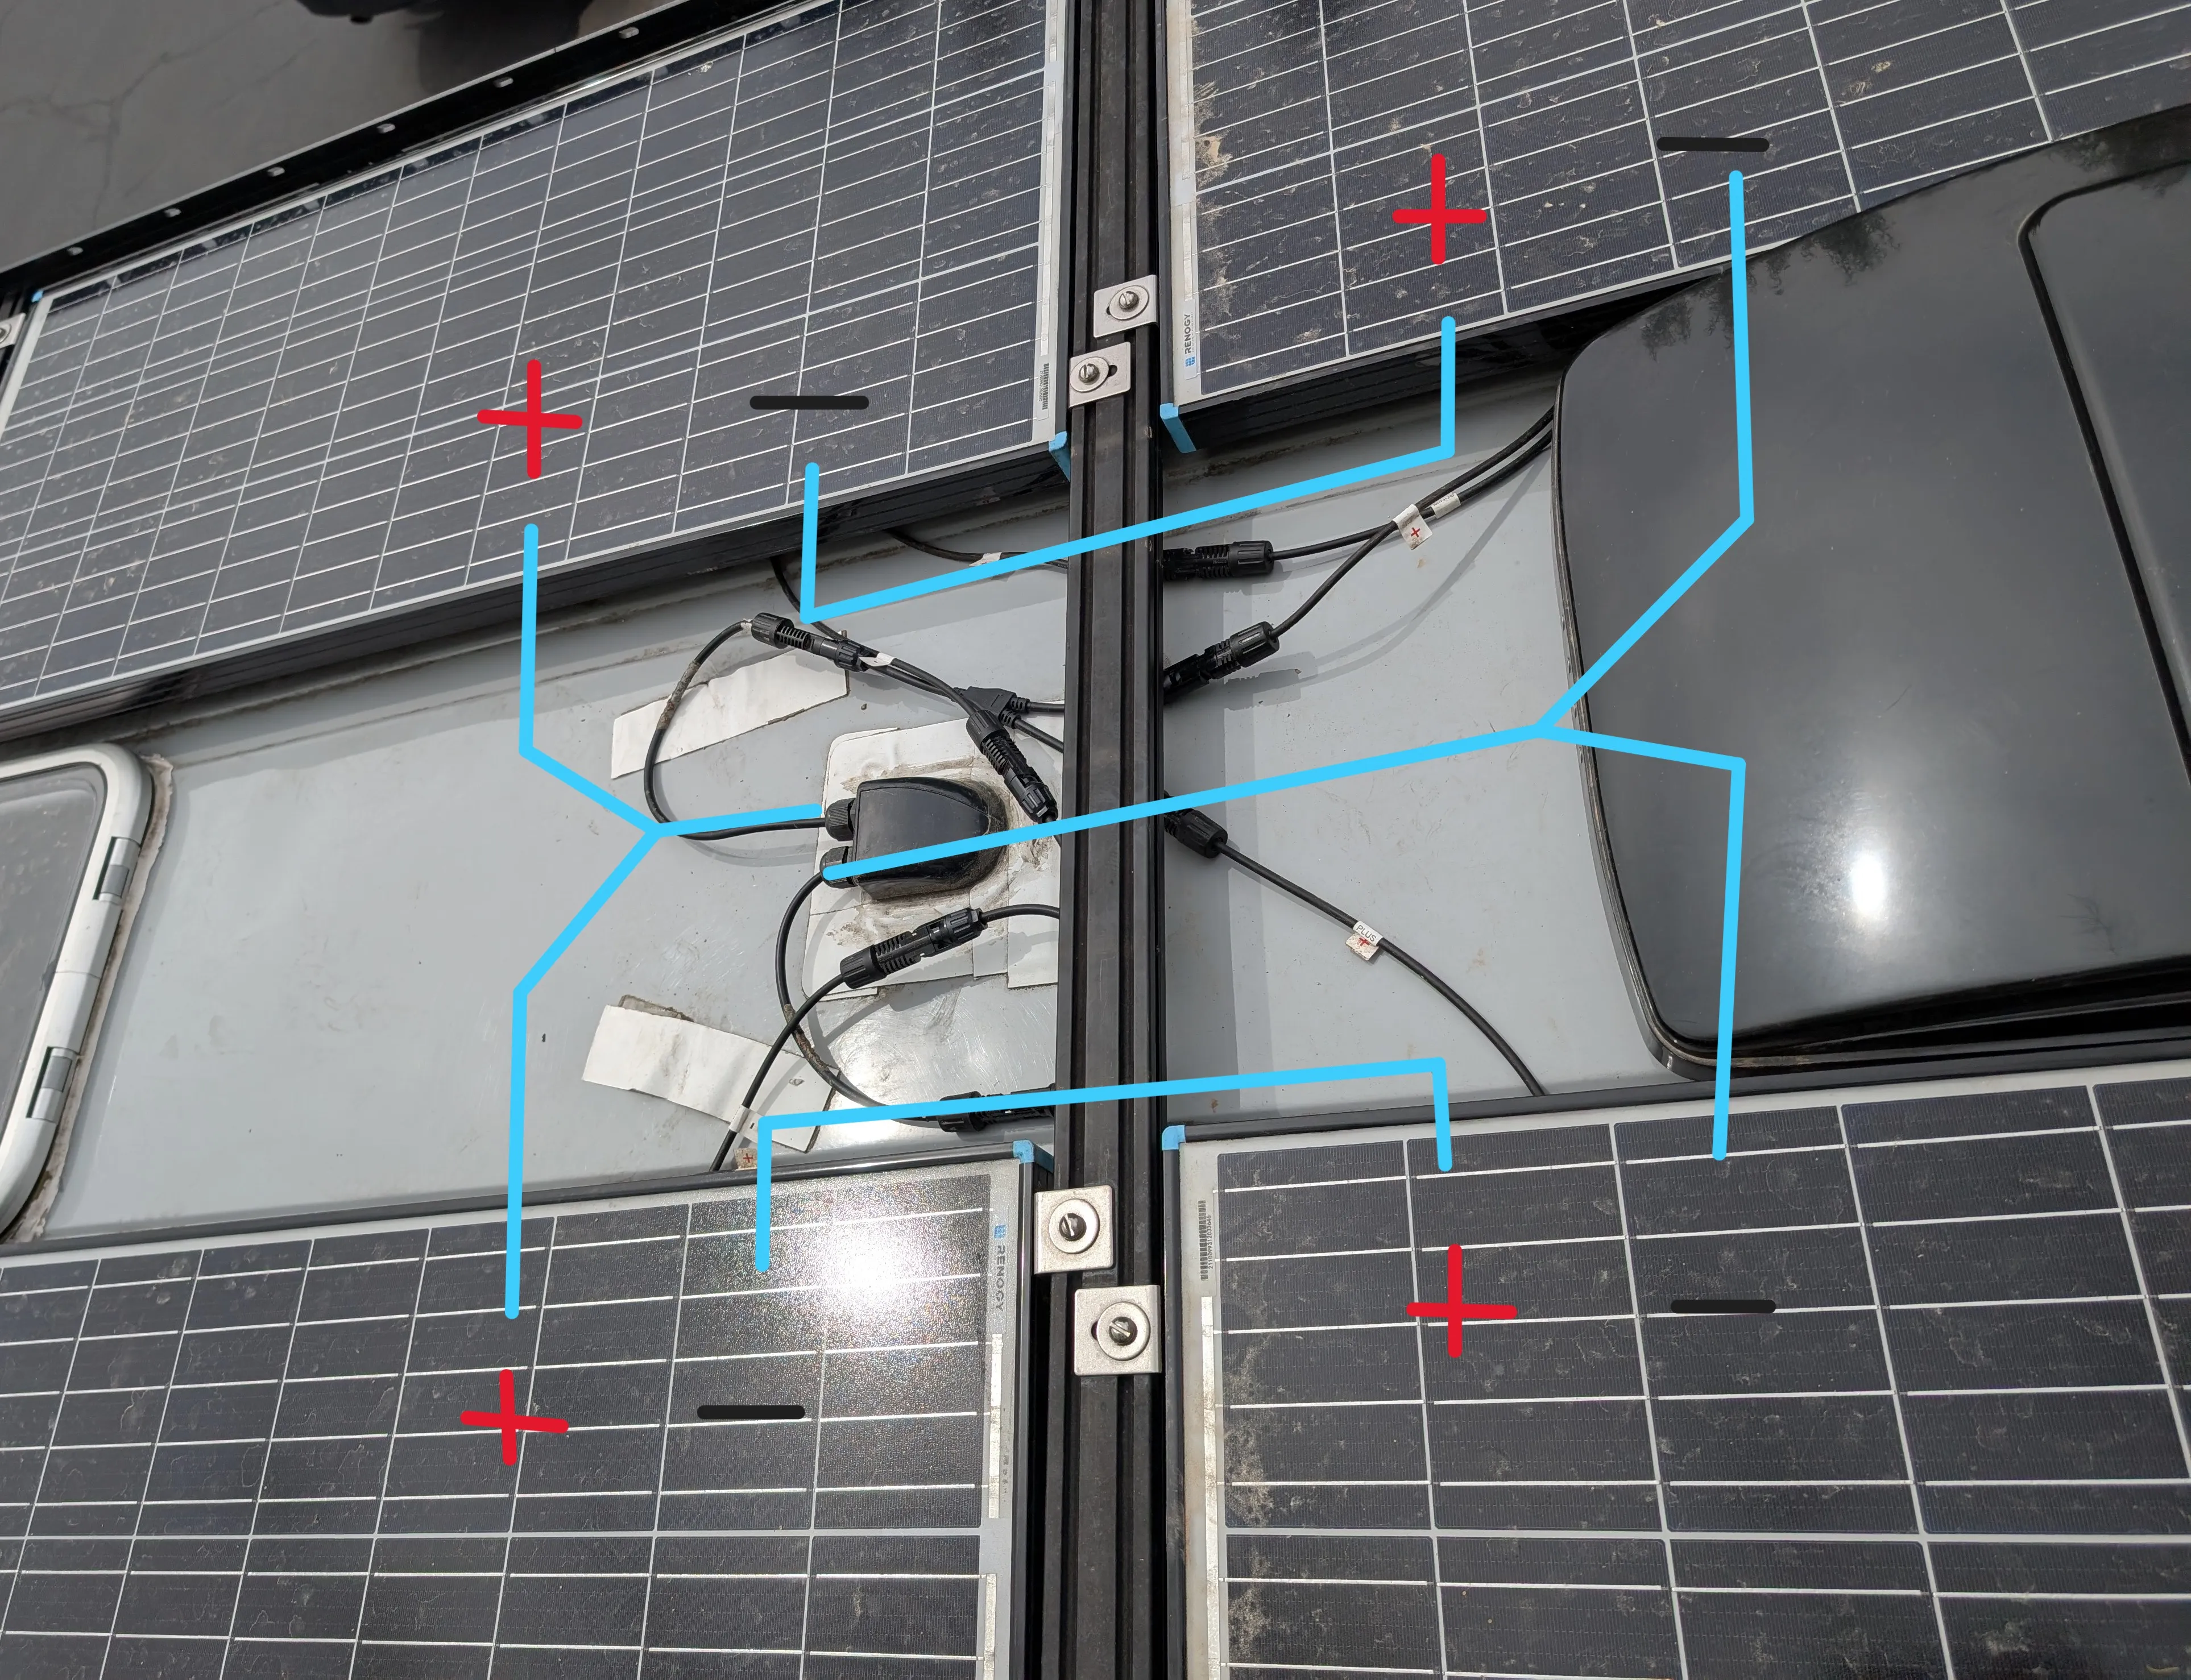
The solar panels were originally wired in parallel but from what I’ve read, series is more common as it performs better in low light conditions and provides higher voltage for charging. Makes sense but there are other tradeoffs I had to make. I chose to wire them in hybrid where two panels are connected in series and two of them are in parallel. This gives me a better balance between higher voltage and lower current for a less expensive MPPT controller. It was super cloudy when I did this but the reading when I finished was 3.5A and 46V. Low on the amperage but the voltage is expected. I’ll blame the clouds.
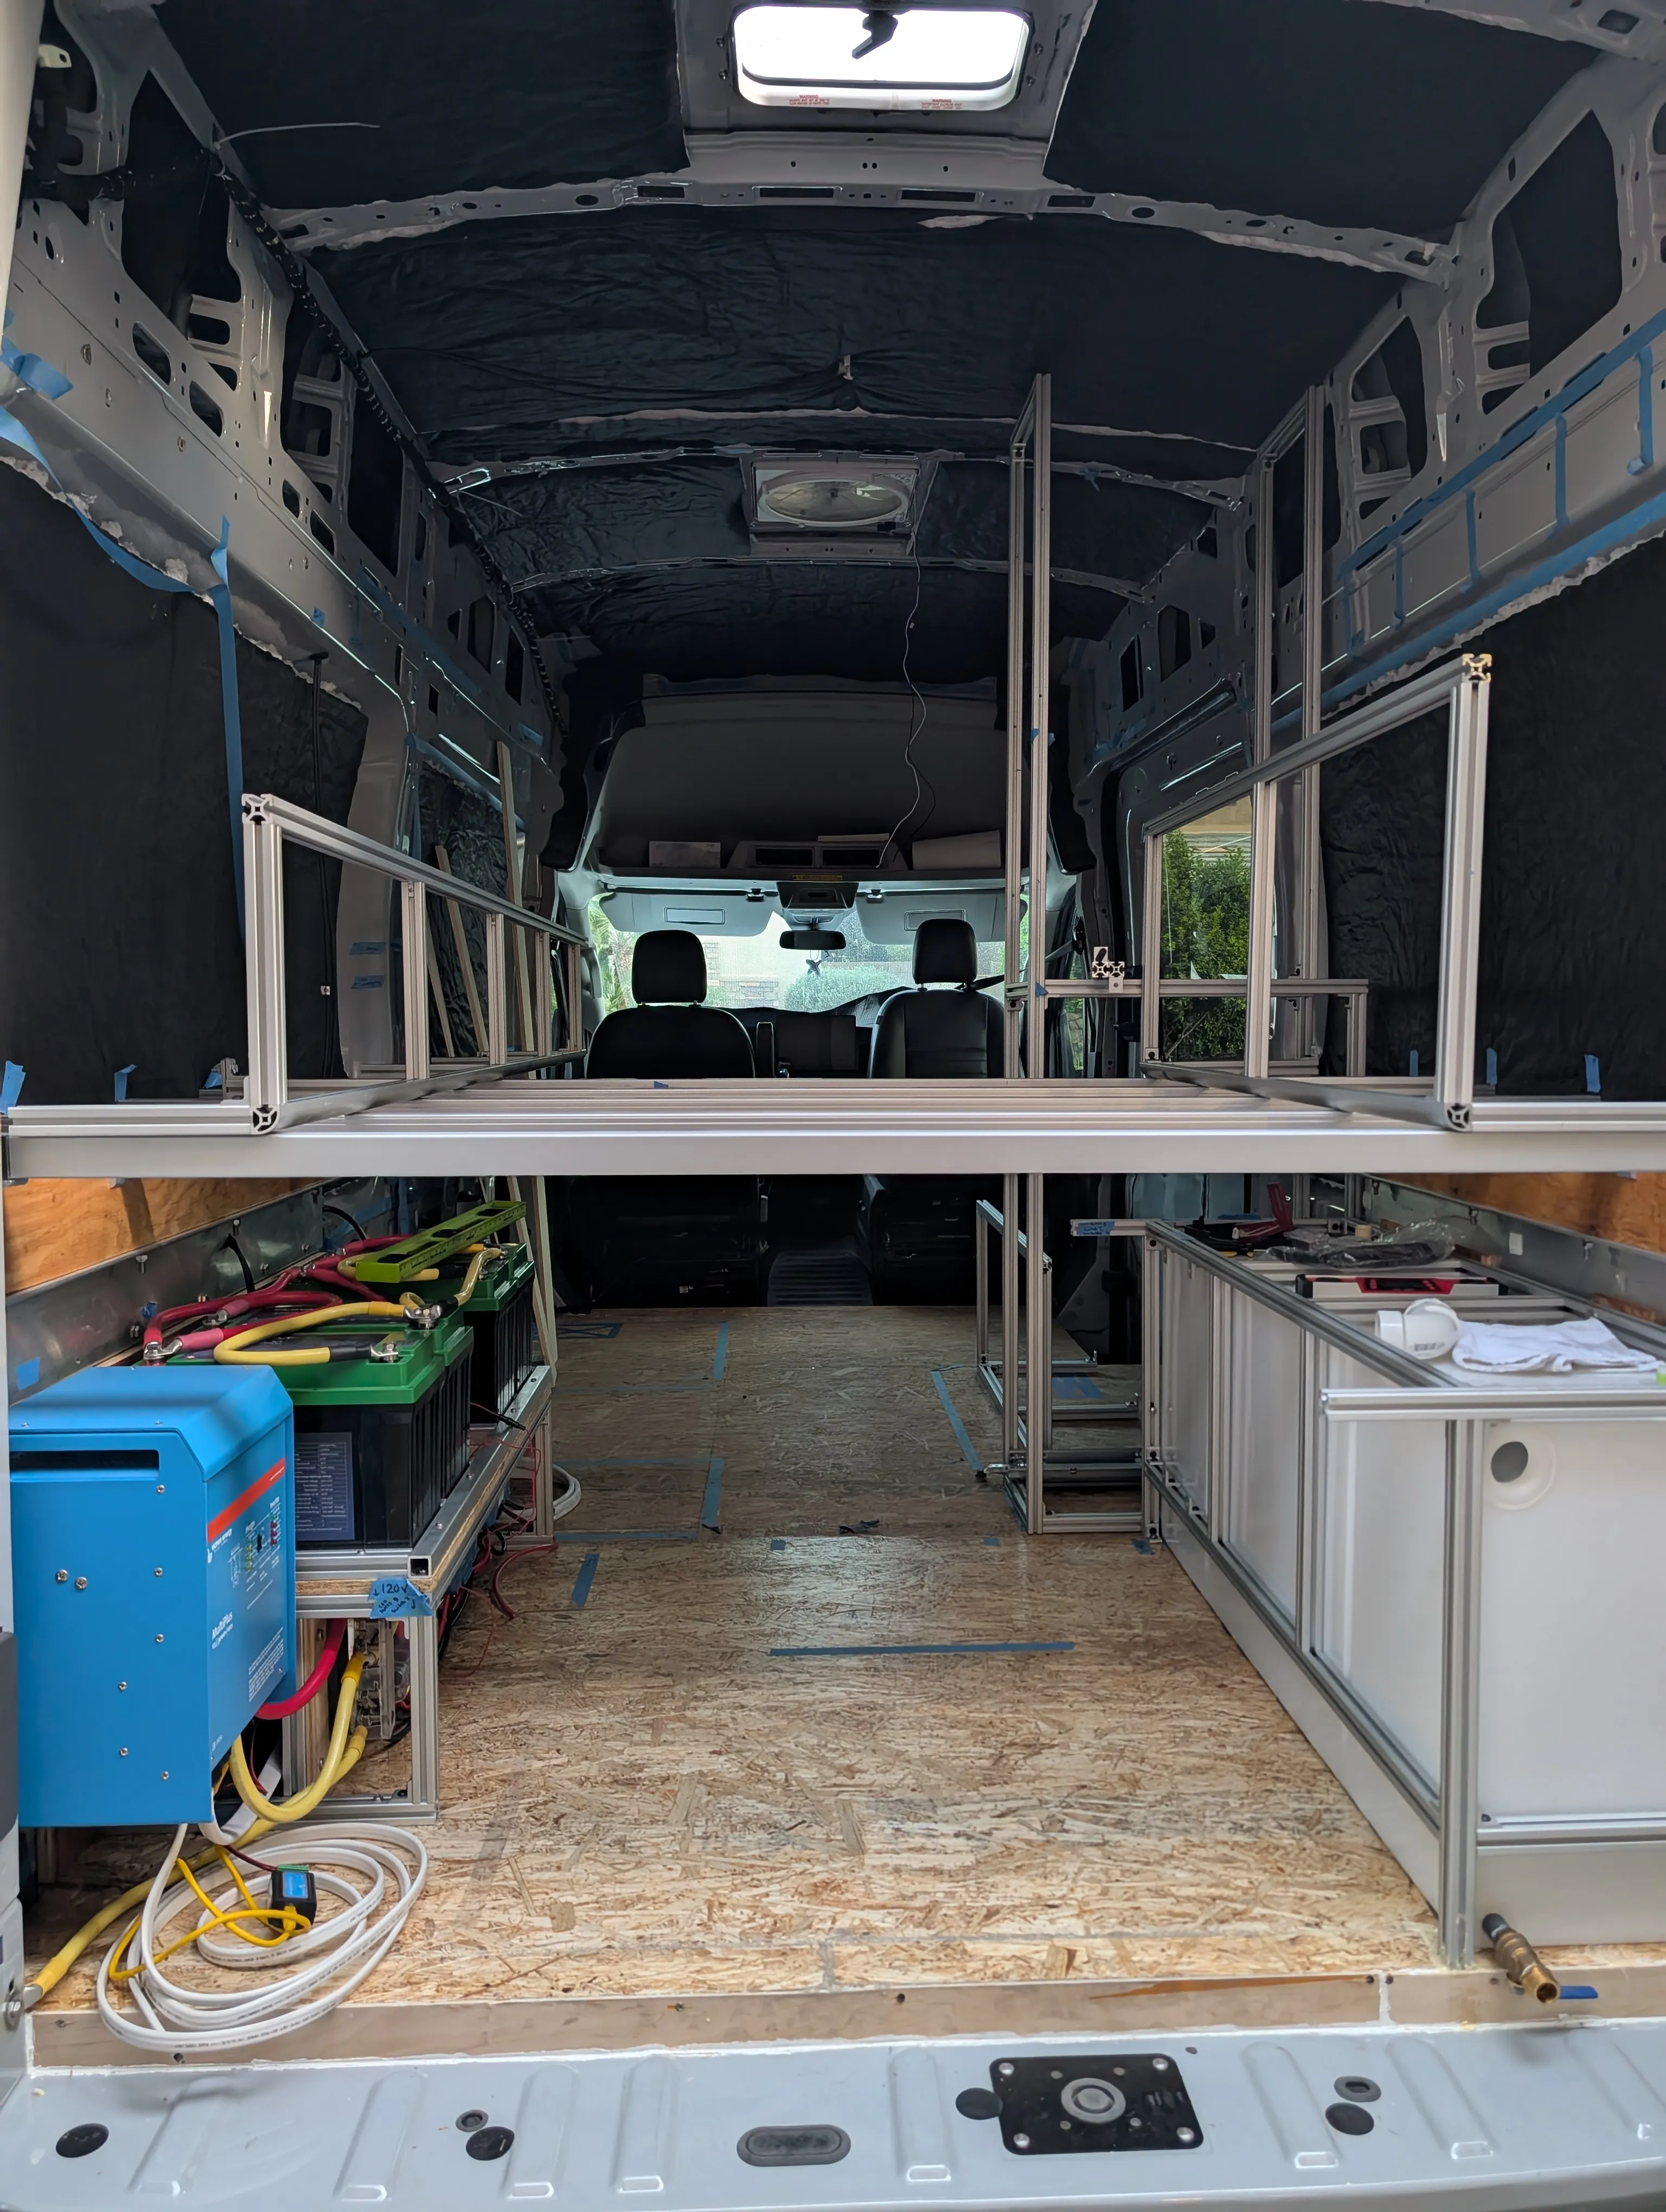
March 27, 2025

Here is what Kepler looked like when he arrived before the transformation. A lot of work was already done so the first step was to figure out what to keep and what to change. Ultimately, the subfloor, insulation, and sound proofing is complete and as you can see some electrical components already exist. The electrical work will be rewired mostly for my own knowledge and because I wasn’t satisfied with the decisions made.